I stood there, staring at a plate still smeared with last night’s lasagna, while a bright blue detergent pod mocked me from the floor of the tub. It was dry. Perfectly intact. The cycle had finished twenty minutes ago, the steam was gone, but the dishes were just as greasy as when I loaded them. It is that sinking feeling, isn’t it? You have wasted water, electricity, and most importantly, your time. I used to think I just bought a lemon of an appliance, but after years of tinkering with dishwasher parts and diagnostics, I realized that the soap door is actually a tiny mechanical drama waiting to go wrong.
Give Your Soap Dispenser a Fighting Chance
The first time this happened to me, I assumed the door was broken and almost went out to buy a whole new assembly. I even tried duct-taping it shut once—huge mistake. It turns out, most of the time, the door is not actually broken in the way we think. It is usually being sabotaged by something as simple as a tall dinner plate or a buildup of crusty, old soap. When I finally sat down to look at the real reason your dishwasher soap door won’t open, I found that the spring mechanism was just gummed up with residue from months of eco-friendly pods that did not quite dissolve. It is a common frustration. According to a report by Consumer Reports, faulty dispensers are among the most frequent minor repairs that lead people to prematurely replace their machines. But you do not need to do that. Often, swapping out a worn dishwasher door latch assembly or just cleaning the door hinges is enough to get things moving again. Have you ever opened your dishwasher only to find that little pod staring back at you like a stubborn toddler? It is enough to make you want to go back to hand-washing (almost).
Is my dishwasher just too old to bother fixing?
I get the skepticism. When the soap door stops popping, it feels like the beginning of the end. You start wondering if the motor is next or if you will soon be dealing with a dishwasher that won’t heat the water. But here is the truth: these dispensers are remarkably simple. Usually, a quick check of the dishwasher parts will show you that it is a five-dollar spring or a bit of gunk rather than a hundred-dollar service call. I remember one specific Saturday where I spent three hours trying to force the door shut, only to realize I had a cracked spray arm mount that was physically blocking the door from sliding. I felt like a total amateur, but that mistake taught me to look at the entire layout, not just the latch. If you see that your dishwasher soap is still dry after a cycle, you are not failing at adulting—you are just dealing with a machine that needs a little neighborly advice and a steady hand.
Scrub Away the Soap Coral
The most common culprit behind a sticky dispenser is simply residue. Over time, liquid detergents or the plastic coatings on pods create a sticky film that acts like a weak glue. I remember one Tuesday night I was so frustrated that I scrubbed the dispenser with an old sonic toothbrush. I found a layer of hardened minerals that looked like white coral—it was essentially petrifying the latch in place. Once I cleared that out, the door popped open with a satisfying click that I hadn’t heard in months. To do this right, use a mixture of warm water and vinegar. Dip a soft brush into the solution and work it into the hinges and the latching mechanism. You are looking for the best way to unstick a jammed dishwasher detergent door without snapping the delicate plastic components. If you feel resistance, do not force it; let the vinegar soak to break down the calcium first. 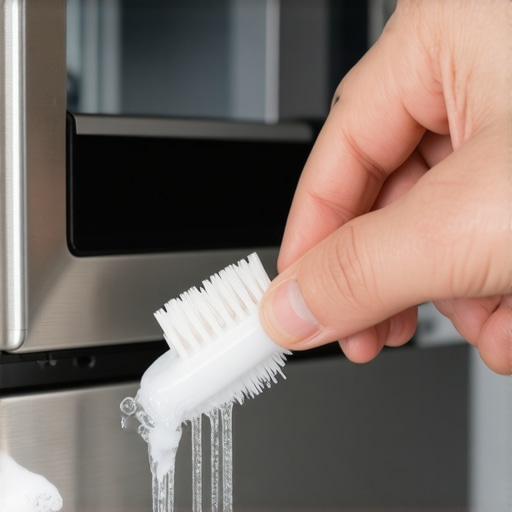
Stop Sabotaging Your Soap Door with Tall Plates
Sometimes the fix does not require a single tool. I have seen countless people—including myself—load a massive twelve-inch dinner plate or a tall cookie sheet right in front of the dispenser. In most dishwasher models, the door needs to flip out or slide upward. If a plate is leaning against it, the door hits the plate, stays shut, and you end up with a dry pod. It is like trying to open your front door with a car parked three inches from the porch. Always double-check that your lower rack items are not blocking the swing zone. This obstruction is often why your dishwasher soap pod falls to the floor undissolved later in the cycle. It finally wiggles out during the rinse when plates have shifted, but by then, the cleaning window has passed.
Inspect the Spring and Latch Assembly
If cleaning and loading are not the issues, the physical hardware is likely tired. There is a small torsion spring that provides the pop when the timer triggers the latch. If that spring snaps, the door might unlatch but just hang there limply. You can test this by manually closing the door and pushing the release lever. If it does not jump open, you are likely swapping out a worn dishwasher door latch assembly soon. I once tried to re-bend a spring to save five dollars, and it worked for exactly two cycles before snapping and flying into the sump filter. Save yourself the headache and just get the OEM part.
When the Wax Motor or Solenoid Quits
In many modern units, the door is not triggered by a mechanical timer but by a small wax motor or an electric solenoid. When the control board says go, it sends power to this part, which then physically pushes the latch. If you have cleaned everything and the loading is perfect, but the door never moves, you will need to perform some dishwasher parts and diagnostics. You can use a multimeter to check for continuity on the solenoid. Think of the solenoid as the finger that pushes the button; if the finger is broken, the button never gets pressed. This is a bit more advanced, but a dishwasher parts a comprehensive guide to diy diagnostics can walk you through the electrical testing without needing an engineering degree.
Check for a Warped Dispenser Frame
Heat is a dishwasher’s best friend and worst enemy. Over years of high-temp drying cycles, the plastic housing of the dispenser can actually warp. If the frame is no longer perfectly rectangular, the sliding door will bind. You will notice this if your dishwasher soap is still dry after a cycle despite the latch being released. Look for strike marks or white stress lines on the plastic. If the housing is warped, the only real fix is replacing the entire dispenser unit. It sounds daunting, but it is usually just four to six screws and a single wiring harness.If you’ve ruled out a warped frame, you’re entering the territory of advanced appliance psychology. I’ve spent years digging into parts and diagnostics, and I’ve noticed a pattern that most DIYers miss: the ‘Pod Trap.’ Everyone says pods are the gold standard, but in my experience, they are frequently the leading cause of dispenser paralysis. Most people think more cleaning power is always better, but a study by the Association of Home Appliance Manufacturers (AHAM) highlights that excessive detergent—especially in soft water—leads to etching and residue that physical components simply cannot overcome. 
Why your detergent is secretly acting like glue
When you use a high-strength pod in a cycle that isn’t hot enough or long enough, that outer plastic casing doesn’t just vanish. It turns into a microscopic slime that coats the latch. Over time, this slime hardens into a lacquer. If you find yourself checking dishwasher parts every other week, try switching to a high-quality powder for a few cycles. It is less convenient, but it is abrasive enough to actually scrub the dispenser’s own hinges as it washes away. I’ve seen this simple switch fix more ‘broken’ doors than actual hardware replacements.
Stop over-tightening your replacement parts
Here is the ‘Oops’ factor that breaks my heart every time I see it in a neighbor’s kitchen. When you finally decide to install a new dispenser, the temptation is to crank those screws down until they cannot budge. Do not do it. The inner door liner of your dishwasher is designed to flex slightly as it heats up. If you over-tighten the mounting screws, you create a rigid hot spot that prevents the dispenser from expanding. The result? The door binds and stays shut the very first time you run a Heavy Duty cycle. It’s the same logic I apply when identifying if an oven control board is repairable; forcing a physical fit often masks an underlying calibration issue that will just lead to another failure.
How do I know if the control board is the real liar?
This is the question that separates the amateurs from the experts. Sometimes the door doesn’t open because the machine thinks it shouldn’t. If your unit is dealing with a faulty turbidity sensor, the control board might skip the detergent release entirely because it misreads the water clarity. It assumes the dishes are already clean or that there is a drainage failure. Before you tear the door apart, check for error codes. If you see a flashing light that doesn’t match the dispenser, you are chasing a ghost. I once spent a whole afternoon testing the resistance on an oven’s broil element only to realize a blown thermal fuse was the culprit. Appliances love to lead you on a wild goose chase. Have you ever fallen into this trap of replacing the obvious part only to find the problem was deeper? Let me know in the comments.I used to be a ‘parts-swapper,’ a person who would throw money at a machine and hope it behaved. Now, I won’t even look at a dishwasher without my digital multimeter in hand. If you are serious about parts and diagnostics, you need to stop eyeballing wires and start measuring resistance. I remember when I was troubleshooting common issues with oven parts, a simple continuity test saved me from buying a two-hundred-dollar control board when it was just a fifteen-dollar thermal fuse. This level of precision is what separates a frustrated weekend from a successful repair. As noted in the Whirlpool Service Technician’s Handbook, the most common ‘unfixed’ issues in modern homes are actually caused by improper voltage readings at the source, not the part itself. When you realize that the hardware is often fine and the signal is just lost, your whole perspective on DIY changes.
Stop Guessing and Start Testing
The most important tool in my kit is not a wrench; it is a high-quality, auto-ranging multimeter. I personally use one with thin-profile leads because they allow me to reach into tight spots when testing an oven temperature sensor without pulling the whole unit out of the wall. If you are just starting, do not buy the cheapest five-dollar meter at the bin. Get something with a ‘continuity beep.’ That audible sound is a lifesaver when you are lying on your back under the sink testing your dishwasher’s circulation pump and cannot see the screen. It turns an impossible two-person job into a quick solo victory.
How do I keep my appliances alive for a decade?
Maintenance is not a one-time event; it is a rhythm. For the dishwasher, I have a strict ‘First Saturday’ rule. I spend ten minutes cleaning the hidden sump filter and checking the spray arms for debris. If you let seeds and bone shards build up, you eventually force the motor to work twice as hard, leading to a premature burnout. For the oven, I do the ‘dollar bill trick’ every six months by testing the oven door seal to ensure I am not leaking heat and wasting energy. These tiny habits prevent the big, expensive failures that ruin a kitchen budget. 
The Future of DIY is Getting Smart
I predict that within the next five years, we will see a massive shift toward onboard AI diagnostics. We are already seeing high-end units that can tell you exactly why an inlet valve is failing via a smartphone notification. However, even with all that tech, the physical components—the springs, the seals, and the latches—will still require a human hand and a bit of grease. The trend is moving toward ‘modular repair,’ where parts are easier to swap but require more software-side calibration. Do not be intimidated by the tech; embrace it. I highly recommend you try one advanced tip this weekend: take your multimeter and check the resistance of your oven’s broil element just to get a baseline for what a healthy part looks like. It is the best way to build confidence before something actually breaks.
The One Question I Ask Before Any Repair
I’ve learned the hard way that jumping straight to the toolbox usually leads to more work, not less. Here are the three ‘lightbulb moments’ that changed my approach to kitchen repairs:
- Your dishwasher is a creature of physics: If the water isn’t hitting at least 120°F, the wax motor in your dispenser might never expand enough to trigger the latch. It’s often a water heater issue, not a broken door.
- The OEM Advantage: I once saved three dollars on a generic spring that had too much tension. It ended up cracking the plastic housing. Always use original dishwasher parts for these delicate mechanical assemblies.
- Spin the Arm: It sounds simple, but I make it a habit to manually spin the lower spray arm every time I load the machine. If it hits a plate, that plate will likely block your soap door too.
The Three Tools That Pay for Themselves
If you want to move beyond guessing, you need more than just a screwdriver. I trust these three items implicitly: First, a digital multimeter is non-negotiable for oven diagnostics pinpointing faults before calling a repair expert or checking your dishwasher’s solenoid. Second, a flexible inspection mirror lets you see behind the dispenser housing without taking the whole door panel off. Finally, I always keep a bottle of high-quality white vinegar handy. It is the safest, most effective way to dissolve the ‘soap coral’ that jams your hinges without damaging the gaskets. These tools transform a stressful Saturday into a quick fifteen-minute fix.
Stop Being Intimidated by the Screws
There is a unique kind of satisfaction that comes from hearing that soap door click shut perfectly after you’ve tuned the mechanism yourself. Mastering parts and diagnostics isn’t about being an engineer; it’s about being observant and patient. Your kitchen is the heart of your home, and keeping it running smoothly is a skill that will save you thousands of dollars over a lifetime. Don’t be afraid to take that first panel off—most of the time, the solution is much simpler than you think. Have you ever found a completely dry, undissolved pod after a full two-hour cycle? Let me know what the culprit was in the comments below!