I will never forget the Tuesday night I reached my breaking point. I opened the dishwasher, expecting that satisfying puff of steam and the sight of sparkling plates, only to find a gooey, blue-and-green blob staring back at me from the bottom of the tub. My dishes were still greasy, the clean light was mocking me, and that expensive detergent pod had essentially just taken a lukewarm bath without doing any actual work. It feels like a betrayal, doesn’t it? You spend good money on those high-tech pods, yet they somehow manage to end up undissolved before the cycle even gets going. Have you ever opened your machine to find a zombie pod just sitting there? It is incredibly frustrating. [image placeholder]
My Dishwasher Was Gaslighting Me
For weeks, I thought I was losing my mind. I would check the dispenser, hear it click during the cycle, and still find the pod stuck to a plate or resting sadly on the floor of the machine. I even started blaming my kids for loading it wrong. But after diving into proper DIY diagnostics, I realized the machine was not crazy—it was just struggling with some very specific mechanical and physics-based hurdles. The frustration is real. You want to save time, but instead, you are re-washing a load of lasagna pans by hand at 10 PM. We are going to fix that today. I am going to walk you through exactly why that little door is failing you and how a few simple tweaks can ensure your detergent actually meets the water.
Is it actually worth the hype to use pods anyway?
I used to think pods were just a marketing gimmick to get us to pay more per wash. However, according to the American Cleaning Institute, modern pods are formulated with multi-chamber technology that releases enzymes at specific temperatures—something traditional powder often struggles to do as effectively. The catch? They only work if they actually dissolve. Early on, I made the rookie mistake of thinking more water was the answer, but I actually had a float switch issue that was messing with the water levels, proving that more is not always better.
Why Your Soap Pod Hits the Floor Instead of the Water
The most common reason for this annoying failure is not actually a broken machine; it is usually an obstruction. If you have a tall dinner plate or a stray spatula blocking the path of the dispenser door, it will not pop open at the right time. When it finally does—often during the drain cycle—the pod just falls onto the floor of the tub. I spent hours identifying dishwasher faults before I realized my oversized cutting board was the culprit. Another big factor is moisture. If your hands are damp when you put the pod in, or if the dispenser cup is wet, that pod is going to stick. It is like glue. Instead of falling out when the door opens, it stays glued to the plastic until the very end. Sometimes, the door itself won’t open because of a gunked-up latch, which is a whole other headache we need to address.
Run the Hot Water at Your Sink First
I learned the hard way that temperature is the silent killer of detergent pods. I once ran a Quick Wash cycle thinking I was being efficient, but the water barely hit lukewarm. When the cycle ended, the pod was a half-melted, slimy ghost of its former self. Most pods require a minimum of 120°F to break down the outer membrane. If your dishwasher starts with cold water from the pipes, the pod won’t even start melting until halfway through the cycle. Before you hit start, run your kitchen faucet until the water is hot to the touch. This simple habit ensures that the very first fill of the machine is at the optimal temperature for why your dishwasher pod is falling out but not dissolving.
Clear the Nozzles So Water Can Actually Reach the Pod
If your spray arms are clogged, it doesn’t matter how hot the water is; it will never reach the detergent. I once spent an hour with a toothpick cleaning out tiny lemon seeds and bits of plastic from the spray arm holes. It felt like a one-in-a-million shot, but that single blockage was preventing the water from hitting the dispenser door with enough force. While you are at it, check the hardware. You might need to consider replacing a cracked dishwasher spray arm mount if the arm is wobbling and losing pressure. 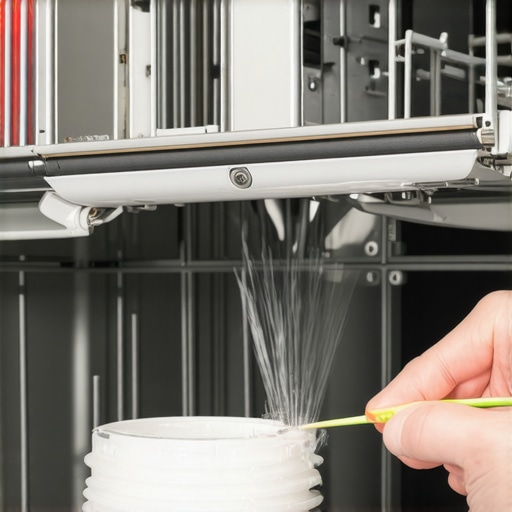
Stop Loading Large Plates Near the Dispenser
This is the most common user error I see. If you put a massive cookie sheet or a tall dinner plate directly in front of the detergent door, it can’t swing open. The door hits the plate, stays cracked, and the pod never gets out. I eventually mastered the best way to load your dishwasher for maximum water reach by keeping the area around the door completely clear. If the door itself feels sluggish, you might be dealing with a gunked-up gasket. Learning how to replace a worn out dishwasher detergent dispenser seal can stop that sticky residue from holding the door shut during the cycle.
Test the Float Switch and Water Levels
If your machine isn’t filling with enough water, the pod will just sit there in a dry heat. I remember the frustration of a bone-dry tub and spent a Saturday testing the dishwasher float switch for continuity. If that little plastic mushroom in the bottom of your tub is stuck in the up position, the machine thinks it is full and won’t add enough water to dissolve the soap. It is a classic part of identifying dishwasher faults that many people overlook before they give up and call a pro. Keep the float area clean of debris and ensure it moves freely.
Here is something that might shock you: you are probably cleaning your dishes too well before you even put them in the machine. I know, it sounds backwards. But if you are one of those people who scrubs every speck of food off before loading, you might be the reason your dishwasher pod is still in the dispenser after the cycle ends. Modern machines use a turbidity sensor to ‘see’ how dirty the water is. If your dishes are already clean, the sensor tells the computer to use less water and lower heat. Without that heat and agitation, the pod’s outer membrane never gets the signal to dissolve. This leads to a vicious cycle where your machine underperforms because it thinks its job is already done.
Stop Rinsing Your Dishes Before Loading
In my years of troubleshooting, I have found that the ‘pre-rinse’ habit is the biggest hurdle to a clean kitchen. When the water stays too clean, the machine might skip the high-heat phase entirely. If you notice your dishes coming out with a weird residue, you should check if you are accidentally leaving a greasy film because the detergent didn’t have enough ‘work’ to do. It is a nuanced balance. You need the food particles to trigger the sensor, but you don’t want so much gunk that you are replacing a faulty turbidity sensor because it got blinded by peanut butter. Have you ever fallen into this trap? Let me know in the comments.
Why does my dishwasher pod still look like a gummy bear?
This is the most common advanced question I get. If the pod is partially melted but still stuck in the tray, you are likely dealing with the ‘Eco-Cycle Trap.’ While we all want to save the planet, many Eco modes prioritize energy savings by keeping the water temperature below 110°F for the majority of the wash. According to a study by the Association of Home Appliance Manufacturers (AHAM), many high-performance pods require a consistent 120°F to 140°F to fully activate their multi-chamber enzymes. If you use a pod on a low-temp eco cycle, you’re basically asking a marathon runner to sprint through a swimming pool—it’s just not going to happen efficiently. 
The Cold Start Error You Cannot Afford to Make
The ‘Oops’ factor often happens in the first three minutes. If you haven’t cleared the line, that first fill is ice-cold water from your pipes. By the time the heater kicks in, the dispenser door has already opened, and your pod is sitting in a cold puddle, becoming a sticky mess that won’t dissolve later. It’s the same logic I apply when I am pinpointing oven faults; you have to look at the sensors and the initial inputs before blaming the mechanical parts. If you find your dishwasher is taking three hours just to leave you with a half-melted pod, it is time to stop the pre-rinsing and start the hot water at the sink first. Advanced diagnostics aren’t just about replacing parts; they’re about understanding the physics of the wash.
If you’re tired of the pod lottery, it’s time to move beyond the ‘set it and forget it’ mindset. I keep a dedicated ‘appliance kit’ in my garage that has saved me thousands. It’s not just about the soap; it’s about the mechanical health of the whole system. When I first started identifying dishwasher faults quickly, I was intimidated, but once you realize that most parts are just modular blocks, the fear vanishes. The key is having the right diagnostic mindset before you start tearing things apart.
The One Tool You Actually Need
I tell everyone who will listen: buy a digital multimeter. It is the only way to stop guessing and start knowing. I spent years assuming my heater was bad, only to realize by testing the dishwasher float switch for continuity that a $10 plastic part was the culprit. This applies to your kitchen’s heavy hitters, too. Whether you are checking a dishwasher element or troubleshooting common oven issues, a multimeter turns a mystery into a simple ‘yes or no’ electrical path. 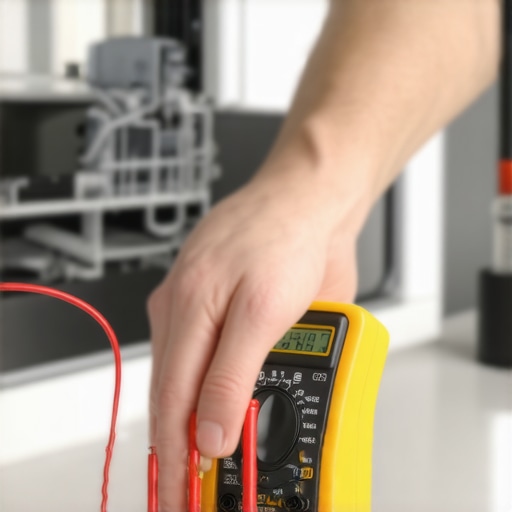
Your Filter is a Science Experiment
The most overlooked maintenance task is actually deep-cleaning the sump. People think the filter is just that mesh screen you rinse under the tap, but if you don’t clean the hidden debris under your dishwasher filter, you’re leaving a buffet for bacteria and a barrier for water pressure. According to the Master Fellow technicians at the Appliance Service Training Institute (ASTI), nearly 30% of ‘poor wash’ complaints are resolved simply by clearing non-organic debris like glass shards or plastic ties from the internal pump housing. This gunk creates a physical resistance that prevents the detergent from ever being properly agitated.
How do I keep this machine alive for a decade?
Maintenance isn’t a one-and-done event; it’s a rhythm. Every three months, I run a dedicated citric acid cleaner on the hottest cycle available. But I also look at my other appliances in tandem. Often, if my dishwasher is struggling with drainage, I check my sink’s disposal. If I’m doing oven diagnostics and pinpointing faults, I check my dishwasher’s circuit too. They are often cousins on the same electrical line. Keeping a log of when you replace things—like replacing a faulty dishwasher turbidity sensor—helps you spot patterns before they become floods.
The Future of the Kitchen Sink
I suspect we’re moving toward machines that won’t even start unless the water temperature is pre-verified by an internal AI, and we might finally say goodbye to the pod entirely. High-end brands are already shifting toward ‘ultra-concentrated’ liquid reservoirs that dose themselves based on laser-detected soil levels. But until then, we are the sensors. We have to be the ones to ensure the environment is right for the chemistry to work. Before you give up and consider when to stop diying and call an oven repair expert, try the ‘Multimeter Challenge’ this weekend. Open up the kickplate and test one component for continuity. It’s the gateway drug to never paying a $200 service fee for a $15 part again. You have the tools; now you just need the patience.
Hard-Earned Wisdom from My Kitchen Repair Battles
After years of trial and error, I’ve realized that dishwasher pods are sensitive little things that respond to the environment as much as the mechanics. Here are a few lightbulb moments that changed my routine forever. First, storage matters more than you think. If you keep your pod container under the sink where it’s humid, the membranes start to fuse before they even touch the machine. I’ve also learned that the ‘sound’ of the wash tells the whole story. If I don’t hear that definitive thwack of the spray arm hitting the water within the first five minutes, I know something is blocking the path. Finally, never underestimate the power of a simple visual check. Before I close the door, I always spin the spray arms by hand to ensure they won’t hit a rogue ladle or a tall plate that causes why your dishwasher pod ends up undissolved in the tub.
The Small Arsenal That Keeps My Appliances Running
You don’t need a professional-grade van to handle most issues, but you do need a few reliable allies. I swear by a high-quality digital multimeter for testing the dishwasher float switch for continuity; it’s the only way to move from guessing to knowing. I also keep a stash of food-grade citric acid to handle clearing hard water deposits that can seize up mechanical parts. For the physical repairs, a simple set of Torx drivers and a long-reach flashlight are non-negotiable. When I get stuck, I always refer back to dishwasher parts and DIY diagnostics to ensure I’m not missing a hidden sensor or a sneaky fuse that a simple visual inspection might miss.
Ready to Conquer Your Next Repair?
It is incredibly empowering to walk into a kitchen, hear an odd noise, and know exactly which panel to unscrew. Whether you are dealing with oven repair essentials or wondering why your dishwasher pod is still in the dispenser, the logic is always the same: stay calm, follow the water, and don’t be afraid to get your hands a little dirty. You have the knowledge now to ensure you never have to face a greasy plate at midnight again. If you ever feel like you’re truly in over your head, remember there’s no shame in knowing when to call an oven repair expert or appliance pro. But for today, try that hot water trick and see the difference it makes. Have you ever found a pod completely fused to a plate after a cycle? Let me know your weirdest dishwasher fail in the comments below!