I remember the Tuesday night I almost hauled my dishwasher out to the curb in a fit of rage. I had just pulled out a “clean” dinner plate, only to find it coated in a fine, sandpaper-like grit that made my skin crawl. It was infuriating. I’d spent a small fortune on premium detergent and rinse aids, yet my machine was constantly leaving a greasy film on everything. I was convinced the motor was toast. I even started browsing dishwasher parts and diagnostics to see if I could justify the cost of a new pump. But here’s the embarrassing truth: I was looking in all the wrong places. I thought the removable plastic cylinder in the middle was the only filter I needed to worry about. I was dead wrong. Deep beneath that mesh lies the sump filter—the final gatekeeper before the drain. If that area gets clogged, your machine is essentially power-washing your plates with “food soup.” Today, I’m going to show you exactly how to find that hidden trap and clear it out so your dishes actually come out sparkling again.
Your Machine Isn’t Broken, It’s Just Choking on Last Month’s Dinner
We often assume that if the water is hot and the soap is sudsy, the dishes must be getting clean. That’s a mistake I made for years. Early on, I fell for the myth that “self-cleaning” cycles could handle anything. I ignored a few stray popcorn kernels and a tiny shard of broken glass, thinking they’d eventually wash away. They didn’t. Instead, they acted like a dam for hair, grease, and soap scum. According to the repair experts at Consumer Reports, a neglected filter is the leading cause of poor cleaning performance and can eventually burn out your pump. If you have noticed that the bottom of your dishwasher is always full of water after a cycle, you aren’t just looking at a drainage fluke. You’re looking at the one part that stops your dishwasher from draining completely. It’s a simple fix, but one that most homeowners completely overlook until they’re ready to call a professional.
Is This Deep Cleaning Actually Worth the Hassle?
I know what you’re thinking. “Do I really need to start taking my appliance apart just to wash some cereal bowls?” I get the skepticism; we all have better things to do with our Saturday mornings. But let me be the voice of experience: spending fifteen minutes on this now saves you from the headache of hand-washing “clean” dishes later. Plus, a clear sump prevents that high-pitched whining sound your motor makes when it’s struggling to push water through a wall of gunk. Have you ever pulled a glass out of the rack and felt like it was dirtier than when it went in? Drop a comment and tell me I’m not the only one who has suffered through the “gritty glass” nightmare! Before we dive into the guts of the machine, let’s talk about the tools you’ll need to get the job done right without stripping any screws.
Clear the Workspace and Reveal the Hidden Housing
First, clear the workspace. Pull out that bottom rack and set it aside on the floor. You’ll see the spray arm—that plastic propeller. In many models, it just pops off with a firm tug, but some have a plastic nut. Don’t force it; if it doesn’t pop, unscrew it. Once that’s out, you’re looking at the primary filter. This is the part most people clean, but we’re going deeper. Think of this like the lobby of a building; the real security happens in the back room. You’ll likely need a Torx screwdriver (usually a T15 or T20) because appliance manufacturers love to use those star-shaped screws to keep casual DIYers out. If you’re unsure what you’re looking at, consult a comprehensive guide to dishwasher parts to identify your specific housing. Remove the screws carefully and place them in a small bowl so they don’t fall into the drain. 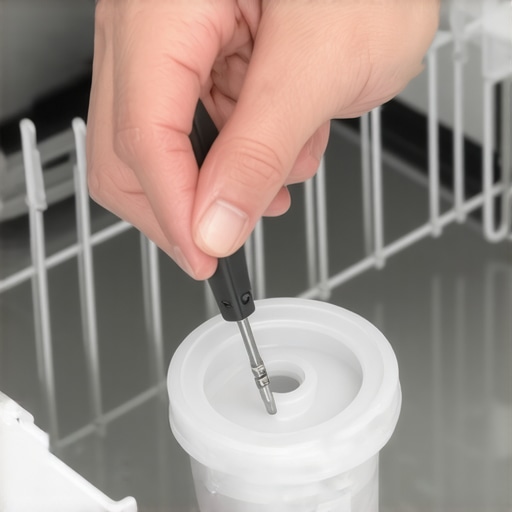
Reach the Gunk Your User Manual Ignored
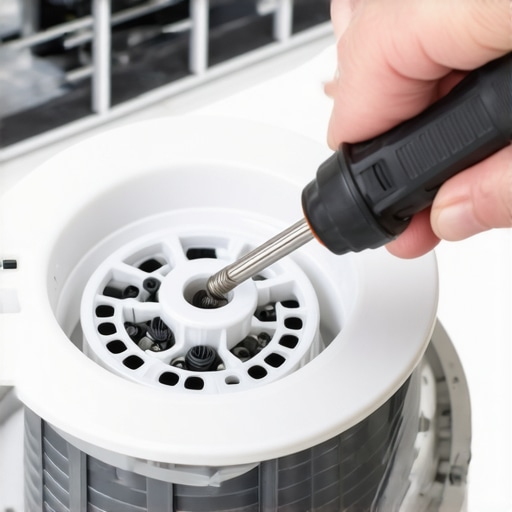
Once those screws are out, lift the plastic cover. This is where things get gross. I’ll never forget the time I did this after a month of ‘gritty’ dishes. I expected some slime, but what I found was a literal calcified ball of hair, a stray olive pit, and a shard of a ‘shatterproof’ measuring cup. The water sitting there was grey and smelled like a wet dog. I had to use a turkey baster to suck out the standing water just to see what I was doing. This is critical because if that area is blocked, you might find the one part that stops your dishwasher from draining completely is simply a piece of plastic wrap caught in the intake. Use a sponge or a shop-vac to clear out the murky water until you can see the white or grey plastic of the sump floor.
Stop the Grinding Before Your Pump Dies
Reach into the hole—the sump—and feel for the impeller. It looks like a tiny fan. If it doesn’t spin freely, something is wedged in there. This is the real reason your dishwasher sounds like its grinding rocks. A single popcorn kernel in here acts like a wrench in the gears. If the blades feel chipped or won’t move at all, you might be looking at replacing the circulation pump impeller entirely, but usually, a good pair of needle-nose pliers can fish out the intruder. Don’t be afraid to use a flashlight; the shadows in the sump can hide sharp glass shards that will slice your fingertips.
Check the Gatekeeper Flap
While you’re down there, check the check valve. It’s a small rubber flap that prevents dirty water from flowing back into the tub. If it’s warped or stuck open, your dishes are basically being rinsed in ‘trash juice.’ You can learn the best way to inspect your check valve to ensure it’s actually doing its job. After everything is cleared, don’t just throw the screws back in. Take the plastic housing to the sink and scrub it with hot, soapy water and a toothbrush. It’s the only way to get the biofilm off the mesh before reassembling. You might also want to unclog your dishwasher’s air gap while the tools are out, ensuring the entire exit path for the water is wide open.
We have all seen those viral videos claiming a cup of vinegar in the top rack will solve every problem from odors to drainage issues. In my experience, that is one of the biggest myths in home maintenance. While vinegar is a great descaler for a white chalky film on your glasses, it does absolutely nothing for the physical debris packed into your sump. If you are dealing with a mechanical blockage, you cannot dissolve your way out of it. You have to get your hands dirty. I’ve seen homeowners spend sixty dollars on specialty cleaners only to realize that why your dishwasher leaves a chalky film on all your dishes often comes down to physical sediment that chemicals just can’t reach.
Stop Relying on Vinegar to Save Your Sump
The contrarian truth is that the more ‘self-cleaning’ chemicals you use without removing the physical gunk, the more you risk creating a ‘sludge’ that sets like concrete. According to data from the Association of Home Appliance Manufacturers (AHAM), nearly 40% of appliance ‘failures’ are actually just maintenance oversights where mechanical obstructions were misidentified as broken motors. If you want to diagnose faults quickly, you have to stop looking for a liquid solution and start looking for a physical one. This applies to your oven too; for instance, many think a ‘self-clean’ cycle is a cure-all, but it can actually fry your thermal fuse if the hidden burner is already buried in grease.
What if the Grinding Noise Happens Even After a Deep Clean?
This is where it gets interesting. If you have cleared the sump and the impeller, but you still hear a rhythmic thumping or grinding, the problem might not be the pump at all. It could be a failing wash arm bearing or even a piece of debris trapped inside the arm itself. Have you ever fallen into this trap? You replace the most expensive part only to find the noise is still there? Let me know in the comments! Sometimes, you might even find that the real reason your dishwasher soap door won’t open is related to the same internal pressure issues caused by a partially blocked circulation path. You have to think of the machine as a closed-loop ecosystem; a clog in one area creates a vacuum or pressure spike in another.
Don’t Drop the Screws Into the Abyss
Here is the ‘oops’ factor that ruins most Saturday afternoon repairs: the disappearing screw. When you are deep in the guts of the machine, it is incredibly easy to drop a Torx screw directly into the drain port. If that happens, you aren’t just looking for a screw; you are potentially looking at a destroyed drain pump when you turn the power back on. Always use a magnetic screwdriver or stuff a clean rag into the drain hole before you start unscrewing the housing. It’s a simple pro-tip that separates the experts from the ‘accidental’ repairmen. If you find yourself stuck, refer back to a guide to identify dishwasher parts so you know exactly which screw goes back into which plastic tension point. Also, be wary of the control board; if your symptoms include random beeping or erratic cycles, it’s worth checking if your oven control board is failing or if the dishwasher’s brains have similar heat-damage symptoms. Diagnostics is about ruling out the cheap fixes before you pull out the credit card for the big ones.
The Three Tools I Refuse to Repair Without
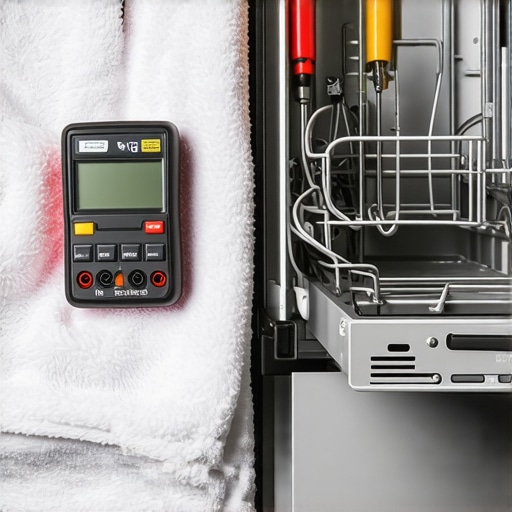
Over the years, I have learned that the difference between a successful repair and a frantic call to a technician usually comes down to three specific items in my toolbox. First, a magnetic-tipped Torx set is non-negotiable. I use these specifically because appliance manufacturers love using recessed screws that are nearly impossible to retrieve if they fall. Second, a high-quality digital multimeter. If you want to master oven repair essentials, you have to stop guessing if a part is bad. I personally use it to perform testing for continuity on the thermostat. Finally, a pair of long-reach needle-nose pliers is the only way to fish out debris from narrow sump channels without tearing the rubber gaskets.
How can I prevent these clogs from coming back next year?
The secret to long-term success isn’t actually cleaning the filter—it’s managing what goes into the machine. I tell everyone: stop pre-rinsing your dishes. Modern detergents actually need a bit of food enzymes to work properly. However, you must scrape off the hard solids. I also make it a habit to run the hot water at my kitchen sink for thirty seconds before hitting ‘start.’ This ensures the first fill cycle is actually hot enough to melt grease rather than just moving it around. If you notice the water isn’t exiting the tub correctly even after a cleaning, you might need to unclog your dishwasher’s air gap to keep the flow path clear and prevent backflow contamination.
Stop guessing and start testing with a multimeter
When it comes to your oven, the stakes are higher because of the high voltage and heat involved. I never trust my eyes to tell me if a bake element is working. I’ve seen dozens of cases where an element looked perfect but had invisible cracks that only opened up under load. This is where pinpointing faults before calling an expert becomes a massive money-saver. According to technical documentation from Whirlpool Training services, nearly 70% of control boards returned under warranty are actually fully functional; the real culprit is usually a blown thermal fuse or a loose wire. By testing your oven’s high limit thermostat yourself, you avoid the ‘parts cannon’ approach where you just keep buying new boards until something works.
The death of the mechanical dial
I predict that in the next five years, we will see the total disappearance of mechanical components in mid-range appliances. We are moving toward a future where every sensor—from the turbidity sensor in your dishwasher to the temperature probe in your oven—will be connected to a diagnostic app on your phone. While this sounds convenient, it makes the initial hardware check even more critical. If your sensors are coated in grease, the software will give you a ‘false’ error code. If you start seeing a garbled mess of characters on your display, it might not be the software; it’s likely heat damage to the physical traces on the board. I encourage you to pull out your dishwasher and check the tension on the door hinge cable today; it’s the easiest way to prevent a heavy door from slamming down and cracking the very control panel we are trying to protect.
The Expensive Mistakes I Made So You Don’t Have To
After years of tinkering with faulty appliances, I’ve realized that the most frustrating repairs aren’t the ones that are hard to fix, but the ones we misdiagnose. One major lightbulb moment for me was realizing that sound is your best diagnostic tool. A high-pitched squeal is usually a bearing, while a rhythmic thumping is almost always a physical obstruction. I also learned the hard way that over-tightening is the enemy of plastic appliance parts; snug is enough, but ‘cranking’ it will lead to a cracked housing every single time.
Another hard-won lesson: always take a photo of the wiring before you disconnect a single terminal. Even when you think you’ve mastered oven repair essentials, those colored wires can start looking identical after twenty minutes of scrubbing grease. When you learn how to identify dishwasher faults quickly, you stop seeing the machine as a mysterious black box and start seeing it as a series of simple, interconnected systems. If you can clear a drain and turn a screw, you can save three hundred dollars on a service call.
What Is Inside My Diagnostic Go-Bag
I don’t believe in buying every tool in the aisle, but there are a few non-negotiables for anyone serious about DIY maintenance. First, a telescoping magnet is a lifesaver for retrieving those tiny screws that inevitably drop into the dark recesses of the chassis. Second, I always keep a digital copy of a comprehensive guide to dishwasher parts on my phone for instant reference when I’m elbow-deep in the sump. For electrical issues, I trust my manual-ranging multimeter more than any ‘smart’ diagnostic app. It’s the only way to be 100% sure when testing your oven’s high limit thermostat with ease. Finally, a small nylon brush—stronger than a toothbrush but softer than steel—is the only way to clean delicate mesh filters without tearing the weave.
Your Path to a Stress-Free Kitchen
Repairing your own appliances isn’t just about saving money; it’s about the peace of mind that comes from knowing exactly how your home works. When you take the time to perform deep dishwasher and oven repair yourself, you ensure the job is done with more care than a rushed technician might provide. You’ve moved past the ‘vinegar myth’ and stepped into the world of real mechanical maintenance. Whether you are clearing out a stubborn sump clog or pinpointing faults before calling an expert, you are officially the master of your kitchen domain. Don’t be afraid to get your hands dirty—the reward of a sparkling clean plate and a perfectly baked meal is worth every minute of effort. Have you ever discovered a bizarre object stuck in your dishwasher impeller that you still can’t explain? Let me know in the comments below!