The water was lukewarm, the plates were still covered in last night’s spaghetti sauce, and I was about five seconds away from tossing the whole dishwasher out the window. I had spent twenty minutes scrubbing by hand because my ‘trusty’ machine decided to quit on me mid-cycle. When I finally stuck my head inside to see what was going on, I didn’t see a major engine failure. Instead, I saw the bottom spray arm sitting at a pathetic, jaunty angle. The plastic mount had snapped. It looked like such a small thing, but that little crack was the reason my kitchen felt like a grease trap. Today, I am going to show you exactly how to swap out that broken mount so you can stop hand-washing your cereal bowls and get back to enjoying your evening.
Your Spray Arm Isn’t Dead It Just Needs a New Foundation
I’ll be honest with you; I used to think that if anything inside the tub broke, it meant I needed a whole new machine. That is exactly what the big-box stores want you to think. But after years of tinkering, I realized that identifying dishwasher faults quickly usually leads you to a plastic part that costs less than a pizza. When that spray arm mount—the piece that actually holds the spinning arm in place—cracks, the water pressure just pushes the arm out of alignment. Instead of a high-pressure jet cleaning your lasagna pan, you get a sad little dribble. I once made the absolute rookie mistake of trying to ‘weld’ a cracked mount back together with a soldering iron and some spare plastic. It lasted exactly one heavy-duty cycle before the heat turned my repair into a gooey, toxic mess that stuck to my favorite plates. Learn from my shame: when it’s cracked, you replace it. It’s the only way to ensure the fix for loose dishwasher spray arms actually sticks for the long haul.
Is This Cheap Plastic Part Actually Worth the Effort?
You might be looking at that flimsy piece of nylon and wondering if it is even worth the trouble of ordering a replacement. According to experts at Consumer Reports, nearly 30 percent of dishwashing performance issues stem from poor water distribution, often caused by mechanical failures in the spray assembly. That little mount is the heartbeat of your machine’s cleaning power. If it’s not secure, the arm doesn’t spin. If the arm doesn’t spin, you’re just sanitizing old food. Getting the right part is half the battle, and I always recommend checking out a comprehensive guide to diy diagnostics before you start yanking things out. Have you ever opened your dishwasher after a full cycle only to find the spray arm just lying face down in the bottom of the tub like it gave up on life? It is a frustrating sight, but I promise it is a fixable one. We are going to get that arm spinning properly again without calling a repairman who charges eighty bucks just to walk through your front door.
Clear the Path to the Sump
First things first: you cannot work in a crowded room. Pull that bottom rack completely out and set it on the counter. While you are down there, this is the perfect time to check if you have a stuck dishwasher filter that wont turn, because you’ll need to clear the area anyway. I once tried to shortcut this by just sliding the rack halfway out; I ended up with a bruised knuckle and a face full of stagnant water when the rack slipped back in. Trust me, take the extra ten seconds to remove it entirely. Once the rack is gone, look at the very center of the floor. That’s your target. If there is a layer of gunk, you should clean the hidden debris under your dishwasher filter so you can actually see the screws or clips holding the mount in place. It’s like trying to change a tire in the mud—you’ll get it done eventually, but it’s going to be ten times harder than it needs to be.
Unscrew the Center Hub to Release the Arm
Most spray arms are held on by a large plastic nut in the center. In many models, this nut is ‘reverse threaded,’ meaning you turn it clockwise to loosen it. Think of it like a stubborn lid on a pickle jar that only opens when you do the opposite of what your brain tells you. Give it a firm twist. If it feels like it’s going to snap, stop and spray a little vinegar on it to dissolve any calcium buildup that might be acting like natural glue. Once the arm is off, you’ll see the mount. It’s usually a small, circular or rectangular plastic housing secured to the motor intake. 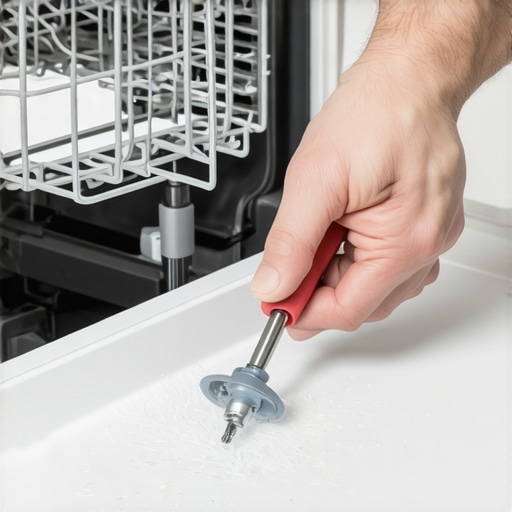
Swap the Broken Mount Without Dropping the Hardware
This is the part where things usually go sideways for the unprepared. The mount is often held in place by one or two Torx-head screws or a heavy-duty snap-fit. I remember working on an old Maytag where I was so excited to get the new part in that I didn’t notice the tiny O-ring seal stayed stuck to the old mount. I finished the ‘repair,’ ran the machine, and ended up with a fix for loose dishwasher spray arms that leaked like a sieve. Always double-check that any seals or gaskets are transferred to the new mount or replaced entirely.
Cover the Drain Before You Regret It
Here is my golden rule for dishwasher repair: always lay a clean kitchen towel over the drain hole before you start unscrewing anything. Those mounting screws are small, slippery, and have a magnetic attraction to the darkest, deepest part of your plumbing. If you drop one down there, you aren’t just replacing a mount anymore; you are embarking on a three-hour archaeological dig into your drain pump. Once the old mount is out, line up the new one. It should sit flush against the floor of the tub. If it wiggles even a millimeter, check for debris caught underneath. Snap it into place or tighten those screws until they are ‘snug,’ not ‘Hulk-tight.’ Over-tightening plastic is the fastest way to find yourself back at the start with a fresh crack. When the mount is firm, pop the spray arm back on and give it a manual spin. It should glide silently. Now you can finally learn the best way to load your dishwasher for maximum water reach to ensure that new mount gets to do its job properly.Most homeowners assume that if the dishwasher is leaking or the oven isn’t heating, the solution must be a massive, visible break. In reality, the most frustrating issues are the ones you can’t see. For instance, there’s a common belief that the ‘self-clean’ feature is a safe way to maintain your range. In my experience, that high-heat cycle is the number one cause of fried control boards. Before you risk a $300 circuit board, remember that oven diagnostics pinpointing faults before calling a repair expert can save you from a self-inflicted disaster. According to data from the Association of Home Appliance Manufacturers (AHAM), thermal stress is the primary contributor to premature electronic component failure in kitchen appliances.
Why Your Eyes are Your Worst Diagnostic Tool
I’ve walked into kitchens where a frustrated DIYer has already bought three different parts, and none of them fixed the issue. Why? Because they relied on visual inspections. When you are testing an oven bake element for invisible cracks, a ‘clean’ looking element can still be dead inside. You need to verify the electrical path. Whether you’re how to test an oven broil element using a simple ohmmeter or testing the resistance on your dishwasher heating element, the numbers on your multimeter don’t lie. Visual guessing is a trap that leads to what I call ‘parts-cannon’ repair—firing new parts at a machine until it accidentally works.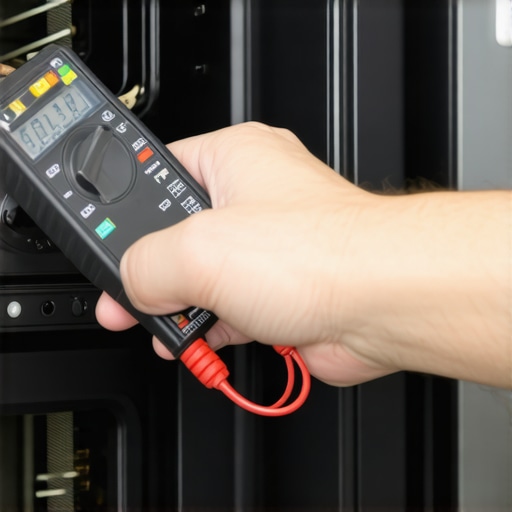
How Can You Spot a Bad Relay Without a Lab?
Another nuance people miss is the relay. You might have a brand-new heating element, but if the signal never reaches it, nothing happens. Learning how to identify a bad oven relay on the control board is what separates the amateurs from the pros. It usually involves how to inspect your oven control board for burn marks or testing for a specific ‘click’ that never comes. If your appliance is acting erratic, it’s rarely the big metal parts; it’s the tiny silicone ones. Have you ever fallen into the trap of replacing a part that wasn’t actually broken? Let me know in the comments; I’ve definitely been there more than once.When I am deep in the weeds of oven repair essentials troubleshooting common issues with parts, my secret weapon isn’t a fancy power drill—it is a digital multimeter. I bought my first Fluke years ago, and it paid for itself in a single weekend. Most people look at a heating element and think it is fine because it isn’t snapped in half, but testing an oven bake element for invisible cracks requires checking for electrical continuity. If you don’t have one of these tools in your drawer, you are essentially flying blind and throwing money at problems. Whether you are learning how to test an oven broil element using a simple ohmmeter or just checking a thermal fuse, it is the only way to be 100 percent certain before you hit ‘buy’ on a replacement part. I have seen too many DIYers replace a control board when the culprit was actually a four-dollar wire that had shaken loose. 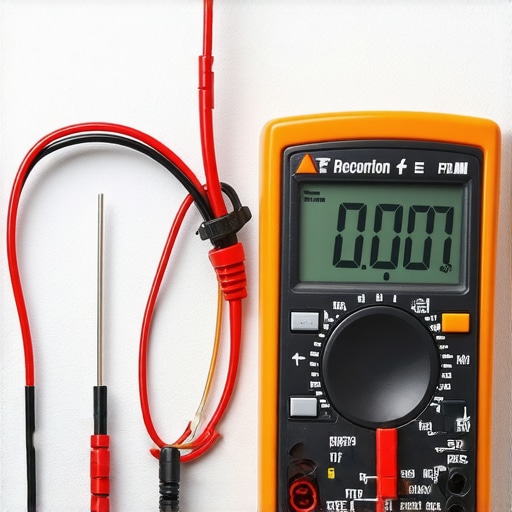
How do I keep my kitchen running without constant repairs?
The key to appliance longevity isn’t luck; it is a maintenance routine that most homeowners ignore until they smell something like burning plastic. I make it a firm habit to clean the hidden debris under your dishwasher filter once a month. This takes less than two minutes but saves your drain pump from a slow, grinding death caused by stray popcorn kernels or shards of glass. If you notice water backing up into your sink, you might even need to know how to unclog a blocked dishwasher air gap with a straw—a clever trick I learned from an old-school technician that works surprisingly well. Don’t ignore the rubber seals either; taking time for the fast way to clean grimy dishwasher door gaskets prevents the slow, silent leaks that rot your kitchen cabinets from the inside out. According to the Service Technicians’ Handbook from the Professional Service Association (PSA), over 40 percent of residential appliance service calls could be avoided entirely through simple monthly maintenance of filters and seals. This data proves that our own neglect is often the biggest factor in equipment failure.
The Future of Home Repair is Digital and Smarter
Looking ahead, I predict that the next generation of ‘smart’ appliances will move beyond just Wi-Fi connectivity and start incorporating dedicated self-testing resistance sensors. Imagine your range sending an alert to your phone the moment it detects a drop in voltage, long before the element actually burns out. Until that becomes the industry standard, however, you remain the primary diagnostic tool in your home. My advanced tip for you today: do not wait for the oven to stop heating. Grab that multimeter and check the resistance between the terminals of your bake element. If it reads outside the standard 20-40 ohm range, it is already failing internally. You can replace it on your own schedule now, rather than dealing with a frantic holiday dinner emergency later.
The Breakthrough Moments That Changed My Repair Strategy
After years of wrestling with stubborn machines, the biggest ‘lightbulb’ moment wasn’t about a specific tool, but about patience. I learned that force is never the answer with plastic dishwasher components; if it doesn’t click into place easily, there’s usually a stray piece of debris in the way. I also realized that while a part might look perfect, its internal resistance tells the real story. If you’re still dealing with sound issues after a fix, you might be diagnosing a rattling noise that points to a different loose clip. Lastly, never underestimate the power of a quick ‘reset’—sometimes just unplugging the unit for ten minutes clears a confused control board faster than any part replacement could.
The Reliable Resources I Keep on Speed-Dial
When I’m stuck on a particularly tricky diagnostic, I always turn to a few trusted sources. First, a high-quality digital multimeter is non-negotiable for testing your ovens high limit thermostat with ease. Second, I frequently reference the official manufacturer parts diagrams; seeing how the ‘exploded view’ of a machine fits together is worth a thousand words. Third, I highly recommend testing your oven temperature sensor without calling a pro using a simple probe—it’s a five-minute job that can save you hundreds. Finally, if you ever feel in over your head, remember that knowing when to stop diying and call an oven repair expert is the sign of a smart homeowner, not a defeated one. If you have questions about specific models, you can always reach us through our contact us page.
#IMAGE_PLACEHOLDER_E#
Your Journey to Becoming a Home Maintenance Hero
Fixing your own appliances is about more than just saving money—it’s about the satisfaction of knowing your home inside and out. Whether you’re swapping a spray arm or diving into complex oven repair, each successful fix builds the confidence you need for the next challenge. Don’t let a few broken parts or a confusing dishwasher error code stop you from maintaining your kitchen like a professional. You’ve got the tools, you’ve got the diagnostics, and now you’ve got the plan. It’s time to get that machine back in peak condition. Have you ever found a weird ‘shortcut’ that actually worked for your dishwasher? Drop your best hack in the comments!