I was three hours into a slow-roast brisket when I noticed the kitchen felt like a sauna. Not the good kind of sauna. I’m talking about the “I am wasting forty dollars of electricity and ruining dinner” kind. I walked over to the range and realized the oven door had sagged open just enough to let a steady stream of 325-degree air hit me square in the face. I pushed it shut. Five minutes later? Click-thud. It was open again. I ended up propping a heavy wooden kitchen chair against the handle just to finish the meal. It was embarrassing, inefficient, and honestly, a little bit dangerous.
Stop Propping Your Oven Shut with Kitchen Chairs
It is a common frustration that most of us ignore until the holidays hit. You think it is just a tired spring, but a door that won’t stay latched usually points to a few specific, fixable culprits. If you have been living with this, you are likely seeing your energy bill climb while your cakes sink in the middle because the temperature won’t stabilize. We are going to get that door sealing tighter than a bank vault today. Whether it is a gunked-up latch or you are identifying a failed door hinge on a wall oven, the fix is usually much simpler than the big-box repair companies want you to believe. I spent years thinking these hinges were magic boxes of tension, but they are just mechanical parts that wear out.
Is a DIY Repair Actually Safe for Beginners?
I will be the first to admit I messed this up early on. I tried to force a misaligned hinge back into place with a pair of rusty pliers and ended up replacing a snapped oven door hinge spring because I didn’t respect the tension. But here is the truth: if you can turn a screwdriver, you can do this. According to the Association of Home Appliance Manufacturers, faulty door seals and hinges are among the primary causes of heat loss in residential units, often reducing cooking efficiency by nearly 20%. That is real money staying in your pocket if you just take twenty minutes to lubricate sticky oven door hinges safely or check the alignment of your latch assembly.
Why a Tight Seal Changes Everything in Your Kitchen
When that door does not stay shut, your oven’s thermostat goes into overdrive. It is trying to compensate for the constant heat loss, which often explains the simple reason your oven won’t reach 450 degrees even when you’ve preheated it for an hour. Beyond the cooking quality, there is the safety aspect to consider. Excessive heat escaping can cause oven control knobs to get too hot to touch or even melt the laminate on your nearby cabinets. Have you ever found yourself doing the “chair-prop” trick just to get through a Sunday roast? I would love to hear your most creative temporary fixes in the comments below! Before we start swapping parts, let’s begin by testing your oven door seal with the dollar bill trick to see if the gasket or the latch is the true villain here.
Run the Dollar Bill Test Before Buying Parts
Before you start tearing screws out of the frame, you need to know if you are fighting a weak gasket or a mechanical hinge failure. Take a crisp dollar bill, open the door, and place it halfway across the seal. Close the door and pull. If the bill slides out with zero resistance, your gasket has lost its ‘squish’ or your hinges aren’t pulling the door tight enough. This is usually where people realize the simple reason your oven won’t reach 450 degrees is just a five-dollar piece of paper telling them the heat is escaping. I once spent forty bucks on a new silicone gasket and an hour scraping off the old one, only to realize the real culprit was a pebble-sized piece of burnt crust jammed in the hinge pivot. It was a classic case of failing at oven diagnostics and pinpointing faults before calling a repair expert.
Pop the Door Off the Chassis Safely
To actually see what is going on, that door has to come off. On most modern units, there are two small locking tabs on the hinges. Flip these up into the locked position and partially close the door until it stops. At this point, you can lift the entire door assembly straight up and out. It is exactly like a puzzle piece; if you have to force it, something is wrong. Once the door is on a towel-covered table, you can get a clear look at the hinge tracks. If you see black, oily gunk, you need to lubricate sticky oven door hinges safely using a high-temp grease, not WD-40, which will just bake into a sticky mess. 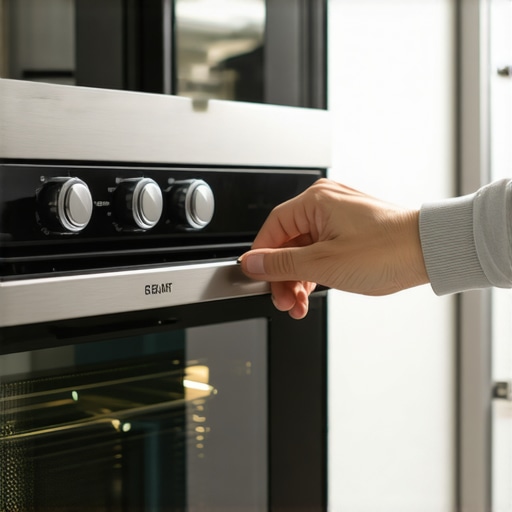
Spot the Difference Between Grime and Metal Fatigue
Examine the hinge arms for any slight bends. Even a millimeter of deviance can prevent the door from latching. If the metal looks straight but the door still feels ‘limp,’ the internal springs have likely reached their limit. This is very similar to fixing a dishwasher door that feels too light or heavy; the physics of tension remain the same across appliances. If the door hangs low, the springs are stretched out. If it snaps shut like a mousetrap, the tension might be incorrectly set or caught on a burr. For those dealing with a door that drops like a stone, you’ll need to learn how to fix an oven door that drops open too fast by checking the spring mounting points.
Tackle the Springs Without Losing a Finger
If you have determined the springs are the issue, proceed with caution. These parts are under extreme tension. I have seen a snapped spring fly across a kitchen and dent a refrigerator door. You are essentially doing oven repair essentials by troubleshooting common issues with parts that are designed to resist you. If your model uses a cable system, look for fraying. Much like replacing a dishwasher door hinge cable, you want to ensure the path of the cable is clear of any sharp metal edges before hooking the new one in. If you find a broken spring, do not try to bend it back into shape. Once that metal is fatigued, it is a safety hazard. Your best bet is replacing a snapped oven door hinge spring with an OEM part to ensure the tension matches the weight of your specific door glass.Most people approach a broken oven or dishwasher like a LEGO set: if it’s not working, just find the broken block and swap it. But after years of tinkering, I have realized the ‘parts cannon’—the habit of firing new components at a machine until it starts working—is the most expensive way to fix a kitchen. The hidden nuance that separates a pro from a frustrated amateur isn’t the tools; it is understanding that a failure in one area often masks a healthy part elsewhere.
Stop Playing the Parts Cannon Game
Everyone tells you to buy a new heating element the moment your soufflé comes out cold. In my experience, however, a perfectly good element often gets tossed in the trash because of a faulty wire harness or a tripped safety. Before you open your wallet, you need to master oven diagnostics and pinpointing faults before calling a repair expert. It is rarely the most obvious part that has failed. For instance, if your dishwasher is acting up, the issue is frequently a sensor reading rather than a mechanical death. Diving into a dishwasher parts guide to DIY diagnostics can save you from replacing a $200 motor when a $15 sensor was the real culprit.
Why Does My Multimeter Show Continuity When the Element Still Won’t Heat?
This is the ultimate trap for advanced DIYers. You pull out your meter, get a ‘beep’ for continuity, and assume the part is fine. But continuity only tells you the path is complete; it doesn’t tell you if the part can handle the load. I’ve seen heating elements that show continuity but have internal ‘thin spots’ that cause them to fail under high voltage. This is why testing the resistance on your oven’s broil element is far more accurate than a simple continuity beep. According to research from the National Association of Service Dealers, nearly 30% of parts returned as ‘defective’ by homeowners are actually fully functional; the diagnostic process was simply flawed from the start. 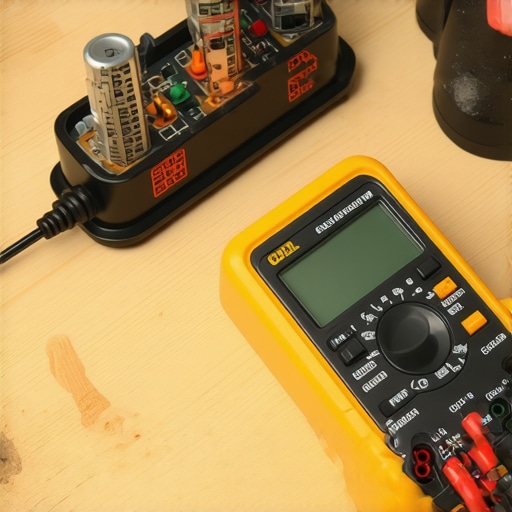
The Invisible Danger of Ghost Resistance
A common ‘oops’ factor involves ignoring the terminal block or the plug itself. If you find yourself checking if your oven control board is failing, look for scorched plastic or loose connections first. A loose screw creates resistance, which generates heat, which eventually melts the wire. You might replace the board, but if you don’t fix the loose connection, you’ll be doing the same repair in six months. It is the same logic used when identifying dishwasher faults quickly; the connections are just as important as the components.
Know Your Limits Before the Damage is Done
There is a fine line between a brave DIYer and someone who is about to cause a kitchen fire. If you’ve spent an hour testing your oven’s high-limit thermostat and everything checks out, but the unit still won’t behave, the issue might be an intermittent software glitch in the main relay. At that point, you have to decide if the cost of the diagnostic tools outweighs the cost of professional help. Knowing when to stop DIYing and call an oven repair expert is an expertise in itself. Have you ever fallen into the trap of replacing the same part twice because you missed the root cause? Let me know in the comments below!If you are serious about moving past the ‘guess and check’ method of repair, you need to stop using the five-dollar analog multimeter you found in the bargain bin. I personally switched to a digital meter with a Low Impedance (LoZ) mode years ago because it prevents ‘ghost voltages’ from giving you a false reading when you are checking for a burnt terminal block on your electric oven. Without the right gear, you are essentially flying blind. According to technical documentation from the Master Samurai Tech academy, high-resistance connections are the silent killers of control boards, and you simply cannot catch those with basic tools. Investing in a set of long-reach nut drivers and a dedicated high-temp silicone lubricant will also save you from the nightmare of stripped screws and seized parts.
How do I keep my appliances from breaking down every year?
The secret isn’t just fixing what is broken; it is aggressive preventative care. For your dishwasher, this means more than just a quick rinse. You should be cleaning your dishwasher’s hidden sump filter every three months to prevent debris from grinding down the pump impeller. For the oven, it is about the structural integrity of the heat box. Most people wait until a door falls off, but cleaning grimy door gaskets prevents the acidic buildup of fats and sugars from eating away at the seal. If you keep the seals supple and the filters clear, you are effectively doubling the lifespan of the heating elements. 
Stop Settling for ‘Close Enough’ Temperatures
Once the mechanical parts are solid, the next level of appliance mastery is calibration. Many home cooks assume that if they set the dial to 350, the oven is at 350. In reality, thermal drift is a natural part of an appliance’s aging process. Learning the fast way to recalibrate your oven for accurate temperatures is what separates a baker from someone who just makes hot dough. If you notice your dishwasher struggling to engage the cycle, don’t immediately assume the computer is dead; try swapping out a worn dishwasher door latch assembly first. A firm physical click is often the only signal the control board needs to start the water flow. Looking ahead, I predict that appliance repair will move toward ‘smart’ self-diagnostics where your phone will tell you exactly which sensor is failing before the machine even stops working. For now, we still rely on our hands and our meters. I challenge you to go into your kitchen right now and try the temperature recalibration steps I mentioned; it’s the single best way to see immediate results in your cooking without spending a dime on new parts!
The Hardest Lesson I Learned While Wrestling with a Double Oven
I used to think that if a part looked okay, it was okay. I wasted an entire Saturday afternoon once because I didn’t realize that a tiny bit of carbon buildup on a terminal was mimicking a dead control board. Here is what I know now: Always photograph your wiring before you disconnect anything; those colorful wires look identical once they are hanging loose. Secondly, don’t ignore the smells. If you are fixing a gas oven that smells like a campfire, you aren’t just looking for a broken part; you are looking for debris that shouldn’t be there. Finally, remember that mechanical parts rarely die alone. If a hinge is shot, the gasket is likely worn from the friction of the misalignment. Getting comfortable with oven repair essentials by troubleshooting common issues with parts means looking at the whole system, not just the broken piece. #IMAGE_PLACEHOLDER_E#
The ‘Save My Sanity’ Toolkit for Home Mechanics
You don’t need a professional van full of gear, but three specific things changed my life. First, a Digital Multimeter with LoZ mode is non-negotiable for checking if your oven control board is failing without being fooled by ghost voltage. Second, keep a tube of high-temp food-grade silicone grease handy; it is the only way to lubricate sticky oven door hinges safely without creating a fire hazard. Lastly, I always keep the dishwasher parts guide to DIY diagnostics bookmarked on my phone. Having a reliable reference prevents that panicked ‘what-do-I-do-now’ feeling when water starts pooling on the floor.
Your Kitchen Is Waiting for a Fix
You have the knowledge now to stop using kitchen chairs to prop your doors shut and start trusting your own hands. Whether you are identifying dishwasher faults quickly or recalibrating your bake element, the satisfaction of a job well done is worth more than the money saved. Don’t let a small mechanical hiccup turn into an expensive replacement. Have you ever discovered a ‘phantom’ problem that turned out to be something incredibly simple? Share your DIY wins or fails in the comments below!