I stood in my kitchen last Friday, flour dusted across my apron and a perfectly proofed sourdough loaf in my hands, staring at a digital display that refused to budge past 385 degrees. I had the dial set for a blistering 450, yet the internal thermometer just hovered there, mocking my dinner plans. It is a sinking feeling. You have done the prep, the family is hungry, and your appliance has suddenly decided it is a low-and-slow smoker instead of a high-heat oven. I have been there more times than I care to admit, and usually, it happens right when you are trying to get that perfect crust on a pizza or a roast.
When Your Oven Just Refuses to Turn Up the Heat
I used to think that when an oven stalled out, it was the end of the line. I once spent nearly four hundred dollars on a professional technician only to realize I could have handled the oven diagnostics myself with a simple tool and ten minutes of patience. We often assume the worst, like a fried motherboard or a total heating system collapse. In reality, the culprit is often a single, tired component that has lost its ability to communicate accurately with the brain of the machine. Today, I am going to show you exactly why that temperature plateau happens and how you can get your kitchen back to searing temperatures without calling in a pro. Have you ever found yourself standing in front of your stove, praying for that preheat light to finally click off?
Is it even worth trying to fix this myself?
Skepticism is healthy, especially when you are dealing with an appliance that pulls a lot of voltage. I made the massive mistake early on of ignoring oven repair essentials and jumping straight to buying a new unit, only to find out later that a simple $20 sensor was the only thing standing between me and a hot meal. According to data from the Association of Home Appliance Manufacturers (AHAM), many consumers replace major appliances up to three years earlier than necessary due to easily fixable sensor or element issues. Before you start shopping for a new range, you should be testing your oven temperature sensor or looking for invisible cracks in the bake element. It is surprisingly simple once you know what to look for, and I am going to walk you through the most common points of failure that cause that annoying 400-degree ceiling. Let’s get under the hood and see why your oven is playing it so cool.The first thing you have to realize is that your oven is essentially a giant toaster with a brain. If that brain gets bad data, it stops the heating process early. This usually comes down to the temperature sensor—that little metal probe sticking out of the back wall. Think of it like a sentry that tells the control board when the heat has reached the target. If the sensor is failing, its resistance changes. I remember the first time I tried to swap one of these. I was so impatient to get my roast in that I didn’t wait for the oven to cool down properly. I burned my thumb, cursed loudly enough for the neighbors to hear, and then dropped the mounting screw into the dark abyss behind the oven. I had to spend forty minutes shimmying the heavy appliance away from the wall just to find a ten-cent screw. Lesson learned: wait for the cool-down and use a magnetized screwdriver.
Why your oven thinks it is already hot enough
When your temperature stalls, it is often because the sensor is providing a false positive. You can check this by testing your oven temperature sensor with a multimeter set to ohms. At room temperature, most sensors should read around 1080 ohms. If yours is wildly different, the brain thinks the oven is at 450 degrees when it is actually only hitting 380. It is a classic case of bad communication.
Hunt for those tiny blisters on the element
If the sensor checks out, we move to the brute force of the operation: the bake element. This is the big loop at the bottom. Even if it glows orange, it might be bleeding power through microscopic fissures. I have seen elements that looked perfectly fine until I got a flashlight right up against the metal. You are looking for invisible cracks in the bake element or small, bubbling blisters. These spots are like a leak in a garden hose; the electricity is still moving, but you have lost the intensity needed to finish the job.
Check the power delivery system before giving up
Sometimes the issue isn’t the part that gets hot, but the bridge that carries the electricity to it. If you have an electric oven, you must look at the back. I once spent an entire afternoon diagnosing a broken element only to find that the terminal block—where the power cord attaches—was half-melted. By checking for a burnt terminal block, you might find a loose wire that is arcing and preventing full voltage from reaching the heater.
Scan the control board for signs of a meltdown
Finally, if the hardware seems solid, the fault might lie in the relay. This is a small mechanical switch on the control board that clicks to send power to the element. If you know how to identify a bad oven relay, you will look for a small black box on the circuit board that has scorch marks or a faint smell of ozone. You can often save hundreds by inspecting your oven control board for these tell-tale burn marks before committing to a full replacement. Mastering these oven repair essentials turns a weekend crisis into a quick Tuesday night fix.Most home cooks think that if their oven is 25 degrees off, they should just jump into the settings and adjust the temperature offset. I am here to tell you that this is usually a mistake. While most modern ranges allow you to recalibrate the display, doing so before you have finished your oven diagnostics is like turning up the radio to ‘fix’ a knocking sound in your car engine. In my experience, if an oven has been accurate for five years and suddenly starts running cool, it is not a software calibration issue; it is a hardware warning. By masking the symptom with a settings tweak, you are ignoring the fact that your sensor is drifting or your element is failing.
Stop trying to recalibrate a dying sensor
The temptation to just hit a few buttons and ‘fix’ the heat is real, but a study by the Intertek testing group suggests that nearly 15% of appliance failures are misdiagnosed because users compensate for failing parts rather than replacing them. If you find yourself constantly bumping the temperature up to get a standard result, you should be testing your oven temperature sensor with a real meter. A sensor that has drifted out of its resistance range will continue to degrade. Eventually, no amount of calibration will save your Sunday roast. This same logic applies across the kitchen; for instance, when performing dishwasher diagnostics, we look for root causes like clogged filters rather than just adding more detergent. Keep that same mindset with your oven.
Why does my multimeter show continuity on a part that won’t heat?
This is the most common ‘trap’ for the advanced DIYer. You pull out the bake element, test it for continuity, hear that satisfying ‘beep’ from your meter, and assume the part is fine. However, an element can have continuity but still be failing under a load. This happens when the internal wire has a partial break or ‘cold spot’ that allows a small amount of current through but cannot handle the high amperage required to reach 450 degrees. You have to be testing your oven bake element for hidden cold spots specifically if you are seeing the heat plateau. 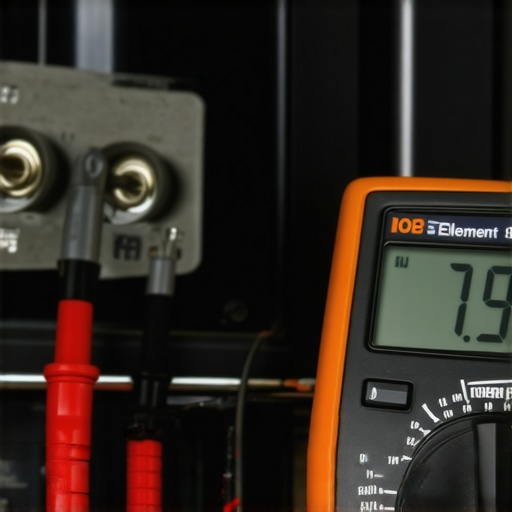
The sneaky high-limit thermostat mistake
Another nuance that many people overlook is the high-limit thermostat. This is a safety device designed to cut power if the oven gets dangerously hot. Over time, these can become ‘weak’ or over-sensitive. Instead of a total shutdown, they might trip prematurely at 390 degrees, then reset themselves as the oven cools slightly. This creates a loop where you can never quite reach high-heat territory. If you are testing your oven’s high-limit thermostat, you are looking for a component that stays closed even as temperatures climb toward your target. Sometimes, the problem is not that the oven cannot produce heat, but that a safety switch is wrongly convinced the house is about to catch fire. Also, do not rule out simple physics; if you find why your oven bakes unevenly on the top rack, it might be as simple as a warped rack or a degraded door seal leaking heat. It is vital to know when to stop diying and call an oven repair expert, especially if you suspect the relay board is clicking for the wrong reasons. Have you ever fallen into this trap and replaced a part that was actually fine? Let me know in the comments.I have spent years building a toolkit that saves me from the ‘repairman tax,’ and if I’ve learned anything, it’s that the right gear changes your entire relationship with your kitchen. If you really want to move beyond basic guessing, you need a high-quality digital multimeter. I personally use a Klein or a Fluke because their readings don’t bounce around when you are trying to verify oven repair essentials. Beyond the meter, a set of magnetized nut drivers is non-negotiable. There is nothing that ruins a Saturday morning faster than a screw falling into the insulation of an oven door. These tools aren’t just for fixing breaks; they are for the deep dives into dishwasher parts and diagnostics that prevent minor clogs from becoming flooded floors.
How can I keep my kitchen running smoothly for a decade?
The secret isn’t just knowing how to fix a break; it’s about preventing the wear that leads to the break. For your dishwasher, this means a monthly ritual of clearing hard water deposits and taking five minutes for cleaning grimy door gaskets. I’ve found that even the most expensive units succumb to mineral buildup if left unchecked. The Master Samurai Tech Academy, a leading authority in appliance repair education, notes that the vast majority of service calls for ‘poor performance’ are actually just maintenance deficits. For ovens, it’s about the seals. If you aren’t periodically checking for heat leaks, you are taxing your elements and your control board far more than necessary. 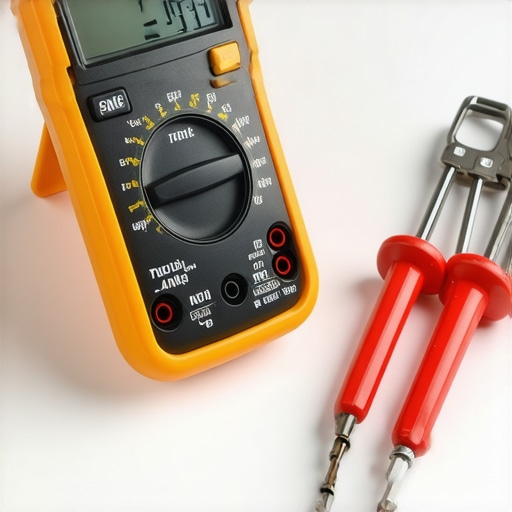 I’m seeing a massive shift in how we handle these machines. We are moving toward a world of ‘Smart Diagnostics’ where your oven might actually email you when a relay begins to drift out of spec. While that sounds convenient, it also makes it easier for manufacturers to lock you out of your own repairs. That is why mastering dishwasher diagnostics now is so vital. Understanding the physics of how a pump moves water or how a sensor measures heat will always be more reliable than a proprietary app telling you to buy a new unit. I predict that within five years, the ‘Right to Repair’ movement will make these technical manuals even more accessible, but only for those who already know how to handle a multimeter. If you haven’t yet, I challenge you to pull your dishwasher out this weekend and spend ten minutes inspecting the check valve. It is a small step that builds the confidence you need to know when to stop diying and when to keep pushing forward.
The Most Expensive Mistakes I Made So You Don’t Have To
After years of tinkering, I realized that the loudest sound in a broken kitchen isn’t the beep of an error code; it’s the silence of a part that has given up. One lightbulb moment for me was discovering that continuity is a liar. I once had a bake element that beeped perfectly on my meter but was actually failing under load. This taught me the value of testing your oven bake element for hidden cold spots rather than just checking if the circuit is ‘closed.’ Another hard lesson was realizing that ‘ghost’ temperature drops are often caused by a weak safety switch. If you are testing your oven’s high-limit thermostat with ease, you are checking the one part that can cut your heat off just as things are getting interesting. Finally, always trust your nose. If you smell a faint metallic tang, stop looking at the elements and start inspecting your oven control board for burn marks. It is better to find a scorched relay early than to let it melt the entire harness.
Tools That Saved My Sanity and My Wallet
If you want to move beyond guessing, you need a toolkit that matches your ambition. I never start a job without my Fluke digital multimeter; it is the gold standard for verifying oven repair essentials because it provides stable readings when cheap meters flutter. I also recommend a set of long-reach magnetic nut drivers. These are lifesavers when you are trying to reach a sensor screw in the back of a dark oven cavity. For those who want to truly master their appliances, the Master Samurai Tech Academy offers the best technical training available. Combining their professional insights with our guide on oven diagnostics will give you the confidence to tackle almost any heat-related failure without a second thought.
Your Kitchen Deserves an Oven That Performs
Don’t let a temperamental heating element dictate what you serve for dinner. Taking the time to diagnose these issues yourself isn’t just about saving money; it is about the satisfaction of knowing your home inside and out. Whether you are swapping a sensor or deciding when to stop diying and call an oven repair expert, you are now equipped with the knowledge to make an informed choice. Your next perfectly roasted meal is only a diagnostic check away. So, tell me, have you ever replaced an expensive part only to find out the real problem was just a $10 loose wire? Let me know your biggest repair ‘fails’ in the comments below!