I still remember the smell of half-cooked roast chicken and the sinking feeling in my gut when my oven display just… died. One minute I was checking the internal temp, and the next, the screen was a blank, dark void. My first instinct was to call a junk hauler. I figured if the “brain” of the machine was gone, the whole thing was toast. I almost spent two thousand dollars on a new range before I realized I was just dealing with a faulty control board. It’s a common panic, but honestly, it’s often a fix you can handle yourself if you know how to pinpoint the faults before the repair guy shows up.
When Your Oven Starts Acting Like It’s Possessed
It’s never a clean break. Usually, your oven starts acting “glitchy” long before it completely quits. You might notice the clock resetting itself or the display showing a garbled mess of characters that look like Klingon. These are the early warning shots. I made a huge mistake early in my DIY journey by assuming a heating issue was always a bad element. I spent an entire afternoon testing the bake element for cold spots, only to realize the element was fine—the control board just wasn’t sending it any power. Talk about a waste of a Saturday! According to the Association of Home Appliance Manufacturers (AHAM), electronic components are increasingly the primary point of failure in modern appliances because of the extreme heat they have to withstand within the chassis.
Today, I want to walk you through the four specific symptoms that tell you the control board is the problem. No more guessing. No more throwing parts at a ghost. We’re going to look at display issues, erratic heating, those annoying F-codes, and the dreaded clicking sound that means the relay board is acting up for all the wrong reasons. Have you ever had your oven quit right when you needed it most? It’s a nightmare I wouldn’t wish on my worst neighbor.
Is a New Control Board Actually Worth the Cost?
I get it. These boards aren’t exactly cheap, and the fear is that you’ll buy one, install it, and the oven still won’t work. But compared to the cost of a brand-new unit, it’s a steal. Most people don’t realize that a control board is essentially the “operating system” of your kitchen. If you can identify a bad relay or a burnt solder joint, you’ve saved yourself hundreds in labor. We aren’t just fixing a machine; we are reclaiming our kitchen’s sanity. Let’s dive into exactly what you need to look for before you start pulling the back panel off.
Before you touch a single screw on that back panel, kill the power at the breaker. I cannot stress this enough. Think of your oven like a high-voltage beast that does not play nice with amateur mistakes. Once you have the unit pulled out and the access panel removed, your eyes become your most valuable diagnostic tool. Most people jump straight to buying expensive components, but a simple visual check can save you a fortune.
Get Your Flashlight and Look for Scorch Marks
I remember one humid August afternoon when I was wrestling with a range that would randomly shut down mid-bake. I sat on the floor, staring at the control board for twenty minutes and saw absolutely nothing. It was not until I grabbed a high-lumen flashlight and angled it just right that I saw a tiny, hair-thin fracture in the solder joint of the main power relay. It looked like a dry creek bed under a microscope. That tiny crack was expanding as the oven heated up, eventually breaking the circuit and killing the display. If I hadn’t looked closer, I would have replaced the whole board when all I needed was a thirty-second solder touch-up.
While you are in there, you should also check for a burnt terminal block on your electric oven. Sometimes the board is perfectly healthy, but the wires feeding it are crispy and failing to deliver the juice. Look for melted plastic, or brittle insulation on the wires. It’s a common mistake to assume that the ‘brain’ of the machine has died when it’s actually just a peripheral connection that has given up. Everyone tells you to trust the error code—if the screen says F3, you buy a sensor, right? Wrong. In my experience, error codes are often the board’s way of saying ‘I’m confused,’ rather than ‘this specific part is broken.’ I’ve seen countless DIYers replace perfectly good components because they treated the digital display like the absolute truth. Real oven repair essentials involve verifying the part with a multimeter before you click ‘buy’ on a replacement. 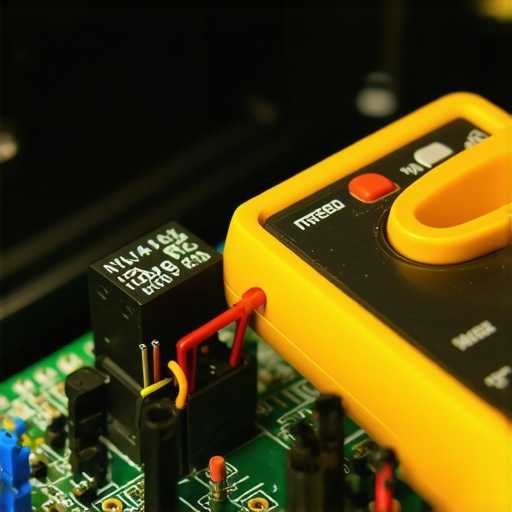
Stop Treating Error Codes Like the Gospel Truth
The nuance that most manuals won’t tell you is that a control board is only as smart as the data it receives. If a wire is partially frayed or a terminal is corroded, the board receives a ‘noisy’ signal. It interprets this noise as a part failure and throws a code. According to research from the Professional Service Association (PSA), nearly 30% of control boards returned to manufacturers under warranty are actually ‘No Fault Found’ (NFF) units. This means people are tossing expensive parts at problems that could have been fixed with a wire brush and some contact cleaner. It’s a frustrating cycle that eats your budget and your time. Let’s dig deeper into why we often look in the wrong place.
Does a Power Surge Always Mean Your Board is Fried?
I often get asked if a lightning strike or a transformer blow-out is the automatic end for an appliance. While it’s true that you might find your dishwasher won’t turn on after a storm, the damage isn’t always the main processor. Sometimes, the surge just pops a thermal fuse or a metal oxide varistor (MOV) designed to take the hit for the more expensive chips. Before you buy a $300 board, check those line filters and fuses. It’s the difference between a ten-minute swap and a week of waiting for a part you didn’t actually need. People also assume that if the display works, the board is ‘good,’ but modern boards utilize multi-rail power supplies. One circuit can be dead while the others function perfectly, leading to those confusing ‘no heat’ situations on an otherwise active display.
The Expensive Trap of Misdiagnosing Power Issues
Another nuance involves the ‘cascading failure’—where one bad part slowly kills another. A weak relay on the board might cause your heating element to cycle too rapidly, eventually burning out the element. If you just replace the element without fixing the relay, you’ll be doing the same job again in three months. This is why identifying dishwasher faults and oven issues requires looking at the whole system, not just the part that stopped working. Also, be careful when reassembling; I’ve seen many people resort to installing hardware without stripping screws only to realize they over-torqued the delicate mounting points of the control module itself. These plastic housings become brittle with age and heat, and a single crack can cause the board to misalign, leading to buttons that don’t press or displays that flicker. It’s about more than just reading a manual; it’s about developing a ‘feel’ for the machine. When you understand that a control board is just a series of switches waiting for a ‘go’ signal, the mystery vanishes and the repair becomes a logic puzzle rather than a guessing game. Have you ever fallen into the trap of replacing a part based only on an error code, only for the problem to persist? Let me know in the comments.
I used to think that a toolbox was just a graveyard for old screwdrivers, but once you start digging into control boards and heating circuits, you realize that your gear dictates your success. If you are serious about avoiding that two-thousand-dollar replacement bill, you need more than just a ‘can-do’ attitude; you need a decent digital multimeter. I personally swear by a True RMS meter because it doesn’t get tricked by the ‘dirty’ power found in modern household circuits. When you are testing a dishwasher heating element for a short, a cheap meter might give you a ghost reading that leads you to buy a part you don’t need. Precision is the difference between a fixed oven and a frustrated weekend.
The One Tool That Actually Saves You Money
Beyond the meter, I always keep a can of electronic contact cleaner and a set of non-conductive probes. You’d be surprised how often a ‘dead’ control board is just suffering from oxidation on the ribbon cable connectors. I’ve seen this countless times with dishwashers where the interface stops responding. Instead of gutting the machine, a quick spray on the contacts can restore communication. It’s part of the broader dishwasher parts and DIY diagnostics strategy that focuses on connectivity before component replacement. As noted in the Service Matters technical manuals by Whirlpool, high-resistance connections are a leading cause of intermittent board failure, often misdiagnosed as terminal hardware death.
How can I keep my kitchen running smooth for years?
Maintenance isn’t just about cleaning the crumbs out of the bottom; it’s about heat management. Heat is the natural enemy of every control board we’ve discussed. To extend the life of your oven’s brain, ensure your cooling fans are actually spinning and not choked with dust. For your dishwasher, the best long-term move is to prevent clogs before they stress the pumps. If you find that your dishwasher bottom is full of standing water, your drain pump is working twice as hard as it should, which eventually creates a back-voltage that can fry the relay on your main board. Clean those filters every month—your control board will thank you for the reduced electrical load.
Looking ahead, I see a massive shift toward ‘Smart Diagnostics’ where appliances will use AI to predict a failure before it happens. We are already seeing sensors that monitor the amperage draw of an igniter to tell you it’s failing before it actually stops glowing. However, until we all have robots fixing our kitchens, you still need to know how to perform oven diagnostics and pinpointing faults manually. The trend is moving toward more modular, albeit more expensive, parts, which makes your ability to verify a failure even more valuable. Don’t let the tech intimidate you; it’s still just wires and switches at the end of the day.
The Future Is Already Living in Your Control Board
We are entering an era where the software on your board might be the issue rather than the hardware. Some modern ranges allow for firmware updates via Wi-Fi to fix ‘bugs’ in the baking algorithms. It sounds like science fiction, but it’s the reality of the modern kitchen. My advice? Keep your manuals and always check for a ‘soft reset’ procedure before pulling the back panel. Sometimes testing your oven’s high-limit thermostat reveals the part is fine, and the board just needed a power cycle to clear a logic trap. If you’re staring at a dead screen right now, I challenge you: don’t call the pro yet. Grab a multimeter, find the schematics tucked in the bottom of the unit, and trace the power yourself. You might just find a ten-dollar fuse is all that stands between you and a working kitchen.
Hard Truths About Logic Board Failures
Over the years, I’ve realized that a control board rarely ‘dies’ of old age; it’s usually murdered by external factors. First, never ignore the power of a simple cleaning. Oxidation on ribbon cables accounts for a huge chunk of ‘dead’ displays. I’ve seen hundreds of DIYers buy new boards when all they needed was a bit of rubbing alcohol on the contacts. Second, remember that heat is the enemy. If your oven’s cooling fan is caked in grease or dust, your new board won’t last a year. Third, always verify the input power. I’ve seen people replace expensive processors when they were actually diagnosing an oven that keeps tripping the circuit breaker because of a faulty terminal block, not a faulty brain. Finally, trust your eyes over the digital screen. A scorch mark or a swollen capacitor tells a truer story than a generic error code ever will.
The Tiny Toolkit That Saves Thousands
If you want to move beyond guessing and start fixing, you need to upgrade your gear. I never open a back panel without my True RMS Multimeter; it’s the only way to get accurate readings on modern high-frequency electronic components. I also keep a can of high-quality electronic contact cleaner and a grounding strap to avoid static-killing the sensitive chips. For finding the right components, I always rely on the manufacturer’s technical sheet—usually tucked in a plastic pouch inside the bottom drawer or behind the back panel. These sheets are the ‘cheat codes’ for oven repair essentials that manufacturers don’t advertise to the public. If you find your oven is still acting up after a board swap, it might be time for recalibrating your oven for accurate temperatures to ensure the software and hardware are in perfect sync.
Take Back Control of Your Kitchen
There is a specific kind of pride that comes from hearing your oven beep back to life after you’ve spent an hour under its hood. You aren’t just saving money; you are proving that you can maintain the complex tools that feed your family. Don’t let the blinking lights and complex circuits intimidate you. With a little patience and systematic oven diagnostics, you can tackle almost any electronic glitch. Of course, wisdom also means knowing when to stop diying and call an oven repair expert if the high-voltage circuits are beyond your comfort zone. But for today, take that first step, grab your flashlight, and see what you can find. Have you ever found a tiny, burnt wire that fixed a massive problem? Tell me your ‘easy win’ story in the comments below!