The smell of preheating dough was already filling the house when it happened. I leaned in to check my sourdough, and… nothing. No blast of heat. No orange glow. Just a cold, dark cavity and a display that insisted everything was fine. It is a gut-punch, isn’t it? You are all set for a win, and your appliance decides to take an unscheduled vacation. After years of tinkering, I have realized that most of the time, the culprit isn’t some expensive computer chip. Often, it is a tiny, stubborn safety device called the high-limit thermostat. Today, I am going to show you how to tackle this little guy without breaking a sweat or your bank account.
That Frustrating Moment the Heat Just Vanishes
I remember one particularly embarrassing Saturday when I convinced myself my oven’s control board was fried. I was so sure of my expert intuition that I spent $150 on a replacement part I didn’t even need. It was a classic case of overthinking. After hours of frustration, I discovered the real problem was a tripped high-limit thermostat—a part that costs less than a decent pizza. If I had just started with pinpointing faults before calling a repair expert, I would have saved a lot of pride and a lot of cash. This little sensor is essentially a kill switch. If the oven gets too hot, it cuts the power to keep your house from burning down. It is a hero, really, even if it feels like a villain when your dinner is raw.
Before you start tearing everything apart, you need to know that testing this component is actually one of the simplest DIY tasks you can perform. You do not need a degree in electrical engineering. You just need a bit of patience and a basic tool. In fact, learning a few multimeter tricks for diagnosing a dead control board or other components can make you feel like a kitchen wizard. We are going to verify if that thermostat has tripped or failed entirely, ensuring you only replace what is actually broken. [image placeholder]
Is This Tiny Switch Actually Necessary?
You might be wondering if this little disc-shaped part is just another thing designed to break. I used to think so, too. But the stakes are higher than a ruined roast. According to the National Fire Protection Association (NFPA), cooking equipment is the leading cause of home fires and fire injuries in the United States. These thermostats are the final line of defense against a runaway heating element. Even if you have already mastered how to test an oven broil element using a simple ohmmeter, the thermostat is the gatekeeper that tells that element when to stop for safety. Have you ever had your oven just quit on you right when you needed it most? It is a common headache, but it is one we can fix together right now.
Kill the Power and Pull the Panel
Before we touch a single screw, we need to talk about safety. Think of your oven’s electricity like a sleeping lion; it is fine as long as you do not poke it. Unplug the unit or flip the breaker. Once the beast is tamed, pull the oven out from the wall. I learned the hard way that floors are unforgiving, so if you are worried about scratches, slide a piece of cardboard under the front feet first. Removing the back panel is usually a matter of six to eight 1/4-inch hex screws. This is where most people get overwhelmed, but remember, you are just looking for a specific path. If you have already looked into oven repair essentials and troubleshooting common issues with parts, you know that the back of an oven is mostly just insulation and wire harnesses.
Spotting the Small Metal Guard
The high-limit thermostat is typically located near the top of the oven cavity, often mounted directly onto the rear wall or near the vent. It is a small, circular component—about the size of a nickel—with two wires attached to it. Think of it as a gatekeeper. When the temperature exceeds a safe threshold, the gate slams shut (or rather, opens the circuit), and no electricity can pass through to the heating elements. I once spent forty minutes looking for one on an older GE model, only to realize it was tucked behind a small heat shield I had ignored. It is easy to confuse this with a thermal fuse or a temperature sensor, but those usually look different. If you are struggling to tell them apart, testing your oven temperature sensor without calling a pro is a similar process, but the sensor is usually a long, thin probe while the thermostat is a flat disc.
The Moment of Truth with a Multimeter
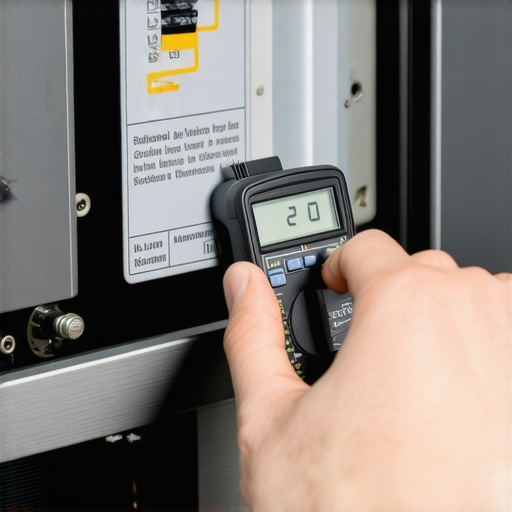
Now, let’s get to the actual testing. You want to check for “continuity,” which is just a fancy way of saying there is a clear path for electricity to flow. Set your multimeter to the lowest ohms setting or the continuity (beep) setting. Pull the two wires off the thermostat—always pull by the metal connector, never the wire itself, or you will be searching for finding the right oven heating element without the manual just to see how the wiring attaches. Touch one probe to each terminal on the thermostat. If the meter beeps or shows a reading close to zero, your thermostat is closed and working fine. If the screen says “OL” or doesn’t change at all, the gate is locked. The part is blown and needs to be replaced. It is a binary world: it is either working perfectly or it is completely dead.
Don’t Lose Your Screws in the Abyss
Here is a piece of advice from someone who has spent way too long on his hands and knees with a flashlight: use a magnetic tray. I remember a particularly humid Tuesday when I was trying to reattach the back panel of a range. I dropped the final screw, and it didn’t just fall—it vanished into the base of the oven. I had to tilt the entire appliance, nearly tipping it over, just to hear it rattle. It was a mess. Since then, I treat my screws like gold. If you find that the thermostat is fine but your oven is still acting possessed, you might need to look higher up the chain. Sometimes how to tell if your oven control board is actually fried becomes the next logical step, though it is a much more expensive pill to swallow. If at any point the wiring looks charred or you smell something metallic and burnt, that is a sign to step back. In those cases, knowing when to skip the diy and call a professional oven technician is the smartest move you can make for your home’s safety.
Many people assume that once they find a dead part, the job is 90% done. I call this the “Part-Swapper’s Fallacy.” In my experience, a tripped high-limit thermostat is rarely the root cause; it is a symptom. If you just replace the part without asking why the oven overheated, you’re basically putting a band-aid on a broken leg. Often, the real culprit is a failing cooling fan or a sticking relay on the control board. If you have been identifying a bad oven relay on the control board, you know that a relay stuck in the “on” position will keep the heat climbing until the thermostat kills the power to prevent a fire.
Why does your brand-new thermostat keep popping?
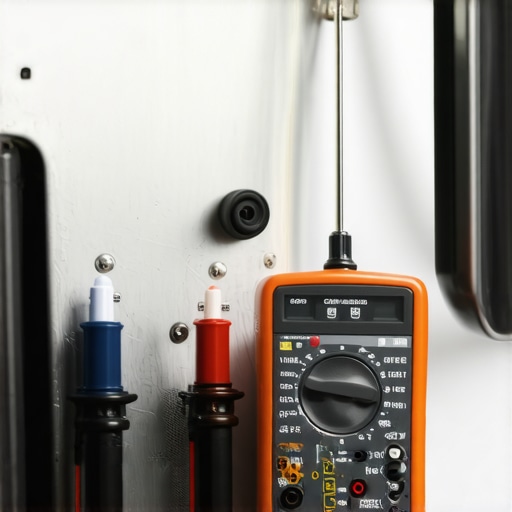
This is a sophisticated trap. Some DIYers buy a “resettable” thermostat thinking they are being clever, but if your oven originally used a “one-shot” thermal fuse, switching to a resettable one can be dangerous. According to experts at Underwriters Laboratories (UL), these thermal protections are calibrated to specific temperature curves. Bypassing or using the wrong tolerance can lead to cabinet damage or worse. This is similar to how people handle dishwasher parts and DIY diagnostics—they treat every sensor as a standalone unit rather than part of a synchronized system. If the system is getting too hot, something else is failing first.
The hidden link between heat and airflow
One common mistake I see is ignoring the “drift.” If you find that you are solving the mystery of why your oven bakes unevenly, the thermostat might be struggling to keep up with a failing bake element that is creating hot spots. Before you blame the thermostat entirely, you should be checking your oven’s bake element for tiny blisters. If you see those physical signs of wear, the thermostat is just doing its job by reacting to the element’s erratic behavior. Replacing the element is the only way to stop the thermostat from tripping again next week.
Avoid the trap of the universal part
I’ve seen plenty of folks try to save five dollars by buying a “universal” high-limit switch from a random marketplace. Don’t do it. These components have specific temperature ratings—often marked in Celsius on the back of the disc. If your oven expects a 120°C cutoff and you install a 150°C version, you’ve just removed your safety net. It’s better to spend time finding the right part without the manual by matching the exact specs of the original component. Have you ever fallen into this trap where you replaced the same part twice in a month? Let me know in the comments.
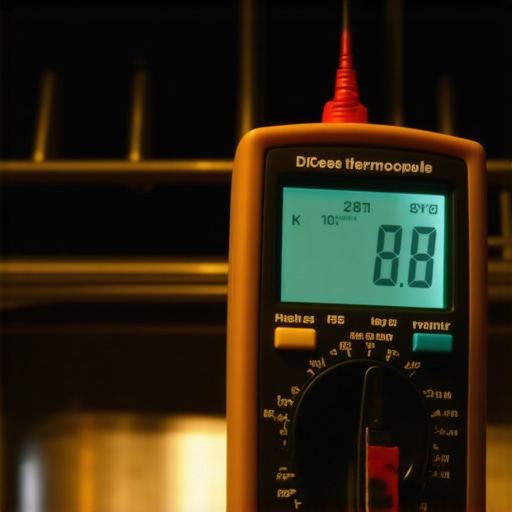
Instead of just replacing parts and crossing my fingers, I’ve started using what I call my truth kit. It is centered around a high-temp K-type thermocouple connected to a digital multimeter. Why? Because the digital display on your oven is often a software-smoothed average, not the real-time thermal reality. When you are checking for hot spots in the bake element, this probe allows you to see the exact moment the high-limit thermostat starts to react. I personally use this method because it reveals if the thermostat is failing due to age or if the oven’s cooling system is actually failing. It is the difference between a $15 fix and a $500 mistake caused by guessing.
The One Tool That Stops the Guesswork
I always recommend investing in a multimeter that supports temperature input. While most folks just use them for continuity, the bead-style probe can be taped (using high-temp tape) to the center of the oven rack. This lets you monitor the cycles from outside the glass. If you see the temperature soaring 50 degrees past the set point before the thermostat cuts out, you know your control board’s relay is sticking. This proactive approach is much better than waiting for the safety fuse to blow. If you are already comfortable with oven repair essentials and troubleshooting common issues with parts, adding a thermocouple to your arsenal is the ultimate level-up for your DIY skills.
How can I keep these components from burning out again?
Maintenance isn’t just about cleaning the glass; it is about protecting the airflow. In my own kitchen, I’ve realized that a dusty rear vent or a failing cooling fan is the silent killer of thermostats. Every six months, I pull the unit out and vacuum the rear intake. This isn’t just an oven problem; I apply the same logic when I am looking at dishwasher parts and DIY diagnostics. If the airflow or water flow is restricted, heat builds up, and safeties trip. For instance, you should be cleaning the hidden filter in your dishwasher sump regularly to prevent the heating element from overworking. If the system has to work twice as hard to reach the target temperature, the lifespan of every fuse and sensor is significantly shortened.
Don’t forget the physical seals either. A leaky door gasket allows heat to escape into the control area, which can cook the very thermostat designed to protect it. I have found that finding the right part number for an oven door gasket and replacing a worn seal is one of the highest-ROI repairs you can perform. According to the Association of Home Appliance Manufacturers (AHAM), maintaining a proper thermal seal can reduce energy consumption and significantly lower the ambient temperature around sensitive electronics. It is the long-game approach that separates a part-swapper from a true home steward. I predict that as we move toward more smart appliances, these manual diagnostic skills will become even more valuable as we interpret the data our appliances send to our phones.
My best advice? Don’t wait for the heat to vanish during a holiday dinner. Grab your multimeter today and test the resistance of your heating elements and the accuracy of your thermostat. It takes ten minutes but saves hours of stress later. Try testing your oven’s actual temperature versus the display this weekend—you might be surprised at what you find.
Secrets I Learned from a Dozen Failed Bake Days
After years of staring into the back of ranges, I have realized that the high-limit thermostat is rarely the only thing going wrong. Here are a few lightbulb moments from my own workbench:
- Heat creep is a silent killer: Just because the thermostat tripped doesn’t mean it is bad. Sometimes your oven is actually getting too hot because of a sticking relay. If you are identifying a bad oven relay on the control board, you might find the true source of your headache.
- Wire integrity matters as much as the part: I once replaced a thermostat three times before realizing the spade connector on the wire was loose and arcing, creating its own heat that tripped the sensor.
- Don’t ignore the ‘lazy’ preheat: If you notice why your oven takes forever to preheat and then drops temp, the high-limit might be hovering right on the edge of failing due to ambient heat buildup in the rear panel.
The Diagnostic Arsenal Every Kitchen Warrior Needs
I do not recommend going into any repair empty-handed. Beyond the standard screwdriver, these are the tools that changed the game for me. First, a high-quality multimeter with a temperature probe is non-negotiable. Learning a few multimeter tricks for diagnosing a dead control board or a blown fuse will save you hundreds in technician fees. Second, I always keep a magnetic parts tray nearby; there is nothing worse than losing a specialized hex screw in the floor vents. Finally, keep a small brush for cleaning the cooling fans. Airflow is the best friend your thermostat has. If you are also maintaining other appliances, knowing about dishwasher parts and DIY diagnostics can help you build a complete home maintenance kit that keeps everything running smoothly.
Own Your Appliance Repairs and Take Control
There is a specific kind of pride that comes from hearing that oven click back to life and feeling the warmth on your face. You do not have to be at the mercy of a broken appliance or an expensive service schedule. By mastering oven diagnostics and pinpointing faults before calling a repair expert, you are taking back control of your kitchen. Fixing a high-limit thermostat is a gateway repair—it builds the confidence you need to tackle bigger projects. Don’t let a tiny metal disc stand between you and your next perfect meal. Have you ever had your oven quit on you right in the middle of a big holiday dinner? Let me know your most frustrating repair story in the comments below!