I walked into the kitchen on a Tuesday morning, coffee in hand, expecting the usual morning quiet. Instead, I opened the dishwasher to grab a clean mug and found a murky, stagnant pond sitting at the bottom of the tub. The machine hadn’t been run in two days. It is a sinking feeling—literally—when your appliance starts acting like a reservoir without your permission. You start worrying about ruined hardwood floors, mold, and that specific, swampy smell that seems to cling to everything. I have spent years helping friends and neighbors troubleshoot these exact headaches, and I can tell you that while a flooded dishwasher looks like a catastrophe, the fix is usually much simpler than a total kitchen remodel.
When I first started diving into appliance repair, I made a massive, embarrassing mistake: I assumed a flood meant a dead motor and replaced the whole thing. I spent a weekend and way too much money on parts I didn’t need before I bothered to look at parts and diagnostics to identify dishwasher faults quickly. It turns out, that pool of water is a very specific clue, and today, we are going to use it to save you a few hundred dollars in service fees.
Your Dishwasher Shouldn’t Double as a Fish Tank
If you are seeing water creep up while the machine is off, you are dealing with a ghost in the machine—but a very physical one. Usually, it comes down to one of two things: clean water leaking in from your house supply, or dirty water backing up from your sink. If the water in the bottom is crystal clear, you are likely looking at the signs your dishwasher inlet valve is failing. This little valve is supposed to shut tight when the cycle ends, but when it wears out, it lets a tiny, constant trickle of water through. According to the Insurance Institute for Business & Home Safety, water damage from slow, hidden leaks is one of the leading causes of residential insurance claims, so catching this early is a huge win for your home.
Will I Just Make a Bigger Mess Trying to Fix This?
I get the skepticism. Dealing with water and electricity in the same box feels like a recipe for a bad afternoon. But most of these components are accessible right behind the bottom kickplate. If the water looks gray or has bits of last night’s dinner floating in it, the issue isn’t the inlet; it’s backflow. You might just need to clean your dishwasher air gap to stop sink backflow. Have you ever opened your dishwasher only to find it fuller than when you left it? Let’s roll up our sleeves and walk through the diagnostic steps together before that puddle turns into a flood.
Before we start pulling things apart, make sure you check out our dishwasher parts comprehensive guide to diy diagnostics to get familiar with the layout. Knowing what you’re looking at is half the battle won.
Stop the Flow Before You Start the Work
Before you touch a single screw, you need to isolate the problem. If you see water actively rising, turn off the water supply valve usually located under the sink. Safety is non-negotiable here; water and electricity are a dangerous pair. Reach under the cabinet or head to your breaker box to kill the power to the unit. While oven repair essentials troubleshooting common issues with parts often focuses on heating elements, dishwashers are all about managing movement and seals. Once the power is off, use a sponge or a shop-vac to get that standing water out. You can’t diagnose a problem you can’t see, and working in a stagnant pond is the fastest way to lose your motivation.
Check the Float Switch First
Think of the float switch as the ‘guard’ of your dishwasher’s water level. It is a small plastic piece, usually saucer or cylinder-shaped, sitting at the bottom of the tub. As water rises, it lifts the float; once it reaches a certain height, it triggers a switch to tell the machine to stop filling. If a stray spoon or a thick layer of grime traps that float in the ‘down’ position, the machine will keep pumping water until your kitchen becomes a pool. I once helped a neighbor whose kitchen looked like a miniature lake because a single grape had wedged itself under the float. We spent twenty minutes panicking before realizing the simple fix for a dishwasher that overflows onto the floor was literally just moving a piece of fruit out of the way. Give it a flick; it should move freely up and down with a metallic ‘click.’ 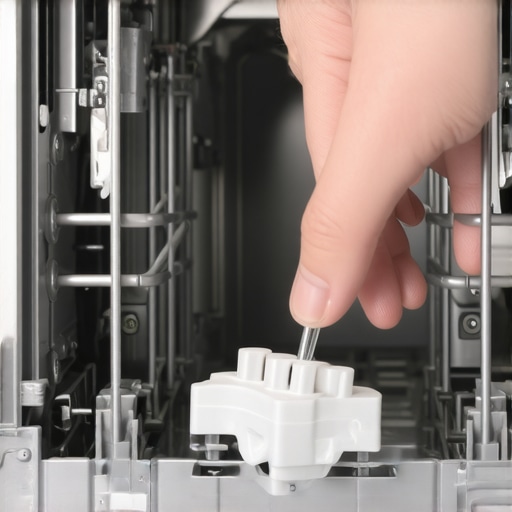
When Your Inlet Valve Becomes a Leaky Faucet
If the dishwasher fills up while it is turned off, the culprit is almost certainly the water inlet valve. This part is a mechanical gatekeeper. Over time, calcium deposits from hard water or simple wear and tear prevent the valve from seating properly. It’s like a garden hose with a nozzle that won’t quite shut off—it just keeps weeping. If you suspect this is the case, look for signs your dishwasher inlet valve is failing, such as a slow, rhythmic drip from the back of the tub. Replacing this valve is one of the most common DIY fixes, and you can usually find the exact part by checking your model number. For those who want to be 100% sure before buying parts, testing your dishwasher water level switch in 5 minutes will help rule out electrical ghosts.
Clearing the Path for Dirty Water
If the water in your tub is murky and smells like old lasagna, you aren’t dealing with an ‘in’ problem; you have an ‘out’ problem. Modern kitchens use either a ‘high loop’ in the drain hose or a physical air gap (the silver cylinder on your sink) to prevent sink water from siphoning back into the dishwasher. If that air gap gets clogged with food debris, the dirty water from your garbage disposal has nowhere to go but back into your clean dishes. You will need to how to clear a clogged dishwasher air gap by popping off the decorative cover and unscrewing the plastic cap. I’ve seen everything from bottle caps to congealed grease blocks these vents. While you’re at it, don’t forget to take a look at the bottom of the machine; the best way to clean a greasy dishwasher filter is often just a bit of hot water and a soft brush, which can prevent future drainage backups before they start.
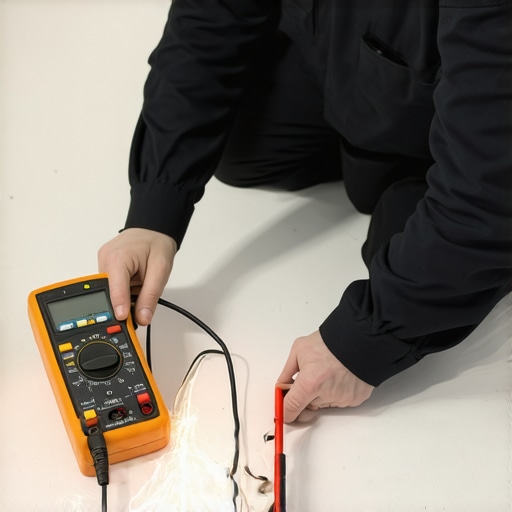
A common myth I see in DIY forums is that if a gas oven igniter glows, it is working perfectly. In my experience, that is a dangerous assumption that leads to hundreds of dollars wasted on gas valves. In reality, an igniter can glow bright orange but still fail to draw enough amperage to open the safety valve. I call this the ‘Glow Trap.’ Before you even think about buying a new valve, you should be testing your gas oven igniter with a multimeter to check the actual draw. If it isn’t hitting that 3.2 to 3.6 amp range, it’s just a pretty light show, not a functional component. This nuance is why why your gas oven isn’t heating even though the igniter glows remains one of the most misunderstood issues in kitchen repair.
Why the Visual Test Fails with Gas Igniters
According to the Association of Home Appliance Manufacturers (AHAM), misdiagnosis of electrical components accounts for nearly 30% of unnecessary part replacements. Most homeowners look for ‘broken’ things—snapped wires or burnt elements—but the most frustrating failures are the ones that look fine to the naked eye. For example, your dishwasher might be humming, and you might think the motor is burnt out. Often, it’s just a tiny piece of plastic or a bone fragment jammed in the impeller. Instead of jumping to conclusions about signs your dishwasher motor is burnt out, you should be checking for blockages first. I once saw a client replace a whole pump assembly when a single cherry pit was the only thing causing the noise.
Is Your Control Board Actually the Problem?
Many DIYers see a dead display and immediately hunt for a replacement board. But wait—before you drop $200 on a new brain for your machine, check the thermal fuse. In both ovens and dishwashers, this tiny component is designed to blow if the unit overheats, cutting all power as a safety measure. You can save yourself a massive headache by testing your oven thermal fuse for continuity before assuming the motherboard is fried. If you do find you need a new brain, knowing is your oven control board failing check these 4 symptoms can prevent you from misidentifying a simple loose wire as a total system failure. The ‘Oops’ factor here is usually rushing the diagnostic stage; always check the simplest point of failure first.
Advanced troubleshooting is all about data, not just observation. When your dishwasher leaves dishes dirty, don’t just assume it needs more soap. In fact, modern high-efficiency machines hate too much detergent. Before you blame the chemicals, consider that the best way to clean a greasy dishwasher filter is often the only ‘repair’ you actually need to restore water pressure. Using parts and diagnostics to identify dishwasher faults quickly means looking at the spray arms and filters before you start pulling the unit out from the counter. Have you ever fallen into the trap of replacing a perfectly good part only to find a $2 fuse was the real culprit? Let me know in the comments below!
Building a reliable diagnostic workflow isn’t just about buying parts; it’s about the precision of your instruments and the consistency of your habits. I’ve seen too many DIYers get frustrated because they were using a five-dollar multimeter that couldn’t give a stable reading. If you’re serious about this, you need a high-impedance digital multimeter. I personally swear by a Fluke or a Klein because when you are testing an oven temperature sensor with just a multimeter, a fluctuation of even a few ohms can be the difference between a successful fix and a wasted afternoon. You also cannot overlook the physical struggle of rusted components. I always keep a specialized nut driver on hand, specifically the correct tool for removing a rusted dishwasher heating element nut, because using the wrong pliers will strip that plastic housing in seconds, turning a twenty-minute job into a two-hour nightmare. According to the Professional Service Association (PSA), using the wrong torque or tool size on appliance fasteners is the leading cause of secondary damage during home repairs.
How do I maintain these complex machines over time?
Long-term success is less about the big repairs and more about the boring, monthly rituals. Every thirty days, I pull my dishwasher filters. It’s not a glamorous job, but the best way to clean a greasy dishwasher filter is to soak it in warm, soapy water rather than scrubbing it with harsh wire brushes that can tear the fine mesh. For your oven, consistency is key. We often assume the thermostat is the law, but you should be how to calibrate your oven with a simple thermometer at least once a year. This prevents the heating elements from working overtime to compensate for a drifting sensor. 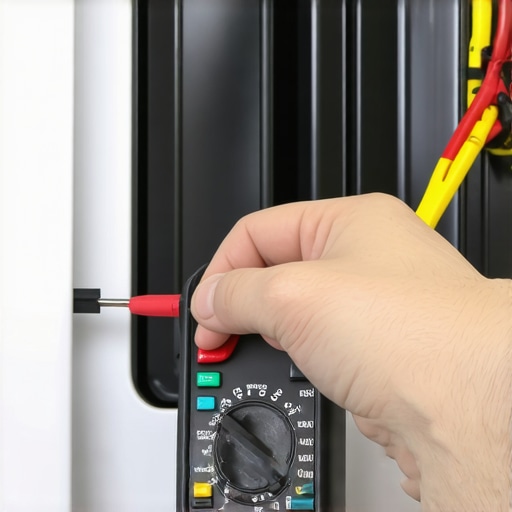 Looking ahead, the future of appliance repair is shifting toward ‘Predictive Maintenance.’ We are starting to see smart sensors that can detect the early vibration of a failing motor or a slight increase in amperage draw before a part actually blows. In five years, your dishwasher might actually send a notification to your phone telling you exactly which part is about to fail. Until then, you have to be the sensor. I want you to go to your kitchen right now and try one thing: perform oven diagnostics pinpointing faults before calling a repair expert by simply checking your bake element for any visible pits or thin spots. Catching a weak spot before it sparks is the ultimate pro move.
The Hardest Lessons I Learned Tinkering with Kitchen Tech
If there is one thing years of grease-stained hands have taught me, it is that 90% of the battle is just slowing down. I used to think I could muscle through a repair, but I quickly learned that forcing a plastic part usually ends in a snap and an expensive replacement order. My biggest lightbulb moment happened when I realized that every weird sound or leak is just the machine trying to talk to me. If your unit is making a strange sound, try how to diagnose a buzzing noise from your oven control board before you assume the whole thing is toast. Also, never underestimate the power of a good photo—I always take a picture of the wiring before I disconnect anything. It’s the difference between a working oven and a Saturday spent wondering where the red wire goes.
The Tools That Saved My Sanity and My Wallet
You don’t need a professional workshop, but you do need more than a rusty screwdriver. If you are serious about this, invest in a decent multimeter. I can’t tell you how many times I’ve saved a weekend by testing the resistance of an oven igniter with your multimeter instead of guessing. I also recommend keeping a small stash of universal gaskets and screws; it sounds boring until you’re staring at a leaking door at 8 PM. Having dishwasher parts a comprehensive guide to diy diagnostics bookmarked on your phone is like having a veteran technician standing right over your shoulder.
#IMAGE_PLACEHOLDER_E#
Step Into Your New Role as the Family Repair Expert
The transition from “I need to call someone” to “I can handle this” is an incredible feeling. Whether you are dealing with a flood or simply figuring out how to fix a dishwasher door that wont close tight, you are building a skill that saves thousands of dollars over a lifetime. Don’t let the technical jargon intimidate you. Start with the small stuff, use your oven repair essentials troubleshooting common issues with parts, and take it one step at a time. You’ve got the knowledge, the tools, and the plan—now go fix that kitchen!
Have you ever spent hours on a repair only to realize the solution was right in front of you? Let me know your most “facepalm” DIY moment in the comments below!