It was three hours before my sister’s engagement dinner and I had a prime rib ready to slide into the oven. I turned the dial, and then—nothing. The display stayed dark, the fan stayed silent, and my heart sank into my shoes. I poked every button like a madman, checked the breaker twice, and even gave the stove leg a frustrated kick. It felt like the universe was personally sabotaging my dinner plans. After a few deep breaths, I realized I was facing a classic ‘dead oven’ scenario that usually ends with a thousand-dollar bill for a new appliance. But through years of tinkering, I’ve learned that a silent oven often boils down to one tiny, cheap part: the thermal fuse. Today, I’m going to show you how to stop the panic and prove exactly whether that fuse is the culprit so you can get back to cooking without the stress.
Your Oven Secret Guard Might Be the Reason It Is Not Turning On
If you have ever stared at a cold, lifeless oven with a sinking feeling in your chest, you are definitely not alone. Most people assume that a total power failure means the expensive control board has fried, but that is a trap I fell into years ago. I once spent nearly $250 on a new board and waited four days for shipping, only to realize the actual problem was a $15 fuse I could have diagnosed in minutes. Before you start wondering if your oven control board is failing, you need to look at the safety components first. The thermal fuse is essentially a one-and-done protector. If the oven gets too hot, the fuse blows to cut off power and prevent a fire. It is a brilliant safety feature, but it is also a common point of failure. According to data from the National Fire Protection Association, cooking equipment is the leading cause of home fires, making these small fuses the unsung heroes of your kitchen. By learning a bit of oven diagnostics, you can verify this part yourself. I’ve found that many homeowners overlook this because it’s tucked away in the back, but mastering this test is the ultimate DIY power move.
Can a Basic Multimeter Actually Save You Hundreds?
I hear this all the time from my neighbors: they worry that testing electrical parts requires an engineering degree or a toolbox full of professional gear. In reality, a basic multimeter is all you need to find the truth. I remember being skeptical myself until I realized that ‘continuity’ is just a fancy word for ‘is the path open?’ If that fuse is blown, the path is blocked. It is much simpler than testing your oven high limit thermostat or chasing down ghostly wiring issues. Have you ever felt that surge of frustration when an appliance just quits on you right when you need it most? I want to hear about your most stressful kitchen fail in the comments! Stick with me, and we will walk through the exact steps to get that fuse out and tested so you can decide if you’re buying a cheap part or a whole new range.
Cut the Power Before You Cut the Screws
If you skip this step, you are not just risking a blown fuse; you are risking a trip to the emergency room. Before you even think about grabbing a screwdriver, pull that range away from the wall and yank the plug. I learned this the hard way during a hurried repair for a friend. I thought I could just ‘be careful’ while the oven was still live. One slip of my wrench and I saw a blue spark that nearly blinded me and left a permanent weld mark on my favorite pliers. It was a terrifying reminder that 240 volts does not play favorites. Once the power is out, take a second to inspect your oven power cord for heat damage or melted plastic. If the cord looks crispy, the fuse might just be the tip of the iceberg. Ensuring the appliance is completely dead to the world is the only way to work with the confidence you need to actually fix the problem.
Expose the Back Panel Without Losing Your Sanity
Most thermal fuses live on the back of the oven, tucked away behind a large sheet metal panel. You will likely need a 1/4-inch nut driver or a Phillips head screwdriver to remove the dozen or so screws holding that panel in place. Here is a pro tip from someone who has spent too much time on his hands and knees: use a magnetic bowl or even a piece of masking tape to hold those screws. I once spent forty minutes trying to fish a dropped screw out from under the kitchen cabinets, which turned a ten-minute job into an afternoon of swearing. As the panel comes off, you are looking for a small, white or silver component with two wires attached to it. This is one of the most critical oven repair essentials you will encounter. It acts like a gatekeeper. If the heat gets high enough to melt the link inside, the gate slams shut, and no electricity can pass through to the control board or the heating elements.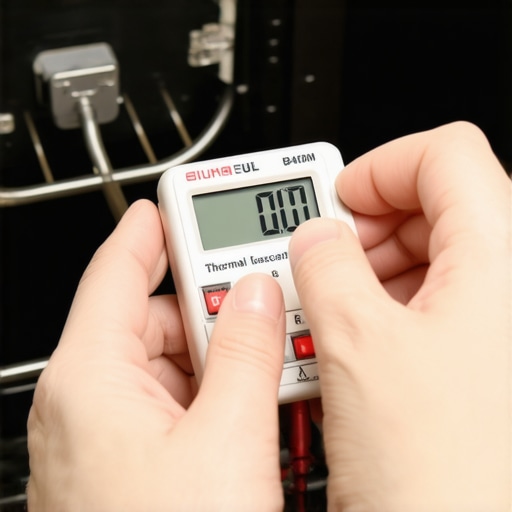
How to Read Your Multimeter Like a Map
Testing for continuity is essentially checking if there is a clear, paved road from one side of the fuse to the other. If the fuse is blown, that road has a massive crater in the middle. Set your multimeter to the lowest setting for Ohms or, even better, the ‘continuity’ setting—the one that looks like a little sound wave icon. This is the same logic used when testing your oven high limit thermostat with ease. When you touch the two probes of your meter together, it should beep or show a reading of near zero. That beep is the sound of success; it means the circuit is complete. If you touch the probes to the two terminals of the fuse and the meter stays silent or shows ‘OL’ (Open Line), you’ve found your culprit. It is a binary world: it either works or it doesn’t.
Navigate the Wiring Without Getting Tangled
Before you touch the fuse, pull at least one of the wires off the terminals. You want to test the fuse in isolation. If you leave the wires connected, the meter might send its tiny electrical signal through the rest of the oven’s wiring, giving you a ‘false positive’ reading that makes you think the fuse is fine when it’s actually dead. While you have the back open, it is also a good time to check other connections. Sometimes, a wire might just be loose or burnt. If you see a clicking sound but no heat, you might also want to check if your oven relay board is clicking for the wrong reasons. If the fuse tests bad, you are looking at a very inexpensive fix. However, if the fuse is fine and the oven still won’t turn on, that is the moment you might need to know when to stop DIYing and call an oven repair expert to dig into the deeper electronics.M o s t D I Y g u i d e s s t o p o n c e y o u f i n d a d e a d f u s e , b u t t h a t i s w h e r e t h e r e a l t r o u b l e s t a r t s . T h e c o m m o n b e l i e f i s t h a t p a r t s j u s t ‘ w e a r o u t ‘ f r o m n o r m a l u s e . I n m y e x p e r i e n c e , a t h e r m a l f u s e i s l i k e a c a n a r y i n a c o a l m i n e — i t d o e s n ’ t j u s t d i e o f o l d a g e ; i t i s u s u a l l y m u r d e r e d b y a d e e p e r m e c h a n i c a l f a i l u r e . I f y o u s i m p l y s w a p t h e p a r t a n d w a l k a w a y , y o u a r e l i k e l y t o b e b a c k o n t h e k i t c h e n f l o o r w i t h y o u r m u l t i m e t e r i n t h r e e w e e k s . T h i s i s o n e o f t h e m o s t c o m m o n t r a p s i n o v e n d i a g n o s t i c s < / a > . Y o u h a v e t o a s k y o u r s e l f * w h y * t h e u n i t g o t h o t e n o u g h t o p o p t h a t s a f e t y l i n k . I s t h e c o o l i n g f a n s e i z i n g u p ? I s t h e o v e n c a v i t y i n s u l a t i o n f a i l i n g ? E v e n a d i r t y < a h r e f = " h t t p s : / / a p p l i a n c e b a r g a i n z . c o m / i s - y o u r - o v e n - c o n t r o l - b o a r d - f a i l i n g - c h e c k - t h e s e - 4 - s y m p t o m s " > o v e n c o n t r o l b o a r d < / a > c a n s o m e t i m e s m i s r e a d t e m p e r a t u r e s e n s o r s a n d d r i v e t h e h e a t i n t o t h e d a n g e r z o n e . # I M A G E _ P L A C E H O L D E R _ C # < h 2 > T h e B i g L i e A b o u t B a d R e p l a c e m e n t P a r t s < / h 2 > A n o t h e r n u a n c e t h a t t r i p s u p b e g i n n e r s i s t h e d i f f e r e n c e b e t w e e n ‘ z e r o ‘ a n d ‘ i n f i n i t y ‘ o n a c h e a p d i g i t a l m e t e r . I h a v e s e e n m a n y p e o p l e m i s r e a d ‘ 0 . L ‘ ( O p e n L o o p ) a s z e r o o h m s o f r e s i s t a n c e . T h a t o n e m i s t a k e l e a d s t o t h i n k i n g a d e a d f u s e i s p e r f e c t l y f i n e . A l w a y s t o u c h y o u r p r o b e s t o g e t h e r f i r s t t o s e e w h a t ‘ z e r o ‘ l o o k s l i k e o n y o u r s p e c i f i c d e v i c e . T h i s i s t h e s a m e l e v e l o f p r e c i s i o n r e q u i r e d f o r < a h r e f = " h t t p s : / / a p p l i a n c e b a r g a i n z . c o m / t e s t i n g - a - g a s - o v e n - s a f e t y - v a l v e - f o r - p r o p e r - v o l t a g e " > t e s t i n g a g a s o v e n s a f e t y v a l v e f o r p r o p e r v o l t a g e < / a > . I f y o u r r e a d i n g s a r e j u m p y , y o u m i g h t j u s t h a v e a b a d c o n n e c t i o n o n y o u r p r o b e t i p s o r c o r r o s i o n o n t h e f u s e t e r m i n a l s . < h 3 > W h y d o e s y o u r o v e n k e e p e a t i n g t h e r m a l f u s e s e v e n a f t e r a r e p l a c e m e n t ? < / h 3 > I f y o u f i n d y o u r s e l f r e p l a c i n g t h e s a m e f u s e r e p e a t e d l y , y o u n e e d t o c h e c k y o u r a i r f l o w i m m e d i a t e l y . T h e A s s o c i a t i o n o f H o m e A p p l i a n c e M a n u f a c t u r e r s ( A H A M ) n o t e s t h a t r e s t r i c t e d v e n t i l a t i o n i s a l e a d i n g c a u s e o f p r e m a t u r e s a f e t y c o m p o n e n t f a i l u r e i n m o d e r n h i g h – d e n s i t y k i t c h e n d e s i g n s . I o n c e w o r k e d o n a r a n g e w h e r e t h e h o m e o w n e r k e p t b l o w i n g f u s e s b e c a u s e t h e y h a d p u s h e d t h e u n i t s o t i g h t a g a i n s t t h e b a c k w a l l t h a t t h e c o o l i n g v e n t s w e r e c o m p l e t e l y s m o t h e r e d . I t i s a n u a n c e t h a t s e p a r t e s t h e p r o s f r o m t h e p a r t – s w a p p e r s . I f y o u a r e s e e i n g o d d b e h a v i o r l i k e a < a h r e f = " h t t p s : / / a p p l i a n c e b a r g a i n z . c o m / w h y - y o u r - o v e n - p r e h e a t - l i g h t - n e v e r - t u r n s - o f f " > p r e h e a t l i g h t t h a t n e v e r t u r n s o f f < / a > , t h e s y s t e m m i g h t b e s t r u g g l i n g w i t h h e a t r e g u l a t i o n l o n g b e f o r e t h e f u s e f i n a l l y g i v e s u p . < h 2 > A v o i d t h e D e a d l y B y p a s s S h o r t c u t < / h 2 > W h a t e v e r y o u d o , d o n o t f a l l i n t o t h e ‘ b y p a s s t r a p . ‘ I h a v e s e e n p e o p l e ‘ j u m p ‘ t h e f u s e w i t h a b i t o f c o p p e r w i r e j u s t t o f i n i s h a h o l i d a y m e a l . T h a t i s n o t a c l e v e r h a c k ; i t i s a r e c i p e f o r a s t r u c t u r e f i r e . I f y o u c a n n o t f i n d t h e s o u r c e o f t h e o v e r h e a t i n g , t h a t i s e x a c t l y < a h r e f = " h t t p s : / / a p p l i a n c e b a r g a i n z . c o m / w h e n - t o - s t o p - d i y i n g - a n d - c a l l - a n - o v e n - r e p a i r - e x p e r t " > w h e n t o s t o p D I Y i n g a n d c a l l a n o v e n r e p a i r e x p e r t < / a > . H a v e y o u e v e r f a l l e n i n t o t h i s t r a p o f f i x i n g t h e s y m p t o m b u t i g n o r i n g t h e u n d e r l y i n g d i s e a s e ? L e t m e k n o w i n t h e c o m m e n t s ! T h i s l o g i c d o e s n ‘ t j u s t a p p l y t o r a n g e s ; i f y o u a r e < a h r e f = " h t t p s : / / a p p l i a n c e b a r g a i n z . c o m / t e s t i n g - y o u r - d i s h w a s h e r s - h i g h - l i m i t - t h e r m o s t a t - f o r - c o n t i n u i t y " > t e s t i n g y o u r d i s h w a s h e r s h i g h l i m i t t h e r m o s t a t f o r c o n t i n u i t y < / a > , r e m e m b e r t h a t a t r i p a l w a y s h a s a r o o t c a u s e . A l w a y s l o o k f o r t h e ‘ w h y ‘ b e f o r e y o u s c r e w t h a t b a c k p a n e l b a c k i n t o p l a c e .
Stop Guessing and Buy a Better Multimeter
The biggest mistake I see DIYers make isn’t a lack of effort; it’s using a five-dollar multimeter that gives inconsistent readings. When I’m deep into oven repair essentials, I reach for my Klein Tools MM400. I personally use this model because it’s auto-ranging, meaning I don’t have to worry about setting the dial to the wrong Ohm scale and getting a false ‘dead’ reading on a fuse that’s actually fine. Cheap meters often struggle with ‘ghost voltage’ or high-impedance paths that can trick you into replacing parts you don’t need. If you are serious about saving money over the next decade, invest in a meter with a loud, clear continuity beep. There is nothing quite like hearing that solid tone to tell you a circuit is healthy while you’re squeezed into a tight corner behind a range. This same logic applies when you are testing your dishwashers high limit thermostat for continuity; precision in your tools removes the anxiety of the ‘what if’ and lets you work with surgical certainty.
How can I maintain my oven for the long haul?
Maintenance isn’t just about cleaning spills; it’s about managing heat. To keep your thermal fuse from blowing again, you must ensure the oven can actually breathe. I make it a habit every six months to check the cooling fan for dust buildup and use the ‘dollar bill trick’ to ensure the door is sealing. If you haven’t tried it, testing your oven door seal with the dollar bill trick is the fastest way to see if heat is leaking out and cooking your internal components instead of your food. Heat escaping through a worn gasket is the number one ‘silent killer’ of thermal fuses. While you are back there, take thirty seconds to lubricate sticky oven door hinges safely with a high-temp silicone lubricant. A door that shuts tight reduces the workload on your heating elements and keeps the ambient temperature inside the cabinet within the safety specs of that fuse. 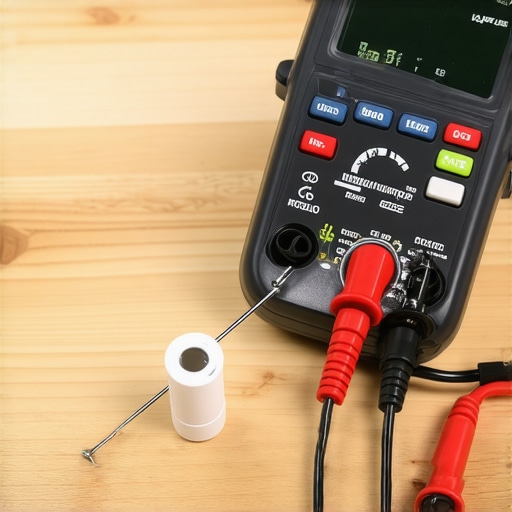
The Secret Tech Sheet You Didn’t Know Existed
If you want to move from ‘tinkerer’ to ‘expert,’ you need to find the Service Data Sheet. This is a niche secret: most manufacturers hide a folded-up technical manual inside the appliance itself—usually tucked into a plastic pouch behind the kickplate or inside the control console. According to technical documentation from Whirlpool’s Service Data manuals, this sheet contains the exact resistance values and wiring diagrams for your specific model. It’s the ‘cheat code’ for dishwasher parts diagnostics and oven troubleshooting alike. I’ve found that reading this sheet can save you hours of searching YouTube for a model that ‘looks similar’ to yours. Looking ahead, I predict we are moving toward a world where these physical sheets are replaced by QR codes linked to augmented reality repair steps, but for now, that paper sheet is your best friend. My challenge to you today: pull off your bottom kickplate and see if your ‘hidden manual’ is still there. If it is, keep it—it’s worth its weight in gold for your next repair.
Three Secrets About Oven Safety Parts That Almost Cost Me a Fortune
Over the years, I’ve realized that a blown fuse is rarely a random event; it’s a symptom of a deeper story your appliance is trying to tell you. One major trap I see is the ‘generic part’ temptation. I once used a non-OEM fuse that didn’t have the correct thermal rating, and it tripped again within two hours because it couldn’t handle the standard cooling cycle. Another lightbulb moment for me was discovering that even if the fuse is fine, the path to it might be charred. If your meter says the fuse is healthy but the stove is still dead, you should definitely learn how to check for a burnt terminal block on your electric oven to find the real source of the power break. Finally, never trust a visual inspection alone. A thermal fuse doesn’t always look ‘burnt’ like an automotive fuse; the internal link can snap without a single mark on the outside casing.
The Gear That Stops My Hands From Shaking
I don’t go into any repair without my ‘Big Three’ toolkit. First is my auto-ranging multimeter, which eliminates the guesswork of setting the wrong scale. Second, I rely on high-temp silicone lubricant for the mechanical parts that might be causing friction and heat. Third, I always cross-reference my findings with a dedicated guide on oven repair essentials to ensure I haven’t missed a secondary safety switch. I trust these tools because they’ve saved me from the embarrassment of putting the whole oven back together only to find it still doesn’t work. Having the right data is just as important as having the right screwdriver when you are deep into oven diagnostics.
Bring Your Oven Back to Life Today
There is a profound sense of pride that comes from hearing your oven click to life after you’ve diagnosed it yourself. You don’t need to be a professional technician to master these basics; you just need patience, safety awareness, and the right steps. Don’t let a silent display intimidate you—pull that range out, grab your meter, and prove to yourself that you can handle this oven repair. Have you ever been surprised by how simple an appliance fix turned out to be? Share your ‘aha!’ moment in the comments below!