I remember the smell vividly. It was a Tuesday evening, and I was finally finishing up the dinner dishes when I heard that dreaded, rhythmic gurgle coming from the sink. Suddenly, grey, greasy water started backing up into my basin, right next to the supposedly clean dishes I was drying. I panicked. I thought my garbage disposal had finally kicked the bucket or that my main sewer line was about to ruin my week. I spent hours poking around under the sink, getting a sore back for nothing. My first big mistake was assuming the problem was huge and expensive. It wasn’t. It was just a tiny bit of trapped debris in that little silver cylinder sitting on the corner of my counter. If you’re seeing water where it shouldn’t be, you don’t need a plumber yet; you just need to know how to clean your dishwasher’s air gap to stop sink backflow once and for all.
Get Rid of the Gunk Without Calling a Plumber
Most folks ignore that little chrome cap until it starts spitting water like a miniature geyser. I certainly did. In fact, I once spent fifty bucks on a heavy-duty drain snake before realizing I just had a single stray piece of kale and some coffee grounds wedged in the air gap. It is a classic oversight in home maintenance. We focus on the big parts, but often, why your dishwasher bottom is full of standing water is linked directly to this small, plastic component. According to the International Association of Plumbing and Mechanical Officials, an air gap is the only physical transition that completely prevents sewage from siphoning back into your clean dishwasher—so when it clogs, the system fails fast. If you’ve noticed why your dishwasher is overflowing onto the kitchen floor lately, the air gap should be your very first stop on the diagnostic trail.
Is a dirty air gap really worth the hassle of fixing myself?
You might be wondering if it is better to just ignore the occasional gurgle and hope it goes away. Trust me, it won’t. I’ve been there, hoping the problem would magically resolve itself, only to end up with a soggy cabinet floor. Have you ever looked at your sink during a drain cycle and felt a genuine sense of dread as the water rose? If so, you aren’t alone! It’s one of the most common kitchen frustrations, but also one of the easiest to solve. Today, I’m going to show you how to unclog your dishwasher’s air gap in five minutes using items you probably already have in your junk drawer. We will get that water flowing the right way again so you can stop worrying about your kitchen turning into a swamp. Ready to stop the sludge?
Strip Off the Chrome Mask
The first thing you need to do is get that shiny metal cylinder off your counter. Most people think it is bolted down, but usually, it just pulls straight up. Think of it like a bottle cap that hasn’t been crimped yet. Once that decorative cover is out of the way, you’ll see the actual workhorse: a plastic inner cap. Sometimes this unscrews, and sometimes it has small plastic tabs you need to pinch. I remember the first time I did this; I was so afraid of snapping the plastic that I barely touched it. Don’t be like me. Give it a firm twist or a solid pinch. If it feels stuck, it might be because of hard water buildup, which is a great time to learn about how to remove hard water deposits that can seize up these components.
Manual Extraction is Your Best Friend
Once the inner cap is off, you are looking down into the guts of the air gap. This is where the magic (and the gross stuff) happens. Use a pair of long-nose tweezers or even a stray toothpick to fish out any visible debris. You’d be surprised what finds its way up there—I once pulled out a complete cherry pit and a tangled mess of hair that had somehow defied gravity. This is also a good moment for parts and diagnostics to identify dishwasher faults quickly before you assume a pump has failed. If the top is clear but water still won’t move, the blockage is deeper in the hose.
Clear the Line with a Simple Kitchen Hack
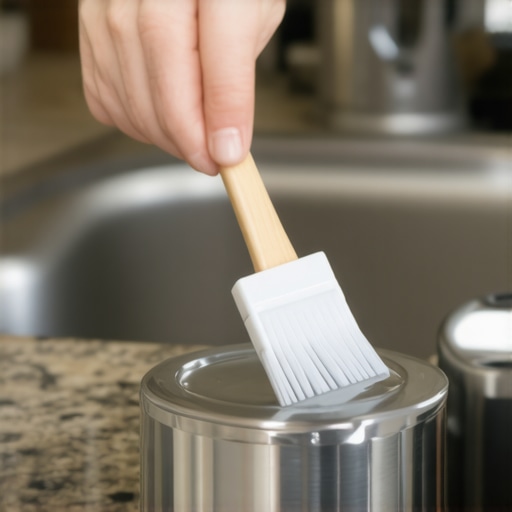
If you can’t see the clog, it is likely sitting in the corrugated hose that runs from the air gap down to your garbage disposal. This is where my messy micro-story comes in. A few years back, I thought I’d be clever and use a high-pressure garden hose inside the kitchen to blast the clog out. Bad idea. The water hit the clog, reflected back, and soaked my entire kitchen island in seconds. A much better way is how to unclog a blocked dishwasher air gap with a straw. You place a large-diameter straw over the small hole inside the air gap and blow hard. This manual pressure is usually enough to pop the ‘plug’ of grease and food into the disposal. It sounds primitive, but it works better than a fifty-dollar snake.
Check the Connection to the Disposal
If the straw trick fails, the clog is usually at the very end of the line where the hose connects to the garbage disposal. This is a notorious bottleneck. Food particles love to settle right at that plastic nipple. You’ll need to loosen the silver hose clamp with a screwdriver and pull the hose off. Have a bucket ready, because if there is standing water in the bottom of your dishwasher, it is going to come rushing out the moment that seal breaks. I once forgot the bucket and spent twenty minutes mopping up grey water. Use a screwdriver to poke into the disposal’s inlet to ensure the hole is actually open. Sometimes, especially with new disposals, the knockout plug was never fully removed, which is a common reason how to unclog your dishwasher’s air gap in five minutes becomes a necessary skill.
Ensure the Hose Maintains a Constant Slope
While you have the hose off, check how it is hanging under the sink. If the hose sags like a heavy rope, gravity will pull heavy debris into that low spot, creating a permanent trap for gunk. You want a straight, downward shot from the air gap to the disposal. If your hose is too long, it creates a loop that mimics a secondary P-trap, which is exactly the one part that stops your dishwasher from draining completely. Trim the hose if you have to, or use a zip tie to pull the slack upward. Getting the physics right under the sink is just as important as the cleaning itself.
Getting the physics right under the sink is just as important as the cleaning itself. But let’s look beyond the pipes for a second. If you’ve spent any time on DIY forums, you’ve probably heard the old saying that if a gas igniter glows, it is working perfectly. In my experience, that is easily the most expensive myth in the kitchen. I once spent a whole weekend thinking I had a failed gas valve because the igniter was a bright, cherry red. I even looked up testing a gas oven safety valve for proper voltage before realizing the valve was fine. The reality is that an igniter can glow but still be functionally dead.
The Glow is a Liar
Here is the nuance most people miss: a gas igniter is a resistance-based component. As it ages, it develops microscopic cracks that increase its resistance. It might still get hot enough to glow, but it won’t draw the specific amperage needed to warp the bimetal strip inside the safety valve. According to the Association of Home Appliance Manufacturers (AHAM), a standard igniter needs to pull between 3.2 and 3.6 amps to open that valve. If yours is only pulling 2.8, you’ll see light, but you won’t see fire. This is why why your gas oven igniter glows but doesn’t light is such a common diagnostic headache. Don’t trust your eyes; trust a clamp-on ammeter.
Can a “Good” Heating Element Have Invisible Cold Spots?
Even electric ovens have their secrets. Most homeowners assume that if the bake element turns red, it is heating the oven evenly. However, internal fractures in the ceramic insulation can cause ‘cold spots’ or even localized overheating that tricks your thermostat. Before you start oven diagnostics pinpointing faults before calling a repair expert, try testing your oven bake element for hidden cold spots using a simple piece of white bread laid across the rack. It’s a low-tech way to see if the heat signature is actually uniform. If the toast is burnt on one side and raw on the other, the element—not the control board—is usually the culprit.
Stop Blindly Replacing Control Boards
The biggest “oops” factor I see involves the main control board. When a dishwasher stops mid-cycle, people panic and buy a $200 board. It’s a classic trap. Often, the board is perfectly fine, but it is receiving a ‘false’ signal from a safety component. I’ve seen people replace entire boards when they really just needed to spend ten minutes testing the dishwasher float switch for continuity. If that little plastic float is stuck or the switch is faulty, the board thinks the machine is overflowing and kills the power. It is doing its job; you are just misdiagnosing the messenger. Before you throw away a machine, go back to parts and diagnostics to identify dishwasher faults quickly to ensure you aren’t fixing a symptom instead of the disease. Have you ever fallen into this trap of replacing a part that wasn’t actually broken? Let me know in the comments.
The One Tool Every Homeowner Actually Needs
If you’re serious about moving beyond the ‘poke it and hope’ method of repair, you need to invest in a quality digital multimeter. For years, I relied on those cheap little light-up voltage testers, but they are practically useless for anything other than confirming a circuit is live. To really know if a part is dying, you have to measure resistance. According to the Fluke Corporation’s technical documentation on electrical troubleshooting, checking for continuity is the bare minimum, but reading the specific Ohms tells you the health of the part. I used this exact method when I was testing the dishwasher float switch for continuity last summer. It wasn’t just ‘broken’; it was failing intermittently due to internal corrosion. Having the right tool turned a three-day headache into a ten-minute confirmation. If you are diving into oven repair essentials troubleshooting common issues with parts, that meter will be your eyes and ears inside the machine.
Stop Fighting the Same Clogs Every Six Months
Maintenance isn’t just about fixing things when they snap; it’s about preventing the slow decay caused by our own tap water. I live in an area with incredibly hard water, and for the longest time, I couldn’t figure out why my dishes looked cloudy. I was constantly how to remove hard water deposits from dishwasher tines because the buildup was so thick it was actually snagging my plates. The trick I learned is that you have to be proactive with the interior walls. By the time you see the white crust, it’s already inside your pump and valves. I now spend ten minutes every month clearing hard water deposits from dishwasher interior walls using a citric acid cycle. It saves the seals and keeps the motor from overworking. It is a simple habit that scales your appliance’s lifespan from five years to fifteen.
How do I maintain these complex machines over time?
The secret to longevity isn’t a magic chemical; it’s the inspection of the soft parts. We often focus on the metal and the motors, but it is the rubber gaskets and plastic mounts that fail first and cause the most collateral damage. Once a quarter, I take a damp cloth and perform the fast way to clean grimy dishwasher door gaskets. If food particles sit on that rubber, they rot the seal, leading to those mysterious puddles on the floor. Similarly, in the oven, I make it a point to check the element. It only takes a second to be testing an oven bake element for invisible cracks. If you see a tiny fissure, replace it immediately. Small cracks lead to shorts that can fry your expensive control board. Consistency in these small checks is the difference between a $20 part and a $2,000 replacement bill.
Smart Sensors and the Future of DIY Repair
I predict that in the next few years, the ‘guesswork’ of home repair will vanish entirely. We are already seeing this with the shift toward advanced sensors. Modern machines are becoming more like cars, where they tell you exactly what is wrong via an error code. For instance, replacing a faulty dishwasher turbidity sensor at home is becoming a common DIY task because the machine literally tells you the water isn’t getting clear enough. In the future, your oven will likely alert your phone that the igniter’s amperage is dropping before it even fails to light. We are moving toward an era of predictive maintenance, but until then, we have to rely on our tools and our senses. I highly recommend you take your multimeter out this weekend and test one component—perhaps the thermal fuse or the igniter—just to get comfortable with the readings. Familiarity today prevents panic tomorrow. If you’re ever in doubt, check out the dishwasher parts a comprehensive guide to diy diagnostics to stay ahead of the curve.
The Hardest Lesson I Learned About Fixing Kitchen Gear
One of the biggest realizations I had was that parts don’t always fail with a bang; they usually fail with a whisper or a deceptive glow. If you are diving into oven repair essentials troubleshooting common issues with parts, you will learn that symptoms like a lazy flame or a clicking relay are often early warning signs. Another lightbulb moment was recognizing when to stop diying and call an oven repair expert—knowing your limits with gas lines and high-voltage circuits is what keeps you safe. Lastly, I learned that a clean dishwasher is not just about the soap; it is about the flow. If you can master the air gap and the float switch, you have won 90% of the battle and saved yourself a hefty service fee.
The DIY Toolkit I Keep Under My Sink
I rely heavily on a few key resources to keep my home running smoothly. First, a reliable digital multimeter is non-negotiable for anyone following a dishwasher parts a comprehensive guide to diy diagnostics. It takes the guesswork out of checking for electrical shorts. Second, I keep a bag of food-grade citric acid on hand for those monthly descaling runs to protect the internal plastic components. Third, I always keep the manufacturer’s technical sheet—usually tucked behind the bottom kickplate of the machine—as my primary source of truth. And finally, if I see why your gas oven flame looks lazy and yellow, I don’t guess; I check the orifice and air shutter immediately to ensure the fuel mix is right.
#IMAGE_PLACEHOLDER_E#
Take Control of Your Kitchen Again
Fixing your own appliances can feel intimidating at first, but every successful repair builds a level of confidence that no YouTube video can replicate. Whether you are dealing with a gurgling sink or learning how to fix a dishwasher that wont fill with water, the effort you put in today saves hundreds of dollars tomorrow. You don’t need to be a professional; you just need to be observant and patient with the process. Have you ever found a weird object like a cherry pit or a stray wedding ring inside your dishwasher air gap? Let me know in the comments below!