It started just as I was sliding a tray of roast chicken into the rack. A low, vibrating buzz began to resonate from the back of the stove, sounding like a disgruntled hornet trapped in a tin can. I froze. My first thought? “Well, there goes five hundred bucks.” But I’ve learned through years of tinkering and a few embarrassing oven repair blunders that your oven isn’t usually dying; it’s just talking to you. Today, I’m going to show you how to listen. We are going to pinpoint exactly where that noise is coming from, determine if your board is actually toast, and save you from a needless service call. [image_placeholder]
That Annoying Vibration Isn’t Always a Death Sentence
Many of us hear an electrical hum and immediately jump to the worst-case scenario. However, oven diagnostics is often a process of elimination. The control board is the brain of your appliance, and just like a stressed-out human, it can get noisy when things aren’t quite right. Sometimes it’s a failing relay, but other times it’s just a loose screw vibrating against the metal chassis. I remember one time I spent hours testing an oven temperature sensor only to realize the buzzing was a vibrating cooling fan housing. It’s a classic rookie mistake, and it’s why I’m a firm believer in checking the physical mounting before you start ordering expensive circuit boards.
Is it actually safe to poke around in there?
This is the big fear, right? Electricity is intimidating. But as long as you’ve cut the power, you are essentially just a detective looking for clues. Have you ever stood in your kitchen, ear pressed against the clock, wondering if you’re about to witness a meltdown? You aren’t alone. According to data from the National Fire Protection Association, while electrical failures are a leading cause of home fires, modern appliances have multiple fail-safes designed to shut things down before they get dangerous. The key is knowing how to tell if your oven control board is repairable or if it’s time to part ways. We’re going to look for the telltale symptoms of a failing board and distinguish them from minor mechanical rattles. By the time we’re done, you’ll know if you need a screwdriver or a credit card.First, isolate the vibration. Think of your oven like a car; if the rattle only happens when you hit high speeds, it is likely the tires. In the kitchen, if the noise only kicks in during preheat, we are looking at the heating elements or the fan. Start by safely pulling the unit away from the wall. You want to use a long screwdriver as a makeshift stethoscope—place the metal tip on the back panel and your ear against the handle. This is a classic trick for oven diagnostics that helps you feel the vibration’s frequency without getting too close to live wires. If the buzz is high-pitched and coming from the top, it is likely the control board. If it is a low thrumming from the center, check the internal cooling fan motor. Much like dishwasher parts, oven components often fail because of simple mechanical fatigue rather than electrical collapse. #IMAGE_PLACE_HOLDER_B#
Grab a Multimeter to Verify Your Hunch
Once you have localized the sound, it is time to stop guessing. A visual inspection is great, but electricity does not always leave a trail of breadcrumbs. If you suspect the board, check for telltale symptoms of a failing board like flickering lights or a display showing a garbled mess of characters. If the noise is a rhythmic clicking, you need to determine if the relay board is clicking for the wrong reasons. This usually means a relay is stuck trying to engage the bake or broil circuit. To confirm, set your multimeter to ohms and perform testing the resistance on your oven’s broil element. If the element is fine, the board is likely sending a ‘dirty’ signal, or a weak capacitor is failing to hold the relay closed.
That Time a Five-Cent Screw Cost Me Three Hours
I will never forget working on an old Kenmore that sounded like a blender full of marbles. I was convinced it was diagnosing an oven that keeps tripping the circuit breaker because the noise was so violent. I spent three hours tearing down the back panel, checking the oven thermal fuse, and even eyeing the terminal block for burns. It turned out that a single mounting screw for the control board housing had backed out just enough to let the metal plate vibrate against the frame. It was not a $200 board; it was a loose screw. This is why you must physically touch every component. Give the board housing a firm press while it is making the noise (use a wooden spoon for safety!). If the noise stops, you do not need oven repair essentials; you just need to tighten a fastener. This logic applies to everything from complex ovens to identifying dishwasher faults quickly.The biggest lie in the DIY world is the ‘top three common parts’ list you find on every appliance website. While those lists are based on general sales data, they don’t account for the ‘parts cannon’—that expensive habit of firing new components at a machine until it finally starts working again. In reality, a massive percentage of control boards returned to manufacturers are actually perfectly functional. According to technical insights from major appliance refurbishers, many ‘failures’ are actually installation errors or misdiagnoses of external wiring issues. For instance, I’ve seen homeowners spend a fortune on a new motherboard when the real culprit was a tiny break in the wiring harness near the door hinge. This is why oven diagnostics should always start with a logic-based continuity test, not a credit card checkout. 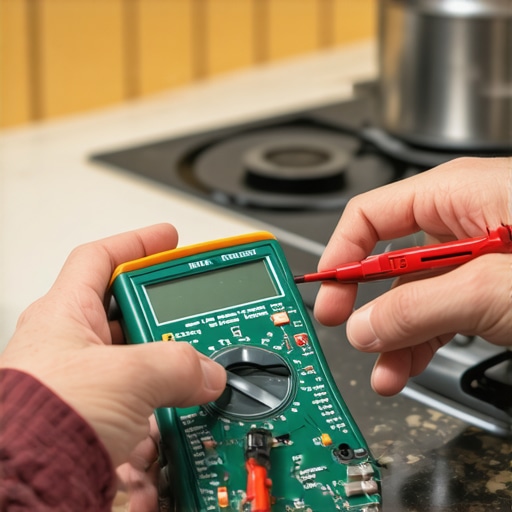
The Parts Cannon Is Your Biggest Enemy
One of the most common traps involves gas appliances. It is a classic ‘oops’ moment for gas oven owners: seeing a bright orange glow and assuming the igniter is healthy. In fact, your gas oven igniter can glow but not light the burner because it isn’t drawing enough amperage to trigger the safety valve. Replacing the expensive gas valve instead of the $30 igniter is a common mistake that wastes both time and money. Before you start troubleshooting common issues with parts, you need to understand the electrical load required for each component to actually function, not just look like it is ‘on.’
Why did my brand new part fail after one week?
This is the nightmare scenario for any DIYer. You finally get the part, install it, and the oven works for three days before dying again. Most people assume they received a defective unit, but it is far more likely that a secondary fault—like a shorted element or a damaged oven thermal fuse—killed the new board. If you do not find the actual source of the electrical surge, you are just feeding expensive parts to a hungry short circuit. This is especially true for those displays showing a garbled mess of characters; the board isn’t just ‘glitching,’ it is often being starved of clean voltage by a failing transformer. The same nuance applies to your kitchen cleanup. Everyone blames the motor when the water stays dirty, but have you checked for a faulty dishwasher turbidity sensor? If that sensor is coated in grease, it tells the machine the water is clean when it is actually full of food debris. Before you dive into identifying dishwasher parts for a full replacement, try a deep clean of the internal sensors. Have you ever fallen into this trap of replacing the most obvious part only to find out it was something microscopic? Let me know in the comments.
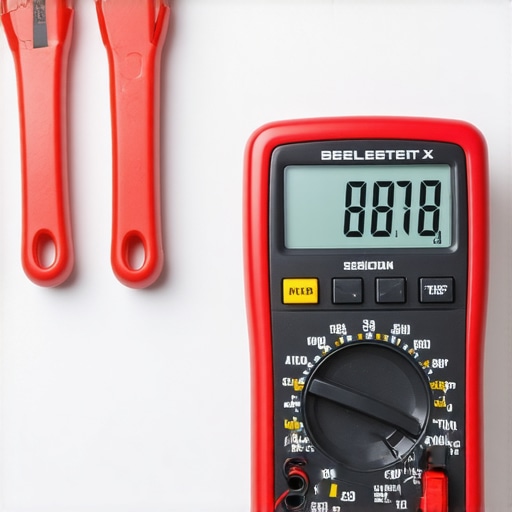
I don’t use the cheap $10 multimeters from the bargain bin anymore. After a close call with a ‘ghost’ voltage reading while testing your oven bake element for hidden cold spots, I switched to a Fluke 117. It has a low-impedance mode (LoZ) that prevents those false readings caused by stray voltage in the wiring harness. This is critical when you are learning how to test a dishwasher heating element for a short because a standard meter might give you a ‘good’ reading on a part that is actually leaking current to the frame. Having a reliable tool isn’t just about accuracy; it’s about the confidence to know when a part is truly dead.
Tools That Actually Give You a Straight Answer
Beyond the multimeter, my ‘must-have’ list includes a set of long-reach needle-nose pliers and a telescopic magnetic pickup tool. You haven’t known true frustration until you drop a mounting screw into the insulation batting of an oven cavity. If you’ve been wondering about the simple reason your oven won’t reach 450 degrees, a precision thermal probe can tell you if the thermostat is drifting—something a basic kitchen thermometer just can’t do with enough speed. According to technical documentation from the Professional Service Association (PSA), over 30% of electronic control board ‘failures’ reported by DIYers are actually just poor ground connections or loose terminal spade connectors that could have been fixed with a simple pair of crimpers.
The Hidden Clog That Mimics a Total Failure
Scaling is the silent killer of modern appliances. In regions with hard water, calcium and magnesium build up inside the tiny solenoids of your water valves. If your dishwasher leaves a chalky film on your good plates, don’t just blame the detergent. It’s likely a sign that your internal components are being choked. Learning how to clear a hard water clog in your dishwasher inlet valve once every two years will save you a $150 service call. I personally use a 90-degree dental pick to clear the mesh screens—it is far more effective than just a vinegar soak. This kind of preventative maintenance scales your appliance’s lifespan from five years to fifteen.
How do I maintain my appliances over the long haul?
The secret isn’t just cleaning; it’s inspection. Once a year, I pull my units out and check the gaskets and hoses. If you notice the rubber is getting brittle, start finding the right gasket for an older dishwasher model before it splits and floods your kitchen. I predict the future of DIY repair is shifting toward ‘software management.’ Manufacturers are increasingly using proprietary error codes that require specialized reset sequences. To stay ahead, you need to treat your appliance’s technical sheet (usually hidden behind the bottom kickplate) like a sacred document. My challenge for you: Grab your multimeter this weekend and perform a ‘dry run’ by identifying dishwasher parts under your sink before an actual emergency happens. Getting comfortable with the layout now will save you hours of panic later.
What I Learned After Blowing a Few Circuits
After years of working on these machines, I’ve realized that patience is actually your most valuable tool. Most of my early failures happened because I wanted the answer immediately. I would see a symptom and immediately jump to the most expensive oven repair essentials without checking the basics first. Now, I always start by cleaning the area and checking for physical obstructions before I ever touch a circuit board. Another big realization was that sound is deceptive; a buzz in the back can actually be a loose bracket in the front. Finally, never underestimate the power of a simple reset. Sometimes, cutting the power at the breaker for ten minutes does more than any new component could ever achieve.
The Gear That Stops the Guesswork
If you want to move beyond guessing, you need a few reliable resources in your corner. First, get a high-quality multimeter with a continuity setting that actually beeps—it’s a game-changer when you’re cramped behind a range and can’t see the screen. Second, always keep a digital copy of your appliance’s service manual on your phone; it contains the diagnostic codes that professionals use to skip the guesswork. I also recommend spending some time with a comprehensive guide to dishwasher parts to see how different brands approach similar mechanical problems. These sources give you the “why” behind the failure, which is far more important than just knowing “what” broke. For those truly tricky moments, I rely on oven diagnostics routines that prioritize testing the most likely culprits first rather than the most expensive ones.
[image_placeholder]
Take the Screwdriver and Save Your Sunday
Repairing your own home appliances is about more than just saving a few hundred dollars; it’s about the confidence of knowing how your home actually works. The next time your oven starts humming or you need to identify dishwasher faults quickly, don’t let the technical jargon or the sight of wires intimidate you. You have the tools, the logic, and the resources to handle it safely. Every successful oven repair starts with that first curious look behind the back panel. Go ahead, take it apart—you might just find it is a five-cent fix waiting for your attention. Have you ever replaced a part only to realize a loose screw or a simple cleaning was the actual solution? Let me know your most surprising ‘fix’ in the comments below!