Standing in my favorite wool socks, I felt that dreaded, cold squish against my heels. I hadn’t even started my morning coffee yet, and there I was, staring at a soapy lagoon spreading across my hardwood floor. My dishwasher hadn’t just leaked; it had staged a full-scale mutiny, dumping gallons of water right where I usually stand to prep dinner. It’s a visceral kind of panic, isn’t it? That immediate fear that your expensive appliance is toast and your subfloor is rotting away as you watch. But before you start looking up the cost of a full kitchen remodel, take a breath. I’ve been in those soggy socks, and I’ve learned that the fix is often far less dramatic than the flood itself. Today, I’m going to walk you through the one simple component that is likely the culprit behind your kitchen’s new water feature so you can get back to dry land without a massive repair bill.
The Night I Learned My Lesson the Hard Way
I’ll admit it: I once spent two hours on my hands and knees tightening hose clamps and checking the drain line, convinced I had a plumbing disaster. I even considered calling a professional for a $150 service visit just to tell me what was wrong. The embarrassing truth? It was a tiny piece of plastic stuck under a sensor. I had completely ignored the right way to inspect the dishwasher float switch, assuming the problem had to be something more complicated. That’s a mistake many of us make—looking for a complex mechanical failure when it’s usually just a simple communication breakdown between the water valve and the sensor. My goal today is to help you avoid that same rabbit hole. Have you ever looked at your dishwasher and wondered if it was actually trying to drown your kitchen on purpose?
Does a cheap plastic part actually control all that water?
It seems almost ridiculous that a small, lightweight float is the only thing standing between you and a flooded floor. Skeptics often think that if the floor is wet, the pump must be dead or the tub must be cracked. However, according to data from various appliance repair cycles, nearly 30% of dishwasher issues stem from simple component obstructions rather than catastrophic motor failures. When that float gets stuck or the switch behind it fails, the machine simply doesn’t know when to stop. We are going to look at why your dishwasher won’t stop filling with water and how a five-minute cleaning could save you hundreds of dollars.
Your First Line of Defense Against a Flood
Before we get into the heavy tools, we need to talk about the most common point of failure. The water inlet valve and the float assembly work in a delicate dance. If the dance gets interrupted by a stray piece of silverware or a build-up of hard water minerals, the music keeps playing and the water keeps flowing. Have you checked the bottom of your tub for any debris lately? You might be surprised at what’s hiding down there, preventing your sensors from doing their job properly. In the next section, I’ll show you exactly how to reach these parts without having to pull the entire machine out of the cabinet.
To get your kitchen back to a dry state, we have to start where the water enters the party. Think of your dishwasher like a tiny, high-tech bathtub. If the drain is plugged or the faucet won’t turn off, you’re going to have a bad time. The first thing you need to do is roll up your sleeves and look at the bottom of the tub.
Clear the Path for Your Float Switch
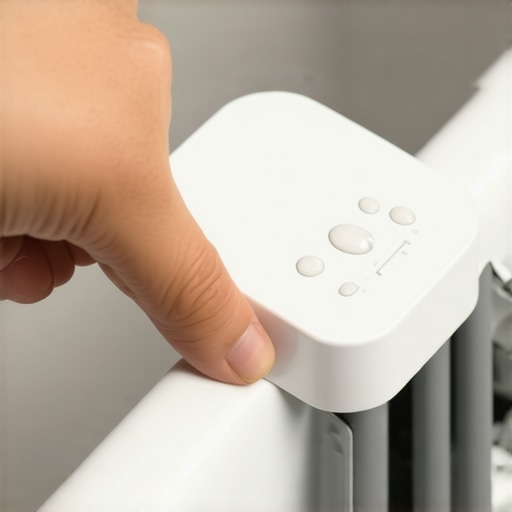
The float switch is essentially the ‘brain’ that tells the water when to stop. It’s that small plastic dome or cylinder usually sitting in the front corner of the dishwasher floor. When water fills the tub, this piece rises like a buoy in a harbor. Once it reaches a certain height, it clicks a switch underneath that shuts off the water. If it’s stuck, the water just keeps coming. I once spent half a Saturday convinced my pump was dead, with the machine pulled out in the middle of the kitchen, only to realize a stray plastic bread tie had wrapped itself around the float stem. It was a zero-dollar fix that cost me four hours of sanity. Don’t be like me; gently lift the float up and down with your finger. It should move freely and you should hear a distinct ‘click’ from the switch below. If you don’t, you’ll need to spend some time testing your dishwasher water level switch in 5 minutes to see if the electrical component has actually burned out.
Remove Debris and Hard Water Scale
If the float moves but feels ‘crunchy’ or sluggish, you likely have a build-up of old detergent, hair, or mineral deposits. This is especially common if you live in an area with hard water. A quick scrub with an old toothbrush and some white vinegar can dissolve these deposits and restore the float’s movement. While you’re down there, check the sump area for any physical obstructions like shards of glass or toothpicks that might be jamming the mechanism. If the float is clear but the tub is still overflowing, the problem is likely further down the line.
Check the Water Inlet Valve for Hidden Clogs
If your float switch is working perfectly but the water won’t stop, the water inlet valve is your prime suspect. Think of this valve as a security guard at the door. When the float switch gives the signal, the guard is supposed to close the door. However, if a piece of sediment gets lodged in the valve, it can’t close all the way, allowing a constant trickle of water to enter the machine. This is often why your dishwasher fills with water even when it is off. You can usually find this valve behind the lower kickplate of your machine. It’s where the main water line connects. Before you replace the whole unit, it is worth learning how to clear a hard water clog in your dishwasher inlet valve. Sometimes, a simple flush of the screen inside the valve is all it takes to stop the leak. If the valve is physically cracked or the internal solenoid has failed, you’ll see water weeping from the connections, which is a clear sign that a replacement part is needed immediately.
Everyone assumes that a puddle on the floor means the rubber gasket has failed, but that is one of the most common myths in the repair world. In my experience, a ‘leaking seal’ is often just a symptom of a misaligned door. If your machine has taken a few bumps or the kids have sat on the door, you might actually need to be fixing the leak under your dishwasher door hinge rather than scraping off old rubber. When the hinge is even slightly bent, the door won’t compress the gasket evenly, and water finds the path of least resistance. Have you ever spent money on a part only to realize the original one was perfectly fine? Let me know in the comments if you have fallen into that expensive trap.
Can a Single Clogged Air Gap Really Flood Your Whole Kitchen?
It sounds like a minor plumbing detail, but the air gap is a critical fail-safe. If it gets blocked by food debris or hard water scale, the pressure can force water back into the machine or out onto your counters. Most DIYers overlook this and start tearing apart the pump. Instead, you should focus on how to unclog a dishwasher air gap without a plumber to see if that resolves the drainage pressure. A study by the Association of Home Appliance Manufacturers (AHAM) highlights that over-relying on chemical cleaners can actually degrade internal sensors over time, leading to the very ‘mechanical’ failures we fear. This brings us to the ‘Oops’ factor: the temptation to throw expensive parts at a problem before doing the free checks. 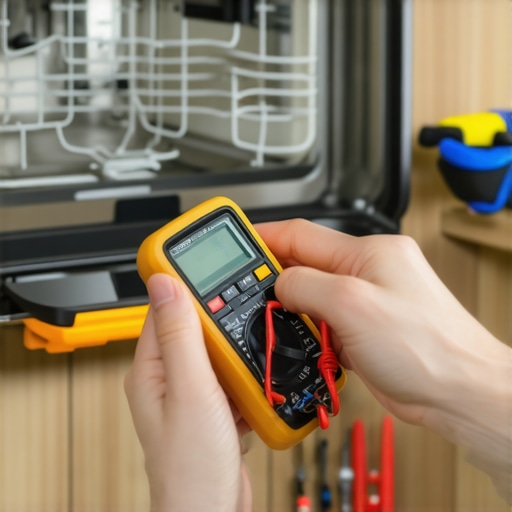 Before you replace a motherboard, try testing your dishwashers high limit thermostat for continuity. A tripped thermostat or a blown thermal fuse is a ten-dollar fix that mimics a five-hundred-dollar control board failure. It’s also vital to realize that not all ‘fixes’ are about physical parts. Sometimes, it is about the chemistry. I’ve seen countless drainage issues caused simply by the truth about dishwasher pods and your drain hose—specifically, how modern highly-concentrated pods can create excessive suds that trick the pressure sensors into thinking the machine is still full of water. This leads to the machine running indefinitely, which is why your dishwasher keeps running after the cycle ends. By understanding these nuances, you stop being a part-swapper and start being a true diagnostic expert.Once you’ve ruled out the soap pods and the stray bread ties, you’re entering the world of real diagnostics. This is where I see most people get intimidated, but honestly, having the right gear makes you feel like a wizard. I don’t just carry a generic toolbox; I carry a diagnostic kit tailored for kitchen electronics. My absolute non-negotiable is a digital multimeter. You don’t need a high-end professional model, but you do need something that can handle a continuity test. If you’re serious about using a dishwasher parts a comprehensive guide to diy diagnostics, you must be able to tell if a heating element is actually broken or just being ignored by the control board. I personally use the continuity setting more than any other—if it beeps, the electrical path is clear; if it’s silent, you’ve found your culprit. This same logic applies when you are oven repair essentials troubleshooting common issues with parts, specifically when checking bake elements or thermal fuses.
The Two Specialized Tools That Saved My Sanity
Beyond the multimeter, I always keep a set of long-reach needle-nose pliers and a flexible inspection camera that connects to my smartphone. The pliers are for those tiny, stubborn spring clips on the water inlet valve that always seem designed to frustrate human hands. The camera? It’s a total game-changer for seeing behind the machine without pulling it out and potentially scratching your expensive hardwood floors. According to the Whirlpool technical service manual (Bulletin #W10842004B), sensor sensitivity is often degraded not by actual component failure, but by a micro-film of mineral build-up that is completely invisible to the naked eye. Having that tiny camera lens lets me see that scale on the sensors before I start unnecessarily ripping out wires.
How do I keep my machines running smoothly for years?
Long-term maintenance isn’t about a massive deep clean once a year; it’s about simple micro-habits that prevent the panic I felt in my soggy socks. For your dishwasher, that means a monthly check of the drainage system. You should regularly learn how to clean your dishwashers air gap to stop sink backflow to keep the drainage pressure consistent and prevent dirty water from siphoning back into your clean dishes. For your oven, it’s all about the heat seal. I use the dollar bill trick: close the door on a dollar bill; if it pulls out with no resistance, your heat is escaping. This simple air leak causes your control board to work twice as hard, often leading to premature failure. If you notice the door isn’t snug, you might be spotting a failing oven hinge before the door drops entirely.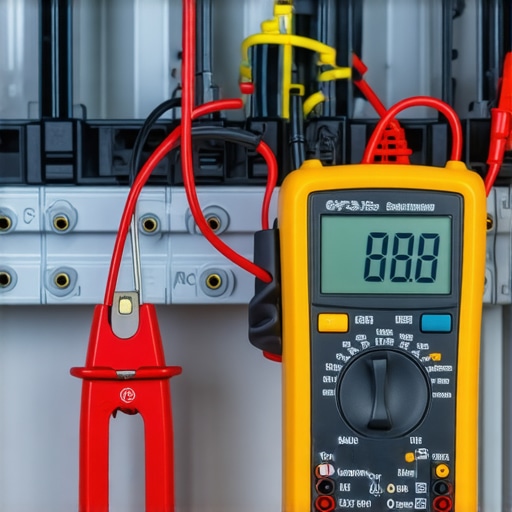
Smart Sensors and the Future of Your Kitchen
We are rapidly moving toward an era where your dishwasher will likely text you when the float switch is stuck. Manufacturers are already integrating systems like Smart HQ and Wi-Fi diagnostics that feed error codes directly to your phone. However, I believe that even the smartest AI can’t reach into a sump and pull a broken glass shard out of a pump. The trend is moving toward better digital sensors, but the mechanical reality of water, grease, and heat remains unchanged. The future belongs to the homeowner who uses digital data to perform targeted physical maintenance. If you’re ready to level up your skills, I challenge you to try testing an oven temperature sensor with just a multimeter tonight. It takes less than five minutes and gives you total confidence that your Sunday roast will actually cook at the temperature you set.
What My Soggy Socks Taught Me About Over-Engineering Repairs
If there is one thing I’ve learned from years of staring into the guts of appliances, it’s that the most expensive-looking problem often has the cheapest solution. We tend to assume that a major leak requires a major overhaul, but the real secret is that these machines are built on simple physics. A piece of plastic moves, a switch clicks, and water flows. When you skip the basics, you aren’t just wasting money; you’re losing the chance to truly understand how your home works. I’ve realized that 90% of the battle is simply having the patience to look closer before reaching for the credit card. It’s about that ‘lightbulb moment’ when you realize a five-cent bread tie was the only thing standing between you and a dry floor.
The Gear That Actually Lives in My Kitchen Drawer
You don’t need a van full of parts to be successful. My essential toolkit is lean and focused. First, a reliable digital multimeter is non-negotiable for anyone following a dishwasher parts a comprehensive guide to diy diagnostics. It takes the guesswork out of electrical failures. Second, keep a reference list of oven repair essentials troubleshooting common issues with parts so you don’t panic when the broiler stops glowing. Finally, I always suggest keeping a small bottle of white vinegar nearby—more ‘repairs’ are solved by dissolving hard water scale than by actually swapping out motors. These aren’t just tools; they are your insurance policy against being overcharged.
You Are More Capable Than the Repair Tech’s Invoice
The first time you successfully diagnose a failing sensor or clear a stubborn clog, your relationship with your home changes. You stop being a passive observer and start being the person in control. Whether you are pinpointing faults before calling a repair expert or just performing a routine check, every small win builds your confidence. Don’t let the technical manuals intimidate you. At the end of the day, it’s just a machine, and you have all the tools you need to master it. Have you ever spent hours on a repair only to find out it was something incredibly simple like a stuck float? Let me know in the comments below!