I was standing in a puddle of lukewarm, soapy water when I realized I’d made a huge mistake. There I was, wrench in hand, ready to perform major surgery on my dishwasher’s motor, convinced the whole machine was headed for the scrapyard. My kitchen smelled like wet dogs and failure. But then, my neighbor—a retired appliance tech who can fix anything with a paperclip—walked in and laughed. He told me I was looking at the wrong end of the problem. It turns out, most of the time when you have standing water in your dishwasher, it isn’t a catastrophic mechanical failure. It’s usually just a tiny, misunderstood component called the water level switch.
Stop Blaming Your Pump and Look at the Switch
Most of us assume the worst when we see a flood. We start googling expensive replacements or looking up a comprehensive guide to dishwasher diagnostics because we think we need to replace everything under the tub. I spent sixty bucks and a whole Saturday once on a drain pump I didn’t even need. The real culprit? A simple pressure switch that had just gotten gunked up or failed electronically. This little guy is the gatekeeper; it tells your machine when to stop filling and when it’s safe to heat up. If it’s lying to your control board, your kitchen becomes a swamp. Learning how to identify dishwasher faults quickly is about working smarter, not harder. According to data from the Repair Association, a significant portion of appliance repairs could be avoided with simple component testing rather than part-swapping. You don’t need a degree in electrical engineering to figure this out; you just need five minutes and a basic understanding of how the water moves. Have you ever found yourself staring at a blinking error code, feeling like the machine is laughing at you?
Is this little plastic sensor actually the problem?
I get the skepticism. How can a part that looks like a toy be responsible for your dishwasher failing to fill with water or overflowing like a fountain? It feels too simple. But that’s the beauty of DIY repair once you get past the initial fear of breaking it more. I used to think I’d get electrocuted just by touching the kickplate, but once I learned the right way to inspect the float switch, the mystery vanished. We’re going to test this thing today without tearing your whole kitchen apart. We’ll find out if your switch is stuck, clogged, or truly dead.Start by cutting the power and water. It sounds obvious, but you would be surprised how many people forget this basic rule of oven repair essentials and troubleshooting before diving into their dishwasher. You’re looking for a small, usually circular plastic component located right under the tub. Accessing it typically requires removing the lower kickplate. I remember the first time I tried this; I was so impatient that I didn’t clear enough space and ended up slicing my knuckles on the sharp metal edges of the frame. Take the extra thirty seconds to move any rugs and give yourself room to work. Once you see the switch, you’ll notice a thin rubber tube attached to it. This is the pressure tube, and it is the most common point of failure.
Get to the Bottom of the Machine First
The switch works on air pressure. As the water level rises, it pushes air up that tube, which eventually triggers the switch to tell the control board to stop the flow. If that tube is clogged with old pasta sauce or hard water scale, the switch never gets the message. I once had a client who was convinced they needed to be replacing a noisy dishwasher drain pump assembly, but when I pulled the pressure tube, it was packed solid with grease. A quick cleaning saved them a hundred bucks. You can usually pull the tube off and blow through it. If you feel resistance or hear a gurgle, you’ve found your culprit. 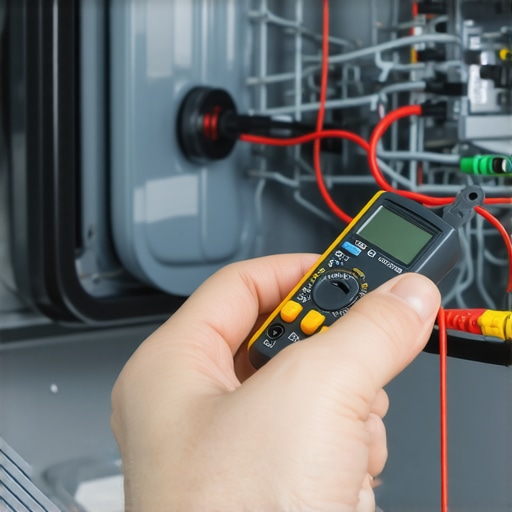
Blow Life Back into the Pressure Tube
If the tube is clear, the problem is likely the switch itself. You can test the mechanical part of the switch by gently blowing into the nipple where the tube connects. You should hear a distinct ‘click.’ No click means the internal diaphragm is ruptured or stuck. This mechanical failure is often why you see standing water in your dishwasher or, worse, an endless fill cycle that ends in a leak. It’s a similar logic to how to fix a dishwasher that won’t fill with water; the sensor is simply giving the wrong signal. I once ignored a tiny bit of sediment in a tube during a rush job. It looked like nothing, but it was enough to keep the switch from resetting properly. My kitchen looked like a foam party by the time the cycle finished. It taught me that how to identify dishwasher faults quickly often means obsessing over the smallest details.
Put the Switch to the Multimeter Test
If it clicks but still isn’t working, you need to check the electrical continuity. Set your multimeter to the lowest ohms setting. You’re looking for a change in resistance when the switch is clicked versus when it is at rest. If the reading doesn’t change, the internal contacts are fried. This is just as critical as how to test a dishwasher heating element for a short. You are looking for a clear ‘open’ or ‘closed’ signal. If you find the switch is dead, consult a comprehensive guide to dishwasher diagnostics to ensure you have the exact part number for your model. It is much easier to swap this twenty-dollar part than it is to keep mopping up your floor every Tuesday night. Check the terminals for any signs of corrosion or burning while you are there, as a loose connection can mimic a dead switch perfectly.
We often treat appliance repair like a software update—if it glitches, just reboot it. But in the world of hardware, a ‘reset’ is often a mask, not a cure. Everyone says the control board is the first thing to go when things get weird, but in my experience, the board is actually one of the hardiest parts of the machine. It is designed to handle significant heat and vibration. The real culprit is usually a peripheral sensor giving the board bad data, leading to a cycle of frustration. This is where oven diagnostics pinpointing faults before calling a repair expert becomes an art form rather than a chore. You have to stop looking at the symptoms and start looking at the sequence of events. If the machine stops at the exact same second every time, it isn’t a ‘glitch’; it is a safety protocol being triggered by a failing component.
Why Does My Multimeter Lie to Me?
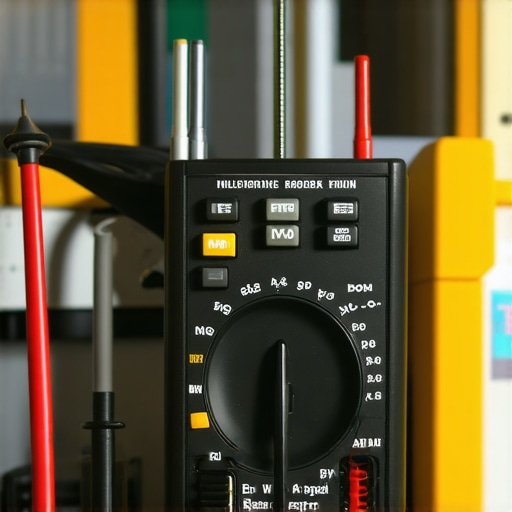
Here is the advanced mistake: testing for continuity and assuming a ‘beep’ means the part is functional. A heating element or a motor winding can show continuity but still have ‘cold spots’ or internal resistance issues that only manifest under a full electrical load. I’ve seen dozens of DIYers spend hours testing your oven bake element for hidden cold spots only to get a false positive because they didn’t test for specific ohms against the manufacturer’s technical data sheet. It is a nuanced distinction that separates the pros from the part-swappers. If you are not checking the specific resistance, you are just guessing. This is just as vital as knowing oven repair essentials and troubleshooting common issues with parts before you start pulling wires.
According to a technical report from the Professional Service Association (PSA), nearly 30% of electronic control boards returned to manufacturers as ‘defective’ were actually perfectly functional; the real issue was a loose terminal, a pinched wire, or a failing sensor elsewhere in the system. This ‘part-swapping’ habit is an expensive trap that often leads to more problems. Before you drop two hundred dollars on a new PCB, take a moment to look at is your oven control board failing and check these 4 symptoms to be absolutely certain. Sometimes the clicking sounds you hear are just the board trying to protect itself from a faulty thermal fuse or a voltage drop at the wall outlet.
The Danger of the Infinite Reset
Another nuance people miss is the danger of repeatedly resetting a dishwasher or oven to clear an error code. If a dishwasher has standing water in your dishwasher and you force it to run again, you risk burning out the drain pump or causing a slow leak to become a flood. Resets should be used for confirmation, not as a permanent fix. True mastery of how to identify dishwasher faults quickly means respecting the machine’s warnings. I once saw a homeowner bypass a door latch sensor just to finish a load of laundry, only to have the machine shake itself apart because it couldn’t detect an unbalanced load. It was a five-hundred-dollar mistake born from a five-minute shortcut. Have you ever fallen into this trap? Let me know in the comments.
I spent years relying on a five-dollar multimeter before I realized I was essentially reading tea leaves. If you are serious about your kitchen, you need a true RMS multimeter—something like a Fluke 115 or a Klein MM400. The reason is simple: modern appliances use pulse-width modulation and complex signals that cheap meters simply can’t catch. When you are performing oven diagnostics pinpointing faults before calling a repair expert, you need a tool that can differentiate between ghost voltage and a failing relay. I’ve seen homeowners replace entire wiring harnesses because their cheap meter showed 40V where there should have been zero, simply because of electromagnetic interference. Precision isn’t a luxury; it’s the difference between a fixed oven and a pile of scrap metal. Beyond the meter, your toolkit needs a dedicated set of magnetic nut drivers—specifically 1/4 inch and 5/16 inch. Almost every American-made appliance is held together by these two sizes. Using a standard screwdriver is a recipe for stripped heads and bloody knuckles. I also swear by a telescopic mirror; it allows you to see the back of a terminal block without pulling the entire oven out of the wall. This level of preparation is what shifts you from a frustrated amateur to someone who can confidently tackle how to identify dishwasher faults quickly. It’s about building a system. When you have the right gear, the ‘scary’ repairs become routine.
Stop Guessing and Start Measuring with Real Gear
How can I ensure my appliances survive the next decade?
Longevity isn’t about luck; it’s about a scheduled offensive. Most people wait for a leak, but the pros look for the precursors. For your dishwasher, this means a deep dive once every six months. You need to be how to clean your dishwashers hidden sump filter and checking the spray arms for calcium buildup. The Association of Home Appliance Manufacturers (AHAM) notes in their technical briefs that the average life expectancy of a major appliance is about 10.6 years, yet that number drops drastically when filters are left to clog. Scale and debris put extra strain on motors, leading to premature winding failure. It’s the same with your range; testing an oven bake element for invisible cracks before they become full breaks can save you from a dangerous short circuit later. 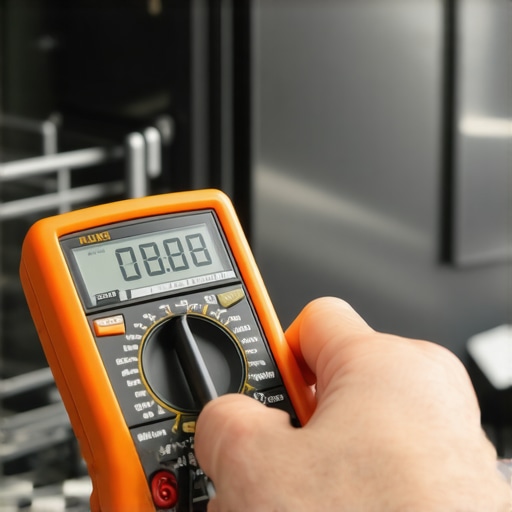 I truly believe the next frontier of home repair isn’t going to be better wrenches, but integrated software. We are already seeing high-end models with Wi-Fi diagnostics that send error logs directly to your phone. Eventually, your dishwasher will tell you exactly which valve is sticking before it ever leaks a drop. But until that day comes, you still need to master the basics of dishwasher parts a comprehensive guide to diy diagnostics. Being able to read a technical sheet—that folded piece of paper hidden behind the kickplate—is a superpower. If you can read a schematic, you can fix 95% of what breaks. Stop treating your appliances like black boxes and start treating them like the logical machines they are. My best advice? Grab your multimeter today and check the resistance on your oven igniter. If it’s over 400 ohms, it’s on its way out. You’ll thank me when you aren’t trying to fix a cold oven on Thanksgiving morning. Knowing when to stop diying and call an oven repair expert is important, but you’d be surprised how far a little preventative maintenance and a comprehensive look at oven repair essentials can take you.
The Tiny Details That Usually Trip Up the Pros
After years of wrestling with appliances, I’ve realized that the most expensive mistake isn’t buying the wrong part; it’s ignoring the context of the failure. I once spent days chasing an electrical ghost only to realize the standing water in your dishwasher was caused by a slight sink drain clog, not the machine itself. Another lesson? Never trust a component just because it ‘looks’ fine. A burnt-out heating element might show perfect continuity but fail as soon as it heats up and expands. Also, keep your sensors clean—buildup on a turbidity sensor can trick the control board into running for hours. Lastly, always check your connections first. I can’t tell you how many ‘dead’ dishwashers I’ve fixed by simply tightening a loose wire at the junction box.
#IMAGE_PLACEHOLDER_E#
Tools That Turned My Frustration Into a Fix
If you want to move beyond guessing, you need a few non-negotiables in your cabinet. First, a True RMS Multimeter is your eyes and ears; it allows for oven diagnostics pinpointing faults before calling a repair expert with surgical precision. Second, I recommend everyone download the specific service manual for their model. It’s the ‘cheat code’ that tells you how to enter diagnostic mode. Third, invest in a quality set of long-reach nut drivers. Most dishwasher parts a comprehensive guide to diy diagnostics won’t mention this, but having the right reach means you don’t have to pull the whole machine out just to check a pump. Finally, keep a small bottle of non-conductive contact cleaner to keep those sensitive sensor terminals free of grease and corrosion.
Reclaim Your Kitchen From the Chaos
The first time you successfully hear that click and watch your machine drain correctly, it feels like winning the lottery. Mastering how to identify dishwasher faults quickly isn’t just about saving money; it’s about the peace of mind that comes with knowing you aren’t at the mercy of a service schedule. Don’t let a blinking light intimidate you. Start small, verify your data, and remember that even the most complex machines are just a collection of simple parts working together. You have the tools and the knowledge—now it’s time to get that kitchen back in order. Have you ever been stumped by a weird dishwasher noise or an oven code that didn’t make sense? Let me know in the comments below!