I remember one freezing Tuesday night when I had a tray of lasagna ready to go. I peeked through the oven window and saw that familiar, comforting orange glow at the bottom. I walked away, expecting the smell of melting cheese in ten minutes. Instead, thirty minutes later, the lasagna was stone cold. The igniter was bright as a campfire, but the burner was dead silent. It’s the ultimate betrayal by a household appliance, and honestly, it’s enough to make you want to order takeout for the rest of your life. We are going to solve this mystery today so you don’t end up like me, staring at a cold pan of pasta in despair.
That Orange Glow Can Be A Total Lie
Most people assume that if the igniter is glowing, it must be working. I used to think the same thing. In fact, one of my biggest early mistakes was rushing out to buy an expensive gas safety valve because I figured the ‘light’ meant the igniter was fine. It wasn’t. Just because it’s hot enough to glow doesn’t mean it’s hot enough to actually trip the safety valve and let the gas flow. If you are currently [pinpointing faults before calling a repair expert](https://appliancebargainz.com/oven-diagnostics-pinpointing-faults-before-calling-a-repair-expert), you need to realize that these components wear out gradually. They are like old lightbulbs that flicker but don’t quite illuminate the room. I’ve spent years digging into [common issues with parts](https://appliancebargainz.com/oven-repair-essentials-troubleshooting-common-issues-with-parts), and this specific ‘glow but no heat’ scenario is the number one trickster in the kitchen.
Is it time to give up and buy a new stove?
I know what you’re thinking. If the parts are failing in such a sneaky way, is it even worth fixing? The answer is a resounding yes. You don’t need a whole new appliance; you likely just need a $30 part and about twenty minutes of your time. Have you ever stood there staring at that orange light, wondering if your oven was just messing with you? You aren’t alone.
The Hidden Science of a Dying Igniter
Here is the thing: these igniters work on resistance. As they age, the material thins out and the electrical resistance changes. According to the repair experts at RepairClinic, a gas oven igniter must draw a very specific amount of current—usually between 3.2 and 3.6 amps—to heat up the bimetal strip inside the gas valve enough to open it. If your igniter is old, it might only be pulling 2.8 amps. That’s enough to make it glow a beautiful, deceptive orange, but it’s not enough to actually start the fire. It’s essentially a weak handshake that never quite closes the deal. This is why [diagnosing an oven that keeps tripping the breaker](https://appliancebargainz.com/diagnosing-an-oven-that-keeps-tripping-the-circuit-breaker) or simply fails to heat is more about the ‘hidden’ health of the part than what you see with your eyes. In my experience, once that glow starts taking more than 90 seconds to ignite the gas, you are on borrowed time. We’re going to walk through how to test this properly so you can stop guessing and start cooking again.
Get Under the Hood Without Getting Burned
Before you touch a single screw, you have to kill the power. I cannot stress this enough. I once skipped this step on a dishwasher repair and got a zap that felt like my soul left my body for a second. It is not worth it. Unplug the range or flip the breaker. Once it is safe, clear out the oven racks. You will usually see two screws at the back of the bottom metal plate. Remove those, and you will find the burner assembly and the igniter. If you find your oven repair essentials include a sense of dread when looking at these wires, just remember it is just a plug-and-play system. Just as you might be identifying dishwasher faults quickly by looking for visible clogs, you should look for white ash or cracks on the igniter surface.
How to Spot a Weak Pulse With Your Multimeter
To really know if your igniter is lying to you, you need a multimeter. You can check for continuity—which is basically asking, ‘Is there a path for the electricity?’—but that does not always tell the whole story with igniters. Since we know why your gas oven igniter glows but doesnt light is often due to low amperage, an amp-clamp meter is the gold standard here. You would clamp it around one of the igniter wires and turn the oven on. If that reading does not hit at least 3.2 amps, the safety valve will not budge. It is like trying to push a heavy door with one finger; you are touching it, but you are not moving it. It is much more definitive than testing your oven bake element for hidden cold spots because gas systems rely on this specific electrical draw to unlock the fuel line.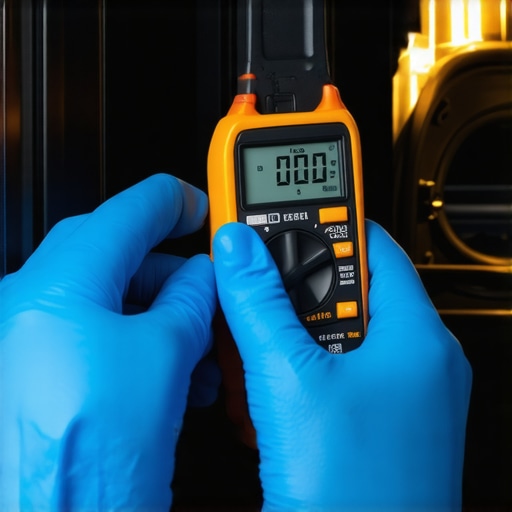
Pulling the Old One Out Without Breaking Everything
Replacing the part is actually the easiest bit, provided you do not manhandle the wires. I remember one job where I got impatient and tried to pull the connector through a tiny hole in the back of the oven frame. I ended up snapping the plastic clip. Now, I always use needle-nose pliers to gently guide the harness through the opening. Most modern igniters come with a quick-connect plug. If yours does not, you will be using porcelain wire nuts. Never use plastic ones from your junk drawer; they will melt and turn your dinner into a chemical-smelling disaster. While you are in there, it is a great time for pinpointing faults before calling a repair expert by checking the burner tube for rust or debris that might block the flame path.
The Right Way to Handle the New Igniter
When you get that new igniter out of the box, treat it like a fragile egg. The gray or black carbide element is incredibly brittle. If you bump it against the oven frame while installing it, it can develop a hairline fracture. Even the oil from your fingers can cause a hot spot that leads to early failure. I always wear clean gloves or hold it strictly by the ceramic base. If you have ever wondered about the 3 reasons your gas oven is clicking but not lighting, remember that even a brand-new part can fail if handled poorly. Line up the mounting holes, tighten the screws until they are snug—not ‘I am trying to crush the metal’ tight—and plug it back in. Knowing when to stop diying and call an oven repair expert is important, but a simple igniter swap is the most rewarding way to save a few hundred dollars.
Stop Blaming the Control Board Right Away
Most DIYers think that a blank display or a total lack of heat means the ‘brain’ of the machine is fried. I’ve seen people drop $300 on a new electronic board only to find out the oven still won’t turn on. In my experience, the control board is actually one of the heartiest parts of the machine; it is designed to withstand significant heat. Often, the real culprit is a tiny, unassuming thermal fuse. This safety device kills all power if the internal cavity gets too hot, but once it trips, it doesn’t reset. Before you commit to a major purchase, you really need to learn the most reliable way to test an oven thermal fuse. It’s a five-minute check that can save you hundreds of dollars. If you are already checking these 4 symptoms of a failing control board, make sure the fuse is your very first stop on the diagnostic trail. 
The Tiny Fuse That Mimics a Total System Failure
The most common ‘oops’ factor I see involves the relay board. Have you ever heard your oven clicking like crazy but nothing happens? It is easy to assume the relay is stuck, but sometimes it is actually just a loose wire or a slightly corroded terminal. People often rush to replace the hardware without cleaning the connections. I always suggest how to tell if your ovens relay board is clicking for the wrong reasons before you start unscrewing things. Also, remember that your dishwasher can offer clues about your electrical health. If you are using a comprehensive guide to diy diagnostics for your other appliances, you’ll notice that ‘phantom’ power issues often stem from the same source: a faulty house-side breaker or a loose neutral wire in the junction box.
Why does my oven still smell like gas after the repair?
This is the ultimate advanced reader question. If you’ve replaced the igniter and the burner is firing, but you still catch a whiff of gas, you might have a hairline crack in the burner tube itself or a failing safety valve that isn’t closing completely. Studies by the Appliance Standards Awareness Project (ASAP) indicate that modern sensors and valves are far more sensitive to voltage fluctuations than the heavy-duty components of the past, meaning even a small drop in power can cause ‘lazy’ valve operation. While you are pinpointing faults before calling a repair expert, look for tiny soot marks along the burner. These indicate a gas leak that is small enough to smell but large enough to be dangerous. Have you ever fallen into the trap of replacing the most expensive part first? Let me know in the comments. I’m curious to hear how many control boards are sitting in trash cans for no reason!I’ve learned the hard way that owning a home isn’t just about the mortgage; it’s about the silent battle against entropy in your kitchen. If you want to stop being a victim of your appliances, you have to upgrade your toolkit. I don’t just mean a screwdriver set from the bargain bin. I personally swear by a True RMS multimeter, like the Klein Tools CL800, because it handles ‘ghost voltages’ that trick cheaper meters into giving false readings. When you are troubleshooting common issues with parts, having a tool that provides an accurate resistance reading on a heating element is the difference between a quick fix and a wasted weekend. I also keep a set of nut drivers specifically for those awkward back-panel screws that always seem to strip when you use a standard drill. According to the Whirlpool Job Aid for Gas and Electric Ranges, one of the most overlooked maintenance steps is a periodic check of the power connection; vibration from years of use can actually loosen mounting screws, so knowing how to check for a burnt terminal block on your electric oven is a skill that prevents literal house fires.
How do I keep my kitchen running smoothly for years?
The secret isn’t just fixing things when they break; it’s about the boring stuff you do when everything is working perfectly. For your dishwasher, this means more than just a rinse. You need to be cleaning grimy dishwasher door gaskets at least once a month. If that rubber gets brittle or covered in old soap scum, it won’t seal, and you’ll end up with a slow leak that rots your subfloor before you even see a puddle. I also recommend the right way to inspect your dishwasher float switch to ensure it’s moving freely. A stuck float is the number one reason for an accidental flood or a machine that refuses to fill. 
Predicting the Next Decade of Appliance Repair
Looking ahead, I see a shift toward ‘smart’ diagnostics where your oven might actually email you when the igniter amperage starts to drop. While that sounds convenient, it also means more proprietary sensors that we’ll have to learn to bypass or replace. We are moving toward a world where software is just as important as a wrench. However, the mechanical basics will always matter. No amount of AI can fix a physical gap in a door. That is why my best advice for right now is to perform the ‘paper test’ on your oven. Take a dollar bill, or a piece of paper, and close the oven door on it. If you can pull it out with zero resistance, your heat is escaping, and your electric bill is paying the price. I want you to go to your kitchen right now and try testing your oven door seal with the dollar bill trick. It’s the easiest way to see if your appliance is actually working for you or against you.
What I Learned After Tossing Too Many Good Parts
My biggest regret in early DIY is what I call the ‘parts cannon.’ I used to fire new components at a problem without truly verifying the fault, and it cost me a fortune. I’ve since learned that accurate measurements are your best friend. For instance, before you buy a new igniter, you must confirm the amperage draw. If you are currently pinpointing faults before calling a repair expert, remember that a component can look perfect and still be electrically dead. I also learned that many ‘broken’ dishwashers are just dirty; I can’t count how many times I’ve saved a machine by simply cleaning grimy dishwasher door gaskets or checking the float switch. Trust the data, not your eyes.
The Gear That Actually Saved My Sanity
You don’t need a professional’s van full of tools, but a few high-quality items make a world of difference. I always recommend a True RMS multimeter for checking resistance on things like a bake element or a thermal fuse. If you want to dive deeper into your oven repair essentials, add a set of magnetic nut drivers and a bright headlamp to your kit. These tools allow you to see the small details, like how to check for a burnt terminal block on your electric oven, which is a common cause of total power loss. I also keep a copy of my appliance’s service manual—usually tucked behind the bottom kickplate—to find the exact wiring diagrams I need.
Take Back Control of Your Kitchen Today
There is a profound sense of pride that comes from hearing your oven click to life or watching your dishwasher drain perfectly after you’ve worked on it yourself. You are no longer at the mercy of a two-week wait for a technician. While it’s vital to know when to stop diying and call an oven repair expert, most of these daily frustrations can be handled with a bit of patience and the right diagnostic path. You’ve got the knowledge now; all that’s left is to grab your tools and get to work. Your next successful oven repair is closer than you think. Have you ever replaced an expensive part only to find out a $5 fuse was the real problem? Let’s swap stories in the comments below.