It happened right after a long Sunday dinner. I went to slide the bottom rack out, and instead of a smooth glide, I got a bone-jarring thud. The rack felt like it was fused to the tub. I yanked. The rack jumped its tracks. Three bowls flipped over, and suddenly I was elbow-deep in cold, gray rinse water trying to realign the wheels. It is a small frustration, but when it happens every single night, it starts to feel like your kitchen is actively rooting against you. I used to think the rack was just getting old or that I had bought a lemon, but the truth is usually much simpler. Today, I am going to help you reclaim that new appliance feel. We are going to identify exactly why your dishwasher racks are fighting back and how to lubricate them safely so they slide with just a fingertip. I once made the massive mistake of spraying standard garage lubricant on my rollers—please, do not do that. It smells terrible when the heat hits it and it is definitely not food-safe. If you are already seeing other issues, you might want to check out my tips on how to identify dishwasher faults quickly before we get our hands dirty with the rollers.
Stop the Screech and Get Your Racks Gliding Again
The reason your dishwasher racks become stubborn usually comes down to a build-up of hard water minerals or the slow degradation of the plastic wheels. Over hundreds of cycles, the factory-applied lubricant washes away, leaving plastic grinding against plastic. It is not just annoying; it actually puts a lot of unnecessary stress on the rack itself. I have seen folks snap a tine right off because they were pulling so hard on a stuck rack. If you have already noticed damage, you should look into how to repair a peeling dishwasher rack to prevent rust from spreading to your plates. According to the Association of Home Appliance Manufacturers (AHAM), maintaining the moving parts of your appliances can significantly reduce the mechanical strain that leads to premature motor failure. When the rack sticks, you jerk the machine, and over time, that can even loosen the dishwasher door that won’t close tight. Have you ever felt like you were in a literal tug-of-war with your dinnerware just to get the machine loaded? It is a battle you do not have to fight anymore.
Is a DIY fix actually better than calling a pro?
You might be worried about breaking a clip or using the wrong substance near your clean forks. That is a fair concern! But trust me, this is one of those five-minute fixes that saves you a hundred-dollar service call. Most of the time, you just need a little bit of food-grade silicone grease or even a simple cleaning of the tracks. If your rack is sticking so badly that it is affecting how your dishes get cleaned, you might also want to investigate why your dishwasher is leaving food on the bottom rack while you have everything pulled apart. We are going to walk through the exact steps to get those wheels spinning freely again without risking your warranty or your sanity.First, you need to pull both racks out completely. You cannot fix what you cannot reach. If you are struggling with the top rack, keep in mind that many modern units have a small plastic clip at the end of the metal rails that you need to pop off first. Once the racks are out, check the tracks for any physical obstructions like a stray cherry pit or a piece of broken glass. I once spent twenty minutes trying to lubricate a rack that just had a rogue toothpick wedged in the rail. If your tracks are white and crusty, you are dealing with calcium. Use the quickest way to remove hard water build-up in your dishwasher to dissolve that grit first. Lubricant will not help if it is just sitting on top of a layer of sandpaper-like mineral deposits.
Selecting a Safe Lubricant That Will Not Poison Your Plates
You have to be extremely picky here. The inside of your dishwasher reaches temperatures over 150 degrees Fahrenheit. Standard petroleum jellies or WD-40 will liquefy, drip onto your heating element, and fill your house with toxic-smelling smoke. You need 100% food-grade silicone grease, often sold as plumber’s grease or keg lubricant. It is waterproof, heat-resistant, and will not wash away in the first cycle. If you are unsure which specific parts are acting up, consult my dishwasher parts a comprehensive guide to diy diagnostics to differentiate between a bad wheel and a warped track.
Apply Grease to the Hubs and Tracks
Take a pea-sized amount of the silicone grease on your fingertip or a cotton swab. Do not just glob it onto the wheel; you want to focus on the hub or the axle where the wheel rotates. Spin the wheel by hand to work the grease into the center. If you have the slide-out metal rails, apply a very thin film along the inside of the channel where the bearings live. This also helps if you are trying to figure out how to fix a dishwasher that is too loud, as grinding metal tracks are a common source of high-pitched squealing.
Inspect the Supports and Rollers for Flat Spots
While the racks are out, look at each wheel individually. If a wheel has a flat spot, no amount of grease will make it roll smoothly. This happens when a wheel gets stuck and is dragged across the track for months. In those cases, you are better off replacing the wheel assembly or even replacing the upper spray arm support in a modern dishwasher if the entire housing is sagging. I remember helping a neighbor who thought her rack was cursed because it would only slide halfway. It turned out one wheel was completely melted from being too close to the heating element. Always check that your rack has not bent downward over time. Before you slide everything back in, take a second to use the best way to clean a greasy dishwasher filter so the entire system is running as cleanly as it is smoothly.
Most people think that if they see a bright orange glow inside their gas oven, the igniter is working perfectly fine. I am here to tell you that this is the most common diagnostic lie in the industry. It is a trap that leads homeowners to waste hundreds of dollars on control boards or gas valves they do not actually need. In my years of tinkering, I have learned that a component can look like it is performing its job while being fundamentally broken on a molecular level. This is exactly why your gas oven isnt heating even though the igniter glows; the component is drawing enough power to create light, but not enough amperage to trigger the safety valve to release gas.
Stop Trusting the Glow in Your Gas Oven
Everyone says that as long as you see heat, the igniter is fine, but in my experience, amperage is the only thing that matters. A weakened igniter is like a flashlight with dying batteries—it still produces light, but it is not strong enough to cut through the dark. If you are just guessing, you might end up pinpointing faults incorrectly and replacing the wrong part. According to technical data from Intertek, a leading quality assurance provider, gas igniters must reach a specific current threshold—typically between 3.2 to 3.6 amps—to open the gas valve. If yours is only hitting 2.8, it will glow beautifully, but your oven will stay stone cold. This is the ultimate ‘oops’ factor: assuming visual cues are sufficient for electrical diagnostics.
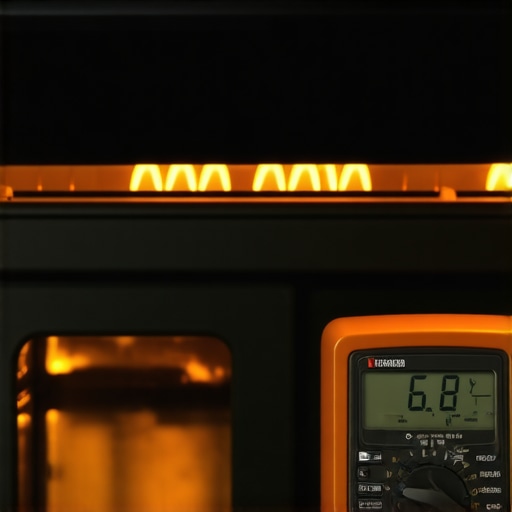
Before you start ordering parts, you need to verify the component with a tool, not just your eyes. I highly recommend learning how to test a gas oven igniter with a multimeter before you give up on the appliance entirely. Have you ever fallen into this trap where you replaced a part that looked fine, only to realize the problem was something else? Let me know in the comments. It happens to the best of us, but a little bit of data goes a long way toward saving your sanity and your wallet.
Why Does My Oven Glow Bright Red but Still Stay Cold?
This is the nuanced question that separates the DIYers from the experts. The issue is usually a resistance shift within the carborundum or silicon carbide material of the igniter. As it ages, it resists the flow of electricity more aggressively. While it still gets hot enough to glow, it fails to allow enough current to pass through to the series-wired gas valve. You can verify this by testing the resistance of an oven igniter directly. If the ohms are out of spec, the part is junk, regardless of how bright it shines. The same principle applies to sensors; if you suspect the heat is fluctuating, you should check for signs your oven temperature sensor is inaccurate. Often, the sensor is simply coated in grease or has a loose connection rather than being truly dead. Mastering these small distinctions will save you from the cycle of frustration that usually ends with a trip to the appliance store.
If you want to move beyond the ‘guess and check’ method that drains your bank account, you need to arm yourself with a decent digital multimeter. I personally swear by the Fluke 117 because it offers a low impedance mode that prevents ghost voltages from lying to you, which is critical when testing an oven temperature sensor. Cheap hardware store meters often jump around too much, making it impossible to tell if a reading of 1080 ohms is steady or failing. Beyond the meter, your toolbox isn’t complete without a set of hollow-shaft magnetic nut drivers. These are non-negotiable for me. I can’t tell you how many times a magnetic tip has saved me from the nightmare of dropping a screw into the bottom of a dishwasher’s sump. When you are fighting years of calcification, you specifically need the correct tool for removing a rusted dishwasher heating element nut, because using a standard adjustable wrench is the fastest way to crack the plastic tub.
How can I maintain my appliances to avoid these headaches?
Maintenance is less about a once-a-year scrub and more about developing an ear for the machine’s ‘normal’ rhythm. Every six months, I perform a ‘health check’ on my main units. I’m looking for subtle signs like is your oven control board failing—things like a slightly dimmer display or a relay that clicks three times instead of once. We are rapidly moving toward an era of ‘predictive maintenance’ where your appliances will likely text your phone before a part actually dies. Manufacturers like Bosch and GE are already integrating Wi-Fi modules that track cycle counts and component wear. Until that tech is standard in every home, you have to be the brains of the operation. You should be able to spend ten minutes identifying the difference between a faulty oven sensor and a bad board so you aren’t tempted to toss a perfectly good stove just because it’s throwing an ambiguous error code.According to official GE technical service manuals, a huge percentage of control board replacements are unnecessary because the real issue was a loose ground wire or a dirty connector. This is where your attention to detail pays off. If you hit a wall and the symptoms don’t make sense, you can always contact us with your model number and I’ll help you dig through the schematics. My challenge to you today: don’t wait for your oven to fail during a holiday meal. Grab a multimeter and check the resistance on your bake element and sensor tonight. It is the single best way to ensure you actually understand the health of your kitchen.
Lessons My Toolbag Taught Me About Persistent Appliances
Over the years, I have realized that the most common mistake is trying to ‘force’ a fix. If a rack isn’t sliding, yanking it only leads to repairing a peeling dishwasher rack later because the vinyl coating finally gave up. Cleanliness is also a form of repair; applying high-end grease over old food particles just creates a grinding paste that destroys your rollers faster. Furthermore, I have learned that the ‘glow’ of an igniter is the most deceptive signal in your kitchen. If you find why your gas oven isnt heating even though the igniter glows, you realize that electricity behaves more like water pressure than a simple on-off switch. Never assume a part is good just because it looks active. Finally, keep a notebook. Every time you find a solution using my dishwasher parts a comprehensive guide to diy diagnostics, write down the model number and the specific tool you used. Your future self will thank you for the shortcut.
The Minimalist Kit for DIY Kitchen Diagnostics
You do not need a van full of tools to maintain your home, but you do need the right ones. First, a reliable multimeter is non-negotiable for oven repair essentials troubleshooting common issues with parts. It turns expensive guesswork into a five-minute data point. Second, keep a tube of NSF-certified food-grade silicone grease in your junk drawer; it is the only thing safe enough for your dishwasher tracks. Third, use your smartphone as a diagnostic tool. Take high-resolution photos of wiring harnesses before you unplug anything. If you ever get stuck or the photos don’t make sense, you can always contact us to help walk you through the trickier schematics. These simple additions to your routine make the difference between a successful fix and a weekend without a working stove.
Your Path to a Frustration-Free Kitchen Starts Today
Repairing your own appliances is about more than just saving a few hundred dollars on a service call. It is about the confidence that comes from knowing exactly how your home functions. Whether you are swapping out a wheel or mastering pinpointing faults before calling a repair expert, every small victory adds up to a more reliable kitchen. Do not let a minor mechanical glitch or a deceptive igniter glow ruin your evening. You have the tools and the knowledge to take charge. Have you ever been fooled by an igniter that glowed but refused to light the oven? I would love to hear your story in the comments below.