I remember standing in my kitchen last Thanksgiving, pulling out ‘clean’ wine glasses that looked like they had been frosted with spray-on snow. It was embarrassing. My sister-in-law politely asked if the dishwasher was broken. I felt that heat in my face—the kind where you want to kick the appliance through the wall. I spent months thinking I just needed better pods, but it did not matter what I bought. My machine was not broken; it was just choking on minerals. Hard water is a silent killer for appliances, and if you are seeing that white haze, your machine is already struggling to breathe. Today, I am going to show you how to blast that gunk out in record time so you can stop hand-washing ‘clean’ dishes.
Stop Blaming Your Detergent and Start Looking at the Scale
When I first noticed the grit, I made the classic rookie mistake of doubling the soap. I even went as far as replacing the dishwasher soap dispenser assembly because I thought the door was failing to release the pod. It was a total waste of thirty bucks and an hour of my life. The real culprit was the calcium and magnesium in my water supply, which creates a rock-hard crust inside the spray arms and on the heating element. You might notice why your dishwasher leaves a chalky film on all your dishes, and trust me, no amount of ‘ultra-strength’ soap can cut through that. According to the U.S. Geological Survey, roughly 85% of American homes have hard water, making this a near-universal headache for homeowners. If you don’t act, you’ll eventually find yourself clearing a hard water clog in your dishwasher inlet valve just to get the thing to fill up.
Is a simple vinegar rinse actually enough to fix this?
Most people think they need expensive, harsh chemicals, but I have found that a targeted approach works faster and cheaper. You have to get to the source of the blockage. For instance, I once ignored the spray arms for so long that they stopped spinning entirely. I spent an afternoon clearing hard water deposits from dishwasher interior walls and poking gunk out of the tiny nozzles with a toothpick. It was a wake-up call. Have you ever pulled out a plate and felt that weird, sandy grit under your thumb despite a two-hour cycle? Let me know if you are currently fighting the ‘white film war’ in your kitchen. We are going to fix it right now without calling a repairman.
Clear the Path for Water Flow
You cannot expect the machine to wash dishes if the water cannot actually hit them. I used to think the spray arms were just there for show, but they are actually precision instruments. Last summer, I noticed my bottom rack was coming out filthy while the top was okay. I pulled the bottom arm out and realized half the holes were plugged with what looked like tiny white pebbles. If you find your dishwasher bottom spray arm isn’t spinning, it is usually because these deposits have weighted it down or blocked the jets entirely. Use a needle or a small wire to poke out every single hole. It is tedious, but it saves you from buying new dishwasher parts prematurely. 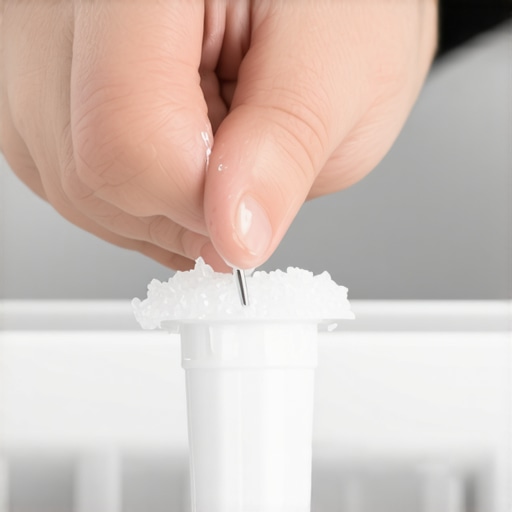
Heat is Your Best Friend Against Scale
Minerals love to cling to cold surfaces, but they really bake onto the heating element. I once had a cycle that took three hours and the dishes were still soaking wet and covered in spots. I finally decided to test a dishwasher heating element for a short because I suspected it was not getting hot enough to activate the detergent. If the water stays lukewarm, the calcium just settles like dust. A quick tip: run the kitchen sink until the water is hot before you hit start on the dishwasher. This ensures the first fill is already at a temperature where minerals are less likely to bond to your plates. If your machine is making a strange noise during this phase, you might be hearing the real reason your dishwasher sounds like it is grinding rocks—those are literally chunks of scale being tossed around by the pump.
The Hidden Gateway You Are Probably Ignoring
If your machine is taking forever to fill or not filling at all, the problem is not the tub; it is the door to the tub. The inlet valve has a tiny screen designed to catch sediment, but hard water turns that screen into a solid wall of crust. I remember a Saturday morning spent hunched over on the floor, thinking I needed a whole new machine, only to find a cheap valve was the issue. Learning how to clear a hard water clog in your dishwasher inlet valve is the single most effective way to restore the pressure needed to blast away film. Without enough water pressure, the detergent just sits in the dispenser, leading to that annoying scenario why your dishwasher pod is still in the dispenser after a wash.
The Vinegar Deep Soak Method
Forget just spraying stuff. You need a concentrated attack. Place a dishwasher-safe bowl filled with two cups of white vinegar on the top rack, upright. Run a heavy-duty cycle with NO detergent. The vinegar will slowly release as the water splashes into the bowl, creating a consistent acidic environment that eats through the calcium on the walls and the racks. I did this after a month of ignoring a sandy texture on my plates, and the difference was night and day. The interior went from a dull, chalky grey back to that shiny stainless steel look it had when it was new.
Vinegar Isn’t Always the Hero You Think It Is
While that vinegar soak I mentioned earlier is a fantastic first line of defense, I have to be honest with you: it is not a magic wand. A common myth among homeowners is that if an appliance isn’t performing, you just need more acid to melt the minerals. In my experience, relying too heavily on vinegar can lead you to ignore mechanical red flags that are staring you in the face. Sometimes the white film isn’t just hard water; it is a sign that you need to be identifying dishwasher faults quickly before they cascade into a flooded kitchen. If the film persists after two vinegar cycles, stop pouring the salad dressing in and start looking at the hardware. You might actually be dealing with a failing motor or a compromised seal. I once spent an entire weekend descaling a machine only to find I was actually testing your dishwashers circulation pump for continuity because the impeller was physically stuck. Have you ever fallen into this trap of over-cleaning a broken part? Let me know in the comments.
Can an Igniter Still Fail if It’s Glowing Bright Orange?
This is the ultimate ‘nuance’ question for gas oven owners. Most people think that if they see a glow, the igniter is fine and the problem must be the gas valve or the control board. That is a massive misconception. A gas igniter can glow beautifully and still be completely useless. According to data from the Association of Home Appliance Manufacturers (AHAM), igniters are one of the most frequently replaced components because they ‘weaken’ over time. They might glow, but they fail to pull the specific amperage—usually between 3.2 and 3.6 amps—required to signal the safety valve to release gas. If you are stuck wondering why your gas oven igniter glows but doesn’t light, you are likely looking at an igniter that has lost its resistance but hasn’t fully snapped yet. 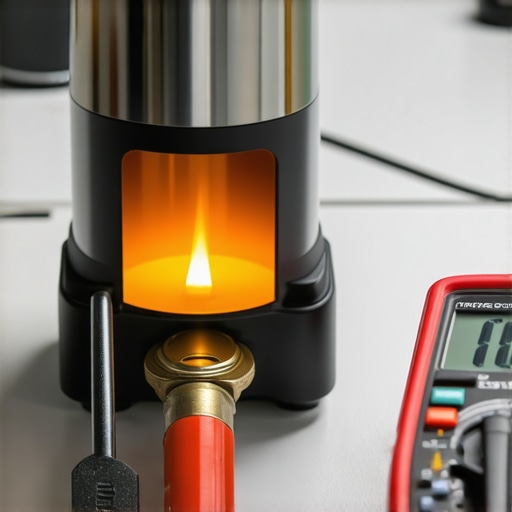
Stop Over-Tightening Your Appliance Hardware
One of the most expensive ‘oops’ factors I see with DIYers involves the simple act of putting things back together. We have this instinct to crank down on every screw to prevent leaks, but with modern appliances, that is a recipe for disaster. When you are troubleshooting common oven issues, you’ll often find yourself removing the door or the control panel. If you over-tighten the screws on the glass, the heat expansion during a 400-degree bake can actually cause the tempered glass to shatter. The same applies to dishwasher parts; over-tightening a plastic mounting bracket will cause it to hairline crack, leading to a slow drip you won’t notice until your subfloor is rotted. Always aim for ‘snug plus a quarter turn,’ especially when dealing with plastic-to-metal connections. If you’re currently pinpointing faults before calling a repair expert, remember that finesse is usually better than force. For instance, if you suspect the brains of the operation are wonky, you should be checking for oven control board failing symptoms rather than just yanking on wires. Before you replace the most expensive part you can find, consider testing an oven bake element for invisible cracks. These tiny fissures often hide behind the mounting plates and can cause intermittent heating issues that drive you crazy.
The Three Tools That Saved My Sanity
I used to try fixing everything with a butter knife and a prayer, but that is how you end up with stripped screws and a kitchen floor full of water. If you are serious about maintaining your gear, you need a digital multimeter. This is the holy grail for identifying dishwasher faults quickly. I personally use a Klein Tools MM400 because it is rugged enough to survive a drop onto tile and accurate enough to tell me exactly why a component is drawing too much juice. Without one, you are just guessing, and guessing gets expensive. Along with a good meter, I keep a set of long-reach dental picks. They are perfect for snagging debris out of the tiny holes in your spray arms or fishing out a stray piece of glass from the drain. I have saved hundreds in repair fees just by being able to see what I am doing and having the right reach. If you ever feel like you are in over your head, though, knowing when to stop diying and call an oven repair expert is just as important as having a toolbox. Sometimes the logic board is the limit of what a weekend warrior should handle.
How do I keep my kitchen running without a weekly crisis?
Maintenance is not a once-a-year event; it is a habit. I have a ‘first of the month’ ritual where I pull the bottom rack out of the dishwasher and spend five minutes how to clean your dishwashers hidden sump filter. Most people do not even know that filter exists until the machine starts smelling like a swamp. For the oven, I do a visual check of the wiring at the back. According to the GE Technical Service Manual for wall ovens, a variance of more than 10% in resistance on a thermal sensor is a guaranteed sign of upcoming failure. This is why I also take a moment to be how to check for a burnt terminal block on your electric oven. If you see discoloration on those wires, you are looking at a fire hazard, not just a baking issue. Clean connections are the difference between an oven that lasts ten years and one that dies in four. 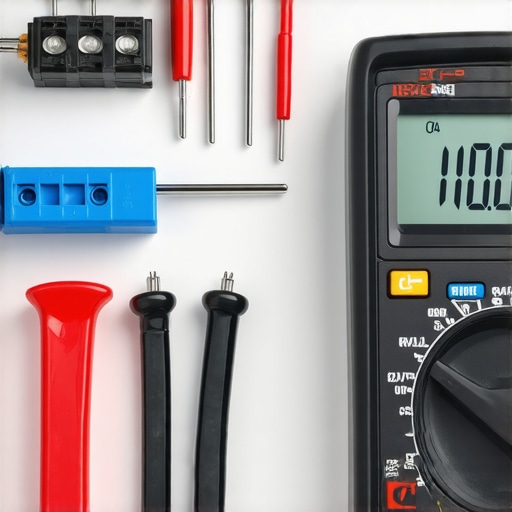
The Future of Smart Diagnostics is Almost Here
I predict that within the next five years, we will stop doing manual ‘diagnostics’ entirely. We are moving toward a world of predictive maintenance where your dishwasher will send a push notification to your phone saying, ‘Hey, my pump impeller is 15% slower than it was last month; order a replacement now.’ We are already seeing this in high-end European models that use turbidity sensors to adjust water usage on the fly. While the tech is cool, it makes the hardware more complex. That means your mechanical skills—like knowing how to turn a wrench or check a fuse—will actually become *more* valuable because the sensors themselves will eventually fail. I have seen ‘smart’ ovens throw error codes just because a steam vent was slightly blocked. You will still need to know the basics to keep the robots in line. Before you go, I want you to try one thing: grab a cheap oven thermometer and use the fast way to recalibrate your oven for accurate temperatures. You might find your ‘bad recipes’ were actually just a calibration error all along.
Hard-Earned Lessons from My Kitchen Floor
One of the biggest shifts in my perspective happened when I realized that a working part is not always a healthy part. Just because your igniter is glowing does not mean it is actually functioning, which is exactly why your gas oven igniter glows but doesn’t light in many cases. Another lesson? Stop treating every screw like it needs to hold up a bridge. I have seen more cracked housings and stripped threads from over-enthusiastic tightening than from actual mechanical wear and tear. If you are currently securing rattling oven door glass, remember that heat causes metal and glass to expand at different rates; give the hardware some room to breathe. Finally, trust your senses but verify with data. If the machine sounds like it is grinding rocks, it probably is, but do not just guess which bearing is gone—get a meter and prove your theory before spending a dime.
The Small Gear That Stops Big Repair Bills
To avoid becoming a parts cannon—someone who just throws new components at a machine hoping one fixes the issue—I rely on a few specific tools and habits. First, a high-quality digital multimeter is non-negotiable for identifying dishwasher faults quickly. It turns a guessing game into a hard science. Second, keep a dedicated appliance log in your kitchen junk drawer. Noting the date you last cleaned the sump filter or replaced a gasket helps you spot failure patterns before they become floods. Lastly, I always keep a copy of the specific service manual for my model bookmarked on my phone. Generic internet videos are great for general advice, but the manufacturer specific resistance specs are what you actually need for real oven diagnostics. Using the right dishwasher parts starts with knowing exactly what is broken.
Stop Paying the I Do Not Know Tax
At the end of the day, your home is your biggest investment, and your appliances are the heartbeat of its daily function. Whether you are tackling a complex oven repair or simply hunting down the right dishwasher parts, the goal is always the same: confidence. You do not have to be a master technician to keep your kitchen running smoothly; you just need the willingness to look a little deeper than the white film on the surface. By mastering oven repair essentials and staying on top of mineral buildup, you are not just saving money—you are taking back control of your home from the cycle of planned obsolescence. Have you ever spent a fortune on a professional repair only to realize it was a simple five dollar fix you could have done yourself? Let me know your biggest win or oops moment in the comments below!