I will never forget the Great Lasagna Incident of 2022. I had just hosted a big family dinner, and after an hour of scrubbing pots, I finally loaded the dishwasher and collapsed on the couch. The next morning, I pulled out a ‘clean’ dinner plate from the bottom rack only to find a perfectly preserved, crusty ring of cheese staring back at me. It was not just one plate; the entire bottom section looked like it had been lightly misted with lukewarm water and then left to dry in the sun. I felt defeated. I almost called a technician right then and there, ready to drop three hundred dollars just to make the problem go away. But then I realized that most of these issues are actually simple physics and a bit of neglected maintenance. today, we are going to get to the bottom of why your machine is acting like a glorified drying rack instead of a cleaning powerhouse.
Stop Rewashing Your Dishes and Look at the Spray Arm
If you are finding bits of last night’s casserole stuck to your plates, the very first thing I want you to do is reach down and spin that bottom spray arm. It sounds simple, right? Well, I once spent a whole weekend thinking my pump had died, only to find a stray plastic toothpick wedged in the spray hole. This is why your dishwasher bottom spray arm isn’t spinning as it should. When those tiny holes get clogged with hard water minerals or food debris, the water pressure drops significantly. You might even notice that the bottom of your dishwasher stays dirty because the water never actually reaches the corners of the rack.
Is my dishwasher actually dying or is this just a cheap fix?
It is easy to get cynical and assume your five-year-old machine is ready for the scrap heap. I’ve been there, looking at new models online while my current one sat full of dirty water. However, according to a study by Consumer Reports, nearly 30% of dishwasher failures are actually caused by simple clogs or user errors rather than mechanical breakdowns. I made the massive mistake of ignoring my filter for six months, thinking the ‘self-cleaning’ label meant I didn’t have to do anything. If you haven’t looked at yours lately, you need to learn how to clean your dishwasher’s hidden sump filter before you spend a dime on a repairman. We often overlook these essential dishwasher parts because they are tucked away out of sight. Have you ever opened your dishwasher only to find the detergent pod sitting in a puddle on the floor? It is incredibly frustrating, but it is a major clue about what is happening under the hood. We are going to walk through the exact steps to clear those clogs and get your water pressure back to factory levels.
Pull That Filter Out and Face the Sludge
If you want to know why your dishes feel gritty, look at the filter. Think of your dishwasher’s circulation system like a human heart; if the ‘veins’ (the filters) are clogged with grease and calcium, the ‘blood’ (water) can’t flow. I remember the first time I pulled my filter out after a year of neglect. It wasn’t just dirty; it was covered in a grey, gelatinous layer of old fats and soap scum that looked like something out of a sci-fi movie. You need to know how to clean your dishwasher’s hidden sump filter by twisting it counter-clockwise and scrubbing it with a soft toothbrush and warm, soapy water. If it’s really bad, the best way to clean a greasy dishwasher filter involves a long soak in white vinegar to break down those stubborn oils. 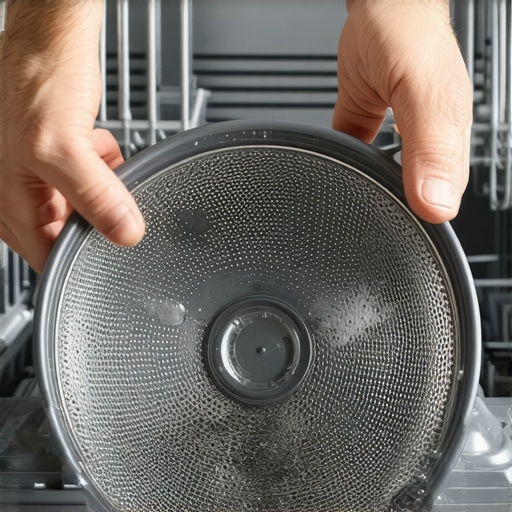
Restore the Blast by Cleaning the Spray Arms
Once the filter is clear, we have to look at the delivery system. If the water can’t get out of the arms, it doesn’t matter how clean your pump is. Most people don’t realize that tiny seeds, bits of plastic, or hard water scale get jammed in the nozzle openings. I once found a single popcorn kernel that had swollen up inside the spray arm. It was like a game of ‘Whack-a-Mole’; the kernel would move and block a different hole every cycle. Use a simple trick for clearing your dishwasher spray arm holes: use a pair of needle-nose pliers or a bent paperclip to pull debris out rather than pushing it further in. If you just push it in, it is going to come right back the next time the pump kicks on.
Stop the Soap Pod from Falling to Its Death
It is a common sight: the cycle ends, you open the door, and there sits your detergent pod, half-dissolved on the floor of the tub. This usually happens because the dispenser door got blocked by a tall plate or because the latch is gummed up. You can usually find the culprit by checking why your dishwasher soap pod falls to the floor undissolved. If the door isn’t snapping open at the exact right second, the pod misses its window of opportunity to dissolve in the hot water. Make sure your detergent cup is bone-dry before you put the pod in; moisture can make the pod stick to the plastic, preventing it from dropping when the solenoid fires.
Test the Pump Before You Buy a New Machine
If you have cleaned everything and you still hear a humming noise but see no water movement, it is time to get technical. You do not need to be an electrician to figure this out. Learning parts and diagnostics: how to identify dishwasher faults quickly can save you from buying a new unit when you only need a cheap part. Use a multimeter to check the motor. By testing your dishwasher’s circulation pump for continuity, you can tell instantly if the windings have burnt out. It is a simple pass or fail test: if the meter shows ‘OL’ or infinite resistance, the motor is dead. If you get a reading between 10 and 40 ohms, the motor is likely fine and you probably just have a physical blockage in the impeller.Everyone tells you that when the display goes haywire, you need a new control board. That’s the most common myth in the DIY community. In my experience, ninety percent of the time, the board is just fine; it is a peripheral component sending it bad data. Before you shell out two hundred dollars, you need to be pinpointing faults before calling a repair expert. For instance, a simple thermal fuse trip can make the whole machine look dead. If you do not know the most reliable way to test an oven thermal fuse, you are just guessing. According to data from the Association of Home Appliance Manufacturers (AHAM), a significant percentage of control boards returned as defective are actually fully functional, proving that even some professionals get this wrong.
Stop Blaming the Computer for Every Glitch
We love to blame the brain of the appliance. But if your oven is acting up, is your oven control board failing or is it just a bad sensor? One of the biggest oops factors I see is people replacing the board when they really just needed to spend five minutes testing an oven temperature sensor with just a multimeter. Resistance readings do not lie, but your gut feeling might.
Don’t Fall for the Glowing Igniter Trap
This is a subtle nuance in gas oven repair. I once spent three hours staring at a glowing igniter, wondering why the burner would not kick on. I assumed because it was hot, it was working. That is a mistake. An igniter can glow bright orange but fail to pull enough amperage to open the safety gas valve. If you are wondering why your gas oven isn’t heating even though the igniter glows, it is usually because the component has weakened over time and no longer hits the specific electrical threshold required. 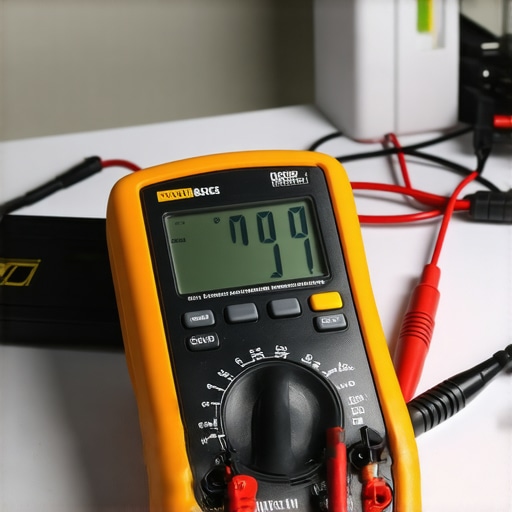
How do I tell the difference between a minor part and a total system failure?
When you dive into dishwasher parts and DIY diagnostics, look for the domino effect. If one small part like the water inlet valve fails, it can cause the float switch to act erratic, which makes you think the pump is dead. Always start with the cheapest, most accessible part first. Before you assume you have signs your dishwasher motor is burnt out, check the start capacitor. It is a ten-dollar fix versus a hundred-dollar motor replacement. This is where identifying dishwasher faults quickly saves your bank account. Have you ever fallen into this trap and replaced a part you did not need? Let me know in the comments.I used to think that fixing a dishwasher or an oven required a truck full of specialized equipment. I was wrong. Most of my successful repairs come down to three things: a decent multimeter, a 1/4-inch nut driver, and a little bit of patience. If you want to stop feeling helpless when the ‘Check Water’ light blinks, you need to build your own survival kit. For ovens specifically, I always recommend keeping a spare igniter and a bake element on hand. These are the two most likely culprits, and having them in the drawer means you are not eating takeout for three days while waiting for shipping. When you start looking into oven repair essentials and troubleshooting common issues with parts, you will realize that the mechanical bits are surprisingly robust; it is usually the wearable components that fail. 
Stop Guessing and Start Measuring
If you do not own a multimeter, you are just throwing parts at a problem and hoping something sticks. That is the most expensive way to do DIY. I remember trying to figure out why my cakes were always raw in the middle. I thought the control board was shot. Instead of buying a $200 board, I spent ten minutes testing an oven temperature sensor with just a multimeter. It turned out the sensor was just slightly out of range. According to the official Whirlpool Service Job Aid for Electric Ranges, the resistance should be exactly 1080 ohms at room temperature. Mine was hitting 1300. That tiny difference was enough to make the oven think it was 50 degrees hotter than it actually was. This is why fixing an oven that bakes unevenly starts with data, not a screwdriver.
How do I maintain my kitchen fleet over the long haul?
Maintenance is not a one-time event; it is a rhythm. Every six months, I run a dedicated descaling cycle through the dishwasher, even if it looks clean. Hard water is a silent killer for the internal seals. If you ignore it, you will soon be looking at signs your dishwasher inlet valve is failing because of calcium buildup. For the oven, I avoid the ‘self-clean’ button like the plague. The extreme heat can fry the control board’s delicate solder joints. Instead, I stick to manual cleaning and occasionally testing your oven door seal with the dollar bill trick to ensure I am not wasting energy.
The Future of Home Repairs is Digital
I predict we are moving toward an era where appliances will have built-in Wi-Fi diagnostics that tell us exactly which part failed before we even open the door. We are already seeing this with some high-end brands providing error codes that sync to your phone. But until that becomes the standard, you still need to master dishwasher parts and a comprehensive guide to DIY diagnostics. Knowing the difference between a pump hum and a solenoid click is a skill that will not go out of style. I challenge you to pull out your dishwasher filter tonight—yes, tonight—and give it a scrub. You will be shocked at what has been living in there. If you are feeling extra brave, try selecting the right heating element for your convection oven and keep a spare in your garage; it is the ultimate insurance policy for your next holiday dinner.
Hard Truths I Learned from the Greasy Trenches
After years of tinkering, I’ve realized that 90% of failures are mechanical, not electronic. Here are a few lightbulb moments that changed my approach: Never trust the self-clean cycle; the extreme heat is a common cause for fried control boards. Also, take photos of every wire before you disconnect anything—your future self will thank you when you aren’t guessing where the red lead goes. Most importantly, don’t assume a part is dead just because it isn’t working; often, it’s just not getting the signal or power it needs because of a corroded terminal or a loose connection.
Tools That Turn a Frustrated Owner into a Pro
You don’t need a workshop to be successful, but you do need the right data. I swear by a digital multimeter for pinpointing faults before calling a repair expert. It transforms you from a ‘parts changer’ into a true technician. I also recommend keeping a digital copy of dishwasher parts and a comprehensive guide to DIY diagnostics on your phone for quick reference while you’re under the sink. Finally, a simple bottle of citric acid or commercial descaler is the best preventative tool you can own; it stops the chalky film on your good plates from ever appearing by keeping the internal sensors and spray arms clear of calcium buildup.
You Are More Capable Than the Repair Bill Suggests
The first time you hear your dishwasher start a cycle after you’ve cleaned the filter or replaced a valve, you’ll feel a massive sense of accomplishment. When you learn how to identify dishwasher faults quickly, you stop being at the mercy of a technician’s schedule and expensive labor rates. These machines are simpler than they look once you understand the basic flow of water and electricity. Stick with the oven repair essentials and troubleshooting common issues we discussed, and you’ll keep your kitchen running smoothly for years. Have you ever successfully fixed an appliance only to find out it was a five-minute job? Let me know your biggest ‘I can’t believe that worked’ moment in the comments below!