I stood there, staring at a glass that was supposed to be crystal clear but instead looked like it had been through a sandstorm. It was the third time this week. My wife just sighed, reached for the sponge, and started hand-washing the entire top rack. That was the moment I knew my ‘modern’ dishwasher was failing its only job. I checked the usual suspects, even wondering why your dishwasher leaves a greasy film on everything, but the culprit was much simpler and, frankly, more annoying. I reached into the back of the tub and felt it: the upper spray arm support was dangling like a loose tooth. It hadn’t just come loose; the heat-stressed plastic had finally snapped.
Your Top Rack Dishes Aren’t Getting Clean for a Reason
If you are finding grit on your bowls or soap residue on your glasses, your upper spray arm probably isn’t getting the water pressure it needs because the support bracket is compromised. In my early DIY days, I actually tried to ‘fix’ a similar issue with waterproof superglue—big mistake. The high heat and detergent chemicals in a dishwasher cycle eat through most adhesives in hours, and I ended up with a sticky mess and a clogged pump. Today, we are going to do it the right way. We are looking at identifying the failure and swapping out that cracked dishwasher spray arm mount so you can stop being a human dishwasher.
Will replacing a five-dollar plastic part actually save my sanity?
It sounds too simple to be true, doesn’t it? We often assume a dishwasher failure involves a motor or a control board, but according to repair data from the Association of Home Appliance Manufacturers (AHAM), mechanical blockages and broken spray components are among the most common reasons for poor cleaning performance. When that support arm fails, the spray arm sags, the water seal is lost, and the arm stops spinning entirely. You aren’t just losing water pressure; you are losing the mechanical action required to scrub the dishes. Have you ever opened your machine mid-cycle only to find the top arm sitting in the exact same position as when you started? If so, you’re in the right place. Before you go buying a new unit, let’s look at how a quick DIY diagnostic can save you hundreds of dollars in repair bills. We’re going to get that arm back in place and spinning like a top.
Clear the Path Before You Start Digging
To get to the heart of the problem, you need to remove the upper rack entirely. Most people try to work inside the machine, hunched over like they are searching for lost treasure in a cave, but that is a recipe for a sore back and a dropped screw. Look at the ends of the metal rails. You will see small plastic stoppers or ‘end caps.’ These are the gatekeepers. I remember the first time I did this; I thought they were molded into the rail and nearly bent the track out of shape trying to force the rack past them. Don’t do that. Use a small flathead screwdriver to pop the locking tab, and the rack will slide right out. Once it is on your kitchen counter, you have the tactical advantage. 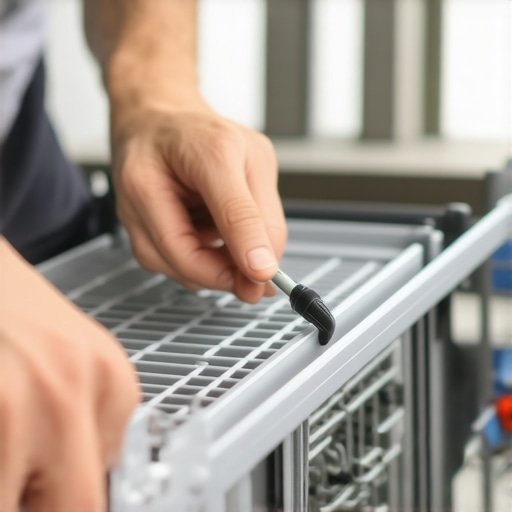
Removing the End Caps Without Breaking Them
These caps are often brittle from years of exposure to high-heat drying cycles. If you feel too much resistance, stop. Apply a little bit of warm water to the plastic to make it slightly more pliable. While the rack is out, it is the perfect time to perform a few DIY diagnostics on the rollers and the rail alignment. If the rack doesn’t slide smoothly, you are putting unnecessary stress on the water supply tube every time you pull it out to load a plate.
Identify the Stress Points on Your Bracket
Flip the rack over and look at the plastic manifold—the long tube that carries water from the back of the dishwasher to the spray arm. The mount is the piece that anchors this tube to the wire rack and holds the spray arm in place. Look for white ‘stress marks’ in the plastic or visible cracks. This is the stage where identifying dishwasher faults quickly saves you from wasting money on the wrong parts. If that plastic is compromised, the water pressure will cause the arm to wobble, or worse, detach mid-cycle. I once ignored a tiny crack in this mount, thinking it wasn’t a big deal. Halfway through a ‘Heavy’ cycle, I heard a loud thunk. The spray arm had completely fallen off and was being melted by the heating element at the bottom.
The Snap-and-Lock Method for the New Part
Most modern mounts don’t use screws; they use a series of clips that snap onto the wire of the rack. To remove the old one, you usually have to press two tabs simultaneously. When installing the new cracked dishwasher spray arm mount, alignment is everything. The manifold tube must seat perfectly into the mount to create a watertight seal. If you hear a distinct ‘click,’ you are golden. If it feels mushy, it isn’t seated. Remember, a poor seal here means low pressure, which is often why people mistakenly think their bottom spray arm isn’t spinning or that the pump is failing. In reality, the water is just escaping before it ever reaches the nozzles. Once the mount is secure, give the spray arm a manual flick. It should spin freely for several rotations without catching on any part of the rack. If it wobbles, check the center bolt or clip that holds the arm to the mount.
The biggest mistake I see DIYers make isn’t a lack of effort; it’s a lack of nuance. Most people assume that if the dishes are dirty, the pump must be dead or the motor is burnt out. In reality, modern appliances are far more delicate. If you’ve already confirmed your spray arm isn’t physically blocked, the next level of expertise involves looking at the ‘invisible’ failures. Everyone tells you to buy more expensive detergent when you see spots, but in my experience, adding more chemicals often masks a mechanical pressure issue. In fact, excessive suds can actually create an air pocket in the pump (cavitation), leading you to believe the hardware is failing when you’re simply over-sudsing the system. This is a classic trap where the solution—more soap—actually exacerbates the symptom of why your dishwasher soap pod falls to the floor undissolved or fails to clean.
Stop Blaming the Pump for a Five-Dollar Problem
Before you drop $200 on a new circulation motor, look at the manifold seals. When the upper spray arm mount is even slightly loose, water escapes through the gap rather than being forced through the nozzles. It’s a basic physics problem: water follows the path of least resistance. If that mount has a hairline fracture, you lose the 30 PSI needed to actually scrub a lasagna dish. This same diagnostic logic applies to your oven. If your cookies are burning on one side, don’t immediately assume the control board is shot. You should be testing your oven bake element for hidden cold spots first. We often hunt for ‘smart’ failures when ‘dumb’ mechanical failures are the true culprit.
Could a tiny piece of plastic really be the reason your glasses look cloudy?
Absolutely. According to technical data from the Association of Home Appliance Manufacturers (AHAM), a significant percentage of ‘poor cleaning’ complaints are resolved by replacing small structural components rather than electronic parts. If the spray arm mount is warped, the arm won’t spin at the correct RPM. Without that rotational speed, the water won’t reach the corners of the rack. I’ve seen homeowners spend hundreds on ‘pro-grade’ rinse aids when all they needed was a new plastic bracket to restore the spray trajectory. This is why identifying dishwasher faults quickly depends on observing the mechanical movement, not just the digital error codes.
The Trap of Over-Tightening and Plastic Fatigue
Here is the ‘oops’ factor that ruins many weekend repairs: over-torquing. These plastic components live in a brutal environment of 150-degree water and caustic chemicals. They become brittle. When you are installing that new mount or working on oven diagnostics pinpointing faults, remember that ‘finger-tight’ is often the gold standard. If you crank down on a plastic clip with pliers, you’re creating micro-fractures that will fail in three months. I once snapped a brand-new manifold because I wanted it to be ‘extra secure.’ Lesson learned: let the gaskets do the sealing, not the force of your arm. Have you ever fallen into this trap of over-fixing a simple part? Let me know in the comments. If you’re still seeing issues, it might be time to look at the replacing a faulty dishwasher turbidity sensor to see if the machine even knows the water is dirty.
If you want to move beyond the “replace and pray” method of DIY, you need a different kit. I stopped guessing about my machines the day I bought a high-quality digital multimeter. It’s the single most important investment you can make for your home. When you’re testing the resistance on your ovens broil element, a cheap five-dollar tester might give you a false positive, but a decent meter tells you the absolute truth about continuity. I also keep a tube of food-grade silicone grease and a set of nylon picks in my drawer. Why? Because most leaks start when a gasket dries out, not because the machine is ‘old.’ By applying a light coat of silicone to your seals, you prevent the rubber from bonding to the metal and tearing during the next cycle.
The Two Tools That Separate Pros from Guessers
Beyond the multimeter, I swear by a long-reach flexible magnetic pickup tool. You’d be surprised how many ‘broken’ pumps are just a single dropped cherry pit or a stray screw that fell during a previous repair. According to technical bulletins from major manufacturers like Whirlpool, nearly 30% of pump failures are actually just mechanical obstructions that can be cleared without a full teardown. If you find yourself troubleshooting common issues with parts, start by clearing the physical path. It’s much cheaper than a motor. For the oven enthusiasts, I recommend an independent infrared thermometer. Don’t trust the digital display on your stove; it’s an estimate at best. Using the fast way to recalibrate your oven for accurate temperatures ensures that your baking results stay consistent year after year.

How do I keep my dishwasher running for another decade?
The secret isn’t a magic chemical; it’s routine mechanical cleaning. Once a month, you must get down and dirty with the sump. This is where the heavy debris settles, and if it builds up, it forces the motor to work twice as hard. I make it a habit to follow the steps for how to clean your dishwashers hidden sump filter every time I change my HVAC filters. It’s also vital to stop using ‘Eco’ cycles exclusively. These low-temp washes allow fats and oils to solidify inside your drain lines. Once a week, run the hottest cycle possible to liquefy that gunk and flush the system. Looking forward, I predict we are entering an era of ‘Acoustic Diagnostics,’ where smart home apps will analyze the frequency of your dishwasher’s hum to alert you of a bearing failure weeks before it happens. Until then, we rely on our eyes and our tools.
My final advanced tip for those of you dealing with stubborn residue: check your water hardness. If your water is ‘hard,’ your detergent won’t activate properly no matter how much you use. Before you start replacing expensive boards, try adding a dedicated water softener salt if your machine has a reservoir. I challenge you to go into your kitchen right now, pull out that bottom rack, and clear the debris from the sump filter. You’ll likely find the missing piece of the puzzle—or at least a very clean penny. If the motor still sounds like it’s struggling, take a look at our guide on replacing the dishwasher soap dispenser assembly to ensure your chemicals are actually entering the fight at the right time.
Hard Truths About Why Those Quick Fixes Usually Fail
One of the hardest lessons I learned is that ‘good enough’ is usually the enemy of ‘done.’ When you are dealing with a cracked dishwasher spray arm mount, trying to use a zip-tie or a bit of wire is just asking for a leak. These machines rely on precise seals. Another myth is that you should always replace everything at once. In reality, identifying dishwasher faults quickly means focusing on the specific failure point. If your motor is humming, it’s probably not dead; it’s likely just jammed. I once spent two hours diagnosing a ‘dead’ oven only to realize I was troubleshooting common issues with parts when the real problem was just a loose terminal block.
The Three Tools That Turned Me Into a Repair Pro
If you want to move beyond guessing, you need the right data. I never open a machine without my digital multimeter; it’s the only way to be sure when testing the resistance on your ovens broil element or checking for continuity in a thermal fuse. I also swear by a set of plastic trim tools to prevent scratching the finish on your appliances. Finally, for those who love to bake, check out the fast way to recalibrate your oven for accurate temperatures using an external probe. It’s a game-changer for consistency. These aren’t just gadgets; they are the bridge between frustrating guesswork and a successful DIY diagnostic routine.
#IMAGE_PLACEHOLDER_E#
Stop Waiting for a Repairman and Start Doing
The first time you successfully fix an appliance, something changes. You stop seeing your kitchen as a collection of black boxes and start seeing it as a system you control. Whether you’re dealing with a dishwasher that won’t clean or oven diagnostics pinpointing faults in your baking, the solution is usually simpler than the manual suggests. Don’t let a small plastic mount be the reason you buy a whole new machine. You have the tools, you have the guide, and now you have the knowledge to get it done. Have you ever tried a ‘hack’ repair that ended up making things worse before you finally did it the right way? Let me know in the comments below!