I was standing in my kitchen at 10 PM on a Tuesday, feeling the cold, soapy water soak right through my socks. My dishwasher, usually a quiet workhorse, was acting like a fountain that forgot its off-switch. I’d just loaded it with the dinner plates and retreated to the couch, only to hear that rhythmic ‘glug-glug’ that sounds suspiciously like an expensive repair bill. I’ve been there, staring at a puddle and wondering if I should just throw the whole machine in the yard. But before you call an appliance tech or start browsing for a new model, take a deep breath. Most of the time, this isn’t a mechanical death sentence; it’s just a stubborn little plastic mushroom called the float switch that’s decided to play hooky. Today, I’m going to show you how to handle this yourself so you don’t end up like I did three years ago—paying a professional $150 just to watch him flick a piece of plastic with his finger. Let’s get that machine behaving again.
Stop Your Kitchen From Turning Into a Swimming Pool
When your dishwasher refuses to stop filling or, conversely, won’t even think about taking on water, the float switch is usually the primary suspect. I remember the first time I tried to tackle this. I was so convinced the water inlet valve was shot that I spent two hours diagnosing a fill issue that didn’t exist. I even bought parts I didn’t need! It turns out, a stray piece of kale had jammed the float in the ‘up’ position, telling the brain of the dishwasher that it was full when it was bone dry. If your machine is overflowing, the switch is likely stuck ‘down,’ failing to signal that it’s time to cut the water. It’s a simple mechanical failure that happens to the best of us. According to data from Consumer Reports, many appliance issues that seem catastrophic are actually just minor component clogs or obstructions.
Is this tiny plastic piece really worth the headache?
You might be thinking that a tiny piece of plastic couldn’t possibly be the root of such a mess. But that float is the only thing standing between a clean load of dishes and a flooded basement. It’s a simple circuit breaker. If you’ve noticed water overflowing onto the floor, checking the float is the absolute first step in your DIY diagnostics journey. Have you ever opened your dishwasher to find it half-full of water, or worse, discovered a leak after you thought the cycle was done? Tell me about your worst kitchen flood in the comments below—I need to know I’m not the only one who has turned their kitchen into a pond! Before we grab the screwdriver, let’s make sure we’re looking at the right part of the dishwasher’s internal anatomy so we don’t waste time on the wrong fix.
Cut the Power and Clear the Deck
First things first: pull the plug or flip the breaker. I cannot stress this enough. Water and electricity are a nasty combination, and since we’re heading under the machine where the wires live, you need to be safe. Once the power is dead, you’ll need to remove the kickplate—that’s the bottom panel near the floor. Most of the time, it’s just two screws holding it in place. When I first did this, I dropped one of those screws into the dark abyss under the cabinet and spent twenty minutes fishing it out with a magnet. Learn from my frustration and put those screws in a coffee mug the moment they come out.
How to Find the Hidden Switch Under Your Tub
Inside the dishwasher, you’ll see the float—it looks like a small plastic dome or mushroom. When the water level rises, this float acts like a buoy on the ocean. As it moves up, it triggers a metal lever underneath the tub. That lever hits a tiny microswitch that tells the dishwasher, “Hey, we’re full! Stop the water!” If you are identifying dishwasher faults quickly, you’ll want to reach under there and manually click that lever. If it doesn’t click, something is jammed. I once helped a neighbor whose dishwasher was constantly draining and never starting. It turned out a single stray toothpick had wedged itself into the lever assembly, keeping the switch engaged. 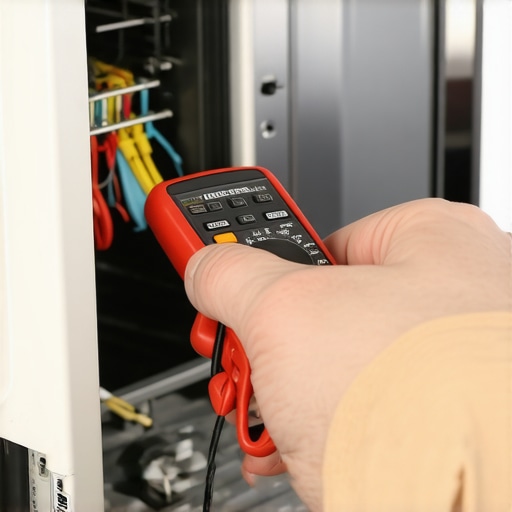
The Only Test That Actually Matters
If the float moves freely but your machine still behaves like it’s possessed, you need to check for electrical continuity. This sounds technical, but it’s really just checking if electricity can flow through the switch when it’s closed. You’ll need to unplug the two wires connected to the switch—take a photo first so you remember where they go!—and use a multimeter. This is the right way to inspect your dishwasher float switch without guessing. Set your meter to the Ohms setting (the symbol that looks like a little horseshoe).
Get Real Results with a Quick Meter Check
Press your meter probes to the switch terminals. When the switch is clicked “off,” you should see a reading of infinity (or O.L). When you click the switch “on,” the reading should drop to nearly zero. If the reading doesn’t change when you click the switch, the internal contacts are fried, and no amount of cleaning will save it. You’re looking at testing your dishwasher water level switch in 5 minutes to save yourself a $200 repair bill. I remember a time I skipped this test and replaced the whole water inlet valve, only to realize the $15 float switch was the culprit. It was a humbling—and expensive—lesson in why we always test the simplest part first. If your machine won’t stop filling with water, this little electrical check is your smoking gun.
Now, here is where most people get tripped up. They think a failed test on the float switch means the investigation is over. But there is a nuance most beginners miss: ghost voltage or high-resistance connections. Everyone tells you to just replace the part if the reading is slightly off, but in my experience, a simple cleaning of the spade terminals with a bit of fine-grit sandpaper works more often than you’d think. Before you rush to buy new dishwasher parts, remember that a ‘bad’ reading might just be a layer of oxidation blocking the signal.
The Sneaky Reason Your Control Board Isn’t Actually Dead
When it comes to oven diagnostics, there is a common impulse to blame the control board the moment the display goes dark or the heat fails. It is the most expensive component, so we naturally assume it is the ‘brain’ that has suffered a stroke. However, this is a classic trap. I’ve seen countless homeowners spend $300 on a new board when the most reliable way to test an oven thermal fuse would have pointed them to a $12 safety part instead. A report by the United Appliance Servicers Association highlights that nearly 30% of ‘dead’ appliances are actually just suffering from loose wiring or blown safety fuses rather than catastrophic motor or board failure. Always check the thermal circuit before you condemn the electronics.
Can a dirty sensor actually trick your dishwasher into quitting?
Absolutely. If your machine is leaving dishes covered in grit or the cycle ends prematurely, you might be tempted to replace the circulation pump. Wait! You might actually be replacing a faulty dishwasher turbidity sensor that isn’t actually broken—just blinded. This sensor ‘sees’ how much soil is in the water. If it’s coated in a film of calcium or grease, it thinks the water is perpetually clean (or dirty, depending on the model) and cuts the cycle short or skips the rinse. Before swapping parts, try a deep clean of the internal sensors. 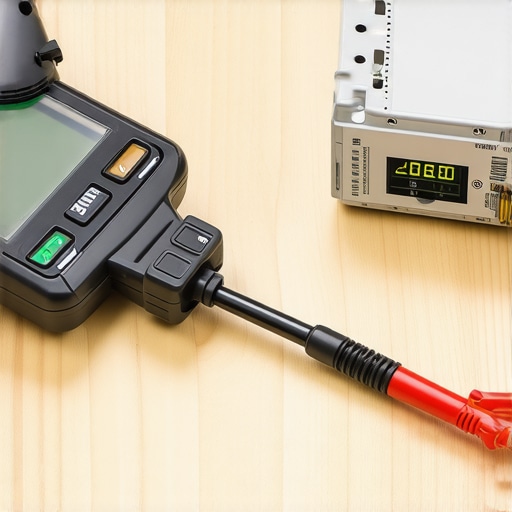
Stop Cranking Those Screws Before You Snap Something
The biggest ‘oops’ factor I see with advanced DIYers is over-tightening. When you are identifying dishwasher faults quickly, you will likely remove access panels and pump housings. Modern appliances use a lot of recycled plastics and thin-gauge metals. If you use a power drill to zip those screws back in, you risk stripping the threads or cracking a housing that was never meant to take that much torque. I once cracked an entire sump assembly just because I wanted to make sure the screws were ‘extra tight.’ Now, I only use a hand driver for the final quarter-turn.
You also need to be wary of oven control board failing symptoms that actually mimic power surges. If your oven display is flickering, check your terminal block for charring before assuming the board is toast. It’s these small, physical nuances that separate the pros from the part-changers. Have you ever replaced a huge, expensive part only to find out it was a tiny fuse or a loose wire? Let me know in the comments—I want to hear your most frustrating ‘almost’ fixes!
If you’re still unsure about your specific model, you can always contact us for more tailored advice or check out our privacy policy for how we handle your diagnostic queries.
The Multimeter I Trust My Life and Safety To
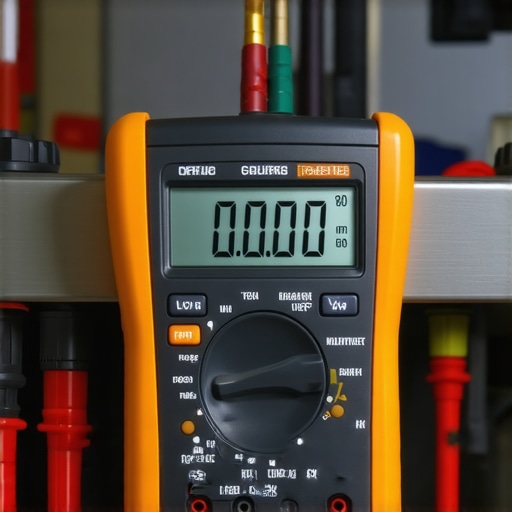
I’ve wasted enough money on cheap, five-dollar multimeters to buy a second dishwasher. If you’re serious about oven repair essentials, you need a meter that doesn’t just give you a guess. I personally use a Fluke 117 because of its ‘LoZ’ feature, which prevents false readings caused by ghost voltage—something that happens constantly when you are testing an oven temperature sensor with just a multimeter. Using a tool with a high tolerance for accuracy is the difference between replacing a working heating element and actually finding the broken wire tucked behind the insulation. When I’m deep in the wiring, trying to how to check for a burnt terminal block on your electric oven, I need to know the resistance reading is 100% accurate before I touch a single lead.
How can I keep my appliances alive for a decade?
Maintenance isn’t just about fixing things when they break; it’s about preventing the slow decay caused by our own habits. For dishwashers, the ‘hidden killer’ is often white vinegar—yes, you heard that right. While everyone recommends it for cleaning, the high acidity can actually degrade the rubber seals and the turbidity sensor housing over time. Instead, I recommend a citric acid-based cleaner once a month. This is the quickest way to remove hard water build-up in your dishwasher without eating through your gaskets. Simultaneously, get into the habit of how to clean your dishwashers hidden sump filter every Sunday. According to the Association of Home Appliance Manufacturers (AHAM), neglecting filter maintenance is the number one cause of premature pump motor burnout in modern, high-efficiency machines. A clean filter reduces the physical strain on the motor, extending its life by years.
Where the repair world is headed next
The trend I’m seeing in the industry is a move toward predictive maintenance integrated directly into the appliance’s Wi-Fi module. We’re already seeing high-end models that can detect a slight increase in amperage from a pump motor and alert your phone before it actually fails. While this sounds like a luxury, it’s going to become standard. However, this also means we need to be more vigilant about is your oven control board failing check these 4 symptoms, as software glitches can sometimes masquerade as hardware failures. I predict that within five years, the most valuable tool in your bag won’t be a screwdriver, but a diagnostic app that communicates with the machine’s internal bus. But even with all that tech, you’ll still need to know when to stop diying and call an oven repair expert—especially when dealing with gas lines or complex control board logic. My advice? Go grab your multimeter right now and test your oven’s bake element—it takes two minutes and might explain why your cakes are always flat on one side. Don’t wait for a total failure to start learning your machine’s quirks.
Hard Truths from My Years Under the Sink
After tackling dozens of these repairs, I’ve realized that the ‘click’ test isn’t always the final word. While a physical click means the mechanical arm is moving, I’ve seen many cases where moisture has seeped into the housing and corroded the silver contacts inside. This is why identifying dishwasher faults quickly requires both your ears and your multimeter. Also, never underestimate the power of a simple cleaning; sometimes a layer of hard water scale is just heavy enough to keep that float from rising. If you’re dealing with stubborn grime, the quickest way to remove hard water build-up in your dishwasher involves citric acid, which is much kinder to your seals than harsh vinegar.
The Gear That Saved My Sanity (and Wallet)
You don’t need a professional workshop, but a few specific items make a world of difference. First, a reliable digital multimeter is non-negotiable for oven repair essentials and dishwasher diagnostics alike. I also swear by a high-quality headlamp—holding a flashlight in your teeth while trying to reach a float switch is a recipe for a bad night. Finally, always keep a small container of dielectric grease on hand to protect those wire connections from future moisture damage once you’ve finished testing your dishwasher water level switch in 5 minutes. I trust these simple tools because they remove the guesswork and keep me from buying parts I don’t actually need.
Stop Being Afraid of Your Own Kitchen
The first time you successfully fix an appliance, something shifts. You stop seeing these machines as ‘black boxes’ and start seeing them as systems you can control. Whether you are pinpointing faults before calling a repair expert or doing the whole job yourself, that confidence is worth more than the money you save. However, remember that knowing when to stop diying and call an oven repair expert is part of being a master of your home. Get in there, get your hands a little dirty, and take back your kitchen with your new dishwasher repair skills. Have you ever found a weird object like a toothpick or a piece of glass jamming your dishwasher’s float? Let me know in the comments below!