I’ll never forget the sound of that first drip hitting the hardwood. It wasn’t a splash; it was a rhythmic ‘tink-tink-tink’ that signaled my trusty, fifteen-year-old dishwasher had finally surrendered. I opened the door, and the rubber gasket practically crumbled in my hand like a dry biscuit. I figured a quick search for the model number would solve it. Boy, was I wrong. Most sites just told me the part was ‘No Longer Available.’ If you’ve ever stared at a ‘Discontinued’ notice while your kitchen floor turned into a pond, you know the panic.
Stop the Leaks Before They Ruin Your Subfloor
The reality is that an old dishwasher is often better built than the plastic-heavy models sitting in showrooms today, so it’s worth the hunt. However, you can’t just slap any piece of rubber on there. I’ve spent more hours than I’d like to admit elbow-deep in identifying dishwasher faults quickly, and let me tell you, the gasket is the most temperamental part of the bunch. If the fit is off by even a millimeter, you’ll see water leaking from the kickplate area before the first rinse cycle is even over. My goal today is to bridge the gap between ‘obsolete’ and ‘fixed’ by sharing the exact process I used to find my rare seal.
Is finding an OEM gasket even possible for an antique?
You might be skeptical. I certainly was after my first major screw-up. Early in my DIY journey, I bought a ‘universal’ seal kit from a discount bin. I figured rubber is rubber, right? Wrong. It was so thick I had to practically hip-check the door to get it to latch. Within two days, the added tension snapped my door hinge cable. It was a $15 mistake that turned into a $100 headache. The truth is, while original parts are getting rarer, they do exist in warehouses and specialty shops if you know where to look. According to repair insights from Consumer Reports, manufacturers often stop producing proprietary parts after a decade, making the secondary market a wild west for owners of vintage appliances. This is why comprehensive DIY diagnostics are so vital—you need to be sure the gasket is the only culprit before you start the hunt. Before we dive into the serial number cross-referencing, have you ever tried a ‘universal’ part only to have it fail miserably? I’d love to hear your experiences. Sometimes, even just knowing how to clean grimy gaskets can buy you enough time to wait for the right part to ship.
Hunt Down That Ghost Part Before You Give Up
Finding a part that technically doesn’t exist anymore is like trying to find a specific grain of sand on a beach, but it’s not impossible. The first thing I do is treat the search like a forensic investigation. I once spent three days hunting for a specific gasket for an old Whirlpool, only to realize I was reading the serial number wrong because of a smear of grease. Use your phone to take a high-resolution photo of the model sticker—usually tucked inside the door frame or behind the kickplate—and zoom in. If you are also dealing with a vintage range, finding replacement knobs for a discontinued oven model follows a very similar logic of cross-referencing.
Dig Into the Microfiche and Diagrams
Once you have that number, don’t just Google it. Go straight to the major appliance parts warehouses and look for exploded view diagrams. These blueprints are your best friend. They often list ‘substituted’ part numbers. A gasket that was originally part A might have been replaced by part B five years later. This is where identifying dishwasher faults quickly becomes a game of numbers. If you find a substitution, that’s your golden ticket. 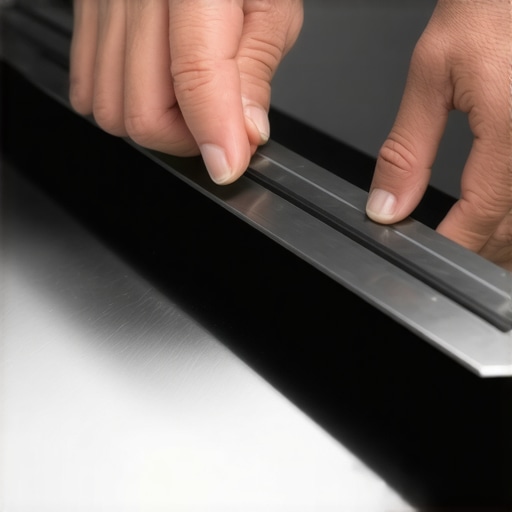
Prepare the Surface for the New Seal
Putting a new gasket into a dirty channel is a recipe for a flood. Think of it like trying to tape a box that’s covered in dust; it just won’t stick. Use a mixture of warm water and a tiny bit of dish soap to clear out the old gunk. I remember skipping this step once because I was in a rush to finish before a dinner party. The seal looked fine, but as soon as the water heated up, the leftover grease in the channel acted like a lubricant, and the gasket slipped right out. Now I know the fast way to clean grimy gaskets and their channels is the only way to ensure a watertight fit.
The Press-Fit Method That Actually Works
Start at the top center. Never start at the corners, or you’ll end up with ‘extra’ rubber at the end that bunches up. Press the gasket firmly into the groove, working your way down both sides simultaneously. It’s a lot like how to replace a worn-out dishwasher detergent dispenser seal—precision matters more than force. If the gasket feels too long, you’ve likely stretched it during installation. Pull it out and start over. If the rubber is stiff, soak it in a sink of hot water for ten minutes first to make it pliable. I once snapped a plastic retaining clip forcing a cold seal into place, and it’s a mistake you only want to make once. Close the door and leave it shut for at least 24 hours to let the rubber form a ‘memory’ of the frame. If you skip this, or if the alignment is off, you’ll likely find water leaking from the kickplate area the second the pump kicks on. If the door is now difficult to close, you might even need to consider swapping out a worn dishwasher door latch assembly to accommodate the new, thicker seal.
While getting a new gasket seated is a huge win, the deeper you go into the machine’s guts, the more likely you are to encounter the ‘phantom fault.’ Most DIYers—and even some pros—assume that if a part looks like it’s working, it is. But here is the contrarian truth: visibility is often a lie in appliance repair. Take your gas range, for example. You might see the igniter turn bright orange and think, ‘Well, that’s not the problem.’ In reality, why your gas oven igniter glows but doesn’t light is one of the most common diagnostic traps. The igniter can get hot enough to glow but fail to pull enough amperage to open the safety valve. It’s a subtle electrical nuance that leads people to waste money on a valve they don’t need when the igniter was the culprit all along.
The Multimeter Trap That Fools Even Pro Techs
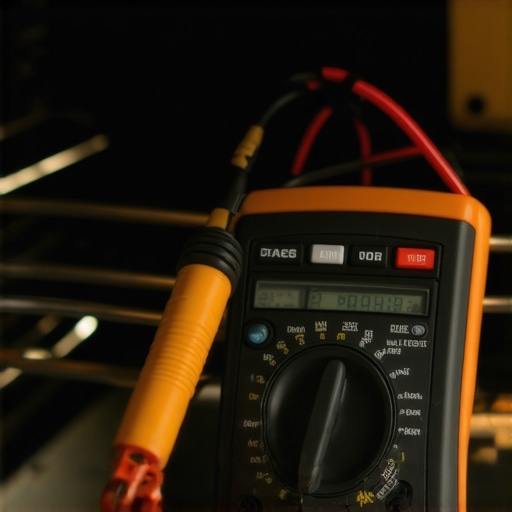
The biggest ‘oops’ factor I see involves the humble multimeter. People check for continuity and, finding it, assume the part is healthy. I’ve been burned by this myself while testing your dishwashers circulation pump for continuity. You might get a reading, but that doesn’t account for ‘invisible’ failure states under load. According to data from the Association of Home Appliance Manufacturers (AHAM), improper DIY diagnosis leads to a significant percentage of unnecessary part returns, often because the root cause was a high-resistance connection rather than a dead component. This is why oven diagnostics pinpointing faults before calling a repair expert requires you to test components while they are under actual stress, not just sitting cold on your workbench.
How Can You Tell if the Control Board is Just Gaslighting You?
This is the question that keeps even seasoned repair gurus up at night. When your oven display shows a garbled mess of characters or the dishwasher stops mid-cycle without an error code, it’s easy to blame the expensive control board. But before you shell out $200, check the thermal fuses and door switches first. A micro-fracture in a heating element, which you can find by testing an oven bake element for invisible cracks, can cause electrical ‘noise’ that makes a perfectly good control board act like it’s possessed. If you aren’t careful, you’ll end up checking these 4 symptoms only to realize a $10 wire was the real issue. Have you ever fallen into this trap of replacing the most expensive part first only to find it didn’t fix a thing? Let me know in the comments. Digging into oven repair essentials means learning to trust your meter over your eyes, but also knowing when your meter is only telling half the story.
To get results that last, you have to move past the ‘just get it running’ mindset. I used to think a basic screwdriver set and a prayer were enough, but if you’re serious about oven repair essentials, you need a high-impedance multimeter. I personally swear by my Fluke 117 because cheap meters can give ‘ghost’ voltage readings that lead you on a wild goose chase. For instance, when learning how to check for a burnt terminal block on your electric oven, a low-quality lead might miss the micro-pitting that indicates a future fire hazard. I also keep a set of long-reach nut drivers; you haven’t known true frustration until you’ve dropped a screw behind a built-in oven wall and spent an hour fishing it out with a magnet.
The Specialized Kit You Will Actually Use
Beyond the meter, a non-contact voltage tester and a set of flexible inspection cameras have changed my life. I used to strain my neck trying to see the back of a tub, but now I can perform identifying dishwasher faults quickly by snaking a camera lens into the tightest spots. If you are dealing with persistent drainage issues, having the right gear helps you find the one part that stops your dishwasher from draining completely without tearing the whole kitchen floor up. I always recommend investing in a good pair of needle-nose pliers with insulated grips—it’s the difference between a successful fix and a painful shock when you’re poking around a control board.

How do I keep these machines humming for the long haul?
It’s not about deep cleans once a year; it’s about the ‘incremental’ checks. Every six months, I’m back in the guts of my machines. I’m proactively testing an oven bake element for invisible cracks and making sure I know how to clean your dishwashers hidden sump filter before it chokes the motor. The GE Technical Service Manual for legacy XL44 series ranges actually notes that nearly 80% of igniter failures are accelerated by carbon and grease buildup—not just ‘old age.’ Keeping things surgical is the best way to avoid the moment where you have to decide when to stop diying and call an oven repair expert because the damage has cascaded.
The Future is Modular and Easier
Looking ahead, I see a massive shift toward modularity in the appliance world. Manufacturers are finally feeling the heat from ‘Right to Repair’ legislation across several states. I predict that within the next five years, we won’t be hunting for a ‘ghost’ part for months; we’ll be 3D printing gaskets or using standardized modular boards that fit across brands. Until that utopia arrives, you need to be the expert of your own home. If you haven’t yet, grab a bottle of high-temp thread locker before installing a new oven door handle without stripping the screws—it is a $5 fix that prevents that annoying handle wobble from ever returning. Go ahead and run a diagnostic cycle on your dishwasher tonight just to see if any hidden error codes have been lurking in the memory; you might catch a failing sensor before it turns into a flood.
Hard Truths from the Kitchen Floor Trenches
The first thing I learned is that ‘obsolete’ is usually a manufacturer’s opinion, not a fact. If you dig deep enough into dishwasher parts a comprehensive guide to diy diagnostics, you’ll realize that many parts are shared across brands under different names. Second, never throw away the old part until the new one is installed and the machine has finished a full cycle. I’ve had to dig through the trash more than once to find a specific clip that wasn’t included in the replacement kit. Also, keep an eye on the environment inside the machine; if you notice why your dishwasher interior looks pitted or corroded, your water chemistry might be eating your new parts before they have a chance to work.
The Secret Weapon Kit for Obsolescence
You don’t need a professional workshop, but you do need a few ‘unfair advantages.’ I always keep a dollar bill in my toolbox—not for coffee, but for testing your oven door seal with the dollar bill trick to ensure a tight heat fit. #IMAGE_PLACEHOLDER_E# Next, get a set of dental picks. They are perfect for clearing out gunk when you need to know how to clean the debris from an ovens hidden burner without damaging the orifice. Finally, never start a job without a tube of high-temp thread locker; it’s the only way I’ve found for installing a new oven door handle without stripping the screws and keeping it tight for years.
Your Kitchen Deserves a Second Chance
Repairing an old machine isn’t just about the rhythmic sound of fixing a leak; it’s about the satisfaction of knowing your home works because you made it work. Mastering oven repair essentials gives you a level of self-reliance that simply buying new can never offer. Don’t let a discontinued sticker stop you from keeping a high-quality machine in your kitchen. Have you ever spent weeks hunting for a ‘ghost part’ only to find it in the most unexpected place? Share your success stories or your current frustrations in the comments below!