I was right in the middle of searing a beautiful ribeye when my kitchen suddenly sounded like the tarmac at O’Hare. It wasn’t the smoke alarm, and it wasn’t the range hood. It was a high-pitched, grinding whine coming from inside my oven’s control panel. I stood there, tongs in hand, wondering if the whole thing was about to melt down. If you’ve ever noticed why your oven is making a humming sound when turned off, you know that sinking feeling in your gut. It’s the sound of a cooling fan motor begging for mercy. Today, I’m going to walk you through exactly how to swap that noisy internal cooling fan motor yourself, saving you a few hundred dollars in labor fees.
The Day My Quiet Kitchen Turned Into a Construction Zone
Most people don’t even know their oven has a second fan. We all know about the big one that blows hot air around your cookies, but the internal cooling fan is the unsung hero that protects your expensive control board from frying. When mine started screaming, I initially panicked and started looking for oven repair essentials and troubleshooting common issues. I made the classic rookie mistake of assuming it was the convection motor. I spent an hour pulling the back panel off before I realized the noise was coming from the top. Trust me, pinpointing faults before calling a repair expert is the only way to keep your sanity and your budget intact.
Can You Really Do This Without Ruining Your Oven?
I get the skepticism. Working on an appliance that pulls 240 volts is intimidating. You’re probably wondering if you’ll end up with a pile of extra screws or a display that shows a garbled mess of characters. But here’s the reality: if you can use a screwdriver and take a photo with your phone, you can do this. The cooling fan is usually just a plug-and-play component once you get the housing open. According to the National Fire Protection Association, overheating is a primary culprit for electronic failures in home appliances, so ignoring this sound isn’t just annoying—it’s actually a risk to your oven’s brain. Have you ever heard your oven making a weird rattling sound and just hoped it would go away?
Why That Screeching Sound Is More Than Just An Annoyance
When that motor starts to fail, it’s usually because the bearings are shot or the blades are clogged with years of kitchen grease. If the fan stops completely, your oven might still heat up, but it will eventually overheat the control board, leading to a much more expensive repair. I’ve seen cases where oven control knobs get too hot to touch simply because that tiny motor wasn’t doing its job. Before we dive into the tools, you need to make sure you’ve diagnosed why the oven is tripping the circuit breaker if the fan has already shorted out. Let’s get your kitchen back to being a place of peace.
Grab Your Tools and Clear the Workspace
Before you even touch a screwdriver, you have to treat your oven like a live wire because, well, it is. I once tried to “quick-check” a wire without killing the breaker, and the resulting spark reminded me why 240 volts is no joke. Head to your breaker box and shut it down completely. If you aren’t sure which one it is, diagnosing an oven that keeps tripping the circuit breaker usually helps you find the right switch pretty fast. This fan is like the radiator in your car; it doesn’t move the car, but without it, the engine melts. In this case, the “engine” is your expensive control board.
Cut the Power Before You Touch Anything
Once the power is off, double-check it by trying to turn on the oven light or the clock. If it’s dead, you’re safe. I’ve seen people skip this and end up with a fried circuit, later wondering is your oven control board failing because of a simple mistake they made during the repair. It’s not worth the risk. Pull the oven out of the wall just enough to get your tools behind the top panel. You don’t need to disconnect the main power cord yet, but give yourself enough slack so you aren’t cramped while reaching for the rear screws.
Get the Oven Out Where You Can Work
Most cooling fans live right behind the control panel or at the very top of the unit under a metal shroud. You’ll need to slide the oven out of its cabinet about six to ten inches. This is where a second set of hands is a godsend to avoid scratching your floors. Once it’s out, you’re looking for the top shroud—a thin metal cover that protects the electronics. 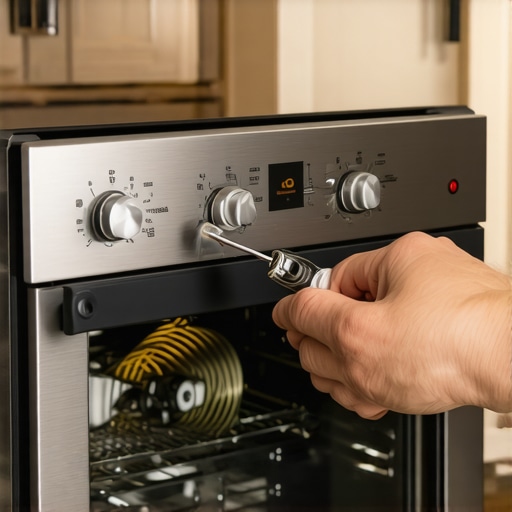 On my Whirlpool, I had to remove about eight hex-head screws to lift the lid. I remember dropping one of those tiny screws into the fiberglass insulation once; it took me twenty minutes with a magnet to find it. Don’t be like me—put your screws in a bowl or a magnetic tray immediately.
Spot the Difference Between the Fan and the Shroud
The cooling fan looks like a long, cylindrical wheel, often called a “squirrel cage” fan. It is a completely different part from the circular convection fan you see inside the oven cavity. If you see charred wires or a strange smell while you’re looking around, you might also want to check for a burnt terminal block on your electric oven while you have the access. I once found a literal hairball of pet dander and kitchen grease wedged in the bearings of my fan. That gunk acts like a brake, forcing the motor to work harder until it eventually starts that high-pitched screaming that ruins your dinner prep.
The Simple Logic of Swapping the Wires
Disconnect the wiring harness first. Do not just yank it; there’s usually a small plastic tab you need to depress with a flathead screwdriver or your thumbnail. Take a crystal-clear photo of the wiring before you unplug anything. This is the golden rule of DIY diagnostics. If you don’t, you might end up with a garbled mess of characters on your display because a sensor was plugged into the wrong port. When you have the new fan ready, oven repair essentials and troubleshooting common issues usually dictate that you should compare the part numbers on the stickers directly. Once the wires are free, the motor is usually held in by two to four screws on a mounting bracket. Swap the old for the new, and tighten those screws until they are snug, but avoid stripping the thin metal housing.
But here is where the ‘experts’ usually get it wrong. Most people assume that once the new part is in, the job is finished. In my experience, a screaming fan is rarely just a bad motor; it’s a warning sign of a larger thermal management issue. Everyone tells you to just swap the part and walk away, but if you don’t look at the ‘why,’ you’ll be back behind that oven in six months. Professionals often find that cooling fans fail prematurely because of restricted cabinet airflow. If your oven was installed too tightly or the vent trim is blocked by kitchen grime, that motor has to work twice as hard to pull air over the electronics.
Is Your Control Board Sending the Wrong Signal to the Fan?
If you install the new motor and it still won’t spin, or if it runs at the wrong speed, you aren’t looking at a mechanical failure anymore. You need to start pinpointing faults before calling a repair expert by testing the voltage coming from the relay board. If the board is failing, it might not be sending the full 120 volts the fan needs. It’s a classic trap: buying a new motor when the real culprit is a sticky relay. According to the Association of Home Appliance Manufacturers (AHAM), electronic component failure is the leading cause of secondary mechanical stress in modern ovens. This is why you should always check if your oven control board is failing before you start blaming the hardware.
The Dangerous Trap of the Burnt Terminal Block
While you have the oven pulled out, there is one ‘oops’ factor that kills more appliances than anything else. Take a look at the very bottom where the power cord meets the stove. If those nuts are even slightly loose, they create resistance, which generates heat. I’ve seen DIYers fix a fan only to have the whole unit die a week later because they ignored a melting plastic housing at the power entry point. You absolutely must check for a burnt terminal block on your electric oven while you have the access. If you see any signs of bubbling or black soot, stop what you are doing. Replacing a fan is a 2/10 on the difficulty scale, but dealing with a melted terminal block requires a bit more care to ensure you don’t create a fire hazard. 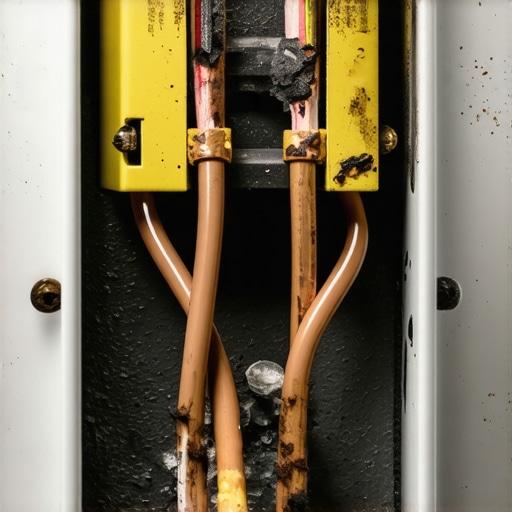
Why Your Dishwasher Diagnostics Follow the Same Logic
This analytical approach isn’t just for ovens. I’ve found that the same logic applies when you are looking at dishwasher parts and DIY diagnostics. For instance, if a pump is loud, people replace the pump. But often, it’s just a tiny piece of glass in the impeller or a drain hose that wasn’t looped correctly. Before you spend $150 on a new assembly, check the simple things. If the project starts to feel like it’s over your head, especially when dealing with gas lines or complex wiring harnesses, you need to know when to stop diying and call an oven repair expert. There is no shame in calling for backup when the alternative is a scorched kitchen. Have you ever replaced a part only to find out the real problem was something much smaller? Let me know in the comments below!
The Tool Kit Every Home Chef Needs
I’ve spent years collecting a ‘war chest’ of tools, and if there’s one thing I’ve learned, it’s that a cheap multimeter is worse than no multimeter at all. When I’m testing an oven bake element for invisible cracks, I rely on a Fluke 117. I know it’s pricey, but the ‘LoZ’ feature prevents those ‘ghost voltages’ that can trick you into thinking a dead circuit board is actually alive. It’s the difference between a five-minute fix and a three-hour headache. If you’re serious about oven repair essentials and troubleshooting common issues, get yourself a dedicated set of long-reach magnetic nut drivers. I can’t tell you how many times a tiny screw has tried to hide in the dark recesses of a range chassis. 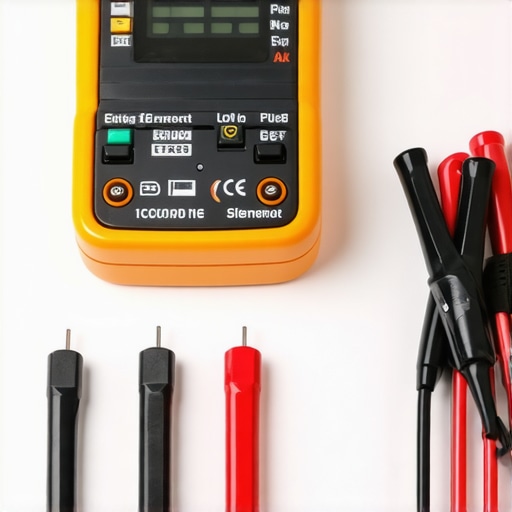
How do I keep my appliances running for decades?
The secret isn’t just fixing things when they break; it’s about the five-minute checks. Every six months, I perform the dollar bill trick to test my oven door seal. If the bill slides out, I’m losing heat and killing my bake element’s lifespan. Similarly, in the dishwasher, I don’t wait for a clog to clean the hidden sump filter. According to the Whirlpool Technical Service Manual (Job Aid W10329932), debris accumulation in the pump housing is the number one cause of premature motor failure. If you keep the waterways clear, the motor doesn’t have to work against backpressure.
Smart Sensors and the Next Wave of DIY Repair
Looking ahead, we are seeing a massive shift toward ‘connected diagnostics.’ Modern ovens are starting to use error code histories that you can access through service modes. I suspect that in five years, we won’t be guessing about a bad relay; we’ll be pinpointing faults before calling a repair expert by reading a real-time data log on our phones. But until then, your best defense is a clean machine and a little bit of curiosity. If your kitchen is acting up, try recalibrating your oven for accurate temperatures or testing your dishwasher’s high-limit thermostat for continuity. My advanced tip for today: go grab your multimeter and check the resistance on your high-limit thermostat tonight. It should be close to zero ohms; if it’s higher, that part is failing and will leave you with a cold oven when you least expect it. Give it a shot and see what you find!
Hard-Won Secrets from My Grease-Stained Workbench
After years of tinkering with heating elements and fan motors, I’ve realized that the loudest scream isn’t always the biggest problem. Sometimes, the most dangerous state for your oven is complete silence. If you finish a bake and don’t hear that cooling fan kick in, your control board is likely sitting in a stagnant pool of heat, slowly cooking its own capacitors. Always check if the fan spins freely by hand before installing the new one; if there’s even a slight hitch, that motor will burn out in months. I also highly recommend vacuuming the back of your appliance while it’s pulled out. A layer of dust acts like a thermal blanket, forcing the fan to run longer than necessary. If you’re dealing with multiple issues at once, remember that how to identify dishwasher faults quickly often involves the same logical path: start with the mechanical movement before blaming the electronics. And please, for the love of your flooring, place a piece of cardboard down before you slide the oven out to avoid those permanent gouges in your linoleum.
Gear That Keeps My Kitchen Running Smoothly
You don’t need a professional workshop, but a few specific items make oven repair essentials and troubleshooting common issues much easier to handle. First, I never start a job without a magnetic parts tray; those tiny hex-head screws have a magical ability to vanish into the insulation. Second, invest in a bright LED headlamp. You need both hands free when you are inspecting your oven’s power cord for heat damage or reaching into the dark corners of the upper shroud. Finally, keep a canister of compressed air nearby to blow out the dust from the control board area. I trust OEM parts from reputable suppliers over generic knock-offs every time because the fitment on the mounting brackets is usually 100% precise, saving you from having to drill new holes in a narrow space.
Take Back Your Kitchen One Screw at a Time
There is a certain pride that comes with fixing the heart of your home yourself. Once that high-pitched whine is gone and your kitchen returns to its peaceful state, you’ll realize that modern appliances aren’t quite the mysteries they seem to be. By taking the time to perform simple checks, like testing your oven’s high-limit thermostat with ease, you are extending the life of your machine by years. Don’t let a scary noise or a complex-looking wiring harness intimidate you. Most of these repairs are just a series of small, manageable steps. Of course, safety is paramount, so always know when to stop diying and call an oven repair expert if you encounter scorched wiring that goes beyond a simple fan swap. You’ve got this! Now, go get that oven back in the wall and get back to cooking. Did you find a hidden ‘gift’ like a pet hairball or years of accumulated dust inside your oven’s fan housing? Let me know in the comments below!