I was right in the middle of prepping a three-layer lasagna for my sister’s birthday when it happened. The kitchen went silent, the lights flickered, and my oven died. I stood there in the dim light of the hallway, still holding a block of mozzarella, feeling that sinking pit in my stomach. I went to the basement, flipped the circuit breaker back on, and as soon as I turned the oven knob? *Snap.* Total darkness again. It is incredibly frustrating when your appliances decide to rebel, especially when dinner is on the line. I know that feeling of defeat, but I also know that you don’t always need to call a technician out just to tell you which part is acting up. Today, we are going to dive into the exact steps to get your kitchen back in working order and stop that breaker from ruining your night.
Stop the Snap and Save Your Dinner
The reason this matters right now is more than just about a hot meal; it is about the health of your home’s electrical system. When an oven trips a breaker, it is usually because of a ground fault or a short circuit. Essentially, electricity is escaping the path it is supposed to be on. I have spent years tinkering with these machines, and I have learned that pinpointing faults before calling a repair expert can save you hundreds of dollars in labor costs. We are going to look at the heating elements, the terminal block, and even the internal wiring to find the culprit. Have you ever been caught in the middle of a big meal prep only to have your power cut out without warning? It is a common nightmare, but it is one we can solve. According to the National Fire Protection Association (NFPA), electrical failures or malfunctions are a leading cause of home fires, and a tripping breaker is a safety feature designed to prevent exactly that. It is your oven’s way of screaming for help before things get dangerous.
Is a tripping breaker actually a fire hazard?
It absolutely can be, but usually, it is just a sign of a worn-out component. Early in my DIY journey, I made the classic mistake of just flipping the breaker back on five or six times, thinking it was just a ‘glitch.’ Don’t do that. I actually ended up melting a wire connector because I was too stubborn to just stop and inspect the power cord for heat damage properly. That mistake turned a simple part replacement into a much more complex rewiring job. If your oven is acting up, you need to start by testing the resistance on your broil element or checking the bake element for physical signs of blistering. Often, a tiny crack in the element’s casing allows electricity to jump to the oven frame, causing an instant trip. By the time we are done here, you will know exactly how to handle these oven repair essentials without the stress.First things first: pull that oven away from the wall and unplug it. Safety isn’t just a suggestion; it is the difference between a successful repair and an emergency room visit. The most likely culprit is the bake element—that big black loop at the bottom. Think of it like a lightbulb filament protected by a heavy-duty metal shell. If that shell cracks, the electricity leaks out and hits the metal frame of the oven. This creates a ground fault, and your breaker shuts everything down in milliseconds to prevent a fire. I remember one Saturday afternoon working on an old GE range. I couldn’t see any damage at first glance and almost gave up. But then I took a small mirror and looked at the very back of the element where it connects to the oven wall. There it was—a tiny, charred spot where the insulation had failed. I felt like a detective finding the smoking gun. By testing an oven bake element for invisible cracks, I saved myself a massive service call fee.
Search for the Tell-Tale Blisters on the Element
Before you start tearing things apart, look for physical clues. A healthy element is smooth and charcoal-grey. A failing element often has ‘blisters’ or white flaky spots that look like crusty salt. These are spots where the internal wire has burned through the casing. If you see these, you don’t even need a meter to tell you what’s wrong; the part is dead. However, some failures are microscopic. You should also consider testing the resistance on your broil element if the oven only trips when you switch to the high-heat setting. It is the same principle: a small breach in the element’s armor causes the circuit to fail the moment it gets hot enough to expand.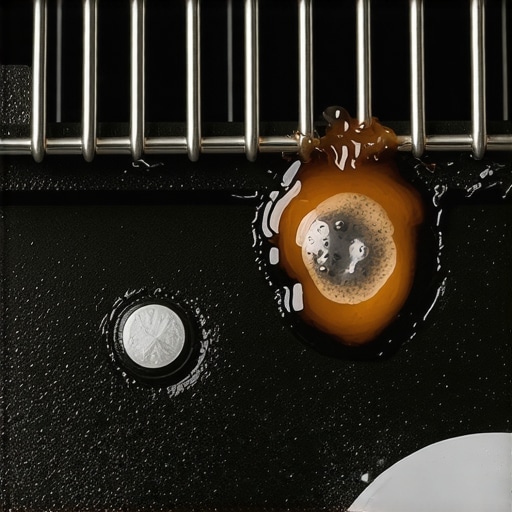
Inspect the Gateway Where Power Enters the Unit
If the elements look pristine, your next stop is the terminal block. This is the plastic block where your thick power cord connects to the oven’s internal wiring. It is the gatekeeper for all that voltage. Over time, the screws can vibrate loose, creating ‘arcing’—basically tiny lightning bolts that melt the plastic. I once found a terminal block so melted it looked like a piece of burnt marshmallow. You must know how to check for a burnt terminal block on your electric oven because a charred block will trip your breaker every single time you try to preheat. Tighten those connections regularly to prevent this from happening in the first place.
Identify a Stuck Relay Before It Fries the Board
What if the heating elements and the power cord look fine? That is when we move into the ‘brain’ of the machine. The relay board acts like a series of smart switches. If one of those switches gets stuck or ‘welded’ shut, it can send too much juice to a component or create a short circuit. You might hear a clicking sound that doesn’t stop or see an error code. Learning how to identify a bad oven relay on the control board is easier than it sounds—you are mostly looking for darkened ‘scorch’ marks on the green circuit board or a distinct smell of burnt electronics.
The Hidden Safety Switch That Might Be Failing
While you are deep in the wiring, don’t overlook the thermostat. If the oven thinks it is freezing when it is actually 500 degrees, it might go into a runaway heating state. Testing your oven’s high limit thermostat with ease ensures that the safety cutoff is actually working. If that part fails, it often trips the breaker as a final fail-safe to prevent the whole unit from melting down. Think of it as the emergency brake on a train; once it is pulled, nothing moves until you fix the underlying issue. Checking these oven repair essentials will help you narrow down the fault to a specific twenty-dollar part instead of a thousand-dollar replacement unit.Many DIYers assume that if a breaker snaps, a part is fundamentally destroyed. However, experience has taught me that ‘nuisance tripping’ is more common than you might think, especially with modern AFCI (Arc-Fault Circuit Interrupter) breakers. These high-sensitivity safety devices often mistake the normal electrical ‘noise’ of an aging but functional heating element for a life-threatening fault. While the common advice is to replace the part immediately, I have found that the issue is frequently a loose connection at the wall outlet or the terminal block rather than the element itself. According to the International Association of Certified Home Inspectors (InterNACHI), loose electrical connections are a primary cause of localized overheating that can trigger a breaker without a direct short. Don’t fall into the trap of throwing parts at a problem before you have verified the integrity of the power supply. I once saw a homeowner replace three perfectly good elements only to realize the issue was a $15 power cord. You should always start by inspecting your oven’s power cord for heat damage before spending a dime on internal components.
Why does my brand-new element still trip the breaker?
It is incredibly disheartening to install a shiny new part only to hear that familiar, heavy ‘clunk’ from the basement electrical panel. If this happens, you are likely dealing with a ‘ground leak’ within the wiring harness itself. Over decades, the high-heat environment inside an oven turns wire insulation brittle. It can look perfectly fine to the naked eye, but the moment the oven metal expands during preheating, a microscopic crack in the wire casing allows electricity to touch the chassis. This is why pinpointing faults before calling a repair expert is about more than just checking resistance; it requires a systematic visual sweep of the entire current path. 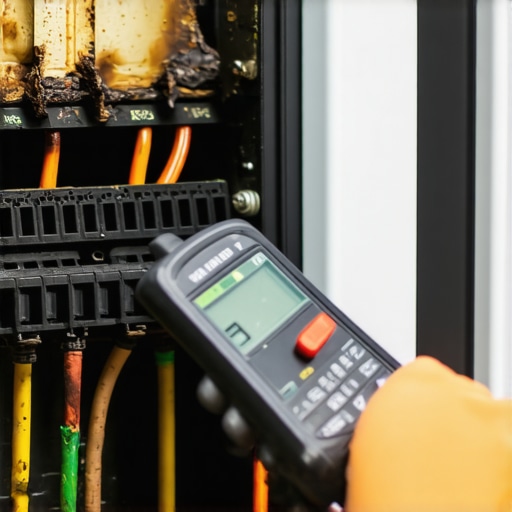 Another nuance people miss is the ‘welded relay’ phenomenon on the control board. If your oven preheat light never turns off, it might mean the control board is stuck in the ‘on’ position. If the high-limit thermostat tries to cut power to save the unit from overheating, but the relay refuses to let go, the breaker becomes your last line of defense. This is a classic example of how to tell if your oven’s relay board is clicking for the wrong reasons. This same diagnostic logic applies to other high-draw machines; for instance, if you are managing a kitchen-wide overhaul, having a dishwasher parts guide handy can help you see how similar thermal fuses and relays operate under load. These hidden components are the unsung heroes of appliance safety. If you ignore the warning signs, you might find that your oven control knobs are getting too hot to touch, which is a major red flag for internal electrical arcing. Have you ever fallen into the trap of replacing a part only to find the problem persisted? Let me know in the comments—I would love to hear your ‘oops’ stories so we can all learn together.
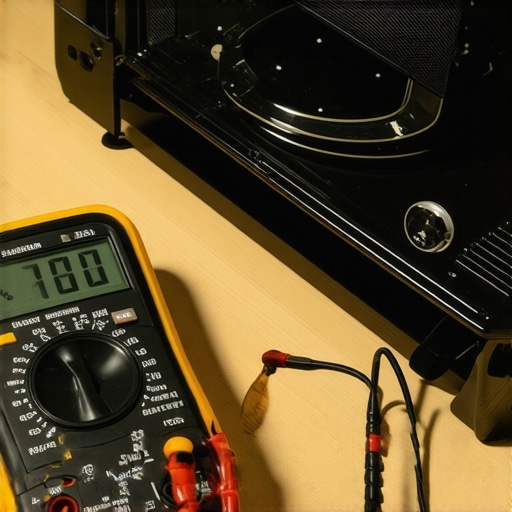
I used to think a basic screwdriver and a prayer were enough to handle my kitchen catastrophes, but experience is a brutal teacher. If you want to stop the cycle of ‘fix and fail,’ you need to invest in a few specific tools that provide data rather than guesses. My absolute non-negotiable is a high-quality digital multimeter with a ‘Peak Hold’ function. I personally use a Fluke because when you are dealing with the 240 volts running through an oven’s terminal block, you want a tool that is fused for high-energy transients. Cheap meters can literally explode in your hand if they hit a high-voltage surge they aren’t rated for. Beyond safety, a good meter allows you to perform parts and diagnostics: how to identify dishwasher faults quickly or check for continuity in an oven element with surgical precision.
Get the Data Before You Buy the Part
Another tool that has saved me more money than my entire toolbox cost is a simple infrared thermometer. It is the only way to know if your control board is telling the truth. I use it for the fast way to recalibrate your oven for accurate temperatures without having to wait an hour for a manual thermometer to settle. If the display says 350 but my infrared sweep shows 320, I know I’m dealing with a sensor drift issue, not a dead element. This kind of diagnostic depth is what separates a DIYer from a ‘Part Swapper’ who just throws money at the machine until it works again. According to the Association of Home Appliance Manufacturers (AHAM), even a minor 10-degree variance in calibration can lead to a 15% increase in energy consumption and premature failure of the relay board due to longer cycle times.
How can you keep your kitchen running without constant repairs?
Maintenance isn’t just about cleaning; it’s about mechanical integrity. For your oven, this means testing your oven door seal with the dollar bill trick every six months. A leaky gasket forces the elements to work twice as hard, which is usually why those terminal blocks burn out in the first place. For your dishwasher, the battle is usually against minerals. I make it a habit to check the drainage path frequently, as it’s much better than wondering why your dishwasher bottom is full of standing water during a holiday party. I’ve found that taking five minutes for how to unclog your dishwashers air gap in five minutes prevents 90% of common drainage errors. If you ignore the small stuff, like a slightly noisy pump or a flickering light, you’re essentially waiting for a catastrophic failure that will cost five times as much to fix.
The Future of Home Diagnostics
We are rapidly moving toward a world of ‘Smart Diagnostics’ where your oven will likely send an error code to your phone before the breaker even trips. However, even with the rise of IoT appliances, the mechanical basics remain the same. A computer can tell you a circuit is open, but it can’t tell you the wire has been chewed by a mouse or corroded by a spill. That’s where you come in. My best advice? Find the ‘Tech Sheet’ hidden inside your appliance—usually behind the bottom kickplate or in a plastic pouch on the back. This document is the ‘holy grail’ for your specific model, containing the wiring diagrams and resistance values that technicians use. If you want to really level up, my challenge to you this weekend is to pull your dishwasher’s kickplate and find that sheet. Reading it will give you more power over your home’s health than any YouTube video ever could.
What Five Years of Burnt Wires Taught Me
One hard truth I have learned is that electrical failures are often ‘noisy’ before they are final. If you have been wondering why your oven light bulb keeps burning out every month, do not just blame the bulb; it is often a symptom of voltage spikes or loose neutral wires that eventually lead to a tripped breaker. I also realized that neglecting small issues, like how to replace a faulty oven light switch, can eventually lead to bigger headaches. A short in that tiny switch can actually cause a system-wide fault if the internal wiring is compromised. Most importantly, mastering oven repair essentials is not about being an electrical genius; it is about having the patience to look for the tiny charred marks that everyone else misses.
The Tools That Turned Me Into a Pro
If you are serious about keeping your kitchen running, you need to move beyond the basic screwdriver. I keep a dedicated kit for parts and diagnostics that has saved me thousands. First, a digital multimeter is essential for checking continuity; it is the only way to confirm a dead element without guessing. Second, I always keep a copy of the service manual or ‘Tech Sheet’ for every appliance I own. If you are expanding your skills, learning how to identify dishwasher faults quickly follows the exact same logic: check the power path first, then the control components. Finally, an infrared thermometer is the fast way to recalibrate your oven for accurate temperatures and ensure your hard work actually fixed the underlying heating cycle.
#IMAGE_PLACEHOLDER_E#
Taking Back Control of Your Kitchen
While it is vital to know when to stop diying and call an oven repair expert, there is an incredible sense of pride in hearing that oven click on and stay on because of your own detective work. Do not let a ‘snap’ from the breaker box ruin your confidence or your dinner plans. By systematically checking the elements, terminal blocks, and relays, you transform from a frustrated homeowner into a capable problem solver. The next time your oven decides to rebel, you will be ready with a multimeter in hand and the knowledge to fix it. Have you ever been terrified to flip a breaker back on after an oven repair only to find you fixed it perfectly? Let me know your success stories in the comments!