I remember standing in my kitchen last Thanksgiving, the smell of roasting turkey filling the air, when I suddenly heard it—a sound like a dying jet engine vibrating right behind my oven’s digital display. It wasn’t the sound of the convection fan spinning; this was a high-pitched, metallic whine that made me think the whole appliance was about to achieve liftoff. I did what most people do: I ignored it for a week, hoping it was just a ‘glitch.’ That was my first mistake. Eventually, my oven just quit mid-bake because the internal electronics had literally cooked themselves. Today, we are going to make sure that doesn’t happen to you by tackling the cooling fan before it becomes a three-hundred-dollar disaster.
That Annoying Buzzing is Actually a Warning Cry
It is easy to dismiss a noisy fan as just an old appliance showing its age. However, if you have noticed why your oven is making a loud buzzing noise, you are likely hearing the bearings in your cooling fan giving up the ghost. This fan isn’t there for the food; it’s there to protect the brains of your machine. Modern ovens are packed with sensitive electronics that can’t handle the extreme heat of a 450-degree roast without a constant stream of cool air. I learned the hard way that oven repair essentials involve more than just checking the heating element. If that cooling fan stalls, the heat rises, and your expensive control board is the first thing to fry. In fact, according to the Association of Home Appliance Manufacturers (AHAM), thermal stress is one of the primary drivers of electronic component failure in high-end kitchen appliances. By performing some basic oven diagnostics early on, you can save yourself from a much larger bill.
Is a DIY fan replacement actually worth the effort?
I get it—the thought of pulling your oven out of the wall and digging into its ‘guts’ is intimidating. You might be wondering if you should just call a pro or if you’re likely to make things worse. Early in my DIY journey, I actually snapped a wire because I was too impatient to find the right connector. But here is the truth: replacing your oven’s internal cooling fan motor is one of the most straightforward repairs you can do with just a screwdriver and a little bit of confidence. It’s a lot less scary than seeing symptoms of a failing control board and realizing you could have prevented it with twenty minutes of work. Have you ever had your oven start screaming at you right in the middle of preparing a big family meal? It’s a stressful moment, but it’s the perfect time to take control of your kitchen maintenance.
Kill the Power Before You Kill the Oven
Before you touch a single screw, you have to cut the power entirely. Think of your oven like a high-voltage heart; you wouldn’t perform surgery while it’s beating. Unplug the unit from the wall or flip the dedicated breaker in your service panel. Once it is safely de-energized, you will likely need to slide the unit out of its housing. I remember my first time doing this—I did not realize how deceptively heavy a wall oven could be and almost ripped the decorative cabinet trim right off the wall. Use a furniture dolly or, better yet, get a second pair of hands to help with the weight. If you are dealing with a range, it is much easier to walk it out, but be mindful of your flooring so you do not leave deep gouges behind.
Find the Fan and Clear the Blockage
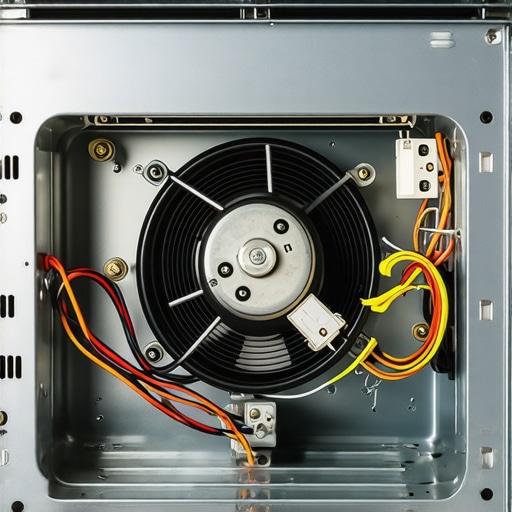
Once you have access to the rear, remove the metal back panel. You are looking for the cooling fan, which is distinct from the convection fan. The cooling fan usually sits near the top of the appliance to vent the control area. This is where oven diagnostics move from guesswork to actual science. Start by checking if the blades are physically obstructed. Sometimes a loose piece of fiberglass insulation gets sucked into the intake, or a plastic wire tie snaps and begins hitting the spinning blades—that mechanical interference is often why your oven is making a loud buzzing noise. Use a soft brush or a vacuum to clear away any dust bunnies that have accumulated over the years, as these act like blankets that trap the very heat the fan is trying to remove.
Give Your Motor a Quick Health Check
If the fan spins freely by hand but refuses to kick on during a bake cycle, you need to know how to test an oven fan motor for resistance. It is essentially like checking for a pulse in the motor’s copper windings. Set your multimeter to the Ohms setting and touch the probes to the two terminals on the motor. A reading of infinity or “OL” (open loop) means the motor has failed internally and is now just a paperweight. While you have the meter out, it is incredibly smart to check how to test your ovens thermal fuse for continuity as well. Often, a cooling fan will stop because a thermal fuse has tripped to protect the oven from overheating, and you don’t want to replace the fan only to find the circuit is still broken elsewhere.
Swap the Old for the New
Swapping the actual part is usually the easiest part of the process, provided you stay organized. Most cooling fans are held in by two or four simple mounting screws on a bracket. My most frustrating messy moment happened here: I once dropped a tiny mounting screw into the fiberglass insulation at the bottom of the oven frame. I spent nearly an hour fishing it out with a magnet on a string because I was too lazy to hold the fan steady with one hand while driving the screw with the other. Don’t be like me; use a magnetic-tipped screwdriver to keep your hardware secure. Follow the specific steps for replacing your oven’s internal cooling fan motor and ensure the wires are firmly seated and tucked away from any moving parts. This simple act of prevention is one of those oven repair essentials that keeps the sensitive electronics of your appliance from melting down during your next big family dinner.
Don’t Trust a New Part Blindly
Let’s dig deeper into the nuance of these repairs. A common myth in the DIY community is that a ‘new’ part is always a ‘good’ part. I cannot tell you how many times I have seen people tear their hair out because they installed a fresh fan motor, yet the oven still overheated. This brings us to a critical realization: sometimes the fan is fine, but the brain telling it to wake up is malfunctioning. If you are not seeing the expected results after a swap, you need to look at is your oven control board failing. According to a study on household electronics by the IEEE Reliability Society, component failures are frequently caused by ‘transient thermal loads’ that degrade solder joints on the motherboard rather than mechanical failure of the fan itself. This means the connection on the board might be physically broken, even if the fan is brand new.
The Hidden Trap of the Back-Panel Pinch
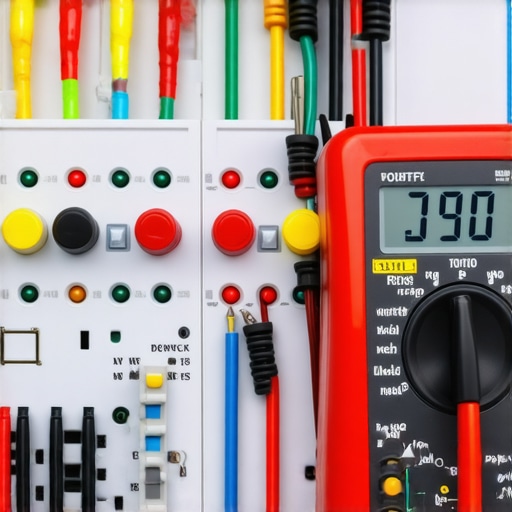
One of the biggest ‘oops’ factors I see is what I call the ‘Back-Panel Pinch.’ When you are sliding that oven back into place, it is incredibly easy to catch the wiring harness between the metal chassis and the kitchen cabinet or the rear housing. I once spent four hours diagnosing an oven that keeps tripping the circuit breaker only to find I had accidentally crushed a wire during the re-installation. This isn’t just a nuisance; it is a serious fire hazard. Always use a piece of electrical tape to secure loose wires to the frame before closing things up to ensure they stay clear of the ‘pinch zones.’ It’s a frustrating mistake that can turn a simple fix into a dangerous short circuit if you aren’t paying attention to the cable routing.
Why does the fan keep spinning long after dinner is served?
If you have noticed why your oven fan runs for hours after cooking, do not panic. Many homeowners assume this is a sign of a short circuit, but it is actually a programmed safety feature. Modern high-density insulation keeps heat trapped inside the cavity so efficiently that the electronics would bake in their own stagnant air if the fan didn’t continue to circulate until the internal temperature drops below a specific threshold—usually around 150°F. However, if it never stops, that is when your oven diagnostics should shift toward a stuck relay on the control board or a faulty temperature sensor that thinks the oven is still hot.
Mastering the Art of Logical Diagnostics
The same level of nuance applies to other kitchen workhorses. For instance, when identifying dishwasher faults, people often jump to replacing the expensive drain pump when the issue is actually a tiny piece of plastic stuck in the impeller. Have you ever fallen into this trap of replacing the most expensive part first? Let me know in the comments! Taking that extra five minutes to test for resistance or continuity saves both your wallet and your sanity. Expertise isn’t just about knowing how to turn a wrench; it is about knowing when the wrench isn’t the tool you actually need.
To move from a weekend warrior to a confident DIYer, you need to stop guessing and start measuring. I spent years using a cheap five-dollar hardware store multimeter before I realized it was giving me fluctuating readings on sensitive components. Now, I never open a back panel without my Klein or Fluke digital multimeter. According to technical bulletins from the Appliance Service Training Institute (ASTI), even a 2% variance in a multimeter’s accuracy can lead you to believe a sensor is bad when it is actually functioning perfectly. This is especially true when testing an oven temperature sensor with just a multimeter, where precise resistance levels are the only way to know if your calibration is off.
Grab the Right Gear for the Job
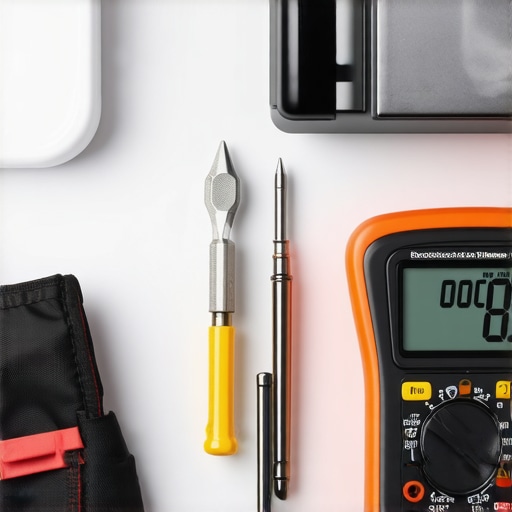
Beyond the meter, my secret weapon is a magnetic nut driver set and a simple magnetizer/demagnetizer tool. There is nothing more frustrating than a screw falling into the dark abyss of a dishwasher’s sump. If you are diving into dishwasher parts and DIY diagnostics, having a flexible borescope camera—the kind that plugs into your smartphone—is a game-changer. It allows you to see behind the unit without pulling the whole thing out, helping you spot leaks or charred wires in seconds. Also, look for the ‘Tech Sheet.’ Manufacturers almost always hide a folded wiring diagram in a plastic pouch behind the bottom toe kick or inside the control console. That paper is your roadmap; treat it like gold.
Keep Rust from Ruining Your Investment
Maintenance isn’t just about fixing what’s broken; it’s about stopping the decay you can’t see. For ovens, moisture is the silent killer of the floor panel. I’ve written extensively about why your oven bottom is rusting and how to stop it, and the solution is usually as simple as keeping the porcelain coating intact and avoiding the use of the high-heat self-clean cycle too frequently. On the dishwasher side, stop overusing detergent. Modern pods are convenient, but the truth about dishwasher pods and your drain hose is that they often create a ‘suds lock’ or leave a film that traps food particles, eventually leading to a foul-smelling sludge that burns out your pump.
How do I keep these machines running for a decade?
The key to longevity is a quarterly ‘Deep Health Check.’ Every three months, I physically inspect my door seals and run a recalibration. If you notice your cakes are coming out uneven, don’t just live with it; learn how to calibrate your oven with a simple thermometer to ensure the software matches the reality of the heat. In the future, I expect we’ll see more appliances with built-in Wi-Fi diagnostics that text your phone when a part is within 10% of failure. Until then, you are the diagnostic brain. Always double-check the basics, like the most reliable way to test an oven thermal fuse, before you commit to buying expensive control boards. My advanced tip for you today: find that hidden tech sheet in your appliance tonight and take a high-quality photo of it. Having that diagram on your phone when you are at the parts store is a total lifesaver.
Hard-Won Secrets From My Toolbag
I have learned that the most expensive part of any oven repair isn’t the component itself—it is the time wasted replacing parts that were not actually broken. One of my biggest lightbulb moments was realizing that a cooling fan often fails due to simple environmental stress, like grease buildup or dust, rather than an electrical fault. If you can keep the intake path clear, you extend the life of your control board by years. Another vital lesson: never trust a visual inspection alone. Even if a wire looks perfectly seated, the most reliable way to test an oven thermal fuse is a quick continuity check with a meter. Finally, remember that every appliance follows a logical path; if the fan is not turning, follow the voltage from the board to the motor before you pull out your credit card for a new assembly.
The Bare Minimum Toolset for Any Appliance Fix
You do not need a professional workshop to handle these repairs, but a few specific items are non-negotiable for success. First, a reliable digital multimeter is your best friend when testing an oven temperature sensor or checking fan motor resistance. I also highly recommend a set of long-reach magnetic nut drivers; they prevent the heartache of losing a screw inside the oven’s fiberglass insulation. For those who also maintain their dishwashers, keeping a small specialized brush for cleaning dishwasher parts like filters and spray arms will prevent most common drainage issues. These simple tools turn a stressful afternoon into a satisfying and productive project.
#IMAGE_PLACEHOLDER_E#
Why You Are the Best Person for This Job
There is a unique sense of pride that comes from hearing your oven hum quietly after you have tackled the repair yourself. By taking the time to perform proper oven diagnostics, you are not just saving money—you are becoming the expert of your own home maintenance. Do not let a few wires or a metal back panel intimidate you. You now have the knowledge to troubleshoot, test, and replace components safely and effectively. Keep your kitchen running smoothly, and remember that every successful oven repair makes the next fix even easier. Have you ever successfully fixed an appliance only to find a leftover screw when you were finished? Let me know your funniest DIY stories in the comments below!