It was my sister’s wedding rehearsal dinner, and I was in charge of the lasagna. I preheated the oven, slid the heavy glass trays onto the racks, and went to pour a glass of wine. Twenty minutes later, the oven was stone cold. No error codes. No smells. Just a silent, expensive-looking box that refused to do its job. I panicked and did what most people do—I assumed the control board had fried and spent $200 on a replacement part I didn’t need. That was my ‘rookie mistake.’ It turns out, the culprit was a tiny, ten-dollar part called a thermal fuse. This little component is essentially a high-tech bodyguard for your kitchen; it sacrifices itself to save your house from a fire if things get too hot. Today, I’m going to show you how to stop the guessing game and use smart oven diagnostics to find the real problem.
The Silent Killer of Dinner Parties
When your oven suddenly stops heating, it’s rarely the most expensive part that failed. Most of the time, the thermal fuse has simply ‘tripped’ or blown because of a momentary spike in temperature. Think of it like a circuit breaker that can only be used once. If it’s blown, the oven won’t complete the electrical circuit to the heating elements. I remember the first time I held one in my hand; it looked so insignificant. But without it, your oven is just a very heavy cupboard. Before you start troubleshooting other common issues, you need to rule this out. Have you ever felt that sinking feeling when your appliance just won’t turn on, despite everything looking perfectly fine? [image]
Is a tiny piece of wire really worth all this trouble?
You might be tempted to just bypass the fuse or ignore it, but that is a dangerous road to walk. According to the National Fire Protection Association (NFPA), cooking equipment remains the leading cause of home fires and fire injuries. These fuses are calibrated to pop at a very specific temperature to prevent a catastrophic meltdown. My early mistake was assuming I could ‘feel’ if a part was bad. You can’t. You need a multimeter and a basic understanding of continuity. Much like testing an oven temperature sensor, checking the fuse is a simple pass/fail test. If the electricity can’t flow through it, the fuse is dead. It’s the most reliable way to know if you’re looking at a $10 fix or a $300 repair. In the next section, I’ll walk you through exactly where to stick those multimeter probes so you can get back to baking without the stress.
Pull the Plug and Strip the Back Panel
Before you even look at a screwdriver, pull that oven plug out of the wall. Working on a live appliance is a mistake you only make once, and I would prefer you did not make it at all. Most ovens hide their ‘bodyguard’—the thermal fuse—behind the rear access panel. You will usually find a series of hex-head or Phillips screws holding a large metal sheet in place. Once that is off, look for a small, typically white plastic or ceramic component with two wires plugged into it. It is often located near the top or by the blower fan. In my early days, I once spent forty minutes dismantling a control console from the front, only to realize I could have reached the fuse in two minutes by just sliding the oven out. Always start at the back.
The $15 Tool That Saves You Hundreds
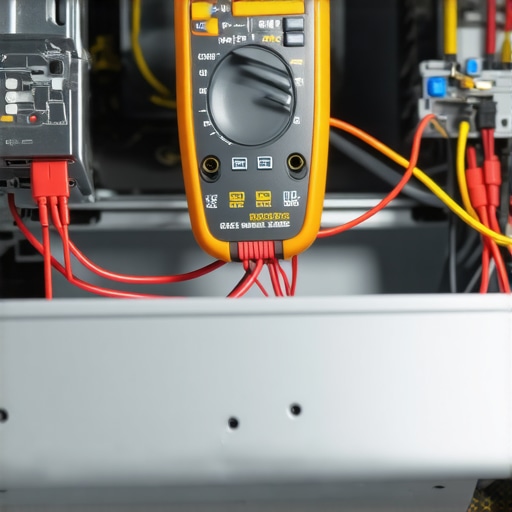
To do this right, you need a multimeter. Think of this tool as your oven’s translator; it turns electrical signals into something you can actually understand. If you are a beginner, the most reliable way to test an oven thermal fuse is using the continuity setting. On your meter, look for the symbol that looks like a tiny sound wave. When you touch the red and black probes together, the meter should emit a continuous beep. This tells you that the path for electricity is clear. If you do not hear that sound when testing a part, the internal bridge has collapsed, and power cannot get through to heat your food.#IMAGE_PLACE_HOLDER_B#
Touch the Probes and Listen for the Beep
Now for the moment of truth. Pull the two wire connectors off the fuse. Do not just tug on the wires; use a pair of needle-nose pliers to grab the metal spade connectors and wiggle them off. Once the fuse is isolated, touch one probe to each metal terminal on the fuse. If the meter beeps, your fuse is perfectly fine, and your problem lies elsewhere. If it stays silent, you have found your culprit. I remember helping a neighbor who was certain his expensive digital display meant he needed to be checking for a failing oven control board. We spent five minutes testing the fuse instead, found it was dead, and a $12 replacement had his kitchen back in action that same afternoon.
When the Fuse Is Not the Problem
If the fuse passes the test, do not get discouraged. You have just saved yourself from buying a part you did not need. The next logical step is to look at the physical connections. I have seen cases where a fuse was fine, but a wire had vibrated loose or a terminal had melted. This is a great time to learn how to check for a burnt terminal block on your electric oven, especially if you noticed a faint plastic smell recently. If everything looks clean and the fuse is good, you might be looking at a faulty heating element. Luckily, replacing the oven bake element in 15 minutes or less is just as straightforward as the fuse. For those with gas models, the diagnostic path shifts slightly toward testing a gas oven igniter with a multimeter to see if it is pulling enough juice to open the gas valve. The goal here is not just to fix it, but to understand the ‘why’ so you are never left standing over a cold lasagna again.
While the thermal fuse is a common culprit for ovens, there is a deeper level of diagnostic nuance that even seasoned DIYers often miss. Everyone says that modern digital appliances are ‘smarter’ because they give you error codes, but in my experience, those codes are frequently red herrings. A code for a heating failure might lead you to buy a new bake element, but the real issue could be a loose connection at the terminal block or a relay on the board that only fails under a specific load. This is where parts and diagnostics become more of an art than a science. I have seen homeowners spend hundreds on sensors when the real problem was a $2 wire that had rubbed thin against a sharp metal edge inside the chassis. Do not let the display screen do your thinking for you.
Can you actually trust those blinking error codes?
The short answer is: not entirely. According to the Association of Home Appliance Manufacturers (AHAM), a significant percentage of parts returned to manufacturers as ‘defective’ are actually perfectly functional. The failure was in the diagnostic process, not the component itself. This is especially true when you are dealing with dishwasher parts. People see a ‘no-fill’ error and immediately buy a new water inlet valve, failing to realize that a gunked-up float switch is the one telling the valve to stay shut. Before you click ‘buy’ on that expensive control board, you must verify the ‘inputs’ first. For example, the right way to inspect your dishwasher float switch is to check for physical obstructions and electrical continuity before even touching the valve. If the switch is stuck ‘up,’ the dishwasher thinks it is full and will never call for water.
The Trap of Over-Tightening and Plastic Fatigue
Here is an ‘oops’ factor that costs people dearly: the physical assembly. Modern appliances use a lot of plastic, and those plastic screw bosses are incredibly unforgiving. I have watched friends try to be helpful by installing a new oven door handle without stripping the screws, only to crack the inner door liner because they used a power drill on a high torque setting. When you are dealing with heat-cycled plastic, it becomes brittle. A quarter-turn too much and you have turned a $30 handle repair into a $400 door replacement. The same logic applies to sensors. If you are replacing a faulty dishwasher turbidity sensor at home, the O-ring seal is more important than how tight the sensor is seated. If you over-compress that seal, it will leak, and that leak will likely drip directly onto your wash motor.
Why Symptom-Swapping Leads to Failure
The most advanced mistake I see is ‘symptom-swapping’ without checking the source of power. If your dishwasher isn’t draining, don’t just blame the pump. Sometimes, the truth about dishwasher pods and your drain hose is that undissolved plastic film has created a physical dam. If you put a new pump on a clogged line, you’ll just burn out the new motor in a week. Similarly, before you decide how to tell if your oven control board is repairable, you need to check the voltage coming into the house. I once spent three hours troubleshooting a ‘dead’ oven only to find out the customer had a ‘dropped leg’ of 240V power from the utility company. The lights worked, but the oven couldn’t heat. Have you ever fallen into this trap where you replaced a part only to find the problem remained? Let me know in the comments below, and let’s make sure you aren’t the next person to buy a control board you don’t actually need.
I spent years using a cheap five-dollar multimeter I bought at a gas station, and let me tell you—accuracy matters when you are dealing with low-voltage sensors. Today, I do not leave the house without my Klein MM400. It has a fast continuity buzzer, which is vital when you are testing your dishwashers high limit thermostat for continuity behind a cramped kickplate. You also need a set of long-reach Torx drivers. Appliance manufacturers love to hide screws deep inside plastic housings where a standard bit driver simply cannot reach. If you are serious about DIY, invest in a magnetic parts tray too. Nothing ruins a Saturday like losing the one proprietary screw that holds the control board in place. According to the Whirlpool Service Matters technical manuals, even a 5% deviation in supply voltage can cause intermittent ‘ghost’ errors on digital displays. That is why I always check the outlet first. 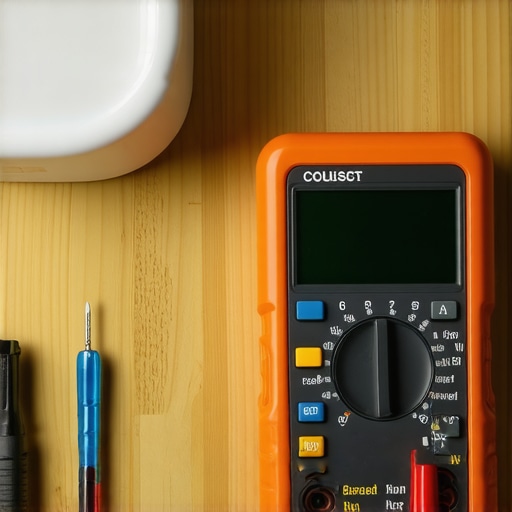
How do I maintain my appliances over time?
Prevention is always cheaper than a midnight repair. For your dishwasher, the biggest enemy is mineral buildup and grease. You should be using the best way to clean a greasy dishwasher filter at least once a month. If that filter is clogged, the motor has to work twice as hard, leading to premature failure. Similarly, hard water can kill an inlet valve in a single season. I recommend the quickest way to remove hard water build up in your dishwasher using a citric acid flush. For ovens, the most important maintenance is actually the seal. A leaky gasket causes the heating element to cycle constantly, which burns it out faster. If your temperature feels off, look into the fast way to recalibrate your oven for accurate temperatures rather than just turning the dial higher. Keeping the hinges lubricated also prevents you from needing to learn how to fix an oven door that wont stay latched later on.
Smart Sensors and the Next Decade of Repairs
I predict that in the next five years, we will see a massive shift toward predictive maintenance in kitchen tech. We are already seeing high-end models with built-in Wi-Fi that can alert you when a pump is pulling too many amps—a sure sign it is about to seize. While some fear this makes DIY harder, I think it makes it easier. Instead of guessing, the machine will tell you exactly which component is failing. However, the basics will never change: you still need to be able to turn a wrench and test for continuity. My advice? Grab your multimeter this weekend and perform a health check on your dishwashers thermal fuse or thermostat just to get comfortable with the process. You will be glad you did when the next holiday dinner is on the line.
The hard truth about that faulty control board you almost bought
After years of tinkering, I’ve realized that the biggest hurdle in DIY repair isn’t the technical skill—it’s the impulse to buy a solution before you’ve defined the problem. I once watched a friend spend a small fortune on a control board because their oven didn’t reach temperature, only to find out the real issue was that they just needed a refresher on oven diagnostics and pinpointing faults. Here is the insider secret: an appliance is a logical circuit. If it’s not working, there is a break in that logic. Don’t assume the most complex part is the one that broke; usually, it’s the ‘gatekeeper’ components like fuses or sensors that gave up first. Another lesson? Document everything. Taking a photo of the wiring before you unplug a single spade connector will save you hours of ‘where did this yellow wire go?’ panic later. Finally, remember that parts and diagnostics are two sides of the same coin; you cannot have one without the other.
#IMAGE_PLACEHOLDER_E#
Gear that actually makes your life easier in the kitchen
You don’t need a professional workshop, but a few specific tools make the difference between a successful fix and a stripped screw. I swear by a non-contact voltage tester for safety—it’s the fastest way to double-check that you actually cut the power before you reach into the cabinet. For those diving into dishwasher parts and DIY diagnostics, a flexible inspection mirror is a lifesaver for seeing leaks under the sump without having to pull the whole machine out. I also recommend keeping a small tube of dielectric grease on hand. It prevents corrosion on electrical terminals, which is a major cause of why your oven preheat light never turns off or why you might be dealing with a dishwasher that wont heat the water. These small investments pay for themselves the very first time you avoid a $150 service call.
Your path to a stress-free kitchen starts with one small test
The first time you successfully diagnose a dead thermal fuse or a stuck float switch, your relationship with your appliances changes. They stop being mysterious, expensive black boxes and start being machines you control. Repairing your own gear isn’t just about saving money—though that’s a nice perk—it’s about the confidence that comes from knowing how your home actually works. Don’t be afraid to fail on your first attempt; every professional repair tech started with a pile of screws and a confused expression. Grab your multimeter, follow the path of the electricity, and take back control of your kitchen. Have you ever spent money on a part only to realize the fix was actually something much smaller? Let me know your ‘oops’ stories in the comments below!