I stood in my kitchen last November, sweating more than the turkey ever would. My oven’s digital display beamed a confident 425°F, but inside, the bird was as pale as a ghost. It’s a gut-wrenching feeling when you realize your main appliance is gaslighting you. For years, I assumed I was just a bad baker until I realized that oven diagnostics can save your reputation and your wallet. Today, we are going to stop the guesswork and get your kitchen back to searing temperatures. Have you ever had a dinner party ruined by an oven that refused to cooperate? Drop your horror story in the comments.
The Night My Prime Rib Stayed Raw
My biggest mistake early on was throwing expensive parts at a problem I didn’t understand. I once replaced a perfectly functional bake element because I failed to recognize the signs your oven temperature sensor is inaccurate. It was a sixty-dollar lesson in humility. Most of the time, your oven isn’t headed for the scrap heap; it just needs a little calibrated attention. We are going to tackle the sensors, the elements, and the hidden culprits that keep your heat dangerously low.
Is DIY appliance repair actually safe for a beginner?
I hear this all the time. Working with high-voltage appliances or gas lines feels like defusing a bomb in a movie. But here is the reality: most temperature issues are caused by components you can reach with a simple screwdriver. You don’t need a trade certificate to master oven repair essentials. If you can follow a recipe for sourdough, you can follow a diagnostic path. According to the Association of Home Appliance Manufacturers (AHAM), keeping your appliance in top shape through minor repairs can significantly reduce energy waste and extend the machine’s lifespan by years.
Your Oven Is Not Dead It Is Just Confused
The most frequent culprit for an oven that stalls at 300 degrees is a failing temperature sensor. It is the brain of the operation, and when it starts sending bad data, the whole system shuts down. If you have a multimeter, you can confirm this in less than ten minutes. I have put together a walkthrough on testing an oven temperature sensor with just a multimeter that removes all the mystery. If the sensor checks out, we start looking at the heat source itself. The simple reason your oven won’t reach 450 degrees often comes down to a weak igniter in gas models or a partially burnt-out element in electric ones. Let us get into how you can tell exactly which part is lying to you.
Stop Trusting the Orange Glow in Gas Ovens
If you own a gas range, you have probably peered through the oven glass and seen that comforting orange light at the bottom. You assume if it is glowing, it is working. That logic is exactly why I spent three days eating cold takeout. The igniter is not just a light bulb; it is a resistance heater that must pull a very specific amount of amperage to open the safety valve. Over time, these components wear out and lose their ‘strength.’ It is like a flashlight with dying batteries; it produces light, but not enough to see by. This is the primary reason why your gas oven isn’t heating even though the igniter glows. If that igniter doesn’t reach the exact temperature needed to trigger the gas flow, your oven will just sit there, perpetually ‘preheating’ a cold cavern. You should also keep an eye on the valve itself, as understanding how to identify a weak gas valve in your wall oven can save you from replacing the wrong part.
Hunt Down Visual Clues on Electric Elements
For those of us with electric ovens, the diagnosis is often much more visceral. When a bake element fails, it rarely goes quietly. I remember baking a batch of cookies when a literal lightning bolt shot across the bottom of my oven. If you see a blister, a break, or a discolored spot on the coil, the circuit has been compromised. In these cases, is your oven sparking check the bake element immediately because that element is physically grounding out against the oven frame. Even if you don’t see a literal firework show, a lack of heat often means the internal wire has snapped inside its protective sheath. Fortunately, replacing the oven bake element in 15 minutes or less is one of the easiest repairs you can perform, requiring nothing more than a nut driver and a little patience.
Let a Multimeter Be Your Source of Truth
If your elements look fine but you are still stuck at 250 degrees, you have to stop guessing and start measuring. A multimeter is the only way to verify ‘continuity’—the unbroken path of electricity. I once spent an entire Saturday afternoon trying to recalibrate my oven because the temperature was fluctuating wildly, only to eventually find that a single wire had vibrated loose. If you test your sensor and get a reading outside the 1000-1100 ohm range at room temperature, it is lying to the control board. If the sensor is fine, your next stop is the power source. I highly recommend learning how to check for a burnt terminal block on your electric oven. My ‘messy’ moment came when I pulled the back panel off my stove and found the main power terminal had half-melted because of a loose screw. It was a terrifying sight that would have been a five-minute fix if I had checked it first.
When the Brain Stops Talking to the Burners
Sometimes the parts are healthy, but the ‘boss’ has quit. The control board is the conductor of this orchestra. If you hear a series of rapid clicks when you try to start a cycle, or if the display is throwing cryptic error codes, is your oven control board failing check these 4 symptoms to confirm your suspicions. A failing relay on the board can prevent power from ever reaching the heating circuit, leaving you with a perfectly good element that never gets the signal to wake up. Unlike a dishwasher where you might look for a is your dishwasher float switch stuck try this quick fix, oven heat issues are almost always binary: either the power is there, or the circuit is broken. Check the relays for burn marks or a ‘sweet’ electrical smell; these are the smoking guns of a dead control board.
Continuity Is Not the Whole Story
Many DIYers believe that if a component shows continuity on a multimeter, it is 100% functional. This is a common myth that leads to hours of frustration. In my years of tinkering, I have found that a part can have a complete circuit but still fail under ‘load.’ Think of it like a rusty pipe: it might allow a trickle of water through, but it will burst the moment you turn the pressure up. When testing the resistance on your ovens broil element, a reading that is technically within range can still fail once the metal expands at 400 degrees. This is why I always advocate for testing components in their ‘fail state.’ If your oven only dies after twenty minutes of baking, a room-temperature test won’t tell you anything.
Why Your Multimeter Might Be Lying to You
The ‘ghost voltage’ phenomenon is the ultimate trap for the unwary. You might see 120V or 240V at a terminal, but as soon as the heating element tries to draw current, that voltage collapses because of a corroded connection elsewhere. This is particularly prevalent when you are testing your dishwashers high-limit thermostat for continuity. A high-resistance connection at the wire nut or a slightly charred terminal block can mimic a dead component. According to technical bulletins from the Professional Service Association (PSA), over 30% of ‘faulty’ control boards returned to manufacturers are actually perfectly fine; the real issue was a loose ground or a high-resistance wire elsewhere in the circuit. Have you ever fallen into this trap and replaced a part that was actually fine? Let me know in the comments. 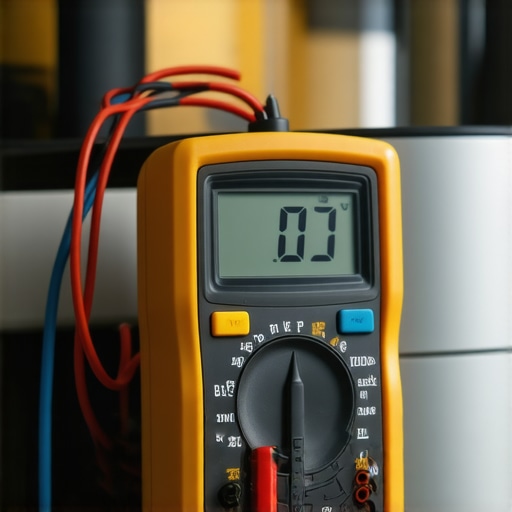
Should You Trust Aftermarket Parts for Critical Safety Components?
This is a question I get from advanced hobbyists who want to save a few bucks. While a generic dishwasher silverware basket is a safe place to save money, I draw a hard line at thermal fuses and gas valves. Using a non-OEM part for the most reliable way to test an oven thermal fuse can be dangerous because aftermarket fuses may have different trip temperatures. The ‘Oops’ factor here is massive: a fuse that trips too late can lead to a house fire, while one that trips too early will leave you right back where you started with a cold oven.
Mastering the Nuances of Dishwasher Diagnostics
We often focus so much on the oven that we forget that dishwasher parts a comprehensive guide to diy diagnostics requires a totally different mindset. In an oven, heat is the primary variable; in a dishwasher, it is fluid dynamics and pressure. When you are looking at parts and diagnostics how to identify dishwasher faults quickly, you have to look for the ‘silent’ killers like mineral buildup inside the pressure switch tube. It isn’t a broken part, but it causes the machine to ‘think’ it is full when it is bone dry. Before you go through the hassle of how to fix a dishwasher that wont fill with water, blow through the pressure hose. You might find that a simple blockage was the culprit all along. Troubleshooting is as much about understanding the ‘logic’ of the machine as it is about using tools. If you can learn to think like the control board, you will stop being a part-changer and start being a repair expert.
Build a Repair Kit That Actually Works
I’ve spent too many hours using cheap, generic tools that stripped screws or gave me wonky electrical readings. If you want to take your kitchen game to the next level, buy a decent auto-ranging multimeter. I personally use a Klein MM400 because it survives the inevitable drops on tile floors. When you are deep into oven repair essentials troubleshooting common issues with parts, having a tool that clearly beeps for continuity saves your sanity. You’ll also want a set of magnetic nut drivers; trying to fish a dropped screw out of an oven’s insulation is a circle of hell I wouldn’t wish on anyone. This kit isn’t just about fixing what’s broken; it’s about the confidence to open the back panel without fear.#IMAGE_PLACE_HOLDER_D#
How do I keep my oven running like new for a decade?
The secret isn’t a magic spray; it’s staying ahead of the physics of heat. High temperatures cause metal to fatigue, and moisture from cooking causes oxidation. Once a year, you should be testing your dishwashers high-limit thermostat for continuity and checking your oven seals. If your door isn’t tight, the heating elements work double-time, leading to premature burnout. Experts at the Appliantology academy emphasize that ‘thermal stress’ is the number one killer of control boards. By ensuring proper airflow and clean filters, you reduce the workload on those expensive relays. It’s also worth learning the fast way to recalibrate your oven for accurate temperatures every time you notice a slight drift in your baking results.
Future-Proof Your Kitchen with Smart Habits
We are entering an era where your dishwasher might tell your phone when its pump is struggling. While ‘smart’ appliances get a lot of flak for being over-complicated, the data they provide is a goldmine for DIYers. In the future, I predict we will see more predictive maintenance sensors that catch a failing motor before it leaks. For now, the best ‘sensor’ is you. Listen for changes in the hum of the motor or a longer-than-usual drain cycle. If you catch it early, the right way to inspect your dishwasher float switch becomes a five-minute check-up rather than a midnight mop-up session. Consistency beats intensity every time. Instead of a ‘deep clean’ once a year, spend five minutes a month on the best way to clean a greasy dishwasher filter. Your spray arms and drain lines will thank you with years of silent, leak-free service. Take ten minutes this weekend to pull out your dishwasher filter—you might be surprised by what’s been hiding in there.
The Costly Mistakes I Made Before Mastering Appliance Diagnostics
If there is one thing I have learned after countless hours on my hands and knees in front of a range, it is that the machine is rarely as broken as it seems. My biggest ‘lightbulb moment’ was realizing that oven diagnostics are actually about eliminating possibilities rather than finding a needle in a haystack. I spent years assuming a cold oven meant a dead control board, but I eventually learned that a simple loose wire or a dusty sensor is more likely. Another hard lesson? Never trust your eyes alone. A heating element can look brand new and still be electrically dead. Mastering oven repair essentials troubleshooting common issues with parts is 90% observation and 10% actually turning a wrench. Finally, always respect the safety systems. Those little thermal fuses are there to keep your house from burning down—never bypass them just to finish a meal.
The Practical Toolkit for Every Home Chef
You don’t need a van full of specialized equipment to be successful, but you do need tools that don’t lie to you. I swear by my auto-ranging multimeter; it is the single most important investment you will make for parts and diagnostics how to identify dishwasher faults quickly. Beyond the hardware, I highly recommend keeping a digital copy of your specific appliance’s ‘tech sheet,’ which is usually tucked behind the bottom kickplate or inside the control console. For broader knowledge, I frequently reference dishwasher parts a comprehensive guide to diy diagnostics to refresh my memory on water-flow logic. These resources, combined with a simple set of magnetic nut drivers #IMAGE_PLACE_HOLDER_E#, will save you more money in one afternoon than a decade of ‘black friday’ sales ever could.
Take Back Control of Your Kitchen Today
The first time you pull your oven away from the wall, it feels like crossing a point of no return. But remember: these machines were built by humans, and they can be fixed by humans. You have the tools, the diagnostic paths, and the patience to get your kitchen back in working order without a $300 service call. Every time you successfully troubleshoot a cold burner or a leaky door, you are building a skill that stays with you for life. Don’t let a flickering display screen intimidate you—you are the one in charge of the kitchen, not the circuit board. It is time to dive in and master oven diagnostics for yourself. Have you ever successfully fixed an appliance only to find a leftover screw when you were finished? Tell me your most stressful DIY moment in the comments below!