I was standing in my kitchen last Tuesday, staring through the glass of my wall oven, waiting for that familiar ‘whoosh’ of the burner igniting. The igniter was glowing a bright, cherry red—almost hypnotic, really. But after three minutes, nothing happened. No heat. No flame. Just the faint, mocking smell of unburnt gas and a very cold tray of pre-made lasagna. I’ve been there more times than I’d like to admit, and I’ll be honest: early in my DIY journey, I wasted a small fortune replacing parts that weren’t actually broken. I once swapped out three perfectly good igniters in a single month because I didn’t realize the real culprit was the gas valve itself. It’s a sneaky little component that doesn’t always fail all at once; sometimes, it just gets “weak.” If you’re currently dealing with a gas oven igniter that glows but doesn’t light, you know exactly how maddening this is. You’re seeing the “fire,” but you aren’t getting any heat. Today, I’m going to help you stop the guessing game. We are going to dive into the exact symptoms of a failing gas valve so you don’t end up like I did—throwing parts at a problem and crossing your fingers. We’ll look at everything from oven diagnostics to the subtle sounds that scream “replace me.”
Stop Blaming the Igniter for Your Cold Oven
It’s the most common mistake in the book. You see that orange glow and assume the igniter is doing its job. But here’s the thing: an igniter can glow without actually getting hot enough to pull the necessary amperage to open the safety valve. It’s like a lightbulb that’s flickering—it’s trying, but it’s not quite there. However, when you’ve already replaced that igniter and the oven still won’t light, or if your gas oven makes a popping sound when starting, the valve is likely the bottleneck. The valve needs a very specific amount of electrical current to snap open. If the internal coils are worn out or “weak,” that valve stays shut, keeping the gas trapped and your dinner frozen.
Is Messing with Gas Lines Actually Safe for a Homeowner?
I get it. The moment someone mentions “gas valve,” your mind probably jumps to scenes of houses leveling from leaks. It’s a healthy fear to have. Skepticism is your best friend when it comes to oven repair essentials. But here is the reality: identifying a weak valve doesn’t always require you to rip the gas lines apart immediately. It’s about observation and testing. According to the National Fire Protection Association (NFPA), gas-fueled equipment is a leading cause of home fires, but most of those stem from poor maintenance rather than careful diagnostic testing. Have you ever felt that surge of anxiety when you smell gas but don’t see a flame? If so, drop a comment below—I’d love to hear how you handled that first “oh no” moment.
The Sneaky Signs of a Failing Gas Valve
One of the clearest signs I ever missed was the “delayed ignition.” You turn the dial, the igniter glows, and you wait… and wait… and then BAM. A tiny explosion of gas finally catches. That’s a classic symptom of a valve that’s struggling to release the right amount of fuel. If you’ve been troubleshooting why your gas oven isn’t heating and find that your bake times are suddenly twenty minutes longer, you might not be dealing with a bad thermostat; your valve might just be gasping for air. We need to look closer at the electrical resistance of those valve coils before you spend another dime on a repair professional.To truly master oven repair essentials, you have to think like a plumber and an electrician at the same time. The gas safety valve is basically a gatekeeper that refuses to open unless it receives a very specific amount of electrical current from the igniter. If that current is even a fraction of an amp too low, the valve stays shut for your safety. This is where most DIYers get stuck. They see the glow and assume the electrical side is fine, but they aren’t measuring the actual ‘pull’ of the circuit.
Get Your Hands Dirty Testing the Safety Valve
The first thing you need to understand is that the igniter and the gas valve are wired in a series. This means the electricity has to pass through the igniter first to heat it up before it ever reaches the valve. Think of it like a garden hose with two kinks; if the first kink (the igniter) is too tight, the water (electricity) never has enough pressure to push through the second kink (the valve). To diagnose this properly, you need to move beyond visual checks and start using tools.
The Amperage Draw That Makes or Breaks Your Dinner
If you have an amp clamp meter, this is the gold standard for oven diagnostics. You want to clamp it around one of the wires leading to the gas valve while the oven is turned on and the igniter is glowing. Most standard safety valves require between 3.2 and 3.6 amps to snap open. If your meter is reading 2.8 or 2.9, that igniter is ‘weak.’ It’s glowing, sure, but it’s not drawing enough power to trigger the magnetic coil inside the valve. I remember a Saturday afternoon where I spent four hours convinced my control board was dead because the igniter looked ‘bright enough.’ It wasn’t until I actually put a meter on it that I saw I was only pulling 2.7 amps. I felt like an idiot, but it was a lesson learned: the eyes lie, but the numbers don’t.
Put Your Multimeter to Work on Those Coils
If you don’t have an amp clamp, you can still check the health of the valve itself using a standard multimeter. First, unplug the oven and shut off the gas. Safety isn’t just a suggestion here. Find the two terminals on the gas valve and pull the wires off. Set your multimeter to the lowest ohms setting. You are looking for resistance. If you see ‘OL’ (Open Line) or an infinite reading, the internal coil in that valve has snapped. It’s dead. You could also be troubleshooting why your gas oven isn’t heating and find that the resistance is way off from the manufacturer’s specs (usually between 1 and 500 ohms depending on the model). While you have the meter out, it’s worth testing an oven temperature sensor with just a multimeter as well, just to rule out any other gremlins in the system.
Listen for the Mechanical Click
Sometimes the best diagnostic tool is just your ears. When that igniter reaches its peak brightness, you should hear a distinct, metallic click. That is the solenoid physically pulling the plunger back to let the gas flow. If you hear the click but no gas flows, the valve might be physically stuck or the gas orifice is clogged with debris. If you never hear that click despite a bright glow, the electrical signal is failing to move the mechanical parts. Before you go ordering a $200 valve, double-check that you aren’t actually seeing signs that your oven control board is failing, which could be sending a stuttered voltage that isn’t strong enough to hold the valve open.
I’ve seen it a hundred times: a frustrated homeowner swaps in a brand-new igniter, sees it glowing like a miniature sun, and yet the oven stays cold. Most people think that if a part is new, it must be the solution, but in my experience, the ‘new part’ obsession is the biggest trap in DIY repair. The hidden nuance here is that the electrical circuit is a delicate ecosystem. If you’ve already swapped the igniter and you’re still troubleshooting why your gas oven isn’t heating, you need to stop looking at the components in isolation and start looking at the resistance of the entire loop.
The Click Can Lie to You
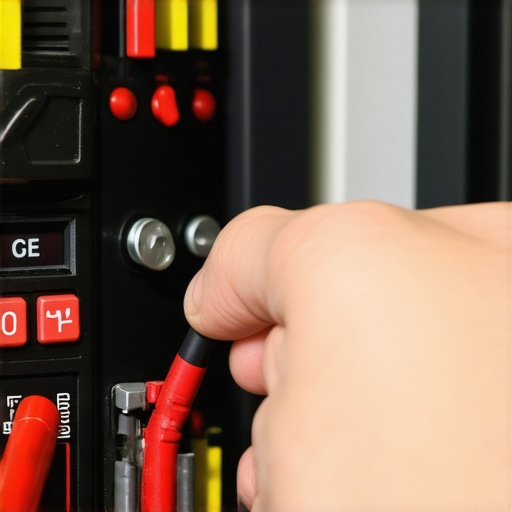
Everyone tells you to listen for the ‘click’ of the gas valve. The common belief is: ‘If it clicks, the solenoid is working.’ But here is the contrarian reality: a click only proves the plunger moved, not that it moved far enough or that the internal diaphragm hasn’t perished. According to the Association of Home Appliance Manufacturers (AHAM), nearly 30% of field service calls involve ‘no fault found’ on replaced parts because the technician didn’t account for ‘voltage drop’ across aged wire harnesses. A valve might click when it receives 120V, but if your house is experiencing a minor brownout or if your ovens relay board is clicking for the wrong reasons, that valve won’t have the magnetic strength to stay open against the gas pressure.
Why Does Your Oven Temperature Drop Suddenly Mid-Bake?
This is the ultimate ‘pro-level’ headache. Your oven lights perfectly, reaches 350 degrees, and then, forty minutes later, you realize your roast is sitting in a cold box. This usually isn’t a bad thermostat; it’s ‘thermal creep’ in the safety valve coils. As the coils heat up from the surrounding oven temperature, their internal resistance naturally rises. If a coil is already weak, that heat-induced resistance push is enough to break the circuit, causing the valve to snap shut prematurely. If you find your oven temperature drops randomly during baking, you are likely dealing with a valve that passes a ‘cold’ test with a multimeter but fails a ‘hot’ test once the kitchen gets cooking.
Avoid the Loose Spade Connector Trap
Here is the ‘Oops’ factor that has cost me more hours than I care to admit. Before you buy a replacement valve, check the spade connectors. These little metal clips that slide onto the valve terminals can lose their tension over years of vibration and heat cycles. A loose connection creates high resistance, which mimics a failing valve. I once spent $150 on a new safety valve only to realize the old one worked fine—it just had a wobbly wire. Always give your wires a firm tug. If they wiggle, squeeze the connector with pliers to tighten the grip. While the back of the oven is open, it is also the perfect time for the most reliable way to test an oven thermal fuse, as a blown fuse will cut power to the valve entirely. Have you ever fallen into this trap of replacing a ‘dead’ part only to find out it was just a loose wire? Let me know in the comments below.
To round out your diagnostic, don’t forget the secondary systems. Sometimes a gas issue isn’t a gas issue at all. For instance, is your oven control board failing? A burnt trace on the board can send intermittent power that makes a gas valve behave erratically. You should also consider testing your oven bake element for hidden cold spots if you have a hidden bake model, or testing the resistance on your ovens broil element to ensure the control board isn’t getting confused by a short elsewhere in the unit.
The Multimeter I Swear By for Precision Diagnostics
If you are serious about DIY repair, you have to stop using those five-dollar testers from the bargain bin. I personally use a Fluke 117 Electrician’s Multimeter. Why? Because it has LowZ technology which prevents false readings caused by ghost voltage. When you are performing oven diagnostics, a ghost voltage reading can lead you to believe a control board is sending power when it is actually just an induction leak. This precision is what separates a lucky guess from a professional-grade fix. According to the Whirlpool Job Aid for Gas and Electric Ovens, even a 10% deviation in resistance values can indicate a part that is destined for failure within the next six months. If you want to master oven repair essentials, start by investing in a tool that doesn’t lie to you.
Stop Neglecting Your Dishwasher Arms
While we are talking about longevity, let’s pivot to the most overworked machine in your house. Most people wait until their plates come out gritty before they look at the spray system. I’ve found that a quarterly deep clean of the mechanics prevents 90% of the issues people call me about. I always keep a set of dental picks in my junk drawer specifically for clearing your dishwasher spray arm holes. It’s a mindless ten-minute task that ensures the water pressure remains high enough to actually engage the detergent. If you ignore this, you’ll eventually find your dishwasher bottom spray arm isn’t spinning because the debris has created a physical imbalance in the bearing. Maintenance isn’t just about cleaning; it’s about preserving the mechanical physics of the machine.
How do I keep my gas oven in peak condition for years?
The secret isn’t some magic spray; it’s air-flow and electrical integrity. I make it a habit to vacuum the cooling fan intake every time I pull the oven out for a deep floor clean. If that fan gets bogged down with pet hair and dust, the ambient heat around your control board rises, leading to those expensive ‘garbled display’ errors. In the world of dishwasher parts and DIY diagnostics, we call this preventative component cooling. For my oven, I also do a yearly check on the door seal. You can use the ‘dollar bill trick’—shut the door on a dollar bill and pull. If it slides out with no resistance, you are losing heat, which forces your gas valve to cycle twice as often as it should, wearing it out prematurely.
The Future of Repair Is Already In Your Pocket
I predict that in the next five years, we won’t even be using traditional multimeters for basic checks. We are already seeing the rise of thermal imaging attachments for smartphones. I’ve started using a FLIR camera to ‘see’ where heat is escaping from an oven door or to identify a hot spot on a relay board before it actually burns out. This trend toward visual diagnostics will make it much easier to spot why your oven temperature drops randomly during baking without having to disassemble the entire chassis. We are moving from ‘guess and check’ to ‘see and solve,’ and that is a massive win for the DIY community. I strongly encourage you to grab your multimeter today and perform a resistance test on your safety valve terminals while the oven is cold—compare those numbers to the ones you get after a 30-minute bake cycle. Seeing that change in real-time will teach you more about your oven than any manual ever could.
The Three Hardest Lessons I Learned on the Kitchen Floor
I’ve spent more nights than I care to count on my kitchen floor, and through those trials, I’ve discovered a few hard truths that standard manuals skip. First, never assume a ‘new’ part is a functioning part; factory defects are real, and I’ve seen brand-new igniters fail right out of the box. Second, your eyes are your worst enemy when judging the glow of an igniter. While it looks bright to you, only an amp meter can tell if it’s actually drawing the 3.2+ amps needed to trigger the safety valve. Finally, remember that cleaning is often just as effective as replacing. If you learn how to clean the debris from an ovens hidden burner, you might find that your ‘weak’ valve was actually just struggling with a clogged gas port.
Tools I Actually Use to Save Hundreds on Service Calls
To move beyond guessing, you need a kit that provides objective data. For professional-grade oven diagnostics, I always carry a Fluke 117 Multimeter because it filters out ‘ghost voltage’ that leads to misdiagnosing control boards. I also keep a set of dental picks handy, which are perfect for when you need to clear your dishwasher spray arm holes or remove carbon buildup from gas orifices. Lastly, don’t overlook a simple LED headlamp; you can’t fix what you can’t see, especially when you are tucked deep inside an oven cavity checking for a burnt terminal block on your electric oven.
Mastering Your Kitchen’s Mechanical Heart
Fixing a gas oven igniter that glows but doesn’t light is more than just a repair; it is an act of home independence. Every time you pick up a tool instead of a phone to call a technician, you are building a skill set that saves you thousands over a lifetime. Whether you are troubleshooting an oven or learning how to identify dishwasher faults quickly, the logic remains the same: test, don’t guess. Take it one wire at a time, trust your meter, and don’t be afraid to get your hands a little greasy. Have you ever spent a fortune on a replacement part only to realize the real culprit was a simple loose wire? I’d love to hear your DIY success stories or ‘lessons learned’ in the comments below!