I remember standing in my kitchen at 10:00 PM, socks soaking wet from a mysterious puddle, staring at my dishwasher like it was a personal enemy. I’d slam the door, it would bounce back, and the cycle light would mock me with a persistent, rhythmic blink. It’s one of those “small” problems that feels like a life-shattering catastrophe when you have a sink full of greasy pans and a mountain of dirty plates. Most of us assume the computer brain has fried, but usually, it is just a tired piece of plastic that has given up the ghost. Today, I am going to show you that you do not need a degree in mechanical engineering to fix this. We are going to get that door clicking shut with the satisfying thud it had the day you bought it.
Stop Fighting Your Dishwasher Door Every Single Night
The latch assembly is the unsung hero of your kitchen. It is not just a lock; it is a vital safety switch. If it does not engage perfectly, the machine will not even think about sending water through those spray arms. I learned this the hard way years ago. I thought I could bypass the sensor with a piece of duct tape and a dream. Spoiler alert: It did not work, and I ended up with a sticky mess and a machine that still would not start. If you are seeing dishwasher faults popping up quickly, the door latch is often the prime suspect. According to data from various home appliance repair forums, door-related failures are among the most common reasons a dishwasher refuses to start, often mistaken for much more expensive motor issues.
Is This Tiny Piece of Plastic Actually Worth the Hassle?
You might be wondering if you should just call a pro and hand over a few hundred dollars for a twenty-minute job. Trust me, it is not worth the repair bill. If you can use a screwdriver, you can do this. I once made the mistake of over-complicating my DIY diagnostics, checking the motor and the pump when the real culprit was right under my nose. If your dishwasher door feels too light or heavy, or if it simply will not stay closed, we are going to fix it. Have you ever found yourself propping a kitchen chair against the door just to keep a cycle running? It is time to stop the madness. Let us look at how swapping out a worn dishwasher door latch assembly can save your sanity. We are going to dive into the tools you need and the exact steps to pop the old one out without breaking the inner door panel. Dealing with appliance issues can be frustrating, especially when it feels like your oven repair essentials and dishwasher maintenance are piling up at the same time, but this specific fix is one of the most rewarding wins for any homeowner.
First things first: safety. You cannot work on something that is still “alive.” Go to your circuit breaker and kill the power to the dishwasher. I once ignored this step while working on my oven—thinking I was too fast for the electricity—and let us just say that the feeling of 120 volts crawling up your arm is a mistake you only make once. While you are at it, check out how to identify if your oven control board is failing too, because once you start fixing things, you tend to notice everything else that is broken. The latch is the gatekeeper of your kitchen appliance, and it needs your full, undivided attention.
Kill the Electricity Before You Do Anything Else
You might think simply turning the machine off at the console is enough, but it is not. A dishwasher is always waiting for a signal, which means there is live current sitting just inches from your fingers. Open the door fully and locate the mounting screws. If you have ever dealt with replacing a dishwasher door hinge cable, you know that these machines are packed tighter than a suitcase on a return flight. Removing the power ensures that if you accidentally nick a wire, you are only dealing with a minor repair rather than a trip to the emergency room.
How to Open the Door Panel Without Dropping It on Your Toes
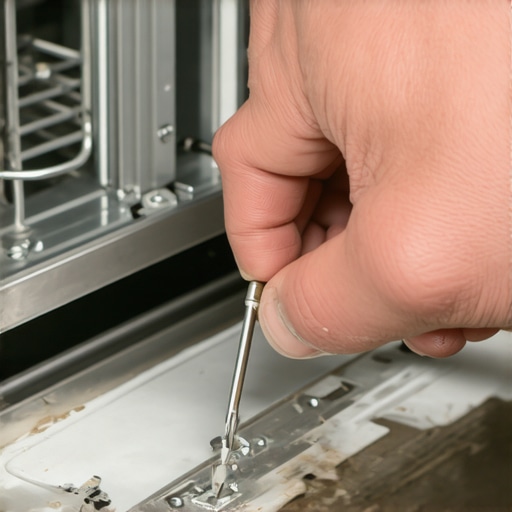
To get to the latch, you have to separate the inner and outer door panels. Usually, this involves removing about six to ten Torx screws around the perimeter of the inner door. Here is where I messed up the first time: I unscrewed everything while the door was fully open. The second the last screw came out, the outer panel—which is surprisingly heavy—slid right off and nearly crushed my feet. Hold the door partially closed or have someone hold the front panel while you work. If you notice your dishwasher door feels too light or heavy during this process, it might be time to look at the springs too.
Handle Those Tiny Wires Like a Bomb Squad Tech
Once you have the panels separated, you will see the latch assembly at the very top. It is usually held in by two screws and has a wire harness plugged into it. This harness is the “brain” telling the machine the door is shut. Before you unplug anything, take a photo with your phone. You think you will remember where the red wire goes, but ten minutes later, you will be staring at it like it is a Rubik’s cube. If you are already doing this, it is worth checking other dishwasher parts for diagnostics while the guts are exposed. I once found a half-melted wire near the latch that looked just like the damage you would see when you need to check for a burnt terminal block on your electric oven.
Pop in the New Latch and Listen for the Click
Take the old latch out and slide the new one into place. It should feel firm. Reconnect the wires exactly as they were in your photo. If the connector feels loose, give it a tiny squeeze with some needle-nose pliers to ensure a snug fit. A loose connection here will cause intermittent starting issues, much like the frustration of 3 reasons your gas oven is clicking but not lighting. Once the latch is secure, align the door panels again. This is the hardest part of the job—getting the screw holes to line up perfectly. Do not tighten any of them all the way until they are all started. This prevents the panel from warping and ensures the latch sits exactly where it needs to strike the frame.
The Big Control Board Lie You Need to Stop Believing
Most DIY guides will tell you that if your machine stays dark, you are looking at a fried motherboard. I used to believe this too, but in my experience, the ‘dead’ machine is usually just a victim of a mechanical failure in the latch assembly. People rush to spend $200 on a control board when a $20 piece of plastic is the real culprit. This is why oven diagnostics pinpointing faults before calling a repair expert is such a critical skill to master for all your appliances. According to data from the Association of Home Appliance Manufacturers (AHAM), a significant percentage of ‘defective’ control boards returned to manufacturers are actually perfectly functional; the real issue was a simple sensor or latch that failed to send the ‘closed’ signal. Don’t be the person who throws away a good board because they skipped the basics of dishwasher parts and DIY diagnostics.
Why Does My Latch Pass a Continuity Test But Still Fail During a Cycle?
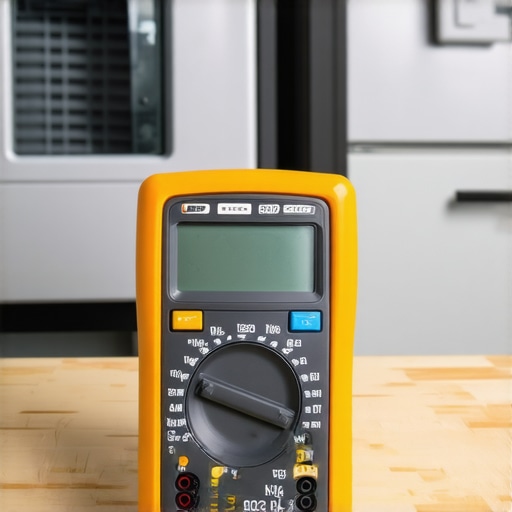
This is the ultimate ‘trap’ for advanced DIYers. You pull out your multimeter, check for continuity, and the latch beeps. You think it’s good, right? Not necessarily. A latch can be electrically sound but mechanically fatigued. If the internal spring has lost its tension, the door might bounce just enough during the high-pressure spray cycle to break the connection for a millisecond. That tiny break is enough to trip the safety and shut the whole thing down. I’ve seen this happen specifically when someone is fixing a dishwasher that keeps draining and never starts. If the seal is old or if you are finding the right gasket for an older dishwasher model, the extra thickness can prevent the latch from seating deep enough to stay engaged under pressure.
One Tiny Turn Can Break Your Entire Repair
Here is the ‘oops’ factor that ruins most weekend projects: over-tightening the mounting screws. When you are reassembling the door, it is tempting to crank those Torx screws down as hard as possible. Don’t do it. The inner door liner is often made of plastic or thin stainless steel; if you over-tighten, you can warp the frame just enough that the latch and strike plate no longer align. You’ll end up with a leak under your dishwasher door hinge because the door isn’t pulling tight against the tub. It’s the same precision required when troubleshooting oven repair essentials—alignment is everything. If you notice your dishwasher door feels too light or heavy after the repair, you likely have a spring or alignment issue, not a latch problem. Have you ever fallen into this trap of replacing the most expensive part first only to realize it was a simple alignment fix? Let me know in the comments. We’ve all been there, and sharing those ‘fails’ is how we all get better at keeping our kitchens running without breaking the bank.
The Tool Kit That Actually Saves Your Afternoon
I’ve wasted more hours than I’d like to admit trying to make a standard screwdriver work in a space designed for a specialized offset bit. If you’re serious about skipping the $200 service call, you need more than just a hammer and a prayer. My go-to is a digital multimeter with auto-ranging capabilities. Why auto-ranging? Because when you’re elbow-deep in oven repair essentials, you don’t want to be fiddling with dials trying to find the right scale for ohms. You need to know instantly if that element is dead or alive. I also swear by a magnetic parts tray; there is no feeling quite as soul-crushing as hearing a tiny mounting screw bounce into the dark abyss of a dishwasher’s bottom pan. Having the right tools transforms a stressful ordeal into a controlled process of how to identify dishwasher faults quickly.
How do I keep these machines humming for another decade?
Maintenance isn’t just a chore; it’s an investment. For your dishwasher, the absolute best thing you can do is clean your dishwasher’s hidden sump filter every few months. I’ve seen perfectly good pumps burn out because they were fighting against a literal wall of labels, glass shards, and popcorn kernels. While you’re in there, take thirty seconds to inspect your dishwasher check valve for clogs. These tiny rubber flaps are often the reason your machine won’t drain, and clearing them takes zero tools. For the oven, stop using the high-heat self-clean cycle. Experts like the team at ‘Appliance Assistant’ often warn that the extreme temperatures used in self-cleaning—often exceeding 900 degrees—are the leading cause of blown thermal fuses and fried control boards. Instead, stick to a manual scrub or a steam-clean if your model supports it.
The Future of Your Kitchen is Getting Smarter and Harder to Fix
We are moving into an era where sensors do the talking for us. In the next five years, expect your dishwasher to ping your phone with the exact part number needed before you even notice the dishes are dirty. We’re already seeing this with advanced oven diagnostics pinpointing faults through Wi-Fi modules. While this sounds convenient, it means the mechanical skills we’re talking about today—like knowing how to perform dishwasher parts diagnostics—will become even more vital to ensure we aren’t at the mercy of expensive proprietary software. I’m predicting a shift toward ‘Right to Repair’ modular designs, but until then, your multimeter is your best friend. My challenge to you: tonight, pull out your dishwasher’s bottom rack and check the filter. If it’s slimy or covered in debris, clean it. It’s a five-minute win that could save you a thousand-dollar replacement down the road.
Why I No Longer Panic When a Machine Stops
After years of dealing with flooded floors and ovens that refuse to heat, I’ve realized that the biggest hurdle isn’t the repair itself—it’s the anxiety of the unknown. Here are a few lightbulb moments that changed how I approach my kitchen:
- The ‘Loose Wire’ Rule: Before you buy an expensive motor, wiggle the connectors. Vibration is a dishwasher’s worst enemy, and a loose plug is often the only thing standing between you and a working machine.
- Diagnostics Over Replacement: I used to be a ‘parts cannon’ guy, firing new components at a problem until something finally worked. Now, I spend twice as much time on oven diagnostics as I do on the actual swap. It saves money and pride.
- Trust the Sound: If your machine sounds different, it *is* different. Learning the unique rhythm of your appliances helps you spot trouble weeks before a total breakdown.
Tools That Saved My Sanity More Than Once
You don’t need a professional workshop, but you do need a few ‘truth-tellers’ in your drawer. First, an auto-ranging multimeter is non-negotiable for anyone looking into how to identify dishwasher faults quickly. It takes the guesswork out of whether a part is dead or just sleeping. Second, I always keep a magnetic parts tray nearby; losing a single Torx screw can turn a twenty-minute fix into a two-hour hunt. Finally, if you ever feel in over your head, remember there is no shame in knowing when to stop diying and call an oven repair expert. The goal is a working kitchen, not an ego boost.
Your Kitchen Is Waiting for You to Lead
Fixing that door latch is just the beginning. Once you realize that these machines are just a collection of simple parts working together, the fear vanishes. Whether you are tackling oven repair essentials or just cleaning a gunked-up filter, you are taking ownership of your home. You have the tools, you have the knowledge, and now you have the momentum. Go ahead, shut that dishwasher door and enjoy the silence of a job well done. Have you ever found a tiny, cheap piece of plastic that saved you from a $500 repair bill? Let me know your favorite DIY win in the comments below!