It was 6:00 PM on a Tuesday, and my kids were already asking when the lasagna would be done. I turned the oven dial, expecting that comforting whoosh of ignition. Instead? Click. Click. Click. Nothing. I stood there like a fool, staring at a cold box of metal. It is that sinking feeling we have all had when a simple dinner turns into a DIY nightmare. We are going to get that flame back today because I have spent way too many nights eating cold cereal while staring at a broken range. I learned the hard way that oven repair essentials are not just for pros—you can handle this.
Don’t Let the Ticking Sound Drive You Crazy
I will be honest: my first instinct used to be hit it and hope. Bad move. Once, I actually made things worse by cleaning the igniter with a soaking wet rag, which is basically the opposite of what you should do. If your gas oven igniter clicks but won’t light, it is usually down to three specific culprits that do not involve a total kitchen remodel. According to data from the National Fire Protection Association, gas ranges are involved in thousands of home fires annually, so while we want to be brave, we have to be smart about safety first. Usually, it is just a dirty igniter, a misaligned burner, or a faulty part that needs a quick swap. If you have ever felt like your kitchen is out to get you, you are not alone. Have you ever tried to light a burner manually just to get through a meal?
Is it time to just give up and buy a new oven?
Absolutely not. Most of the time, the fix is cheaper than a week’s worth of groceries. We are going to look at how to swap a broken spark igniter and check those burner ports without losing your mind. It is all about the small details that big repair companies do not always tell you over the phone. Let’s get your kitchen back in working order.
Clear Out the Clogs Blocking Your Flame
Your gas burner is a lot like a flute; if the holes are plugged, you aren’t going to get any music—or in this case, the heat you need for dinner. I once spent forty minutes fighting with my back-left burner while trying to sear a steak, only to realize a boil-over from a previous night’s pasta had turned into a concrete-hard crust right over the gas port. I took a simple sewing needle and carefully poked through each small opening in the burner head. The moment I turned the dial after that, the flame roared to life. This is the first and easiest step in oven diagnostics. Use a stiff toothbrush or a needle to clear the debris, but never use a toothpick. I learned the hard way that wood can snap off inside those tiny holes, leaving you with a permanent clog that is a nightmare to fish out.
Give Your Igniter a Gentle Scrub
The igniter is the heart of the ignition process, acting exactly like a spark plug in a car engine. If that ceramic nub is covered in grease or carbon buildup, the spark won’t have the strength to jump across and ignite the gas. You want to see a crisp, bright blue spark. If you are seeing a weak, yellowish flicker, the igniter is struggling against the grime. Take a cotton swab dipped in a small amount of rubbing alcohol and gently clean the tip of the igniter. Make sure it is completely dry before you try to test it. If the spark is still non-existent or erratic after a good cleaning, it is probably time to swap a broken spark igniter for a fresh one. These parts are usually held in by just a couple of screws and are one of the most common oven repair essentials you should know. 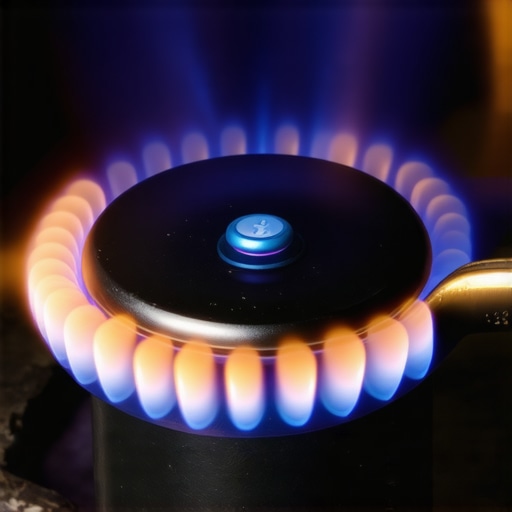
Check the Alignment of Your Burner Caps
Sometimes the fix is so simple it’s embarrassing. A slightly tilted or poorly seated burner cap will kill your ignition every single time. If the cap is wonky, the gas escapes from the wrong side of the burner and never actually meets the spark. I have seen friends tear their entire range apart and look into complex electrical issues, only to find out the cap was sitting at a five-degree angle because a single grain of rice was stuck underneath it. Always ensure the cap is sitting flat and locked into its grooves.
Verify the Voltage at the Safety Valve
If you can hear the clicking and see a strong spark, but the smell of gas never appears, the problem is buried deeper in the machine. This is where you move from basic maintenance to technical troubleshooting. The safety valve acts as the gatekeeper for the gas line; if it does not receive the correct amount of electrical current, it stays closed for safety. You can use a multimeter for testing a gas oven safety valve for proper voltage to see if the signal is actually reaching the part. This logic of checking the power flow is exactly how you would handle how to identify dishwasher faults quickly as well. If the reading is zero or significantly low, the valve is likely toast and needs a replacement.
Listen for the Right Kind of Clicking
A healthy ignition system produces a rhythmic, sharp, and consistent clicking sound. If the sound is faint, muffled, or sounds like it is struggling to keep a beat, the spark module itself might be failing. This often happens after a heavy cleaning session where too much moisture gets into the control switches behind the knobs. If you have recently dealt with a kitchen flood or a massive boil-over, you might even find yourself fixing a dishwasher that wont start after a power surge alongside your oven issues, as electrical spikes or moisture can wreak havoc on multiple appliances at once. Always give the switches time to dry out completely—sometimes 24 hours with a fan pointed at the knobs—before deciding the module is dead.
The Glowing Igniter is Often a Liar
Here is a piece of advice that flies in the face of every YouTube tutorial you have probably watched: just because your igniter is glowing bright orange does not mean it is actually working. I have seen countless homeowners waste money on new safety valves because they saw that warm glow and assumed the igniter was fine. In reality, an igniter is a resistance-based component. Over time, the material wears thin, and while it still gets hot enough to look pretty, it fails to draw the 3.2 to 3.6 amps of current required to pull the safety valve open. If your gas oven igniter glows but doesn’t light, you are likely dealing with a component that is ‘tired’ rather than ‘dead.’ I once spent three hours tracing gas lines only to realize my ‘working’ igniter was just under-performing by a fraction of an amp.
Why does my oven stay cold even when the igniter is glowing bright orange?
This is the ultimate ‘trap’ for the DIYer. Expert technicians at the Association of Home Appliance Manufacturers often emphasize that visual diagnostics are the most common source of home repair error. The safety valve is designed as a fail-safe; it will not release gas unless it ‘feels’ the exact electrical load of a fully functional igniter. This is where oven diagnostics become a game of numbers rather than sight. Using a clamp-on ammeter to check that draw is the only way to be 100% sure before you start tearing out more expensive parts. Have you ever fallen into this trap of trusting your eyes over a meter? Let me know in the comments because I certainly have.
The Control Board Isn’t Always the Villain
When an oven starts acting possessed—beeping at midnight or refusing to start a cycle—most people immediately jump to the most expensive conclusion: a fried control board. Before you drop $300 on a new brain for your range, look at the individual relays. Often, it is just a single sticky switch on the board that can be tested individually. Learning how to identify a bad oven relay on the control board can save you a fortune. It is a similar story with cleaning; if you are checking for oven control board failing symptoms, make sure you haven’t just gotten moisture behind the overlay from a heavy steam clean. Sometimes, a hair dryer and some patience are more effective than a screwdriver.
Don’t Ignore the Dishwasher Logic
We often treat the oven and dishwasher as two different worlds, but their diagnostic logic is identical. For instance, if your dishes are coming out dirty, you might think the pump is failing, but the real reason your dishwasher soap door wont open is often a simple mechanical blockage from a stray tall plate rather than a motor failure. If you ever feel like you are in over your head, it is crucial to know when to stop diying and call an oven repair expert. There is no shame in calling for backup when the electrical schematics start looking like ancient hieroglyphics. Safety and precision always beat a lucky guess.
Stop Guessing and Buy a Real Multimeter
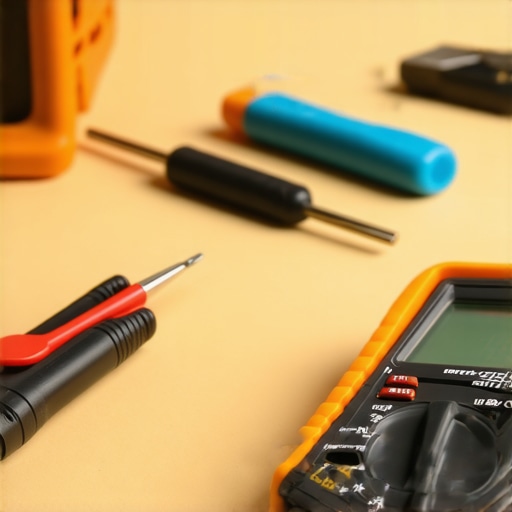
If you are going to transition from a weekend warrior to a kitchen master, you need to stop relying on visual cues. I spent years trying to eyeball whether a wire was burnt or a fuse was blown, and honestly, it cost me more in wasted parts than a high-quality tool ever would. My go-to is a Fluke 117 or a reliable Klein digital multimeter. These aren’t just gadgets; they are the only way to be certain about what is happening inside those wires. Whether you are testing your oven’s high-limit thermostat with ease or testing your dishwashers high-limit thermostat for continuity, the meter tells a story that your eyes cannot see. I once found a ‘perfect’ looking wire that had a microscopic break inside the insulation; I would have never found it without a continuity beep. For anyone serious about dishwasher parts a comprehensive guide to diy diagnostics, a meter is your best friend.
How do I keep my appliances running for a decade?
Consistency is the secret sauce. Most people wait for a catastrophic failure before they look under the hood, but the real pros do a ‘gut check’ every six months. This means more than just wiping the crumbs off the bottom. You should be checking the flexibility of your seals and the tightness of your hardware. I’ve seen small vibrations turn into major leaks because a mounting screw backed out over time. It is much easier swapping out a worn dishwasher door latch assembly now than dealing with a flooded kitchen later. Also, take five minutes for the fast way to clean grimy dishwasher door gaskets. That gunk isn’t just gross; it’s acidic and will eventually eat through the rubber, destroying your vacuum seal and making your machine work twice as hard.
Recalibrate the Heat Before You Burn the Turkey
Your oven’s thermostat is not a set-it-and-forget-it component. Over years of heat cycles, the sensor can drift. According to the Whirlpool Technical Education Job Aid for gas ranges, even a 5% variance in thermistor resistance can result in a 20-degree temperature swing. This is why your cookies might be burnt on the bottom but raw in the middle. I always recommend the fast way to recalibrate your oven for accurate temperatures using a secondary independent thermometer. It is a simple software adjustment on most modern boards that restores factory-level precision. If you’ve been blaming your recipes for bad results, it might just be your hardware lying to you. Don’t let a drifting sensor ruin your Sunday roast when the fix takes less than ten minutes.
Why Your Next Oven Might Fix Itself
The future of home repair is shifting toward ‘Smart Diagnostics.’ We are already seeing brands like LG and Samsung integrate systems like ThinQ and SmartHQ, which allow the appliance to transmit an acoustic signal or a WiFi data packet directly to a technician—or your smartphone. In the next few years, I predict we will see modular repairability become the standard, where the oven tells you exactly which relay has failed before you even open the back panel. However, until every kitchen is fully automated, the fundamentals of oven diagnostics will always come down to your ability to read a circuit and understand the flow of power. My challenge to you: don’t wait for a breakdown. Grab an oven thermometer this weekend and check your calibration; you might be surprised how far off your ‘perfect’ oven actually is.
Lessons Learned While Staring at a Cold Oven
Over the years, I have realized that the biggest mistake most DIYers make is assuming that every problem requires a complex solution. In reality, about 80% of the time, the fix is sitting right in front of you. I have learned that a simple multimeter is often more valuable than a whole set of expensive wrenches. If I had known earlier how to check for electrical continuity, I would have saved hundreds of dollars on parts I did not actually need. Another big realization? Don’t trust your eyes. An igniter that glows is merely a ‘maybe,’ but a multimeter reading is a ‘definitely.’ Most importantly, I have learned that patience is a tool just like a screwdriver; rushing through oven diagnostics usually leads to stripped screws and more frustration.
#IMAGE_PLACE_HOLDER_E#
My Go-To Kit for Kitchen Troubleshooting
When you are ready to stop guessing and start fixing, you need a few reliable resources in your corner. First, always keep a copy of your specific model’s technical sheet, usually tucked behind the bottom kickplate or inside the control console. For a deeper dive into how these systems interact, I highly recommend checking out dishwasher parts a comprehensive guide to diy diagnostics, as the logic for sensors and valves often overlaps between appliances. I also trust the Association of Home Appliance Manufacturers for safety standards, and I never start a job without a non-contact voltage tester. Having these tools turns a stressful afternoon into a manageable project.
Take Back Control of Your Kitchen Today
There is a unique sense of pride that comes from hearing that whoosh of a successful ignition after you have spent the afternoon troubleshooting. You don’t have to be a professional technician to master oven repair essentials; you just need the right approach and a bit of bravery. If you hit a wall, remember there is no shame in knowing when to stop diying and call an oven repair expert to finish the job safely. Your kitchen is the heart of your home, and keeping it running is one of the most practical skills you can ever develop. Go ahead, grab your tools, and get that flame back. Have you ever been tricked by a glowing igniter that actually wasn’t working? Let me know your biggest DIY surprise in the comments below!