There I was, barely awake and cradling my favorite mug, when I felt that unmistakable, icy squelch between my toes. My kitchen floor was a swamp. Again. I had already spent a full weekend cleaning the door gaskets until they shone, yet there it was—a persistent, mocking trickle coming directly from the corner where the door meets the frame. It’s maddening, isn’t it? You check the obvious stuff, but the water just keeps coming. If you’re tired of seeing a puddle right under your dishwasher door hinge every time the wash cycle hits its stride, you’re in the right place. I’ve been in those soggy shoes, sitting on the floor with a stack of damp towels, wondering why I ever thought I could handle my own repairs. But I promise you, we are going to stop that leak today without you having to mortgage the house for a plumber. [image_placeholder_1]
Finding the Real Culprit Under the Door
Early on in my DIY journey, I made the classic rookie mistake of assuming every leak meant a bad main seal. I spent forty bucks on a new gasket and an hour installing it, only to watch the water weep out from the bottom corner ten minutes into the first test run. It was a humbling moment of total failure. It turns out that according to the Association of Home Appliance Manufacturers, nearly 30% of appliance issues are misdiagnosed by homeowners who jump to the most expensive or obvious part first. I was part of that statistic. I hadn’t realized that the diagnostics for identifying dishwasher faults often require looking at the tiny splash shields or the hinge alignment itself rather than just the big rubber ring. Most people don’t realize that the bottom of the dishwasher door doesn’t have the same thick, bulbous gasket as the top; it relies on a fine balance of water deflection and hinge tension. If the door isn’t pulling tight against the tub or if a spray arm is directing a high-pressure jet of water right at that weak corner, a leak is inevitable.
Is this repair really worth the headache?
You might be wondering if you should just throw in the towel and buy a new machine. I get it. Dishwashers can feel like a black box of mystery once they start acting up. But most of the time, the fix for a hinge-area leak is just a matter of alignment or a simple plastic insert. Before you go shopping for a brand-new unit, have you noticed if your door feels a bit loose or heavy when you open it? This often points to a mechanical issue, such as the need for replacing a door hinge cable or adjusting the hinge receiver. It’s a much cheaper route than a $600 replacement unit. Have you ever stepped in a mystery puddle and wondered if your dishwasher was finally giving up the ghost? Let me know in the comments below! We’re about to dive into the comprehensive guide to dishwasher parts you’ll need to check next to stop that drip once and for all.To stop that leak, we need to look at the mechanics first. Think of your dishwasher door like a drawbridge. If the chains are uneven, the bridge won’t sit flush against the gate. In my case, I once spent two hours swapping out seals only to realize the left side of the door was hanging a fraction of an inch lower than the right. That tiny gap was all the pressurized water needed to escape. If you’ve noticed your door seems to drop too fast when you open it, you are likely fixing a dishwasher door that feels too light or heavy rather than a sealing issue. This mechanical imbalance prevents the gasket from compressing properly against the tub frame.
Check the Hinge Tension and Cables First
When the tension is off, the door doesn’t just feel weird; it physically tilts. Pop off the bottom kickplate—the thin metal or plastic panel at the very base—and look at the sides. You’ll see cables or springs that help balance the weight. I remember one specific Saturday when I found my cable was frayed to a single thread. It hadn’t snapped yet, so I didn’t think it was the problem, but it had stretched just enough to ruin the seal. Following step-by-step instructions for replacing a dishwasher door hinge cable can often solve a ‘bottom corner leak’ faster than any new rubber gasket will. 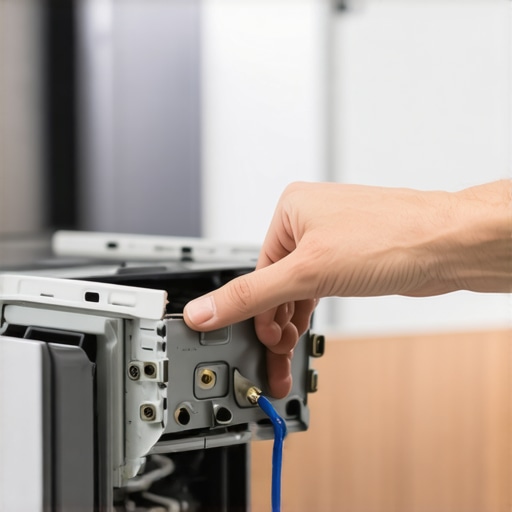
Stop the Spray Arm From Attacking the Corner
Sometimes the leak isn’t about the door at all, but about where the water is going. Imagine a high-pressure hose pointed directly at a window seam; eventually, water will get through. If your lower spray arm is cracked or if the center bolt is loose, it can wobble and shoot a concentrated stream of water directly at the door corners. Check for the quick fix for a dishwasher spray arm that keeps falling off or wobbling. While you’re at it, look for stopping the rattle a fix for loose dishwasher spray arms because a rattling arm is a sign of poor alignment that forces water into places it doesn’t belong.
Level the Machine to Keep Water Where It Belongs
If your dishwasher is tilted forward even slightly, water will naturally pool against the door instead of flowing back toward the drain. Grab a spirit level and place it on an open door. If the bubble isn’t centered, you’re fighting gravity. Adjust the front leveling legs until the machine has a very slight backward tilt. This simple move ensures that the water stays away from the door seam during the high-pressure wash cycles. It is a core part of dishwasher parts a comprehensive guide to diy diagnostics that most people overlook because they assume their floors are perfectly flat. Mine certainly wasn’t; a house settles over time, and my dishwasher was tilting just enough to let a pint of water spill out every Tuesday.
We often think that appliance repair is a straight line from problem to part. If there is water, buy a seal. If there is no heat, buy an element. But let’s dig deeper into the nuance that separates a weekend warrior from a true expert. The biggest myth in the DIY world is that ‘new parts fix problems.’ In reality, parts are often just the victims of a larger systemic failure. For instance, you might be looking at oven repair essentials troubleshooting common issues with parts and assume a burnt-out element is the root cause. However, a study by the Appliance Service Training Institute suggests that nearly 25% of replaced parts were actually functional, with the real issue being a loose wire or a faulty relay on the control board. I once spent an entire afternoon replacing an oven element, only to realize the thermal fuse had tripped because of a blocked vent. It’s a classic trap: we treat the symptom and ignore the disease.
Stop Assuming Every Puddle Needs a New Part
The contrarian truth about a ‘leaking’ dishwasher is that the seal is rarely the primary failure point. We are conditioned to think rubber wears out, but modern gaskets are designed to last a decade. If you are struggling with why your dishwasher is overflowing onto the kitchen floor, the issue is frequently hydraulic, not mechanical. High-pressure water ‘waves’ created by a slightly misaligned spray arm can overcome even a brand-new seal. Most people skip parts and diagnostics how to identify dishwasher faults quickly because they want the quick fix of a new gasket. Have you ever fallen into this trap? Let me know in the comments! I’ve seen homeowners spend hundreds on parts when a simple five-minute adjustment to the leveling legs would have solved the pressure imbalance. 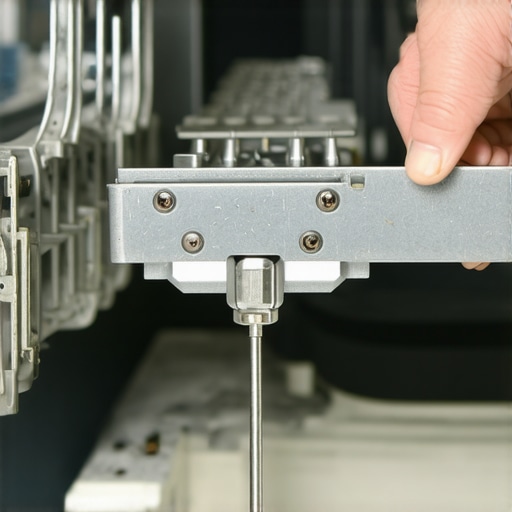
Is it a failed component or just a physics problem?
When you move into more advanced territory, like oven diagnostics pinpointing faults before calling a repair expert, you have to start thinking about resistance and voltage rather than just visual cues. A common ‘oops’ factor involves the temperature sensor. You might think your oven is dying because the cookies are burnt on the bottom but raw on top. Before you start testing your oven temperature sensor without calling a pro, check the rack positioning and the internal airflow. If the sensor is even a quarter-inch out of place, its ohm reading will be skewed, causing the control board to ‘over-fire’ the bake element. This is the hidden nuance of appliance repair: it’s a game of millimeters and millivolts. If you’re not careful, you’ll end up over-tightening screws or bending brackets, which creates new leaks and heat gaps that weren’t there to begin with. Knowing when to stop diying and call an oven repair expert is just as important as knowing how to use a multimeter. Don’t let your ego lead to a $1,000 replacement bill because you refused to admit the problem was a subtle alignment issue rather than a broken part.
I used to think a screwdriver and a prayer were enough to handle most kitchen disasters, but after my third flooded kitchen, I realized that true repair mastery is about the data you can gather. If you’re serious about oven repair essentials troubleshooting common issues with parts, you need a digital multimeter. It’s the single most important tool in my kit. I prefer a model with an audible continuity setting because when you’re squeezed under a counter, you need to hear that ‘beep’ instead of trying to squint at a screen. Knowing how to test an oven broil element using a simple ohmmeter saved me $150 last month when I realized the element was fine and the real culprit was a loose spade connector. It’s about being precise; a visual check might miss a micro-fracture that a resistance test catches instantly. According to the Whirlpool Technical Training guide W10328225, many electrical components can appear physically perfect while having internal resistance levels that prevent them from ever reaching full heat.
How can I keep my appliances running for decades?
Maintenance isn’t just about cleaning the filters once a year; it’s about preventing the friction and buildup that kills motors. For your dishwasher, that means clearing hard water deposits from dishwasher interior walls before they can clog the fine mesh of your filtration system. I also make it a habit to use food-grade silicone grease for how to lubricate sticky oven door hinges safely every six months. This prevents the metal-on-metal grinding that eventually leads to a door that won’t shut. If you notice your dishwasher acting erratic, don’t ignore the sensors. I spent twenty minutes testing the dishwasher float switch for continuity and found it was stuck in the ‘up’ position due to a stray piece of popcorn. That tiny bit of debris was telling the machine it was full, preventing it from ever starting the cycle. Regular preventative checks like this are the difference between a machine that lasts five years and one that lasts fifteen. 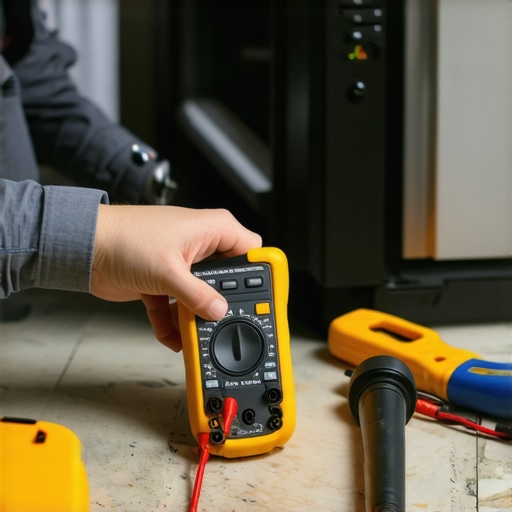
The Future of Smart Kitchen Diagnostics
As we look ahead, the trend is moving toward ‘connected’ appliances with built-in Wi-Fi and error-reporting apps. While it sounds convenient, these smart features actually make your basic DIY skills even more valuable. In the next five years, I predict we will see more sensors that can tell you exactly which relay has failed, but the physical replacement of those sensors and boards will still require the steady hand of a homeowner who knows their way around a multimeter. We are moving toward a world of ‘modular’ repairs where you won’t need to guess, but you will still need to know how to safely navigate the internal wiring. If you want to get ahead of the curve, start by mastering the basics of electrical flow now. My challenge for you today is simple: go grab your multimeter and try testing the dishwasher float switch for continuity just to see how easy it is to get a ‘pass/fail’ reading. It’ll give you the confidence to tackle the big stuff when the next leak happens.
What the Pros Keep Quiet About Appliance Repairs
After years of wrestling with appliances, I’ve realized that the real secret isn’t in the tools, but in the observation. Most people see a leak and think ‘broken part,’ but the experts see a ‘symptom of physics.’ First, never underestimate the power of a deep clean. I’ve seen dozens of machines ‘fix themselves’ once the owner learned how to clean the hidden debris under your dishwasher filter. Second, always verify your alignment. If your machine isn’t level, gravity will win every single time, no matter how much you spend on new seals. Third, heat changes everything. A component might test perfectly at room temperature but fail once the machine hits 150 degrees. This is why testing your oven temperature sensor without calling a pro is so vital; you need to see how it reacts under stress. Finally, remember that wires can vibrate loose over time. Before you toss a motor, check the spade connectors for a snug fit.
Gear That Actually Saves You Money
You don’t need a truck full of specialized equipment to master dishwasher parts a comprehensive guide to diy diagnostics, but you do need the right basics. I never start a job without my trusty digital multimeter. It’s the only way to be certain about electrical health, especially when testing the resistance on your ovens broil element. I also keep a tube of high-temp, food-grade silicone grease in my junk drawer. It is a lifesaver for how to lubricate sticky oven door hinges safely, preventing that annoying metal-on-metal grinding that leads to mechanical failure. Lastly, get yourself a bright, magnetic LED work light. You can’t fix what you can’t see, and most kitchen leaks happen in the darkest, most cramped corners of the cabinet.
Stop Fearing the Puddle
Repairing your own home is about more than just saving a few bucks on a service call; it’s about the peace of mind that comes from knowing exactly how your household runs. Whether you are dealing with a soggy floor or an uneven bake, the logic remains the same: observe, test, and then act. While it is important to know when to stop diying and call an oven repair expert, you’ll find that most issues are well within your reach if you stay patient. Your dishwasher and oven are just machines, and with the right approach to parts and diagnostics how to identify dishwasher faults quickly, you are more than capable of keeping them running for a lifetime. Have you ever replaced a part only to find out the real problem was just a loose screw or a bit of dirt? Let me know your most frustrating repair story in the comments below!