I’ll never forget the sinking feeling in my stomach when I hosted my sister-in-law’s engagement brunch. I’d spent hours on the frittata, but when I reached for my favorite stoneware plates, they were covered in a dull, gritty white haze. I tried buffing it off with a tea towel, but it was like the plates had developed a permanent, ghostly tan. It wasn’t just “unclean”—it felt like I was failing at basic adulting. I’d spent years thinking I was an expert at keeping a kitchen running, but there I was, staring at a stack of ceramic that looked like it had been salvaged from a chalk mine.
Stop Guessing Why Your Plates Look Dusty
Most people assume that more soap equals cleaner dishes. I fell into that trap for a long time. I’d pour in extra detergent, thinking I was giving the machine a boost, but all I was doing was making the film worse. That chalky residue is usually a chemical standoff between your water’s mineral content and your detergent. If you’ve ever noticed that your silverware has those same annoying white streaks, you’re dealing with the exact same headache. Today, we are going to stop the guesswork and finally reclaim your cabinet’s shine.
Wait, Is Hard Water Really the Only Culprit?
You might be thinking, “My water isn’t that bad,” or “I use the expensive pods, it shouldn’t happen.” But even “moderately hard” water can cause havoc. According to the U.S. Geological Survey, over 85% of homes in the US have hard water to some degree. It’s not just a cosmetic issue; those minerals are actually clogging up the works. One of my biggest early mistakes was ignoring visible deposits on the interior walls, thinking they were harmless. In reality, they were a sign that my inlet valve was struggling with a hard water clog, reducing the water pressure needed to rinse away the soap properly. Have you ever opened your dishwasher only to find that everything feels slightly “sticky” or looks like it was dusted with flour? If so, tell me—I need to know I’m not the only one who’s been tempted to just throw the whole machine away! Beyond the water itself, the way you pack the racks plays a huge role. I used to jam every single plate in there like a Tetris champion, but loading for maximum water reach is the only way to ensure the rinse cycle actually reaches every surface. If the water can’t hit the plate, the minerals and detergent just sit there and dry into that stubborn film. We’re going to look at how to strip that build-up away and, more importantly, how to keep it from coming back.
Strip the Chalk Before Your Next Cycle
The fastest way to reset your machine is to tackle the mineral build-up head-on. Think of your dishwasher like a coffee pot; over time, the ‘scales’ of calcium and magnesium attach to everything. I remember one Saturday morning I spent two hours with a bottle of white vinegar and a scrub brush because I couldn’t stand the sight of my ‘clean’ plates anymore. I poured two cups of vinegar into a bowl, placed it upright on the bottom rack, and ran a heavy cycle. It’s the quickest way to remove hard water build up in your dishwasher without buying expensive chemical strippers. The acidity of the vinegar acts like a solvent, melting away that white haze that soap alone can’t touch. If you have neglected your machine for years, you might even see chunks of white scale flaking off the walls afterward. It is satisfying, but also a bit gross to see what you’ve been ‘washing’ your dishes with.
Stop Your Filter From Choking Your Wash
If your filter is clogged, your dishwasher is essentially bathing your dishes in dirty, mineral-heavy soup. Most people don’t realize that there is a fine mesh screen at the bottom of the tub designed to catch food particles. When this gets gunked up, it restricts flow and keeps those minerals circulating. You need to how to clean your dishwashers hidden sump filter at least once a month. I once pulled mine out and found a literal layer of grey slime and what looked like sand. Once that was gone, the water pressure improved instantly. It’s like trying to breathe through a wet towel; once you remove the obstruction, everything works more efficiently. 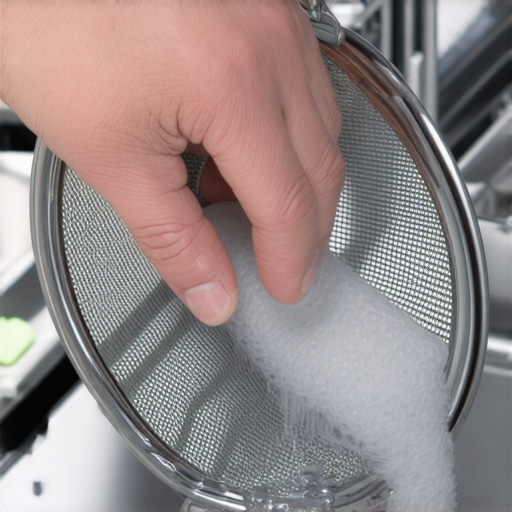
Adjust Your Chemistry to Fight Hard Water
If you’ve cleaned the machine and the film still returns, your detergent is losing the battle. Modern pods are great, but they aren’t magic. If your water is extremely hard, the soap binds to the minerals instead of the grease on your plates. This is exactly why your dishwasher leaves a chalky film on all your dishes. To fix this, you need a rinse aid. It’s not just a ‘shining’ agent; it’s a surfactant that lowers the surface tension of the water, making it sheet off the plates rather than forming droplets that dry into spots. I used to think rinse aid was a marketing scam until I ran a side-by-side test with my heavy stoneware. The side with the rinse aid came out looking brand new, while the other looked like it had been through a dust storm.
Test the Heat if Your Dishes Stay Wet
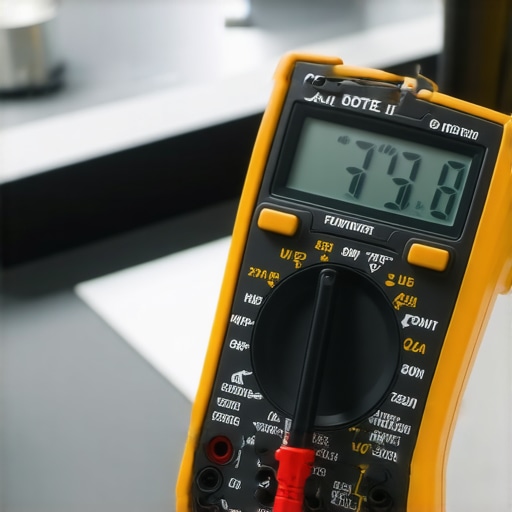
Temperature is the final piece of the puzzle. If the water isn’t hitting at least 120-140 degrees Fahrenheit, the detergent won’t fully dissolve. A malfunctioning heating element is a common silent killer of dish quality. You can use a multimeter to how to test a dishwasher heating element for a short or a break in continuity. If that element isn’t getting hot, the water can’t strip the minerals away, and you’re left with a cold, foggy mess. Refer to a dishwasher parts a comprehensive guide to diy diagnostics to locate your specific element. Don’t forget the edges, either; take a moment to use the fast way to clean grimy dishwasher door gaskets to ensure no old soap or mold is leaking back into the tub during the rinse phase. Every small part of the machine needs to be in sync to get that factory-room shine back on your glassware.
While clearing the visible grime is a great start, there is a much deeper level to appliance maintenance that most homeowners overlook. I used to think that if the water was hot and the soap was expensive, the results were guaranteed. But expertise comes from the moments when the standard fixes fail. For instance, did you know that what looks like a white film might not be mineral build-up at all? It could be ‘etching,’ a permanent microscopic scratching of the glass. Everyone tells you to use more detergent for better results, but in my experience, using too much soap in soft water is the fastest way to ruin your glassware forever. The chemical reaction becomes too aggressive without minerals to neutralize it, literally eating away at the surface of your plates.
Stop Blaming Hard Water for Every White Spot
The biggest trap I see people fall into is ‘part-swapping’ without a proper diagnosis. It is tempting to see a film and immediately buy a new heating element, but you might be throwing money away. You need to understand the nuances of parts and diagnostics to identify dishwasher faults quickly. For example, if your dishes are coming out wet and filmy, the element might be fine, but you could be testing your dishwashers high limit thermostat for continuity and find it has tripped, preventing the heater from ever turning on. It’s a five-dollar fix versus a sixty-dollar part. I’ve seen the same thing happen with ovens; people replace the bake element when the real issue is that the oven control board is failing. Diagnostics is about logic, not just replacing what looks broken.
Why Your Modern Sensors Might Be Lying to You
Does your dishwasher seem to run for three hours and still leave a haze? Modern units use a turbidity sensor to ‘see’ how dirty the water is. If this sensor is coated in a thin layer of grease or calcium, it incorrectly tells the machine the water is clean, cutting the rinse cycle short. This is often why your dishwasher pod is falling out but not dissolving properly—the machine thinks the job is done before the chemicals have even finished their work. According to the Association of Home Appliance Manufacturers (AHAM), modern soil-sensing technology is highly efficient but relies entirely on the clarity of these internal sensors. If you aren’t replacing a faulty dishwasher turbidity sensor when it starts to fail, you are basically forcing your dishwasher to work blind. Have you ever fallen into the trap of replacing a major part only to realize it was just a dirty sensor or a tripped fuse? Let me know in the comments—I’d love to hear your ‘oops’ stories so we can all learn together.
I used to be terrified of the electronics hiding behind my dishwasher’s kickplate. To me, wires and control boards looked like a mess of spaghetti that only a pro should touch. But here is the truth I learned after spending way too much on service calls: most appliance issues are mechanical, and the ones that aren’t can be solved with a twenty-dollar multimeter. If you want to stop the cycle of foggy plates and half-baked dinners, you have to move past basic cleaning and into the world of active diagnostics.
Your Multimeter is Your New Best Friend
The single most important tool in my kitchen isn’t my chef’s knife; it’s my digital multimeter. This little device takes the ‘vibe-based’ troubleshooting out of the equation. Instead of wondering if a part is bad, you get a definitive answer. I recently spent a Saturday pinpointing faults before calling a repair expert and found that my oven wasn’t heating because of a simple loose connection at the terminal block. If I hadn’t checked, I probably would have replaced the whole board for no reason. Learning how to use one to check your ovens high limit thermostat with ease or even testing your dishwasher water level switch in 5 minutes gives you a level of control that most homeowners never achieve. You stop being a victim of your machines and start being the one in charge.
How do I keep these complex machines running for the next decade?
Maintenance isn’t just a once-a-year deep clean; it’s a mindset of ‘check and verify.’ I follow a simple rule: every time I clean the filters, I check one electrical component. For example, while I have the dishwasher apart, I’ll take thirty seconds for testing your dishwashers circulation pump for continuity. It sounds technical, but it’s just touching two probes to two metal tabs. This ‘preventative diagnostic’ approach lets you catch a failing pump or a weak heating element before it leaves you with a kitchen full of dirty dishes on a Tuesday night. According to the technical documentation from Whirlpool’s Professional Service Manuals, over 40% of component failures are preceded by a change in electrical resistance that can be detected months in advance. By staying ahead of it, you’re not just repairing; you’re managing the health of your home.

The Future of Home Repair is Getting Smarter
We are entering an era where our appliances are going to start diagnosing themselves, but we aren’t quite there yet. For now, the most reliable ‘smart’ feature in your house is your own ability to look at dishwasher parts a comprehensive guide to diy diagnostics and understand the flow of power. I predict that within the next five years, the ‘Right to Repair’ movement will force manufacturers to make these diagnostic modes even more accessible to us. But even then, you’ll still need to know the oven repair essentials for troubleshooting common issues manually. There is a specific kind of satisfaction that comes from hearing your dishwasher hum perfectly because you took the time to verify the sensor was clear, rather than just hoping for the best. If you’ve been hesitant, my challenge to you is this: find your oven’s model number, look up the resistance specs for the bake element, and test it tonight. You’ll be surprised how much confidence a simple reading on a screen can give you.
The Hard Truth About My Biggest Maintenance Mistakes
After years of scrubbing plates that looked like they had been dusted with powdered sugar, I finally realized that my frustration wasn’t a lack of effort—it was a lack of data. Here are the lightbulb moments that changed how I treat my kitchen:
- The ‘More Soap’ Trap: Adding extra detergent to hard water just creates more residue. In fact, if you have soft water, using too much soap actually causes permanent etching that looks identical to a film but can never be removed.
- Rinse Aid is a Necessity: I used to think of it as a luxury, but it is the only thing that breaks the surface tension of the water so minerals can’t settle.
- Diagnostics Over Guesswork: Replacing a heating element without testing it first is like buying new tires because your car won’t start. I learned the hard way that parts and diagnostics to identify dishwasher faults quickly will save you hundreds of dollars.
- The Invisible Culprit: Sometimes the film isn’t the dishwasher’s fault at all; it is a lack of pressure. Ensuring you use the best way to load your dishwasher for maximum water reach is the difference between a foggy plate and a crystal-clear glass.
My Go-To Resources for Household Sanity
You don’t need a degree in engineering to fix your own machines, but you do need the right map. These are the tools and guides I personally rely on when my kitchen starts acting up:
- A Digital Multimeter: This is the most honest tool in your house. It won’t lie to you about whether a circuit is broken.
- Comprehensive Component Guides: I keep a copy of dishwasher parts a comprehensive guide to diy diagnostics bookmarked on my phone for when I’m elbow-deep in the sump pump.
- Repair Philosophy: For everything beyond the dishwasher, I follow the oven repair essentials for troubleshooting common issues to keep my entire kitchen in sync.
- The Safety Net: Knowing your limits is part of being a pro. I always re-read the guide on when to stop diying and call an oven repair expert before I touch anything involving gas lines.
Why You Are Ready to Slay the White Film Beast
You no longer have to settle for dishes that look like they belong in an attic. By understanding the chemistry of your water and the mechanics of your machine, you’ve moved from being a frustrated bystander to a competent home technician. The next time you see that stubborn dishwasher white film, you won’t reach for more soap; you’ll reach for your multimeter or your vinegar bottle with total confidence. Your appliances are there to serve you, and with these diagnostic skills, you are finally the one in charge of the results. Have you ever replaced a huge, expensive part only to realize the real fix was a simple five-minute clean? Let me know your biggest ‘oops’ moment in the comments below!