I stood there at my kitchen sink at 11:30 PM, the kind of hour where every minor inconvenience feels like a personal attack. I was staring at a casserole dish that looked exactly the same as when I’d put it in forty minutes earlier—covered in baked-on cheese and a heavy layer of greasy disappointment. It’s a special kind of defeat when you realize you’ve spent more time pre-rinsing your plates than the machine actually spent washing them. I used to think the answer was more detergent, a hotter setting, or perhaps a more expensive heavy-duty cycle, but after years of tinkering with dishwasher parts and diagnostics, I learned a humbling truth. The problem wasn’t the motor, the pump, or a lack of power; it was entirely me. I was packing that rack like a high-stakes, frantic game of Tetris where everyone loses and nobody gets clean forks. [image_placeholder]
Stop Shielding Your Dishes from the Water Jets
The secret to a truly clean load isn’t some magic chemical rinse or a ‘pro’ brand of pods. It’s all about the geometry of the spray and maintaining clear lines of sight between the water and the grime. If you’ve ever wondered why your dishwasher leaves a chalky film or why the items in the corners always come out feeling gritty, you’re likely “shielding” your dishes. This happens when one large bowl or an oversized cutting board blocks the path of the water jets, leaving everything behind it virtually untouched. I made the classic rookie mistake of nesting my spoons so tightly they practically fused together during the cycle—a mistake that led me to research how to identify dishwasher faults quickly before I realized it was just my own stubbornness at play. I’d spent hours worrying about broken valves when the only thing broken was my loading technique.
Interestingly, research from the University of Bonn has shown that while modern dishwashers are incredibly water-efficient—using as little as 3 gallons per cycle compared to the nearly 27 gallons used during manual washing—that efficiency is completely negated if the water can’t actually touch the plates. You end up running the machine twice, which is a waste of both time and money. I learned this the hard way after a month of ‘clean’ dishes that still smelled faintly of last night’s salmon.
Is a specific loading pattern actually worth the extra minute of my time?
You might be thinking, “It’s a modern appliance, shouldn’t it just work regardless of how I throw things in there?” I totally get it. After a long day, the last thing anyone wants to do is carefully calculate the trajectory of water droplets. We just want to toss the mess in and walk away. But taking an extra sixty seconds to angle your bowls toward the center spray arm and ensuring that nothing is overlapping makes the difference between a sparkling kitchen and finding why your dishwasher bottom is full of standing water because food debris wasn’t properly blasted away and ended up clogging the drainage path. I’ve even seen cases where poor loading caused the dishwasher spray arm to keep falling off because it was physically hitting a stray spatula that I’d poorly positioned. Today, I’m going to show you exactly how to position every plate, cup, and odd-shaped utensil to ensure the water hits the target every time. Have you ever pulled out a ‘clean’ plate only to find it covered in yesterday’s dried-on breakfast? Tell me your biggest dishwasher frustration in the comments—I’ve probably lived through it too.
Face the Center or Face the Grime
Think of your dishwasher’s spray arm as a whirling garden sprinkler. If you place a large dinner plate directly in front of a bowl, that bowl is essentially standing in the rain under a giant umbrella. Everything on the bottom rack must face the center. I used to just line plates up like soldiers in a row, but the water jets actually spray in a circular pattern from the middle out. By angling your plates toward the center spray hub, you ensure the water hits the surface at a 45-degree angle, which is the sweet spot for mechanical scrubbing. If you ignore this, you’ll likely find why your dishwasher leaves a chalky film—it’s often just soap that was never properly rinsed off because the water couldn’t reach it. 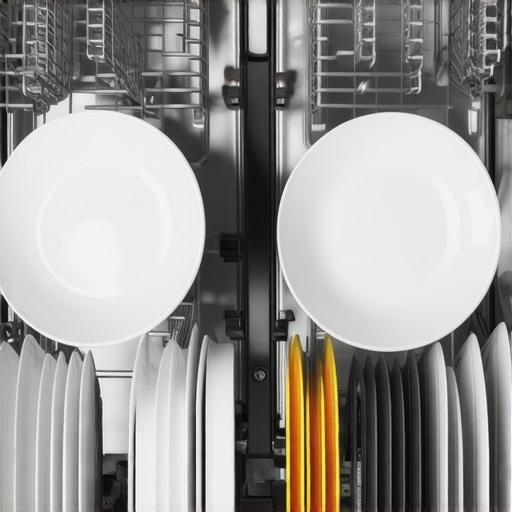
Stop Your Spoons from Spooning
The silverware basket is where most dishwasher battles are lost. When you put all your spoons in the same direction, they nest together, creating a waterproof seal that traps food. I once pulled out a ‘clean’ spoon that still had a perfectly preserved glob of peanut butter on it because it had been hugged too tightly by its neighbor. The pro move is to ‘mix the crowd.’ Alternate your forks and spoons—some handle up, some handle down. However, always keep knives handle-up for safety. If your basket is getting crowded, you might eventually need to look into replacing a melted dishwasher cutlery basket if you’ve been jamming it too close to the heating element. Proper spacing here prevents that annoying grit that sticks to your forks.
The Top Rack Needs an Angle
The top rack is for delicate items, but it’s also the place where water tends to pool. If you lay your coffee mugs perfectly flat, you’ll end up with a disgusting puddle of ‘dishwasher juice’ on the bottom of every cup. Tilt your glasses and Tupperware at a steep angle between the tines. This allows gravity to do the work, letting the water run off during the dry cycle. If you notice your glasses aren’t sitting right, check for mineral buildup; learning how to remove hard water deposits from dishwasher tines can help restore the grip needed to keep your wine glasses from rattling. Speaking of movement, if you hear a clunking sound mid-cycle, you should stop and check if a tall item is blocking the spray arm’s rotation. I’ve had to perform parts and diagnostics on my own machine simply because a stray spatula stopped the arm, causing the motor to hum in distress. It’s a simple fix, but one that saves the life of your appliance.
Clear the Perimeter for the Heavy Hitters
Large mixing bowls, cutting boards, and baking sheets should always go along the very outer edges or the back of the bottom rack. Never put them in the front near the door, as they can block the detergent dispenser from opening. I remember one frantic Monday morning where I thought my machine had finally died because the dishes were bone dry and still dirty. After a quick look at dishwasher parts and diagnostics, I realized my oversized cutting board had physically wedged the soap door shut. It was a humbling moment that cost me a double-wash and a lot of pride. Keep the ‘walls’ of the dishwasher clear so the water can bounce off the sides and reach the middle of the load.
However, there is a much deeper layer to this than just where you place your salad plates. I’ve noticed a huge misconception that more ‘elbow grease’—in the form of pre-rinsing—leads to better results. In fact, it’s often the opposite. Everyone says you need to scrub your plates before they hit the rack, but in my experience, leaving some food residue actually helps.
Ditch the Pre-Rinse if You Want Cleaner Plates
It sounds counterintuitive, but if your dishes are too clean when you start the cycle, the detergent has nothing to interact with. Modern dishwasher pods contain enzymes designed to latch onto food particles. When those enzymes find a barren ceramic surface, they can become abrasive, eventually etching your glassware or simply washing down the drain without doing their job. The American Cleaning Institute (ACI) explicitly notes that pre-rinsing is a waste of water and can actually trick your machine’s turbidity sensors into thinking the load is already clean, which explains why your dishwasher cycle takes hours longer than usual or ends too early with dirty results. I used to be a chronic pre-rinser until I realized I was paying for water twice—once at the sink and once in the machine—only to get worse results. Have you ever fallen into this trap of pre-rinsing everything only to find spots? Let me know in the comments.
Can a Simple Multimeter Save You Five Hundred Dollars?
When a dishwasher stops heating or an oven stops reaching temperature, most people assume the ‘brain’ is dead and start looking for a replacement appliance. This is the ultimate ‘Oops’ factor. Before you give up, you need to look at the individual components. For instance, testing the resistance on your dishwasher heating element takes five minutes with a $20 tool and can save you from a $500 repair bill. I once spent a whole weekend thinking my oven’s control board had fried, only to realize I was just looking at a faulty relay. Learning 5 multimeter tricks for diagnosing a dead control board changed how I approach every appliance in my house. It’s about moving from guesswork to precision. 
Spot the Invisible Signs of Component Failure
Nuance is everything in diagnostics. You might hear a sound and think it’s a motor failure, but diagnosing a humming noise from your dishwashers drain pump often reveals a simple physical obstruction like a popcorn kernel or a shard of glass. Similarly, when it comes to oven diagnostics pinpointing faults before calling a repair expert, I always tell people to look for the ‘ghost faults.’ A ghost fault is when an error code points to one part, but the issue is actually a loose connection or a blown thermal fuse. I’ve seen people replace entire motors when they should have been checking the thermal fuse on your dishwasher before buying a new one. It’s a tiny, five-dollar part that can render a thousand-dollar machine useless.
The real secret to mastering these machines is realizing they are just a series of switches and sensors. If you can identify the failure point, you can fix it. Whether you are dealing with a faulty sensor or you’re trying to figure out how to identify a bad oven relay on the control board, the methodology is the same: stop guessing and start measuring. I’ve spent years deep-diving into dishwasher parts and diagnostics, and the most satisfying feeling is hearing that motor hum back to life because you replaced a $10 capacitor instead of a $300 motor assembly.
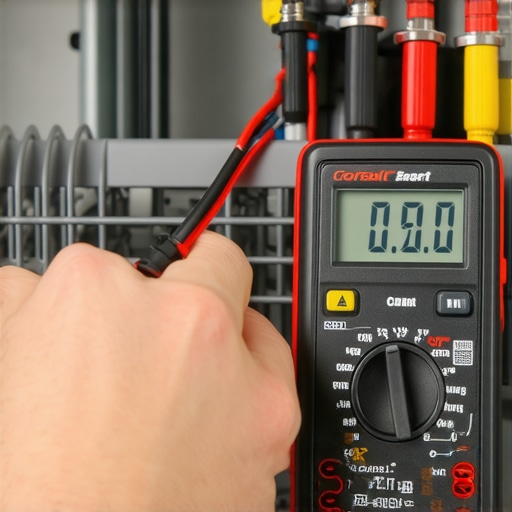
To move from a frustrated homeowner to a confident DIYer, you need more than just a sense of adventure; you need a few specific tools that turn a guessing game into a science. I’ve found that most people fail at home repairs because they try to diagnose a complex electrical circuit with just their eyes. My absolute secret weapon is a digital multimeter. It’s not just for electricians. When you start testing the resistance on your dishwasher heating element, you aren’t just looking at a metal rod; you’re verifying its physical integrity at a molecular level. If the Ohms don’t match the manufacturer’s specs, you know exactly why your water is cold. I also recommend a set of long-reach Torx drivers and a 1/4-inch nut driver. Modern machines are held together by these specialized screws, and using the wrong bit is the fastest way to strip a head and turn a ten-minute job into a four-hour nightmare. According to the technical service manuals from Whirlpool—often referred to as ‘Job Aids’ in the industry—nearly 30% of service calls could be avoided if homeowners simply checked for loose terminal connections before calling a pro.
Ditch the Guesswork with a Pro Tool Kit
Beyond the multimeter, I always keep a simple plastic straw in my kitchen junk drawer. It sounds ridiculous, but learning how to unclog a blocked dishwasher air gap with a straw is a pro-level hack that clears out built-up gunk in seconds without taking the whole sink apart. For the oven, I never start a repair without a high-intensity flashlight. I use it for testing an oven bake element for invisible cracks. These tiny fissures often won’t show up in normal kitchen lighting, but a bright beam will catch the jagged edge of a failing element before it actually shorts out and ruins your dinner. If you’re serious about this, invest in a decent thermal camera attachment for your smartphone; it allows you to see heat leaks around gaskets in real-time, which is a total game-changer for energy efficiency.
Small Habits That Save Your Heating Elements
Maintenance isn’t just about fixing things when they break; it’s about preventing the break in the first place. Every three months, I make it a point to focus on clearing hard water deposits from dishwasher interior walls. That white, crusty buildup isn’t just ugly—it acts as an insulator, forcing your pumps and heaters to work twice as hard to reach the same temperature. I’ve seen enough oven repair essentials troubleshooting common issues with parts to know that a little vinegar and a soft brush can extend the life of your door seals by years. If you ignore the grime, those rubber gaskets get brittle, leading to steam leaks that can eventually fry your control board.
How do I maintain these high-heat appliances over time?
The key to longevity is consistency and observation. Every month, run a cleaning cycle with a dedicated descaler and listen for changes in the ‘voice’ of your machine. A high-pitched whine usually means a bearing is starting to go, while a low thrum might just be a loose panel. I predict that within the next five years, we will see a massive shift toward AI-integrated diagnostic kits that plug into the service port of your oven or dishwasher, allowing your phone to tell you exactly which part is failing before it actually dies. We are moving toward an era of ‘predictive maintenance’ where the machine tells you it’s sick before it stops working entirely. For now, we rely on our tools and our senses. I want you to try this: go to your oven right now and try testing your oven temperature sensor without calling a pro. It’s the easiest way to see if your ‘bad’ baking is actually just a $20 part that’s lost its calibration.
The Hard Truth About My Five-Dollar Fixes
If there is one thing a decade of tinkering has taught me, it is that the loudest noise usually comes from the smallest part. I have wasted days thinking I needed a new motor when all I really needed was to stop the rattling by fixing a loose dishwasher spray arm. Here are the lightbulb moments that saved my sanity:
- Most ‘broken’ machines are just dirty: A significant portion of oven repair essentials starts with cleaning the sensors and terminals to ensure a solid connection.
- Respect the error code but verify the component: Digital displays are helpful, but a multimeter never lies. Before you buy, always test for continuity.
- Small leaks become big disasters: If you see steam escaping, do not wait. Learn about fixing the steam leak from your oven door before it warps your cabinetry or fries the control board.
[image_placeholder]
The Essential ‘Go-Bag’ for Your Kitchen Appliances
You do not need a professional workshop to be effective, but you do need the right data. My personal toolkit consists of three non-negotiables. First, I always keep a copy of my dishwasher parts and diagnostics manual open to prevent the expensive ‘part-swapping’ trap. Second, a reliable digital multimeter is vital for testing your dishwashers float switch for continuity; it is the only way to know if a part is electronically dead. Third, a high-intensity flashlight is my secret weapon for checking your ovens bake element for tiny blisters. These tools move you away from guesswork and into the realm of precision.
Take the Screws Out and See for Yourself
It is easy to feel intimidated by the sheer number of wires and tubes inside a modern appliance. But remember, these machines are designed to be serviced, which means they can be understood. Whether you are learning how to identify dishwasher faults quickly or simply tightening a wobbly handle, every small win builds the confidence to tackle the big stuff. Do not be afraid to get your hands a little dirty; the reward of a perfectly running kitchen—and a fatter wallet—is worth every second of the effort. If you ever feel truly stuck, do not hesitate to call an oven repair expert to get a professional opinion. You have got this!
Have you ever found a weird object like a cherry pit or a piece of glass inside your drain pump? Tell me about your strangest find in the comments below!