The first time I heard it, I thought I was losing my mind. It was one of those dead-quiet Tuesday nights where you can hear a pin drop three houses away. I was halfway through a book when a faint, rhythmic vibration started buzzing in the back of my skull. I followed the sound into the kitchen, and there it was: my oven, stone cold and completely off, was humming like a beehive in mid-July. I remember touching the stovetop, expecting it to be searing hot, but it was chilly. That’s the moment the “repair-man-anxiety” kicks in. You start thinking about service calls, $100-an-hour labor rates, and the possibility that you’ll be eating microwave burritos for a month while you save up for a replacement. I’ve been the “appliance guy” on my block for a decade, and I’ve seen homeowners get absolutely fleeced because they didn’t know how to listen to their machines. That hum is a language. Sometimes it’s the oven telling you a cooling fan bearing is shot. Other times, it’s a transformer that’s loosened its mounting screws and is vibrating at 60Hz against the metal frame. I once spent three hours tearing apart a back panel only to find a loose wire was vibrating against a heat shield. If I’d just used a better approach to oven diagnostics, I would have been back on the couch in twenty minutes. This isn’t just about noise; it’s about peace of mind.
That Ghostly Buzz in Your Kitchen
I want to help you figure out if you’re looking at a $15 fix or a “call the pro” situation. We’ll look at the components that stay energized even when the display is dark. If you’ve also been fixing an oven that stays warm, you might have a stuck relay on the control board that’s keeping a component engaged. It’s frustrating, I know. But before you go out and buy a whole new set of oven repair essentials, let’s talk about that skepticism and what that sound actually means for your safety. [image_placeholder] I made the mistake early on of ignoring a faint hum, thinking it was just “character” for an older unit, only to have the cooling fan seize up entirely during a Thanksgiving turkey roast. Don’t be like me. Understanding the internal rhythm of your range is the first step toward a DIY victory. Have you ever stood in your kitchen at midnight wondering if you should unplug the whole stove? Drop a comment below; I’d love to hear what yours sounds like.
Is this sound actually going to burn my house down?
That’s the big one, right? The fear of a short circuit. While a hum is usually just a mechanical vibration, the National Fire Protection Association notes that a significant percentage of home fires start with undetected electrical faults. A hum *can* indicate an electrical “leak” or a failing component drawing power it shouldn’t. But don’t panic yet. Most of the time, it’s just a cooling fan that doesn’t know the party is over. I’ve learned the hard way—by replacing parts I didn’t need—that a systematic check is your best friend. We are going to dive into the specific components that cause these phantom noises, starting with the most common culprits you can check without being an electrical engineer.
Track Down the Sound with Systematic Isolation
To stop the noise, you first have to find its heartbeat. Think of your oven’s electrical system like a pressurized water pipe; even when the faucet is off, the pressure is still there, and a tiny leak can cause a whistle. In your oven, that ‘pressure’ is the voltage waiting at the control board. Start by pulling the unit away from the wall and unplugging it. If the sound stops immediately, you are dealing with an electrical component that is stuck ‘on’ or a transformer that is failing. I once worked on a unit where the owner was convinced the house was haunted because the oven hummed only at night. It turned out the vibration was coming from a loose transformer winding that only became audible when the kitchen was perfectly silent. After you’ve killed the power, you need to remove the rear access panel to get a clear view of the guts.
Scan the Control Board for Visual Red Flags
The control board is the brain of the operation, and when it starts to fail, it often lets you know through sound before it throws an error code. You should know how to inspect your oven control board for burn marks because a chattering relay—which sounds like a rapid clicking or a low-pitched buzz—often leaves a tell-tale scorch mark on the plastic housing. I remember a specific Frigidaire that sounded like a low-flying plane; I spent an hour checking the cooling fan only to realize a relay was vibrating against the board like a cold tooth. If you see any melted solder or blackened areas, you’ve found your culprit. Learning how to identify a bad oven relay on the control board can save you from replacing the entire expensive assembly if you’re handy with a soldering iron. 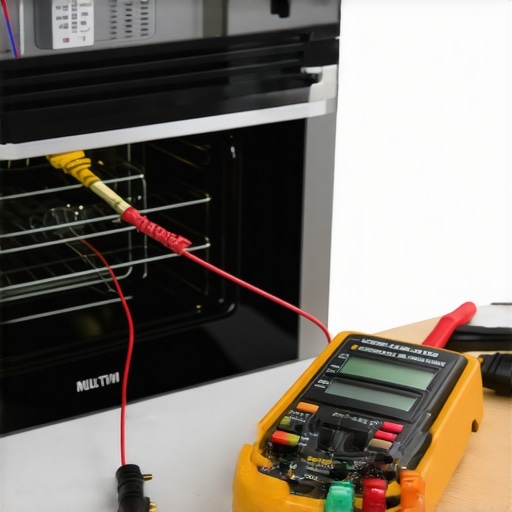
Put Your Multimeter to Work
If the board looks clean, the hum might be coming from a component that is partially shorted but hasn’t fully failed yet. This is where you need to go beyond just looking and start measuring. You can easily learn how to test an oven broil element using a simple ohmmeter to see if the resistance is within the manufacturer’s specs. An element that is touching the frame or has a microscopic crack can vibrate at 60Hz, creating that annoying drone. While you have the meter out, I highly recommend testing your oven temperature sensor without calling a pro. If the sensor is sending faulty data to the board, it might be telling the cooling fan to run at half-power, which often creates a more noticeable hum than a fan running at full speed.
Stop Mechanical Rattles by Tightening Up
Sometimes the fix is as simple as a screwdriver. Modern ovens are essentially large metal echo chambers. If a single mounting screw on the cooling fan or the transformer has vibrated loose, the entire back panel acts as a speaker. I once had a client whose oven hum was actually a vibration from the gas line touching the rear heat shield. Before you start ordering from a list of oven repair essentials, go through and tighten every visible screw on the back and internal mounting brackets. You’d be surprised how often ‘broken’ appliances just need a quarter-turn of a Phillips head.Most DIYers start and end their diagnostic journey with a simple continuity test. They hear that satisfying ‘beep’ on the multimeter and assume the component is immortal. But here is the hard truth: a part can have perfect continuity and still be a total dud. Everyone says that if the circuit is closed, the part is fine, but in my experience, load performance is what actually matters. I have seen countless heating elements that pass a basic resistance check but fail miserably once they reach 400 degrees. This is why you must go deeper than the basics.
Continuity is the biggest lie in appliance repair
If you are just chasing a beep, you are missing the nuance of ‘leakage to ground’ or high-resistance failure under heat. For instance, when you are how to check your ovens bake element for tiny blisters, you are looking for physical evidence that the internal insulation has failed. A multimeter might show a complete circuit, but those blisters mean the element is arcing internally, which causes that rhythmic humming or buzzing I mentioned earlier. If you only rely on testing the resistance on your ovens broil element, you might miss a ‘phantom’ fault that only appears when the metal expands under load. 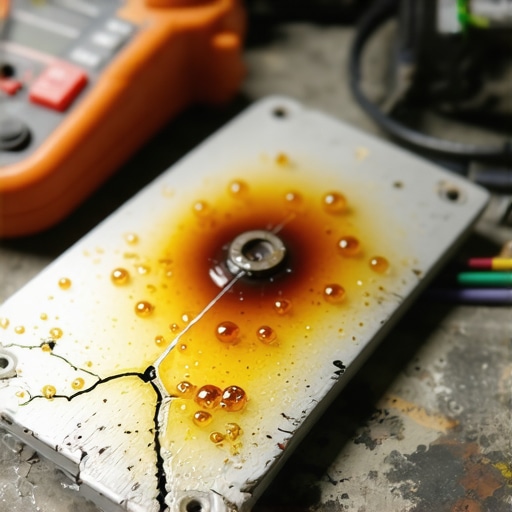
Why does a passing test still lead to a cold oven?
The answer usually lies in the voltage drop. A component might show continuity at the 9V battery level of your multimeter but fail to draw the necessary amperage when hit with 240V. According to the Association of Home Appliance Manufacturers (AHAM), a significant percentage of parts returned as ‘defective’ are actually misdiagnosed because homeowners didn’t account for secondary sensors or thermal fuses that only trip under specific heat loads. This is the ‘trap’ of the weekend warrior: replacing the element when the high-limit thermostat is the real culprit.
Stop guessing between your dishwasher pumps
The confusion doesn’t stop at the oven. I see people make the ‘Oops’ mistake of ordering the wrong motor for their dishwasher every single week. They hear a noise and jump straight into a dishwasher parts a comprehensive guide to diy diagnostics, but they fail to distinguish between the two distinct hearts of the machine. You have to understand the difference between a drain pump and a circulation pump before you touch a screwdriver. If the noise happens while water is sitting in the tub, you are likely diagnosing a humming noise from your dishwashers drain pump. If it happens during the wash cycle, it is the circulation motor. Swapping the wrong one is a $150 mistake that won’t fix your hum. Have you ever fallen into this trap of replacing a ‘good’ part because the test seemed to pass? Let me know in the comments; we’ve all been there once.To graduate from a ‘parts-swapper’ to a true diagnostic master, you need to change your toolkit. I stopped buying the $20 multimeters from the big-box hardware stores years ago. Why? Because of ‘ghost voltage.’ This is a phenomenon where your meter picks up a voltage reading from a nearby wire through induction, making you think a component is getting power when it actually isn’t. I now swear by the Fluke 117 because of its LoZ (low impedance) feature. This feature physically puts a small load on the circuit to dissipate that fake voltage, giving you the truth. If you want to get serious about parts and diagnostics: how to identify dishwasher faults quickly, you have to trust your tools. Beyond the meter, a set of magnetized nut drivers and a telescopic mirror are your best friends for seeing behind the ‘blind’ spots of a dishwasher tub. 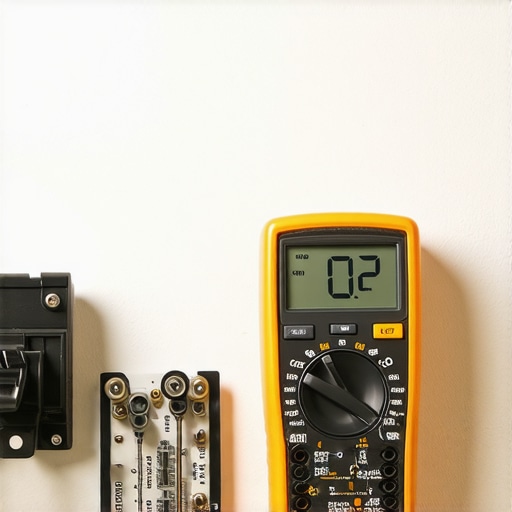
Why Your Next Oven Might Fix Itself
We are entering an era where appliances aren’t just dumb boxes of coils and fans. We’re seeing the rise of ‘Digital Twins’ in high-end kitchen tech, where the machine runs a virtual simulation of itself to predict failure. Within the next five years, your oven won’t just hum when a fan is failing; it will send an alert to your phone telling you exactly which bearing is worn out. But until that day comes, we rely on our eyes and ears. I’ve seen this trend starting with smart control boards that log every single voltage spike. It’s cool tech, but it makes the basics even more important because one loose wire can now fry a $400 microprocessor instead of just blowing a $2 fuse. You have to be meticulous. Before you even open the cabinet, make sure you know when to stop diying and call an oven repair expert because these new boards are sensitive to static electricity from your own hands.
How do I keep my appliances running for twenty years?
The secret isn’t in the repair; it’s in the prevention. Most people treat their appliances like furniture—they set them and forget them until they break. I recommend a ‘Quarterly Kitchen Audit.’ First, how to inspect your ovens power cord for heat damage. Look for discolored plastic or stiffness in the wire. High-heat cycles can slowly degrade the insulation over time. Second, for your dishwasher, you must prioritize hygiene to save the pumps. I spent a whole Saturday how to clean the hidden debris under your dishwasher filter and found enough glass shards and bone fragments to kill a circulation motor twice over. As noted in the Intertek safety standards for household appliances, thermal protection and debris management are the two biggest factors in preventing premature component failure. If you keep the pathways clear and the electrical connections tight, you’ll beat the manufacturer’s ‘planned obsolescence’ every single time. My challenge to you: Pull your oven out today, just six inches, and check the plug for any signs of soot. It takes two minutes and could save you a thousand bucks.
The Hard Truths I Learned Under a Broken Oven
After a decade of tinkering, I’ve realized that the most common reason people fail at DIY repair isn’t a lack of skill, but a lack of patience for the ‘silent’ clues.
- Trust your ears over your eyes: A visual inspection is great, but identifying a bad dishwasher circulation motor by the sound will save you hours of disassembly.
- Heat changes everything: A component that tests fine while cold can fail the moment it expands. I learned this the hard way while testing your ovens high-limit thermostat with ease—don’t assume a ‘pass’ is forever.
- The phantom noise is a gift: That hum is your appliance begging for a $20 part before it demands a $500 motor.
[image_placeholder]
The Toolbag That Actually Saves You Money
You don’t need a professional workshop to be successful, but you do need the right resources. I personally swear by these three things: first, a reliable LoZ multimeter to avoid ghost voltage. Second, I always keep a copy of the manufacturer’s tech sheet, which is usually tucked inside the bottom toe kick or the control panel of the machine. Third, for those specific ‘weird’ sounds, I constantly refer back to this dishwasher parts a comprehensive guide to diy diagnostics to ensure I’m looking at the right pump. If you’re hearing something thinner than a hum, you might want to investigate why your dishwasher is making a high pitched whistling noise before you pull the whole unit out. Having these references ready turns a panic-driven repair into a systematic success.
Your Journey from Parts-Swapper to Pro
Repairing your own gear is about more than saving a buck; it’s about the confidence that comes from knowing how your home works. Whether you are hunting down a short or stocking up on oven repair essentials, remember that every mistake is just a lesson in how not to do it next time. Don’t let a buzzing control board or a rattling noise intimidate you. You have the tools, the data, and the intuition to fix it. If you ever hit a wall, feel free to contact us or drop a question in the community. What was the one sound that finally convinced you to pick up a screwdriver and start your own diagnostics journey? Let’s talk about it in the comments below.