Have you ever finished baking a batch of cookies, turned off the oven, and noticed it still feels warm—or even hot—for hours afterward? That annoying lingering heat can be baffling and, honestly, a little nerve-wracking. I remember the first time it happened to me; I thought maybe I left something on or that my oven was malfunctioning in some major way. It was a frustrating realization that something was off, but I didn’t know where to start troubleshooting.
Dealing with a constantly warm oven can be more than just a minor inconvenience. It can lead to energy waste, safety concerns, and even affect the quality of your future baking sessions. So, today, I want to walk you through the reasons behind this common issue and how you can fix it yourself—saving time and money. After years of tinkering and a few costly mistakes (believe me, I made more than my fair share early on), I’ve gathered some tips that really work.
Is Ignoring a Hot Oven Actually Safe or Worth the Hype?
Test the Heating Element and Thermostat
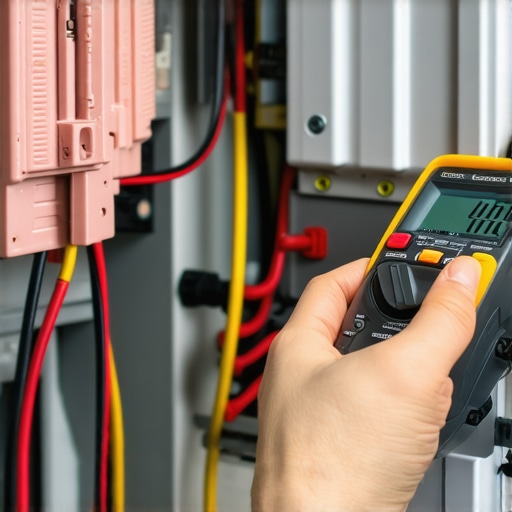
Start by inspecting the oven’s heating element for any signs of damage, such as cracks or blisters. Use a multimeter to measure its resistance—if it’s infinite, the element may be broken. Similarly, test the oven’s thermostat or temperature sensor, which regulates heating cycles. If these components are faulty, they’ll cause the oven to stay warm or continue heating unnecessarily, much like a thermostat stuck in the ‘on’ position. I once replaced a faulty bake element in my oven after noticing it felt hot long after cooking, following a quick resistance test, and the issue was immediately resolved. You can learn how to identify these parts accurately by visiting this diagnostic guide.
Check the Oven’s Control Board and Settings
Next, examine the oven’s control board or electronic interface. Sometimes, a glitch or stuck button can keep the oven in a continuous heating cycle. Disconnect the oven from power, wait a few minutes to allow the control board to reset, then restore power and see if the problem persists. If the control panel is unresponsive or shows error codes, consult this troubleshooting resource for specific fixes. I once fixed a control panel that kept the oven warm, simply by reseating the control board connections, which cleared the glitch.
Inspect the Oven’s Thermal Fuse and Safety Devices
Many ovens have thermal fuses and safety switches designed to cut power when overheating occurs. A malfunctioning fuse can remain open or closed, causing the oven to think it’s always hot. Use a multimeter to test these safety devices for continuity—no continuity indicates a blown fuse or stuck switch. Replacing a faulty thermal fuse often requires locating it within the oven body, which can be tricky; look for it near the heating elements or behind panels. For detailed steps, consider checking this guide. Once replaced, the oven should return to normal operation, and the lingering heat issue will resolve.
Assess for Constant Power and Wiring Issues
If all components check out, examine the wiring connections. A short circuit or a stuck relay relay can keep power flowing to the heating elements even when not needed. Turn off power at the circuit breaker, then visually inspect wiring for frays, burns, or loose connections. Use a multimeter to verify that relays switch off properly. If you find damaged wiring or relics, replacing them will prevent continuous heat. Remember, always prioritize safety and consider consulting a professional if unsure. For more advanced diagnostics, visit this repair guide.
Many DIY enthusiasts and even seasoned technicians often fall prey to common misconceptions about appliance diagnostics, especially regarding dishwashers and ovens. One prevalent myth is that replacing a single faulty part, like a heating element or a thermostat, always guarantees a fix. However, in my experience, the root cause is frequently more intertwined, involving multiple components working in unison—a reality backed by experts like those at appliance repair specialists. Overlooking this interconnectedness can lead to recurring issues despite numerous part replacements, turning a simple repair into an ongoing saga.
What’s The Most Overlooked Step in Diagnosing Appliance Faults?
Many jump straight to parts swapping without thorough diagnostics, risking misdiagnosis. For example, a dishwasher that refuses to drain might seem like a faulty pump, but a clogged filter or a blocked air gap could be the culprit—details often missed by novices. This oversight can lead to unnecessary expenses and frustration. Advanced diagnostics involve systematically testing components, such as using a multimeter to check continuity on switches and relays, or inspecting wiring harnesses for subtle damages—steps outlined comprehensively in this guide. Moreover, understanding the nuances of control boards, which often cause intermittent issues, can distinguish between a simple fix and a costly part replacement. Remember, the complexity of modern appliances calls for a multi-layered troubleshooting approach, rather than a one-size-fits-all mentality. Masking symptoms by replacing visible parts can be tempting but often ignores underlying issues that continue wreaking havoc. Recognizing this hidden layer of diagnostics is crucial for effective repairs and long-term reliability. Recent studies, including by industry experts, emphasize that a holistic diagnostic plan reduces waste and enhances repair success rates. So, next time you face an appliance issue, pause and ask yourself: Am I considering all possible failure points? Having a methodical approach certainly saves both money and time. Have you ever fallen into this trap? Let me know in the comments.
Keeping It Working: Precision Tools and Routine Maintenance
Maintaining your dishwasher and oven over time requires more than just replacing parts when they break. Having the right tools is essential for diagnosing issues accurately and performing repairs efficiently. Personally, I rely on a high-quality digital multimeter, which allows me to test electrical components like thermostats, relays, and control boards with pinpoint accuracy. Investing in a reliable multimeter such as the Fluke 87V has transformed my troubleshooting process, making it faster and more precise. Routine inspections of wiring connections and seals can prevent many long-term problems. Applying a silicone-based lubricant to door seals and hinges periodically helps maintain airtightness and reduces wear, which is crucial for appliances that are used daily.
Software tools have also become valuable in diagnostics. For advanced appliances, manufacturers often provide proprietary diagnostic software accessible via USB or Wi-Fi. For example, some modern ovens can be connected to a diagnostic app that logs errors and sensor data over time—offering insights beyond what a visual inspection reveals. These tools help identify issues early, saving money and avoiding unexpected breakdowns.
Predicting and Preparing for Future Repairs
If you consider your repair approach as a long-term investment, regular calibration and cleaning of components extend their lifespan. For dishwashers, using a rinse aid regularly helps prevent mineral buildup in spray arms, thereby maintaining cleaning performance and reducing strain on the pump. In ovens, cleaning oven sensor contacts with a soft cloth and contact cleaner ensures accurate temperature readings, which is vital for consistent results. As technology advances, I expect diagnostic tools to become more integrated with AI, offering real-time troubleshooting support via smartphones or voice assistants, further lowering the barrier for DIY repairs.
How do I maintain my appliances for sustained performance?
Consistency in cleaning and routine checks can drastically improve your appliances’ longevity. Regularly inspecting and replacing worn oven parts or dishwasher components minimizes unexpected failures. Utilize diagnostic procedures, such as testing heating elements or flow sensors, outlined in dedicated guides, to catch issues early. Remember to keep a stock of essential replacement parts—like thermal fuses or door seals—to minimize downtime. embracing proper maintenance techniques and tools ensures your appliances stay reliable, saving you money and stress over time. Stay proactive, and don’t wait for a breakdown to act—peace of mind is worth the small effort.
What The Toughest Repair Taught Me About Appliance Diagnostics
Sometimes, the most stubborn issues reveal underlying problems I never anticipated. For example, a dishwasher that refused to drain was actually caused by a clogged filter hidden behind panels, not the pump itself. This taught me to always consider overlooked components and not jump to conclusions based solely on symptoms. Embracing patience and thorough testing saves time and money, transforming frustrations into valuable learning experiences.
Fixing a constant-warm oven once led me to discover a malfunctioning control board that kept relaying incorrect signals. It highlighted the importance of inspecting electronics before replacing physically damaged parts. That experience deepened my understanding that electronics often cause long-term issues and deserve careful diagnosis.
Ever attempted a repair without proper tools? I did, and it resulted in a lot of guesswork and accidental damage. Investing in quality diagnostic tools like a multimeter changed my approach entirely, allowing me to pinpoint issues precisely without guesswork. This has shown me that the right tools are investments that pay off multiple times over.
Over time, I realized that routine maintenance, although seemingly simple, is essential in catching minor problems early. Regularly inspecting wiring and cleaning sensors prevents sudden failures. These habits increase appliance lifespan and confidence in diagnosing faults.
From tackling complex control board issues to understanding the importance of proper tools, these lessons solidified my repair skills. Remember, every challenge is an opportunity to learn more. If you’re eager to deepen your troubleshooting abilities, exploring detailed guides like this diagnostic guide can be transformative.