Ever had that moment when your oven stops broiling, and you wonder if the heating element is to blame? I remember the frustration—my dinner plans ruined because I didn’t realize a tiny component had given up the ghost. It’s a nagging feeling, isn’t it? The curiosity about whether the problem is DIY-able or if I need to call in a pro. But here’s the thing: diagnosing that oven broil element doesn’t have to be complicated or expensive.
Why Testing Your Oven Broil Element Matters More Than You Think
Understanding how to test your oven’s broil element can save you from costly repairs and unnecessary replacements. When your broil function suddenly stops working, many assume it’s a broken thermostat or a blown fuse. While those are common culprits, sometimes the issue is simply a burnt-out heating element. But how can you be sure without calling a technician? Well, by learning to test it with a basic tool—a simple ohmmeter—you get the power back in your hands.
Is Checking the Broil Element Actually Worth the Hype?
I used to think that testing electrical components required fancy tools and skills I didn’t have. My first mistake was jumping straight into replacing parts without proper diagnosis—that led to wasted money and more frustration. Turns out, a straightforward test with an ohmmeter reveals all you need to know about the element’s health. In fact, Appliance Bargainz points out that proper diagnostics before repairs can make all the difference, preventing unnecessary replacements and third-party costs. If you’re tired of guessing and want a reliable way to troubleshoot, this simple method is your best friend.
Gather Your Tools and Prepare for Testing
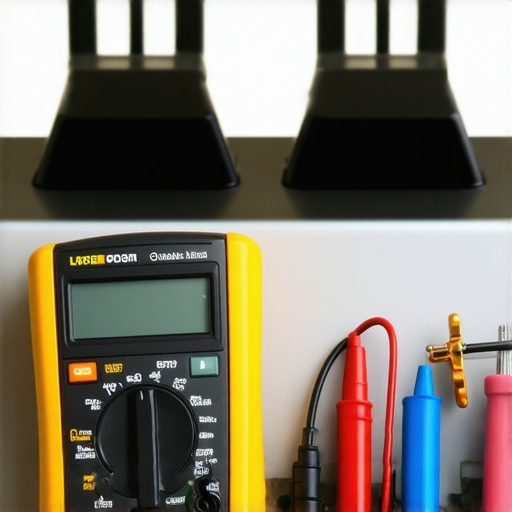
Before diving into testing, ensure you have a reliable multimeter or an ohmmeter. Think of this device as a health scanner for electrical parts—like a doctor’s stethoscope for your oven. Turn off the power supply to your oven at the circuit breaker to avoid electric shocks, resembling shutting off a water supply before fixing a pipe. Remove the oven’s back panel or access cover following your model’s instructions—this is akin to opening the hood of a car to inspect the engine.
Locate the Broil Element and Disconnect It
Identify the heating element at the top of your oven—it looks like a thick wire loop or ribbon. Carefully disconnect the wires attached to it; think of unplugging a toy before repairing it. If wires are secured with screws, use a screwdriver to detach them, ensuring you don’t yank or damage any connectors. Take note of how the wires are connected; a quick photo or memo can save confusion during reattachment.
Conduct the Resistance Test
Set Your Multimeter Correctly
Set your multimeter to measure resistance (ohms). If your device has range settings, choose a low range, such as 200 ohms—like tuning a radio to the right frequency to get a clear signal. This setting prepares your tool to detect the tiny current flow through the heating element, similar to listening for a whisper in a quiet room.
Perform the Test
Touch one multimeter lead to one terminal of the element and the other lead to the opposite terminal—like checking if a bridge supports the weight from both ends. A good, functioning broil element typically shows a resistance value between 10 to 50 ohms. If the meter reads ‘infinite’ or shows no continuity—like the needle pointing to zero—it indicates a broken circuit, meaning the element has burnt out and needs replacement.
During my first attempt, I accidentally connected the leads backward; the multimeter still provided the same reading, but I learned that polarity doesn’t affect resistance measurements. However, ensuring proper contact is crucial—press the leads firmly onto the terminals to get an accurate reading.
Interpret Your Results and Decide the Next Step
If your test shows high or infinite resistance, the element is faulty. If the reading is within the normal range, the issue might lie elsewhere, such as the oven’s control board or thermostat. Remember, testing isolates the problem, comparable to a mechanic diagnosing an engine misfire—sometimes the spark plug, other times the fuel injector.
For more detailed troubleshooting steps, visit this guide on oven repairs. If you suspect your element is dead, replacement parts are readily available, and diagnostics tips can help you confirm compatibility and installation procedures.
Reassemble and Test the Oven
Reconnect the wires securely—think of replugging a device into a power source. Mount the access panel back if detached. Restore power at the circuit breaker and test your oven’s broil function—like flipping a switch to see if the light turns on. If it works, celebrate your DIY success; if not, revisit your diagnostics or consult a specialist.
 Many DIY enthusiasts believe that diagnosing appliance issues is straightforward—simply test the part suspected to be faulty and replace if necessary. However, this approach often leads to overlooking critical nuances, especially when dealing with complex systems like dishwashers or ovens. A common misconception is that resistance testing alone can definitively identify a failed heating element or control board; in reality, nuances such as thermal cycling effects and intermittent faults mean that multi-faceted diagnostics are essential for accuracy. Falling into the trap of assuming a component is dead based solely on a single test risks misdiagnosis, leading to unnecessary replacements and prolonged downtime. For example, ovens may exhibit false faults due to wiring issues or sensor misreadings, which can only be confirmed through comprehensive testing, including testing the thermal fuse, thermostat, and control board in conjunction. According to appliance repair experts, understanding the detailed nuances—such as the importance of testing continuity in circuits that may intermittently open—is crucial for precise diagnosis. Advanced troubleshooting sometimes requires considering how components interact over varied operating conditions, not just static resistance measurements. This is especially true when dealing with control boards that can produce inconsistent signals due to cold solder joints or cracked circuitry, which a basic ohmmeter might not detect. So, learning to interpret test results within the broader context of appliance behavior helps avoid costly mistakes. For in-depth guidance on pinpointing faults before calling an expert, visit this detailed diagnostic guide. Remember, the devil is in the details, and knowing these hidden nuances can save you both time and money. Have you ever fallen into this trap? Let me know in the comments.
Prioritizing Regular Maintenance to Extend Appliance Lifespan
Keeping your appliances in top shape involves more than just fixing issues as they arise; it requires a proactive approach with the right tools and methods. Personally, I swear by using a high-quality thermal imaging camera to detect hidden hotspots in ovens or dishwashers, revealing insulation failures or wiring problems before they cause significant damage. This approach not only prevents costly breakdowns but also ensures consistent performance over the long haul.
Invest in a Reliable Multimeter and Know How to Use It
A dependable multimeter is a cornerstone tool in diagnosing appliance faults. I prefer one with auto-ranging capability and true RMS measurement, which provides accurate readings across different electrical scenarios. For example, when testing heating elements or control circuits, an auto-ranging multimeter saves time and minimizes errors. Familiarity with using it to check for continuity and proper resistance ensures you can quickly identify faulty components, avoiding unnecessary part replacements.
Embrace Diagnostic Software for Complex Systems
In recent years, diagnostic software compatible with smart appliances has revolutionized maintenance. While I mostly work with traditional tools, I’ve started experimenting with manufacturer-specific diagnostic apps that connect via Wi-Fi or Bluetooth. They provide error code histories, real-time sensor data, and system health reports. This technology is particularly useful for modern ovens and dishwashers with integrated microcontrollers, helping to pinpoint issues that simple resistance checks might miss. As this trend advances, expect more appliances to come equipped with diagnostic interfaces that simplify troubleshooting further.
Predicting Future Trends in Appliance Diagnostics and Maintenance
In the coming years, we can expect an increased integration of IoT-enabled diagnostic tools. These will allow homeowners and technicians to monitor appliance health remotely, receive proactive alerts, and even schedule maintenance automatically. Such developments promise to reduce downtime and extend appliance lifespan significantly.
Question: How do I Maintain My Appliances Over Time to Prevent Major Failures?
Consistency is key. Regularly cleaning your appliances—like descaling your oven or clearing dishwasher spray nozzles—prevents buildup that can cause overheating or malfunction. I also recommend scheduling seasonal inspections using a multimeter to test key components, such as thermostats and heating elements, especially if your appliance is several years old. By staying ahead with routine diagnostics, you can catch early signs of wear and tear, saving money and avoiding disruptive breakdowns. For comprehensive guides on maintenance routines, visit this resource on oven repair essentials.
If you haven’t invested in a thermal imaging camera yet, I highly recommend trying one. Its ability to detect unseen electrical issues can be a game-changer in your maintenance toolkit. Remember, the goal is to catch problems before they become costly repairs—think of it as a health check-up for your appliances. For those interested in diving deeper into diagnostics, exploring software tools can offer insights that static resistance checks can’t provide. Take proactive steps today, and your appliances will thank you with years of reliable service.
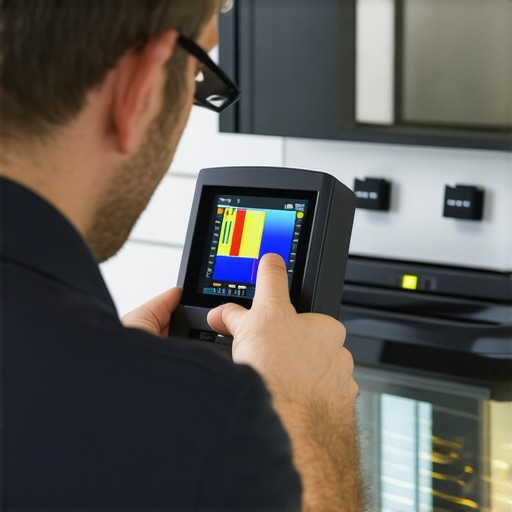
Image Prompt: A technician using a thermal imaging camera to inspect an oven’s interior, highlighting the benefits of advanced diagnostic tools for appliance maintenance. Alt text: Technician diagnosing appliance with thermal imaging for proactive maintenance. Title: Using Thermal Imaging for Appliance Health Checks.
The Hidden Lessons from My Oven Repair Journey
One of the most valuable insights I gained was that patience and thoroughness outweigh sheer technical skill. When I first started diagnosing my oven’s broil element, I assumed a single resistance test would reveal everything. But I soon learned that understanding the nuances—like testing wire continuity and examining wiring connections—was crucial. The biggest lightbulb moment was realizing that a failed resistance reading isn’t always black and white; sometimes, partial faults or intermittent issues demand a more comprehensive approach. Moreover, I discovered that trusting quality tools and proper safety precautions transformed a daunting task into a manageable DIY project, saving me hundreds and empowering me to take control of appliance maintenance.
Top Resources That Transformed My Approach to Diagnostics
My first recommendation is always to invest in a reliable digital multimeter—a true game-changer. I personally favor models with auto-ranging and true RMS capabilities, which deliver precise readings across various appliances. For deep dives into troubleshooting, this diagnostic guide offers step-by-step insights that cut through confusion. Additionally, I lean on specific online forums and tutorials where real-world experiences reveal common pitfalls and proven solutions. Lastly, having a dependable repair manual tailored to your oven model—the same one used by professionals—can prevent costly mistakes and ensure every repair is safe and effective.
You’ve Got the Power to Master Your Appliance Repairs
Remember, diagnosing and fixing your oven broil element isn’t just about saving money—it’s about building confidence and independence. Every successful repair adds to your toolkit of skills, making future troubleshooting less intimidating. So, why not start today? Equip yourself with the right tools, leverage trusted resources, and embrace the learning process. Your appliances—like your skills—are worth the effort. Have you tried testing your oven’s heating elements on your own? Share your experiences or questions below, and let’s troubleshoot together!”}}