I stood in my kitchen last summer, ankles deep in lukewarm, gray water, staring at a machine that had clearly gone on strike. My first thought? The pump is dead! I rushed out, bought the first replacement I could find, spent two hours wrestling with the unit, and… nothing. The water stayed. I had replaced the drain pump when the issue was actually the circulation pump. I felt like a total rookie, wasting a perfectly good Saturday because I didn’t know the difference between the two hearts of my appliance. If you’ve ever felt like your dishwasher is speaking a foreign language while it floods your floor, believe me, I have been there. Today, we are going to fix that confusion once and for all. I am going to show you exactly how to tell these two parts apart so you never waste a dime on a part you don’t need. It is about more than just a quick fix; it is about mastering dishwasher parts and DIY diagnostics so you can keep your kitchen running without the headache.
My $150 Mistake and Why You Need to Know These Two Pumps Apart
Think of your dishwasher as a tiny, specialized car wash. It has two very different jobs: washing the dishes and getting rid of the trash. Each job has its own dedicated motor. The circulation pump is the workhorse that pushes water through the spray arms to scrub your plates. Meanwhile, the drain pump is the cleanup crew that kicks in at the end of the cycle to shove that dirty water out of the tub. I once spent way too long stopping a rattle in my spray arms only to realize the real culprit was a failing circulation motor that couldn’t provide enough pressure.
Is This Tiny Bit of Knowledge Really Worth the Hype?
You might be thinking that it is easier to just call a pro or guess based on an error code. But identifying dishwasher faults quickly can save you hundreds in labor costs. According to Consumer Reports, nearly 30% of dishwasher repairs are related to pump or motor failures, so knowing which one is acting up is the most valuable tool in your belt. Have you ever opened your dishwasher only to find a lake of stagnant water at the bottom? Tell me about your most frustrating appliance fail in the comments!
How to Listen for the Real Culprit
You can usually tell which part is failing just by using your ears. If your machine sounds like a jet engine during the wash cycle, you are likely identifying a bad dishwasher circulation motor. On the other hand, if the machine finishes its cycle but you hear a weird humming noise from your dishwasher’s drain pump, that is your signal that the exit path is blocked or the motor is seized. Modern units are designed to be efficient, but as Energy Star points out, these high-performance pumps are more sensitive to debris than the old clunkers our parents owned. Before you go out and buy a whole new machine, let’s look at the specific symptoms that point to each pump.
Don’t Let the Standing Water Win
To get your kitchen back in order, you need to start with the easiest path first: the drain pump. Think of this little motor as the bilge pump on a sinking ship. If it fails, everything else is just a soggy mess. I remember a particularly wet Tuesday when my own machine refused to drain. I assumed the motor was toast, but when I actually pulled the unit out and popped the pump off, I found a single cherry pit wedged in the impeller. That $0.05 piece of fruit almost cost me a $90 replacement part. Before you buy anything, you must check for blockages. This involves clearing debris from a dishwasher check valve without tools if possible, or diving into the sump area to feel for glass shards. If your machine is struggling but still moving some water, you might just be dealing with why your dishwasher drains too slowly and how to speed it up through a deep clean of the hose and filters.
Testing for Electrical Life with a Multimeter
Once you are sure there is no physical blockage, it is time to see if the motor has actually given up the ghost electrically. Grab a multimeter—it is the only way to be 100% sure. Set it to the Ohms setting and touch the probes to the terminals on the pump. You are looking for a specific resistance range, usually between 15 and 40 ohms depending on your model. If you get a reading of ‘OL’ or infinity, the internal coil is broken, and no amount of cleaning will save it. This is a similar process to testing the dishwasher float switch for continuity, another common culprit for filling issues. If the electrical test fails, you are officially in the market for a new part.
The Heavy Hitter: Diagnosing the Circulation Motor
If your dishwasher fills up and then just… sits there hum-drumming without any water actually spraying, the circulation pump is the likely suspect. This motor is the heart of the operation, pushing water through the heater and into the spray arms. Unlike the drain pump, which is often small and easy to access from the front, the circulation pump is a beast typically located right in the center of the chassis. You need to look for the signs of a dying circulation pump in your dishwasher, such as a high-pitched squeal or a complete lack of water pressure during the wash cycle.
Stop the Noise and Save the Wash
Sometimes these motors aren’t dead, just dying. I once helped a neighbor who complained about a ‘vibrating’ sound that shook the whole kitchen. We found that the mounting grommets on the motor had perished, which is an easy fix compared to a full replacement. However, if the sound is coming from *inside* the motor, it’s usually the bearings. Knowing how to stop the noise and fix a vibrating dishwasher pump early can prevent the motor from seizing entirely. This level of identifying dishwasher faults quickly is what separates a weekend warrior from someone who spends three weeks washing dishes in the sink. If you can distinguish a bearing whine from a debris rattle, you have already won half the battle.I see it every single week in the DIY forums: someone gets an F3 error on their display and immediately drops $250 on a new control board. It is the classic part-swapper trap. In my experience, jumping to the most expensive component is usually a recipe for frustration. Most people assume the computer is the brain, so if things go south, the brain must be fried. But appliance circuits are more like a string of lights; if one tiny thermal fuse or sensor fails, the whole system shuts down to protect itself. Before you even think about telling if your oven control board is actually fried, you need to verify the inputs first. This is where oven repair essentials come into play. A simple $15 sensor could be mimicking a total board failure. Have you ever fallen into this trap and replaced a huge part only to find the problem remained? Let me know in the comments!
Are Error Codes Always Telling the Truth?
The short answer is no. Error codes are just a starting point, not a final verdict. According to data from industry service reports, nearly 20% of electronic control boards returned to manufacturers as defective are actually fully functional, meaning the fault was misdiagnosed. For instance, when diagnosing an F3 error code on your digital oven display, the board is simply reporting a temperature spike. That spike could be caused by a faulty sensor, a loose wire, or even a sticking relay rather than a dead board. 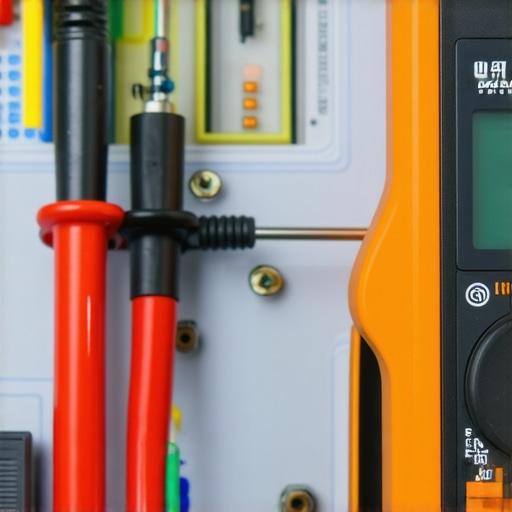
The Glowing Igniter That Is Actually Dead
Here is the ultimate mystery for gas range owners: the glowing igniter. Everyone thinks that if it glows, it works. But this is a massive misconception that leads to wasted money. In reality, a gas igniter must reach a specific amperage to pull enough current to open the safety valve. If the igniter is old, it might glow bright orange but never get hot enough to trigger the gas flow. I have seen people spend hours identifying a faulty gas oven solenoid when the igniter was simply weak. This is why replacing a glowing but faulty oven igniter is one of the most common mid-level repairs I recommend. Similarly, if your oven is taking forever to heat, do not just assume it is the fuel supply. Check why your oven takes 45 minutes to reach 350 degrees; it is often a failing bake element or a thermal fuse that is barely hanging on. Before you dive into identifying dishwasher faults quickly or tearing apart your oven, use a multimeter to check for continuity. It is the difference between a surgical fix and a blind guess.I’ve spent enough time on my hands and knees to know that the right tool isn’t just about speed; it’s about confidence. When I first started, I used a cheap $5 multimeter that gave me ghost readings and led me down a rabbit hole of replacing parts that were perfectly fine. Now, I never touch a machine without a professional-grade meter that has a clear continuity beep. If you want to truly master 5 multimeter tricks for diagnosing a dead control board, you need gear that doesn’t lie to you. Along with a good meter, a magnetized 1/4-inch nut driver is non-negotiable for my kit. Most dishwasher and oven panels are secured by these hex-head screws, and dropping one into the dark abyss of a chassis is a soul-crushing experience that turns a 20-minute job into a two-hour ordeal.
Stop the Grime Before It Stops Your Machine
Most homeowners wait for a total breakdown, but I’ve learned that a 10-minute checkup every month prevents that ‘puddle on the floor’ panic. I make it a strict habit to check how to clean the hidden filter in your dishwasher sump because that’s where the real mechanical damage begins. Debris builds up over time, creating backpressure that forces the motors to work twice as hard, eventually burning out those expensive circulation pumps we discussed earlier. It is about more than just washing dishes; it is about protecting the machine’s heart.
How do I keep my kitchen appliances from dying early?
The secret lies in a routine that feels almost boring until you realize you haven’t called a repairman in five years. According to the technical guidelines from the Association of Home Appliance Manufacturers (AHAM), maintaining clear spray arms and performing a monthly descaling cycle can extend the operational life of a dishwasher by up to 30%. This isn’t just a suggestion; it’s the difference between a 12-year lifespan and a 6-year burnout. For your oven, it means avoiding the self-clean cycle—which can literally fry the control board with excess heat—and instead focusing on oven diagnostics and pinpointing faults before calling a repair expert.
The Future of DIY Kitchen Maintenance
We are rapidly heading toward a world where your appliances will have even more complex onboard computers. I predict that within the next few years, ‘smart’ diagnostics will move from simple error codes to full-blown augmented reality interfaces on your phone. But until every home has a digital assistant that can see through walls, you are the computer. You need to stay sharp on identifying dishwasher faults quickly so you aren’t at the mercy of a service tech’s schedule or a massive markup on common dishwasher parts and DIY diagnostics. My best advice? Grab your multimeter this weekend and test just one component for continuity—even if it’s working fine. Getting used to what ‘normal’ looks like today is the only way you’ll spot the ‘abnormal’ when a real crisis hits.
Three Hard Truths I Learned While Staring at a Wet Kitchen Floor
Over the years, I have realized that parts and diagnostics are not just about technical skill; they are about patience. First, cleanliness is almost always the first line of defense. I cannot tell you how many times I thought a motor was toast, only to find that I just needed to learn how to clean the hidden debris under your dishwasher filter to restore full power. Second, the most expensive part is rarely the one that is actually broken. We often blame the control board because it is the brain, but it is usually a $10 sensor or a clogged hose that is the real villain. Finally, your senses are your best tools. If it smells like ozone, it is electrical; if it sounds like grinding, it is mechanical. Trusting your gut after identifying dishwasher faults quickly will save you more money than any smart appliance ever could.
Gear That Saves Me From Saturday Meltdowns
If you are serious about this, you need a small kit that removes the guesswork. My first recommendation is an auto-ranging multimeter; it is the only way to succeed at testing your oven temperature sensor without calling a pro. I also swear by magnetized 1/4-inch and 5/16-inch nut drivers—these will save you from losing screws in the dark corners of a chassis. Lastly, keep a digital copy of a dishwasher parts and DIY diagnostics manual on your phone. Having the diagram right in front of you while you are under the sink is a total game-changer for your confidence.
#IMAGE_PLACEHOLDER_E#
Your Kitchen Is Waiting for a Leader
Taking that first step into oven repair essentials or dishwasher maintenance can feel intimidating, but remember that these machines were built by people to be fixed by people. You don’t need a degree in engineering to swap a heating element or clear a pump; you just need the willingness to look closer and ask the right questions. By mastering oven repair essentials and troubleshooting, you are not just fixing a machine—you are taking control of your home’s efficiency. Don’t wait for the next flood to start learning. Grab your tools and see what you can discover today. Have you ever successfully fixed an appliance only to find a totally unrelated object inside the machine? Let me know in the comments below!