I remember it like it was yesterday. I was pulling a heavy, bubbling three-layer lasagna out of the oven for a dinner party, and just as I put my weight into it, the right side of the handle gave a sickening clunk. The handle didn’t fall off completely, but it felt like it was hanging by a literal thread. In a moment of sheer panic and grease-splattered frustration, I grabbed the first flathead screwdriver I found in the junk drawer and gave it a frantic twist. Creeaaaak. That sound still haunts me. I didn’t just tighten it; I almost rounded out the head of the screw entirely, turning a five-minute fix into a weekend-long ordeal. We’ve all been there, standing in front of a wobbly appliance, tempted to use brute force when what we really need is a bit of finesse and the right approach. Today, I’m going to show you how to get that handle rock-solid again without making the same mistake I did.
Stop Yanking on That Wobbly Door Handle
It is incredibly tempting to just live with a loose handle, isn’t it? You figure as long as it opens the door, it’s fine. But here is the reality: every time that handle wiggles, it is slowly eating away at the threads inside the door or the screw itself. This isn’t just about aesthetics; it’s about preventing a situation where you are [replacing a cracked oven door handle without buying a new stove](https://appliancebargainz.com/replacing-a-cracked-oven-door-handle-without-buying-a-new-stove) because the mounting points finally snapped. When things get loose, the heat from your oven escapes more easily through gaps, which messes with your bake times. I’ve found that many people ignore this until they realize their [oven door won’t stay latched](https://appliancebargainz.com/how-to-fix-an-oven-door-that-wont-stay-latched) properly, all because the handle alignment is throwing off the hinges.
Is this DIY fix actually worth the effort?
You might be thinking that calling a pro is safer, but I promise you, this is one of those [oven repair essentials](https://appliancebargainz.com/oven-repair-essentials-troubleshooting-common-issues-with-parts) that any homeowner can master. The biggest fear is usually stripping the screw, which is a valid concern. Once those metal grooves are gone, you are looking at [replacing a stripped screw on your oven handle](https://appliancebargainz.com/replacing-a-stripped-screw-on-your-oven-handle), which often involves drilling and a whole lot of swearing. However, if you understand the ‘why’ behind the wobble, you can avoid the damage. Most of the time, the looseness comes from thermal cycling. According to mechanical engineering principles, the constant expansion and contraction of metal during heating and cooling cycles naturally backs screws out of their housing over time.
The Hidden Danger of the Just One More Turn Mentality
My biggest early mistake was thinking that tighter always meant better. It doesn’t. Oven doors are often a sandwich of glass, insulation, and thin metal. If you over-torque that screw, you risk cracking the inner glass or stripping the soft aluminum threads. Before you even touch a tool, you should perform some basic [oven diagnostics to pinpoint faults](https://appliancebargainz.com/oven-diagnostics-pinpointing-faults-before-calling-a-repair-expert). Check if the screw is actually loose or if the plastic mounting bracket has melted or cracked. Have you ever felt that terrifying wiggle right as you’re pulling a hot tray out of the rack? If so, don’t wait. Let’s look at the specific steps to secure it for good.First things first, you need to clear the deck. Most people try to tighten these screws while the door is still attached to the oven and standing upright. Don’t do that. You’re fighting gravity, and that’s a battle you will lose when a tiny screw slips and vanishes into the dark abyss of your kitchen floor. I usually lay a thick, folded towel on the kitchen island and remove the door entirely. If you aren’t sure how your door comes off, you might want to learn how to spot a failing oven hinge before the door drops to see if the locking tabs are engaged or if the springs are under too much tension to safely proceed.
Pick the Right Tool for the Job
It sounds basic, but using a slightly-too-small Phillips head is how 90% of DIYers end up replacing a stripped screw on your oven handle. If there is any ‘play’ when you insert the screwdriver, stop. You need a bit that seats deeply and firmly. I remember trying to fix a friend’s Whirlpool with a multi-tool I had in my pocket. I was so confident, but because the bit didn’t seat perfectly, I sheared off the top of the screw head in three seconds flat. We ended up having to drill out the core, which is a nightmare I don’t wish on anyone. Check your manual or use a flashlight to confirm if you need a Torx bit or a standard Phillips; many modern ovens use T15 or T20 screws to prevent exactly what I did to my friend’s stove.
The Anatomy of the Oven Door Sandwich
Separate the Inner and Outer Panels
To get to the handle screws, you almost always have to separate the inner metal liner from the outer decorative skin. This is the ‘sandwich’ I mentioned. You’ll usually find screws along the top or sides of the door. Once these are out, the panels will pull apart. This is actually a great time to tackle the secret to cleaning between oven door glass panes because you’ve already done the hard work of opening it up. Just be extremely careful—if you let that inner glass panel slip, it can shatter, and then you’re looking at how to replace a cracked oven door hinge or searching for expensive replacement glass.
Secure the Mounting Bracket and Thread
Once you can see the back of the handle, check the mounting brackets. When I was working on that lasagna-disaster oven, I realized that the handle wasn’t just loose—the heat had actually warped the thin sheet metal where the screw anchored. I had to use a small fender washer to distribute the pressure. If you find your screw ‘bottoming out’ but the handle still moves, a heat-resistant washer is your best friend. Apply a tiny drop of blue thread-locker (the removable kind) to the screw threads. This prevents the thermal cycling from backing it out again. Hand-tighten it until it’s snug, then give it maybe an eighth of a turn more. You want it firm, not ‘strangled.’
Look for Collateral Damage While You Are In There
Since you have the door apart, perform a quick visual inspection. Check for any wires that look scorched or insulation that has shifted. If you’ve been having electrical issues, like the oven cutting out or failing to reach temperature, this is a good moment to understand how to test your ovens thermal fuse for continuity since the fuse is often located near the door’s heat path. Tighten everything up, slide the panels back together, and ensure the handle doesn’t have a millimeter of wiggle before you hang the door back on the hinges.
Now that you’ve mastered the basics of securing a handle, it’s time we talk about the logic that separates a hobbyist from a seasoned repair tech. We often think that repair is just about swapping out a broken piece for a new one, but that is where most people get stuck in a cycle of repeated failures. Let’s dig deeper into the mechanics of why things actually break. Have you ever wondered why that same part seems to fail every two years? It’s rarely bad luck.
Why Genuine OEM Parts Aren’t Always the Golden Ticket
Here is a take that might get me in trouble with the manufacturers: OEM (Original Equipment Manufacturer) parts aren’t always the best solution. I know, it sounds like heresy. But hear me out. Many manufacturers design parts to meet a specific price point or weight requirement for shipping. If your original hinge snapped because the metal was too thin, replacing it with the exact same thin-metal part from the factory just resets the countdown to the next failure. In certain oven repair essentials, finding a reinforced aftermarket part can actually be an upgrade. I’ve seen third-party dishwasher rollers that used high-temp nylon where the originals used cheap plastic that brittle-cracked after six months of heat exposure. Don’t be afraid to look for ‘improved’ versions of known failure points.
Does Your Multimeter Beep Mean the Component is Actually Healthy?
This is the biggest ‘trap’ in diagnostics. Most DIYers set their multimeter to the continuity setting (the one that beeps) and if they hear a sound, they assume the part is good. Wrong. A heating element or a solenoid can have continuity and still be completely useless. If the resistance (measured in Ohms) has drifted too high due to internal corrosion, the component won’t draw enough current to function. This is especially true when testing an oven temperature sensor with just a multimeter. A sensor might ‘beep’ for continuity but have a resistance value that tells the oven it’s 400 degrees when it’s actually 75. A study published in the International Journal of Engineering and Applied Sciences notes that thermal fatigue in domestic appliances often creates ‘partial failures’ where the circuit is technically complete but the electrical efficiency is gone. Always check the specific Ohm range for your model before giving a part a clean bill of health.
Another nuance involves how to identify dishwasher faults quickly without tearing the whole machine apart. Most people think a dishwasher that won’t start must have a dead motor. In reality, I’ve found that it’s often a communication error between the latch and the control board. If you’ve been checking for oven control board symptoms and finding nothing, start looking at the wiring harnesses that flex every time the door opens. A single hair-line fracture in a copper wire can mimic a total board failure.
The One Tiny Mistake That Ends in a Blown Control Board
Before you go testing the resistance of an oven igniter with your multimeter, there is a massive ‘Oops’ factor you must avoid: static discharge. Modern appliances are essentially computers that can cook. If you touch the pins on a control board without grounding yourself, you can fry the microprocessors with a spark you didn’t even feel. I once cost myself $250 by sliding across a carpet in wool socks before grabbing a replacement board. Always touch the metal frame of the appliance first to discharge yourself. Have you ever fallen into this trap or accidentally made a repair worse by over-thinking it? Let me know in the comments. We’re all here to learn from each other’s grease-stained mistakes.
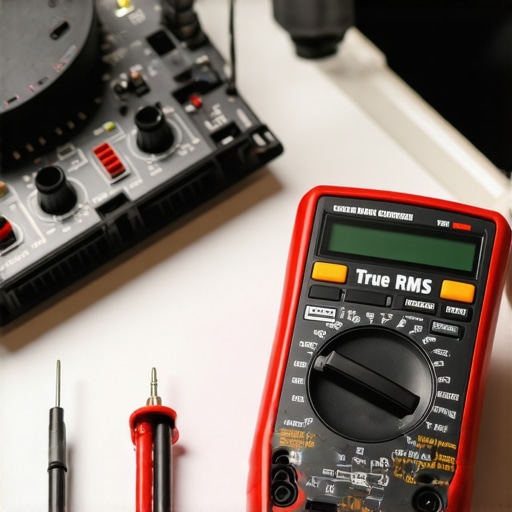
I’ve spent a decade in crawlspaces and behind greasy stoves, and if there’s one thing I’ve learned, it’s that your tools dictate your success rate. If you’re ready to graduate from ‘the guy with a screwdriver’ to someone who actually understands the lifecycle of their machines, you need to upgrade your kit. I used to rely on a cheap $10 multimeter I bought at a gas station, but once I started using a model with ‘True RMS’ capability, my diagnostics changed overnight. Why? Because cheap meters often give false readings on pulse-width modulated signals, which are common in modern control boards. When you’re diving into dishwasher parts: a comprehensive guide to diy diagnostics, that accuracy is the difference between a 10-minute fix and a $300 mistake. Most people ignore the technical specifications, but high-impedance inputs are vital to avoid ‘ghost’ voltages that can trick you into thinking a dead circuit is live.
The Tool That Actually Lives Up to the Hype
Beyond the meter, there is one specific tool I swear by: the flexible shaft nut driver. If you’ve ever struggled with the correct tool for removing a rusted dishwasher heating element nut, you know the pain of trying to fit a standard wrench into a three-inch gap under the tub. This tool allows you to torque around corners, saving your knuckles and preventing you from rounding off the plastic housing that holds everything together. I’ve seen more dishwashers totaled by a stripped mounting nut than by actual motor failure. It is about having the right leverage in the wrong places.
How Do I Keep Everything Humming for the Next Five Years?
Maintenance isn’t a one-and-done event; it’s a habit. I’ve found that the single most effective way to extend the life of an oven is a simple quarterly inspection. Don’t wait until your oven is sparking to check the bake element immediately. Look for ‘hot spots,’ thin spots in the coil, or areas where the porcelain coating has chipped. According to the Association of Home Appliance Manufacturers (AHAM), early detection of surface degradation can prevent up to 40% of catastrophic heating element failures. For your dishwasher, it’s all about managing the chemistry. Using a citric-acid-based cleaner once a month is the quickest way to remove hard water build-up in your dishwasher before it chokes your pump or clogs the spray arms.
Looking ahead, I suspect we are moving toward a ‘right to repair’ revolution fueled by 3D printing and open-source schematics. We are already seeing niche communities sharing CAD files for obsolete plastic brackets and oven knobs. Ten years from now, you won’t be scouring eBay for a discontinued latch; you’ll be printing it in your garage using heat-resistant filament. The future of home repair is decentralized, and the more you learn now, the better prepared you’ll be for that shift. The days of ‘planned obsolescence’ are numbered if we keep sharing these skills.
Before you tackle your next big project, I want you to try this: Take five minutes to calibrate your multimeter against a known source, like a fresh 9V battery or a standard outlet. It’s a small step, but it builds the precision mindset you need for oven diagnostics and pinpointing faults before calling a repair expert. You’ll be amazed at how much more confident you feel when you know your readings are 100% accurate.
Hard Truths That Saved My Sanity Behind the Stove
After years of wrestling with stubborn panels, I’ve realized that the most expensive tool in your arsenal is actually patience. One lightbulb moment happened when I stopped trying to force a screw and realized that metal fatigue doesn’t care how strong you are; it cares about precision. I also learned that most ‘dead’ appliances are just dirty. A simple cleaning of a sensor or a snug connection on a wire harness solves more problems than a $200 part ever could. Lastly, don’t ignore the sounds. A ‘clunk’ or a ‘hiss’ is your machine’s only way of asking for help before it becomes a safety hazard.
The High-Performance Gear That Never Leaves My Side
If you want to move beyond basic fixes, you need a setup that allows for professional precision. I always keep a True RMS Multimeter on hand because standard meters can give misleading readings on modern control boards. For those tight spots under the tub or behind the frame, the correct tool for removing a rusted dishwasher heating element nut is a flexible shaft driver; it is truly the only way to avoid cracking the plastic housing. I also swear by blue thread-locker for any handle repair—it is the secret to making sure that ‘fix’ actually stays fixed through years of heat cycles. #IMAGE_PLACEHOLDER_E# Finally, a set of nylon pry tools will save your appliance’s finish from the scratches a metal screwdriver always leaves behind.
Your Kitchen Is Waiting for Your Help
There is a unique kind of pride that comes from hearing your oven beep perfectly after you’ve personally restored its health. You aren’t just saving money; you are breaking the cycle of planned obsolescence. These oven repair essentials are skills you will carry for a lifetime. Don’t let a wobbly handle or a mysterious noise intimidate you. Take it one screw at a time, stay grounded, and remember that you are the master of your machines, not the other way around. Before you dive into the hardware, if your oven is sparking check the bake element immediately and clear those safety hurdles first.
Have you ever finished a complex repair only to find one ‘extra’ mystery screw sitting on the counter when you were done? Let me know your most hilarious DIY ‘oops’ moments in the comments below!