I stood there with a microfiber cloth in one hand and a spray bottle in the other, feeling like a total failure. The afternoon sun was streaming through my kitchen window, illuminating every single brown drip and dusty streak trapped—mockingly—inside my oven door glass. I had scrubbed the outside until my arms ached and the inside until the porcelain gleamed, but that hazy mess in the middle remained. It is the kind of thing that makes a perfectly clean kitchen feel neglected. For the longest time, I thought I just had to live with it or shell out for a whole new door assembly. I even tried that viral trick where you tape a wipe to a coat hanger and poke it through the vents. Spoiler alert: it just made a bigger, streakier mess that I couldn’t reach to dry. Today, I am going to show you how to stop fighting those internal stains and finally get that crystal-clear view of your baking.
Get Rid of Those Drips Inside Your Door
If you have ever felt the urge to spray glass cleaner directly into the top vents of your oven, please, put the bottle down. That is exactly how most of us end up with those permanent-looking vertical streaks in the first place. Early in my DIY journey, I made the mistake of thinking I could ‘flood’ the grime out. Not only did it stay dirty, but I almost caused a short in the wiring. Understanding [oven repair essentials](https://appliancebargainz.com/oven-repair-essentials-troubleshooting-common-issues-with-parts) starts with realizing that the door is a precision-engineered ‘sandwich’ of glass and heat shields. It’s not just about vanity, either. When you can’t see through that glass, you’re constantly opening the door to check on your food, which leads to heat loss. This often makes people think they are [fixing an oven that bakes too slow](https://appliancebargainz.com/fixing-an-oven-that-bakes-too-slow-for-your-recipes) when the real issue is just a lack of visibility. Before we crack this thing open, I highly recommend you [test your oven door seal with the dollar bill trick](https://appliancebargainz.com/testing-your-oven-door-seal-with-the-dollar-bill-trick). If your gasket is shot, it’s likely letting more grease-laden steam into those glass layers than it should, meaning you’ll be right back here cleaning it again in a month.
Will Taking My Oven Door Apart Ruin It?
This is the number one question I get from neighbors. The fear is that once those screws come out, the tempered glass will shatter or the hinges will spring back and break your wrist. I won’t lie; I actually [snapped an oven door hinge spring](https://appliancebargainz.com/how-to-replace-a-snapped-oven-door-hinge-spring-2) once because I didn’t lock the hinges properly before sliding the door off. It was a loud, scary pop, but it was a lesson well-learned. The truth is that tempered glass is incredibly resilient to heat and flat impacts. According to the glass specialists at Guardian Glass, tempered glass is roughly four to five times stronger than standard glass due to the extreme heating and cooling process it undergoes. As long as you don’t clobber the edges or work on a hard stone countertop without a towel down, your glass is tougher than you think. Have you ever tried one of those ‘magic’ coat-hanger cleaning hacks only to realize you made the problem ten times worse? Drop a comment below; I need to know I’m not the only one who has fallen for that! Sometimes, if your [oven door glass is rattling](https://appliancebargainz.com/why-your-oven-door-glass-is-rattling-and-how-to-secure-it), it’s a sign that the internal spacers are already shifting, making this the perfect time to get in there, clean things up, and tighten the structural hardware.To get that factory-fresh clarity, you have to commit to the teardown. Most modern oven doors are held together by just a few screws at the top or bottom. Before you touch a screwdriver, though, you have to address the hinges. Think of the hinges as loaded springs waiting to snap; if you don’t lock them, they will retract into the oven frame with enough force to dent the metal. I learned this the hard way when I was rushing to prep for a Thanksgiving dinner. I skipped the locking step, the hinge snapped back like a heavy-duty mousetrap, and I spent the next hour how to spot a failing oven hinge before the door drops trying to figure out if I had bent the mounting bracket or just bruised my pride. 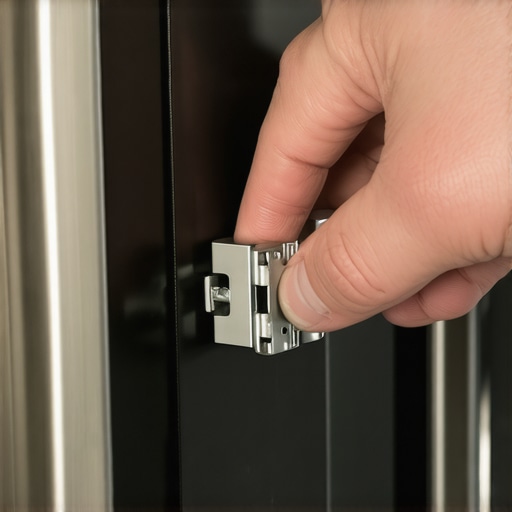
Lock the Hinges or Risk a Snap
Open your door fully. Look at the hinges where they meet the oven body. You will see a small metal flip-latch or a hole where you can insert a pin. Flip those latches down until they hook onto the hinge arm. This effectively ‘freezes’ the spring in the open position. Once locked, partially close the door until you feel it stop against the locks—usually at a 45-degree angle—and then lift the whole assembly straight up and out. If the door feels stuck, do not force it. This is where oven diagnostics comes in handy; sometimes grease buildup in the hinge receivers acts like a glue, requiring a gentle wiggle rather than brute force.
Separate the Glass Sandwich with Care
Lay the door flat on a table covered with a thick towel. Imagine the door as a three-layer sandwich: the outer decorative glass, the internal frame, and the heat-reflective inner pane. Most of the grime you see is trapped between these layers. You will usually find screws along the top edge or the sides. I once made the mistake of using a worn-out Phillips head on these, nearly ruining the project before it started. If you find yourself struggling with hardware that won’t budge, you might need to look into replacing a stripped screw on your oven handle or using a better-fitting bit to avoid permanent damage.
Keep the Spacers in Order
As you lift the metal frame away, you will see small rubber or plastic spacers. These are the unsung heroes that prevent the glass from rattling against the metal. It is vital to note exactly where these go. During my first successful clean, I thought I could remember the layout, but when I put it back together, the glass shifted every time I closed the door. This is a common reason why your oven door glass is rattling. Take a quick photo with your phone before moving anything—it is the best diagnostic tool you have in your pocket.
Scrub the Inner Layers without Scratches
Now that the glass is free, use a dedicated glass scraper or a razor blade at a shallow 45-degree angle for the burnt-on bits. Avoid using steel wool, as it can create micro-scratches that actually catch more grease later. If you notice that your door still does not feel right after reassembly, or if it sags, it might be time to learn how to fix an oven door that won’t stay latched to ensure a tight, energy-efficient seal. Clean both sides of every pane with a mixture of vinegar and water, then dry them with a lint-free cloth. Reassembling is just the reverse process, but ensure those hinge locks are only released once the door is fully seated back in the oven frame.Cleaning that glass ‘sandwich’ isn’t just a Saturday chore; it’s a vital part of protecting your electronics. Many homeowners assume that the grime between the panes is purely a cosmetic nuisance, but professional technicians often see a different story. If your door isn’t sealing correctly because of grease buildup or a misaligned frame, you’re looking at more than just heat loss. You’re looking at potential hardware failure.
Stop Using Caustic Sprays on Your Glass Layers
Everyone tells you to reach for the heavy-duty degreasers, but in my experience, those chemicals do more harm than good to the internal structure of the door. The harsh fumes and liquids can degrade the adhesive holding the glass in place or, worse, seep into the door’s internal insulation. When this happens, the insulation loses its R-value, and you’ll find yourself fixing an oven that heats way past the set temperature because the thermostat is trying to compensate for the leak. Use a simple 50/50 mix of white vinegar and water. It’s effective, cheap, and won’t eat through your gaskets.
How a Foggy Door Actually Wrecks Your Control Board
Here is the advanced nuance: the moisture trapped between your glass panes isn’t just water; it’s grease-laden steam. If your seal is failing, that steam doesn’t just stay in the door. It travels upward. I’ve seen countless cases where steam from a poorly sealed door migrates into the upper console, leading people to wonder is your oven control board failing when the real culprit was a dirty, leaky door frame. According to the Association of Home Appliance Manufacturers (AHAM), maintaining a tight thermal seal is the primary defense against internal electronic overheating. When you skip a proper deep clean and gasket check, you aren’t just looking at an ugly door; you’re risking a $400 circuit board repair. #IMAGE_PLACE_HOLDER_C#
Can You Accidentally Strip the Heat-Reflective Coating?
Most modern ovens use ‘Low-E’ (low-emissivity) glass on the internal panes. This is a thin, invisible metallic coating that reflects heat back into the oven. If you go at it with steel wool or abrasive powders, you can literally scrub that efficiency right off. This is why oven diagnostics should always start with non-destructive methods. If you have already scratched yours, you might notice your oven feels hotter to the touch on the outside than it used to.
Don’t Ignore the Hinges and Latches
Once you’ve cleaned the glass, the reassembly is the most critical stage. If you don’t align the frame perfectly, the door won’t sit flush. This gap allows heat to escape, which might lead you to start how to test your ovens thermal fuse for continuity after the oven shuts down unexpectedly from overheating. Just like when you are identifying dishwasher faults quickly, the solution is usually found in the physical alignment of moving parts. Check your hinges for any bends or cracks before putting the door back on the unit. Have you ever fallen into the ‘caustic cleaner’ trap and regretted it? Let me know in the comments below; I’d love to hear your DIY horror stories!Once you’ve successfully navigated the glass-sandwich teardown, you’ll realize that having the right gear makes this a twenty-minute job instead of a three-hour ordeal. I personally swear by a magnetic bit driver with a flexible extension. Why? Because there is nothing more soul-crushing than hearing a tiny screw rattle down into the deep recesses of a door frame where you can’t reach it. This is one of those oven repair essentials that separates a frustration-free Saturday from a weekend-long project. If you’re also managing other kitchen appliances, the same logic applies when you are identifying dishwasher faults quickly; having a dedicated kit saves your hardware from being stripped by a ‘close enough’ tool.
Invest in Tools That Save Your Sanity
I’ve seen people try to pry glass layers apart with butter knives or flathead screwdrivers, which is a recipe for a trip to the emergency room. Instead, pick up a set of non-marring plastic pry tools. They are designed for automotive dashboards, but they are perfect for separating tempered glass from metal frames without scratching the protective finish. According to technical documentation from the National Association of Service Dealers (NASD), maintaining proper torque on assembly screws is vital for the thermal expansion of the glass. If you tighten them too much, the glass has nowhere to go when it heats up and can eventually crack.
How do I keep my oven glass clear for years?
The secret isn’t more scrubbing; it’s preventative maintenance. I’ve started wiping the vent area with a dry microfiber cloth after every high-heat roast. This prevents the grease-laden steam from settling and hardening between the panes. While you have the door off, it’s the perfect time for oven diagnostics to ensure your hinges aren’t sagging. If they are, that gap will just let more grime in. 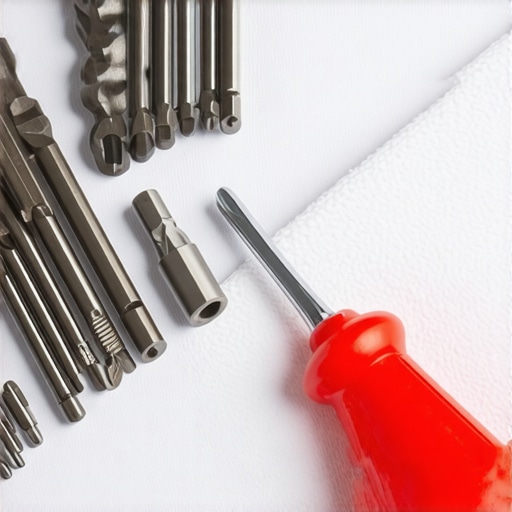
Smart Coatings are the Future of Kitchen Cleanup
I predict that within the next decade, we won’t be doing this teardown at all. We are already seeing the emergence of oleophobic (oil-repelling) coatings in high-end commercial units that prevent carbon from bonding to the surface. Eventually, this technology will trickle down to residential models, essentially making the glass ‘self-cleaning’ on a molecular level. Until then, staying on top of your thermal seals is your best bet. If you notice your visibility dropping, you might start wondering is your oven control board failing because of heat escape, or if you simply need to recalibrate your oven for accurate temperatures after a deep clean. I challenge you to try the ‘thirty-second wipe’ on your door vents after your next big meal; it’s the single best way to prevent future buildup.
What I Discovered After Five Failed Teardowns
First, never assume the door is clean enough until you check the gaskets. I used to ignore the rubber seal, but it is the gatekeeper of your kitchen’s efficiency. Before you put everything back together, take a second to learn how to replace a cracked oven door hinge if yours looks even slightly warped. A perfect seal is the only thing standing between you and a future foggy glass disaster.
Second, patience is your most valuable tool. I once forced a screw that felt tight only to realize the glass was not seated correctly. This is one of the oven repair essentials: if it does not fit easily, something is wrong. Stop, take a breath, and realign.
Third, once you regain that visibility, you might realize your oven is not baking the way it looks. Use this opportunity to recalibrate your oven for accurate temperatures so your food tastes as good as it looks through that clean glass.
My Go To Kit for a Flawless Kitchen
To keep my appliances in top shape, I do not just rely on standard tools. I highly recommend a dedicated silicone-tipped scraper for the glass edges; it removes burnt grease without a single scratch. For those who want to level up their maintenance game, I suggest keeping a digital copy of your specific oven diagnostics manual on your phone. It has saved me from calling a pro more times than I can count. Finally, do not forget your other appliances! Applying these cleaning habits while identifying dishwasher faults quickly ensures your whole kitchen runs like a well-oiled machine.
Ready to See Your Baking Again?
There is a unique sense of pride that comes with sliding a tray of cookies into an oven with perfectly clear glass. It transforms your cooking experience from a guessing game into a craft. Do not let the fear of a few screws stop you from mastering this part of your home maintenance. You have got the skills, the tools, and the knowledge to tackle this oven repair task with confidence. Go ahead, grab that screwdriver and get started!
Have you ever found a mystery screw left over after you put your oven door back together? Let me know in the comments below!