I stood there in my kitchen, socks slowly wicking up a cold puddle that definitely wasn’t there ten minutes ago. My first instinct was to grab a towel, but my second was pure, unadulterated annoyance. That tiny, slow drip from the corner of my dishwasher door—the one I’d been ignoring for weeks—had finally turned into a persistent stream. I’d spent plenty of time on parts and diagnostics for other appliances, but I figured a door seal was just a simple piece of rubber. I was wrong. I went to a big-box store, grabbed a ‘universal’ gasket, and tried to force it into the channel. It was too thick, the door wouldn’t latch, and I nearly bent the hinges trying to make it work. Today, I’m going to save you that headache and show you exactly how to pinpoint the right seal for your machine, even if you’re finding the right gasket for an older dishwasher model that the manufacturer seems to have forgotten. [image_placeholder]
Stop Guessing and Start Sealing Correctly
Believe me, I know the temptation to just ‘make it work’ with whatever is available. But your dishwasher is a pressurized environment. When that water starts spraying, any gap in the seal becomes a highway for a kitchen flood. I once spent an entire afternoon mopping because I thought a little bit of silicone caulk could bridge a gap in a torn gasket. It didn’t. It just made a sticky mess that was even harder to clean off later. You need to understand that gaskets are engineered for specific groove depths and door tensions. If you don’t get the right one, you might find your dishwasher door that wont close tight no matter how much you adjust the latch. This is why a proper dishwasher parts guide is your best friend. It’s not just about the part; it’s about the peace of mind knowing you won’t wake up to warped laminate flooring. Have you ever tried a ‘quick fix’ on an appliance that ended up costing you three times as much in the long run?
Is a specific model number really that important?
You might think that a gasket is just a gasket, but the variations are mind-boggling. According to data from the International Association of Certified Home Inspectors (InterNACHI), moisture-related issues from failing seals are among the top reasons for premature appliance replacement and secondary home damage. A gasket that is even 1/16th of an inch off can prevent the vacuum seal necessary for some modern high-efficiency cycles. If you’re currently seeing leaks from the vent or water pooling at the base, the culprit is almost certainly a worn-out or incorrect seal. We’re going to walk through the steps of identifying your specific model and why those tiny serial numbers on the side of the door are actually the keys to your kingdom. It’s time to stop the ‘good enough’ repairs and get back to a dry kitchen.Stop guessing and start by finding your dishwasher’s ID card. That little sticker, usually hidden on the side of the inner door or the frame, is the only way to ensure you don’t end up with a ‘universal’ part that doesn’t fit. I’ve seen people try to measure the old, stretched-out rubber with a tape measure, but that’s a fool’s errand. You need the exact part number from a parts and diagnostics search to get it right. Once you have the part, it’s time to prep the machine.
Rip Out the Old Gasket Without Damaging the Groove
Pulling the old seal out is the easy part, but what most people miss is the gunk left behind. I once replaced a seal on a Frigidaire and couldn’t figure out why the new one kept popping out in the upper left corner. It turned out there was a tiny calcified piece of old rubber and some soap scum acting like a wedge. Take a damp cloth and a soft brush to clean that channel thoroughly. You want that groove as clean as a whistle. If the door still won’t stay shut after you’ve cleared the track, you might actually be replacing a worn dishwasher door latch assembly instead of just the seal. 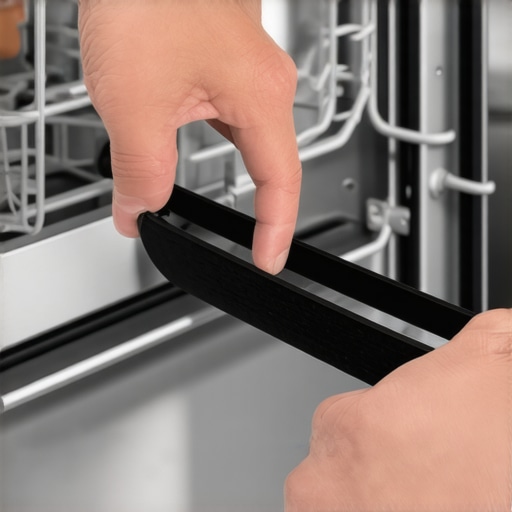
The Secret to a Perfect Press-Fit
When you start the install, find the center of the gasket. Many gaskets have a little mark to show where the top-center should be. Don’t stretch the rubber as you go! If you pull it too tight, it will eventually snap back and leave gaps at the bottom. I learned this the hard way on a GE model where I stretched the gasket to ‘make it reach’ the ends, only to have it fail during the first high-heat cycle. Instead, gently press it into the channel, moving from the top down to both sides. If the seal feels too stiff, soak it in a sink of warm water for five minutes first. It makes a world of difference. To see if you’ve done it right, you can even use the same logic as testing your oven door seal with the dollar bill trick—close the door on a piece of paper and try to pull it out. There should be significant resistance. If the paper slides out easily, the seal isn’t seating properly against the tub.
Dealing With the Infamous Bottom Seal
Most dishwashers have a three-sided gasket (top and sides), but some have a separate ‘wipe’ or flap at the bottom. This is where dishwasher parts diagnostics becomes crucial. That bottom seal is often held in by screws or a plastic plate. Don’t just yank on it. If that bottom flap is torn, you’ll see water creeping out from under the kickplate during the wash cycle. It’s a bit more work to replace than the main gasket, but it’s the difference between a dry floor and a ruined subfloor.People often assume that water on the floor always equals a bad gasket. It’s a logical jump, but it’s frequently wrong. In my experience, a hairline crack in the plastic of the lower spray arm is actually a more common culprit. When that arm spins, it can shoot a concentrated jet of water directly at the door seam. No gasket is designed to withstand a direct, high-pressure blast like that. If you’ve replaced the seal and still see puddles, check why your dishwasher bottom spray arm isn’t spinning correctly or if the arm itself is split. This is the kind of nuance that separates the weekend warriors from the pros. I’ve seen homeowners go through three gaskets before realizing the water was just ‘jumping the fence.’
The Invisible Water Jet That Mimics a Leaky Seal
Don’t ignore the ‘Dishwasher Wave’ effect. In larger tubs, if the machine isn’t perfectly level, water can pool against the side of the gasket rather than draining back toward the sump. Expert studies from groups like the Association of Home Appliance Manufacturers (AHAM) suggest that a mere 2-degree tilt can increase local water pressure against the door by up to 15%. Checking your floor’s levelness is as critical as the gasket itself. Furthermore, many overlook that a partially clogged drain hose can create backpressure, forcing water out of the door vent. If your gasket is new and your spray arms are perfect, it’s time to look deeper into the plumbing system.
Why Your Multimeter Might Be Lying About That Sensor
I also want to challenge the idea that a ‘clicking’ sound always points to a mechanical failure. In the world of high-end appliances, diagnostics are rarely that straightforward. For instance, a clicking dishwasher might actually be trapped in a ‘flood’ loop. You should spend time testing your dishwasher water level switch in 5 minutes before you start tearing the door apart. If the switch is stuck ‘up,’ the machine thinks it’s overflowing and will constantly cycle the drain pump. It’s a software-level logic trap that looks like a hardware failure. Similarly, if you notice your dishwasher smells of ozone, the circulation pump might be drawing too much amperage due to a bearing issue, heating up the wiring harness—a nuance often missed during basic repairs. This brings me to the ‘Oops’ factor in oven repairs. Most homeowners think a heating issue is just a dead element. But AHAM notes that modern electronic controls rely on incredibly precise resistance feedback. If your sensor is off by even a few ohms, the board might shut down the circuit to prevent a runaway thermal event. You might see issues related to oven repair essentials troubleshooting common issues with parts, but the reality is the sensor is simply ‘drifting.’ It’s providing enough resistance to pass a basic test but failing under operational load.
Why do my new oven elements keep failing so quickly?
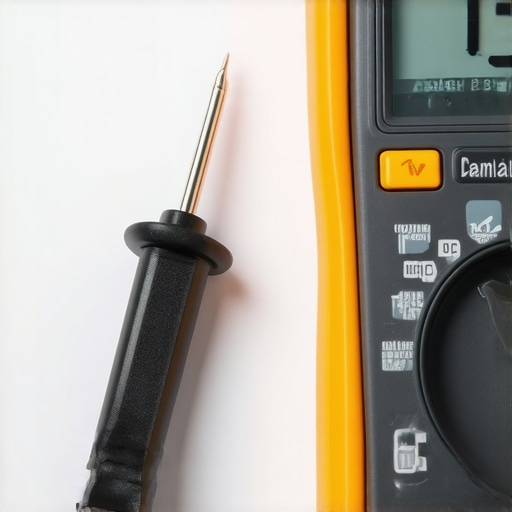
If you are replacing parts every six months, you aren’t fixing the problem; you’re treating a symptom. A common advanced mistake is ignoring the terminal block behind the back panel. High resistance at a loose or corroded connection creates heat that eventually travels down the wire and causes the element to fail prematurely. Before you buy another part, dive into oven diagnostics pinpointing faults before calling a repair expert. You need to be testing an oven temperature sensor with just a multimeter and checking the physical integrity of every spade connector for signs of ‘pitting’ or carbon buildup. #IMAGE_PLACE_HOLDER_C# Have you ever fallen into this trap where you replaced the same part twice only to realize the real villain was a $5 corroded wire? Let me know in the comments.
I’ve spent years tinkering with these machines, and if there’s one thing I’ve learned, it’s that a cheap multimeter from a discount bin is often the reason people give up on DIY. I personally swear by the Fluke 117. I use it because it features a low-impedance mode that prevents ghost voltages from tricking me into thinking a circuit is live when it’s actually just inductive leakage. When you are deep into parts and diagnostics, having a tool you can trust is the difference between a twenty-minute fix and a four-hour frustration session. I also keep a set of stainless steel dental picks in my kit. They are perfect for cleaning out the tiny orifices in spray arms or scraping carbon off an oven igniter without damaging the ceramic base. Proper tools turn a stressful job into a manageable project.
How can I keep my dishwasher and oven running forever?
The secret isn’t just fixing things when they break; it’s preventing the slow creep of decay. For dishwashers, that means mastering the best way to clean a greasy dishwasher filter every single month. If that filter is clogged, the pump works twice as hard, runs hotter, and dies years before its time. For ovens, I recommend a yearly calibration check. You’d be surprised how much an oven drifts over time. Learning the fast way to recalibrate your oven for accurate temperatures can save you from thinking your control board is dying when it just needs a minor software adjustment. Consistent care is the only way to avoid the ‘appliance graveyard’ in your garage.
According to the Service Technicians Society (STS), over 40% of component failures are actually poor electrical connections caused by vibration and oxidation rather than the part itself burning out. This is why I always apply a tiny dab of dielectric grease to spade connectors during an oven repair essentials troubleshooting common issues with parts session. It prevents moisture from corroding the contact point and ensures a solid connection for the life of the appliance. Looking ahead, I see appliance repair becoming much more data-driven. We’re already seeing smart dishwashers that can log exactly how many hours the motor has run. Soon, you won’t be guessing if a part is bad; your phone will tell you the exact internal resistance of the heater. But until then, you still need to know the basics of testing your dishwashers high limit thermostat for continuity to keep things safe.
If you want to feel like a true pro, try this advanced tip today: Pull your dishwasher’s kickplate off and look for the tech sheet. It’s a folded piece of paper usually tucked into a small plastic sleeve or taped to the frame. That sheet contains the hidden diagnostic codes and wiring diagrams specific to your exact serial number. Mastering that document is the ultimate shortcut to professional-grade repairs.
Hard Truths from My Years in the Appliance Trenches
Looking back, most of my repair nightmares happened because I took a shortcut. I’ve learned that cheap parts are often the most expensive because you end up buying them twice—or worse, they damage something else. If you are swapping out a worn dishwasher door latch assembly, don’t just bend the old one back into shape; replace it. Also, never underestimate the power of a clean surface. Any grime left in a gasket groove will eventually cause a leak. Lastly, if a part doesn’t fit easily, it’s likely the wrong part. Forcing a parts and diagnostics match is a recipe for broken plastic and more stress.
The Resource Vault for Your Next Project
I don’t expect you to memorize every wiring diagram. That’s why I rely on a few specific resources to keep things moving. First, always look for that hidden tech sheet inside your machine. Second, I highly recommend checking out oven repair essentials troubleshooting common issues with parts before you even pull the unit from the wall. If you’re dealing with heating issues, knowing how to test an oven fan motor for resistance can save you from buying a new heating element you don’t need. These guides aren’t just for pros; they are the bridge between guessing and knowing you’ve fixed it.
[image_placeholder]
Stop Fearing the Machine and Start Fixing
It’s easy to feel defeated when a kitchen appliance fails, but remember that these machines were designed to be serviced. By taking the time to master parts and diagnostics, you are reclaiming your home from the cycle of planned obsolescence. Whether you’re finding the simple fix for a dishwasher door that slams open or diagnosing a complex electrical fault, the key is patience. You’ve got the knowledge now to handle dishwasher, diagnostics, oven repair, and parts like a seasoned technician. What’s the most frustrating leak or repair you’ve ever had to tackle? Let me know in the comments below!