There I was, standing in a kitchen that smelled like half-washed lasagna, physically bracing my hip against the dishwasher door just to keep the cycle running. Every three minutes, a disheartening click-pop would echo through the room, the machine would die, and a trickle of steam would escape like it was mocking me. I’d slam it shut, mutter a few choice words, and repeat the cycle. It felt ridiculous. If you have ever found yourself propping a heavy kitchen chair against your appliance just to get through the rinse cycle, you know exactly the kind of frustration I am talking about. Dealing with a dishwasher door that won’t close tight isn’t just an annoyance; it is a sign that your door latch assembly has finally given up the ghost. Today, I am going to show you that you don’t need a degree in mechanical engineering to fix this. We are going to get that machine sealing like new again.
Your Dishwasher Isn’t Broken, It Just Can’t Hear You
It is easy to panic when the lights on the console stay dark or the water won’t start spraying. Most people immediately assume the motor is shot or the control board has fried itself into oblivion. In reality, the door latch is the gatekeeper. If the sensor doesn’t detect a firm, locked connection, it cuts power as a safety measure to prevent your kitchen from becoming an indoor swimming pool. I remember one of my first DIY attempts where I actually spent two hours digging through dishwasher parts and diagnostic guides, convinced I had a major electrical fault. I even went as far as testing the thermal fuse. It turned out to be a tiny, cracked piece of plastic in the latch assembly that cost less than a pizza. I felt like a fool, but it was a massive lesson: always check the mechanical seals first. According to a report by Consumer Reports, mechanical failures like door latches are among the top five most common reasons for appliance service calls, yet they are remarkably simple to address yourself. If you are currently staring at a dishwasher that won’t start, the latch is your primary suspect.
Will this tiny piece of plastic actually fix my problem?
It’s natural to be skeptical. How can a small component held in by two screws be the culprit for such a massive headache? The truth is that these assemblies endure a lot of heat, moisture, and physical stress every single day. Over time, the springs weaken or the plastic housing warps. By swapping out a worn dishwasher door latch assembly, you aren’t just fixing a click; you are restoring the safety circuit that allows the entire brain of the machine to function. Have you ever tried a ‘quick fix’ like bending the strike plate, only to have it fail a week later? Tell me your horror stories in the comments below! We’re going to walk through the proper way to replace a door latch so you never have to play ‘human doorstop’ ever again.
Flip the Breaker Before You Do Anything Else
Before you even pick up a screwdriver, you need to ensure there is zero chance of a stray current ruining your day. A dishwasher is a unique beast that combines water and electricity in a tight space—a combination that demands respect. Head to your electrical panel and flip the breaker for the dishwasher. I cannot stress this enough. I once skipped this step while working on a neighbor’s unit, thinking I would just be ‘quick,’ and I received a jolt that left my arm tingling for an hour. It is a rookie mistake that is easily avoided. Once the power is off, try to turn the dishwasher on one last time to confirm it is truly dead. Safety is the foundation of any successful dishwasher diagnostics and repair journey.
Peeling Back the Layers of the Control Panel
Most modern dishwashers house the latch assembly behind the inner door panel. To get there, you will need to open the door fully and locate the Torx screws (usually T15 or T20) lining the perimeter. Here is the trick: only remove the screws that hold the control panel or the inner liner to the outer door skin. I remember my first time doing this—I was so confident that I unscrewed every single visible bolt without supporting the outer door skin. The heavy front panel slid right off and nearly crushed my toes. I spent the next twenty minutes trying to figure out how to align the control board while balancing the metal skin on my knees. Learn from my bruised feet: keep a hand on that panel as you remove the final screws. Once the screws are out, the panel should separate slightly, revealing the ‘guts’ of your machine. 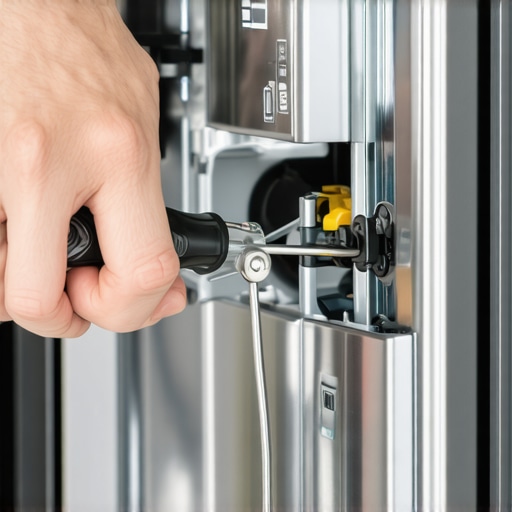
Don’t Let the Wires Intimidate You
With the panel opened, you will see a mess of wires. Do not panic. The door latch is the plastic component located at the very top center. It usually has two wire harnesses plugged into it. These harnesses are like Legos; they generally only fit one way, but it is still a smart move to snap a photo with your phone before disconnecting anything. This is a crucial part of identifying dishwasher faults quickly and ensuring you can put it back together. Gently squeeze the tabs on the wire connectors and pull them away from the latch. If they feel stuck, don’t yank them—wiggle them slightly. If you break the plastic clip on the harness, you are looking at a much more complicated repair.
Out With the Old Latch and In With the New
The latch itself is typically held in place by two small screws or a couple of plastic locking tabs. Once you have cleared the wires, unscrew the old assembly and set it aside. This is the perfect moment to compare your old part with the new one. When you are swapping out a worn dishwasher door latch assembly, ensure the strike plate—the metal hook on the dishwasher tub—isn’t bent or misaligned. If the hook is crooked, even a brand-new latch won’t fix your sealing issue. Slide the new latch into position, secure the screws, and click the wire harnesses back into their respective slots. You should hear a satisfying ‘click’ when the wires seat properly. Before you button everything back up, do a dry run by closing the door. You should feel that familiar, firm resistance that tells you the gasket is being squeezed tight. Following the proper way to replace a door latch means taking these extra ten seconds to verify the mechanical alignment before you restore the power.Now that you have the panel open, let’s dive into the nuances that most beginners overlook. A common myth is that if the door won’t stay shut, the latch is automatically the culprit. In reality, I have seen dozens of cases where the issue was actually a warped tub or unlevel flooring. Everyone says to just swap the part, but in my experience, checking the machine’s level is the real first step. According to the Association of Home Appliance Manufacturers (AHAM), even a slight imbalance causes the frame to twist, which misaligns the strike plate and puts unnecessary stress on the plastic housing. Have you ever fallen into this trap? Let me know in the comments.
Stop Greasing Your Appliance Latches
Here is the biggest ‘oops’ factor in dishwasher diagnostics: the urge to lubricate a sticking latch. While it feels intuitive to reach for the grease, modern appliance components are designed to be ‘dry’ systems. Oiling the mechanism attracts soap scum and grit, essentially creating a grinding paste that destroys the new parts faster than the old ones. This same rule applies when dealing with oven repair essentials; internal mechanisms often rely on specific tolerances that grease will only ruin.
Is a multimeter actually necessary for a door latch fix?
While a mechanical ‘click’ is a good sign, it doesn’t confirm that electricity is flowing through the safety circuit. If you have installed the new assembly and the unit still won’t power on, you need to verify continuity. If you have ever practiced testing your oven’s thermal fuse for continuity, the technique is exactly the same here. Use your multimeter to check the microswitch inside the latch; if there is no continuity when the switch is depressed, you likely have a wiring fault elsewhere in the door harness. 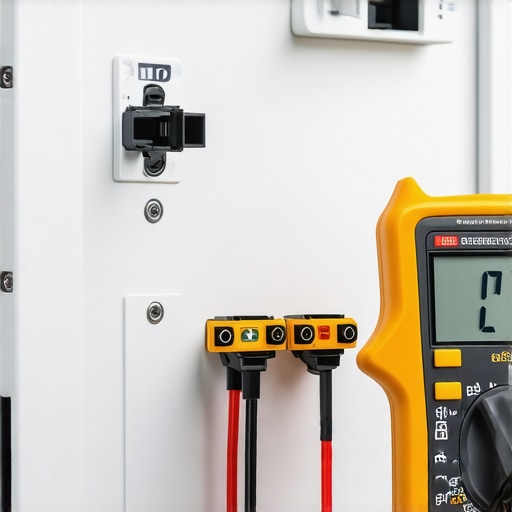
Check the Seal Before Blaming the Steel
Sometimes, the latch is doing its job perfectly, but the door still leaks or won’t ‘feel’ tight. This is where pinpointing faults before calling a repair expert becomes crucial. Your door gasket can lose its elasticity over time, forcing the latch to work twice as hard to maintain a seal. I always recommend testing your door seal with the dollar bill trick before assuming the latch is the weak link. If that bill slides out easily, you are fighting a losing battle with the latch alone. Replacing the gasket is the only way to restore the vacuum-like seal your dishwasher needs to run efficiently.Once you have the mechanical side sorted, you need to think about the longevity of the repair. I personally swear by using a magnetic T15 Torx driver. There is nothing more infuriating than dropping a tiny screw into the dark abyss of the dishwasher’s insulation. I use a Klein Tools magnetic wand specifically because it is thin enough to reach into the control panel’s narrowest channels. If you find yourself frequently diagnosing an oven that keeps tripping the circuit breaker, having a dedicated multimeter like a Fluke 115 is non-negotiable. It provides the accuracy needed to catch those phantom electrical leaks that cheaper units miss. Beyond specialized tools, you have to look at the environment. Hard water is the silent killer of latches and seals. When I consult for local repairs, I always point people toward technical bulletins from manufacturers like Whirlpool, which suggest that mineral buildup on the strike plate is a leading cause of latch ‘binding.’ It is not just about the part; it is about the friction. 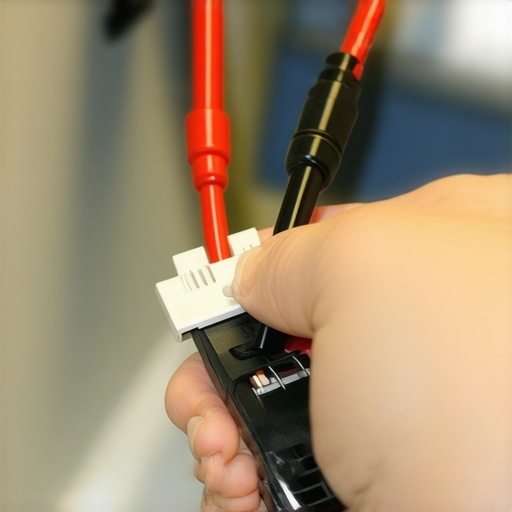
How can I keep my repair lasting for years?
The secret is not a secret at all: it is routine hygiene. Every month, you should be practicing the best way to clean a greasy dishwasher filter. A clogged filter causes the machine to vibrate more during the drain cycle, which eventually rattles the door latch out of alignment. While you are down there, take two minutes for the right way to inspect your dishwasher float switch. If the float is gunked up, it can cause the water level to fluctuate, putting pressure on the door seals that they were not designed to handle. I predict that in the next few years, we will see ‘force-feedback’ latches that can alert your phone via an app if the door is not closed within a millimeter of its ideal specification. When you scale your skills from a simple latch swap to full oven diagnostics and pinpointing faults, organization becomes your best friend. I use magnetic parts trays to keep every screw categorized. A dishwasher door has at least three different screw lengths; mix them up, and you will punch a hole through the outer plastic. This level of detail is exactly what you find in professional service manuals. If you are moving from wet repairs to the heat of the kitchen, remember that oven repair essentials follow the same logic. Consistency in your dishwasher diagnostics will save you hundreds over the life of the machine. I strongly encourage you to grab your multimeter tonight and perform the most reliable way to test an oven thermal fuse just for the practice. Getting comfortable with these readings before a real emergency happens is what separates the weekend warrior from the home pro.
What I Learned After Breaking More Latches Than I Fixed
Through years of tinkering, I’ve realized that swapping out a worn dishwasher door latch assembly is rarely just about the latch itself. Often, the real culprit is ‘heat fatigue’—where the constant steam cycles eventually warp the plastic surrounding the latch, causing it to sit just a millimeter off. If you don’t address the alignment, your new part will fail in months. Another lightbulb moment for me was realizing that the wire harnesses can develop micro-corrosion. When you have the panel open, always give those connectors a quick wipe with a dry cloth. It’s these small details that separate a ‘temporary fix’ from a permanent solution. If you’re still curious about the ‘why’ behind these failures, I recommend checking out my dishwasher parts and diagnostics guide for a deeper dive.
The Gear That Makes You Look Like a Pro
You don’t need a van full of tools, but a few specific items changed the game for me. First, a magnetic Torx set is non-negotiable; I’ve lost too many screws to the ‘insulation abyss’ to ever use a standard driver again. Second, a reliable multimeter is your best friend when you’re moving between different appliances, like when you’re mastering oven repair essentials and troubleshooting. I personally trust Fluke because they handle the high-heat environments of kitchens without losing accuracy. #IMAGE_PLACEHOLDER_E# Lastly, keep a bottle of white vinegar handy to clean the strike plate—removing mineral buildup is the easiest way to prevent future binding. Once you can accurately perform the most reliable way to test an oven thermal fuse, you’ll have the confidence to tackle any dishwasher issue.
Take Control of Your Kitchen Maintenance Today
Fixing a dishwasher door that won’t close tight is more than just a chore; it’s about reclaiming your time and saving your hard-earned money. There is a specific kind of pride that comes from hearing that first successful click and seeing the lights flash to life without having to prop a chair against the door. You are now equipped with the knowledge to stop guessing and start fixing. Your dishwasher is a tool that serves you—don’t let it become a source of stress. Have you ever found a surprising object stuck inside your door latch assembly during a repair? Let me know in the comments below!