I was standing in a puddle of grey, lukewarm water when I realized I’d seriously messed up. It was a Tuesday night, the dishwasher was humming along, and suddenly, a miniature geyser erupted from that little chrome cylinder next to my kitchen faucet. You know the one—the air gap. I tried to ignore it at first, thinking it was just a small quirk of my aging kitchen, but when the water started cascading over the countertop and onto my hardwood floors, the panic set in. I’d spent years tinkering with dishwasher parts and diagnostics, yet here I was, defeated by a tiny piece of plastic. My first instinct? I grabbed a toothpick and started poking blindly into the small holes. Big mistake. All I did was shove the gunk deeper, making the blockage even tighter and turning a small leak into a full-on flood. That’s the classic neighbor error I want to save you from today. We aren’t just talking about a minor leak; we’re talking about preventing a messy sink backflow that smells like a wet dog and old broccoli. Today, I’m going to show you exactly how to clear that air gap so your kitchen stays dry and your sanity remains intact.
Stop the Kitchen Flood Before Your Floors Warp
The air gap is a simple device, but when it fails, the mess is anything but simple. Most people think their machine is toast when they see water leaking, but often it is just a stubborn buildup of food particles, grease, and hard water minerals. According to the International Association of Plumbing and Mechanical Officials (IAPMO), air gaps are a critical safety feature designed to prevent sewage and dirty sink water from siphoning back into your clean dishes—so ignoring that leak is actually a health hazard. When I first started doing my own dishwasher diagnostics, I didn’t realize how much sludge can accumulate from those modern “eco-friendly” cycles that don’t always get hot enough to melt away heavy grease. If you’ve noticed water sitting in the bottom of your dishwasher at the end of a cycle, the air gap is the very first place you should look. It is the gatekeeper of your entire drainage system.
Is this really a DIY job or am I going to break something?
I get it. The idea of taking apart anything connected to your plumbing feels like an invitation for a five-hundred-dollar plumber bill. But trust me, this is one of the easiest fixes in the house. You don’t need fancy tools or a background in mechanical engineering. Most of the time, you just need a simple bottle brush and a little bit of confidence. Have you ever looked at that chrome cap and wondered if it was just there for decoration? Tell me, have you already tried the “finger over the hole” trick only to have it spray you right in the face? If so, you’re in the right place. We are going to tackle unclogging your air gap without a plumber and get your kitchen back to being a splash-free zone. Before we dive into the actual scrubbing, let’s look at why this happens and how to spot the signs before the water hits the floor again.
Pop the Top to See What You Are Dealing With
The first step is remarkably simple: you need to get the hood off. That chrome cylinder sitting on your sink is just a decorative cover. Most of them are held on by friction, so a firm upward pull should do it. If it’s stuck, a gentle twist usually breaks the seal of any dried-on dish soap. Beneath that, you will find a plastic inner cap, often held in place by two small tabs or a threaded nut. When I first did this, I was terrified I’d snap the plastic, but these parts are surprisingly resilient. Think of the air gap like a chimney for your dishwasher’s plumbing; if the chimney is soot-clogged, the smoke (or in this case, the dirty water) has nowhere to go but back into your kitchen. Once the inner cap is off, look down into the two holes. One is the ‘in’ from the dishwasher and the other is the ‘out’ to the garbage disposal. If you see a thick layer of white crust, you are likely dealing with calcium deposits, and you should check out the quickest way to remove hard water build-up in your dishwasher before proceeding with the physical scrub.
Scrub the Inner Cylinder Like Your Floors Depend on It
Now that you have exposed the heart of the device, grab a small bottle brush or a pipe cleaner. You want to reach down into those two holes and move the brush vigorously up and down. This is where most clogs live—small bits of eggshell or pasta that didn’t make the jump into the drain line. I remember a particularly nasty Saturday when I skipped the brush and tried to use a toothpick instead. I ended up breaking the toothpick off inside the gap, creating a secondary clog that was twice as hard to remove. Don’t be me. Use a tool designed for the job. While you are at it, it is a great time to evaluate your overall drainage health. Learning how to clean your dishwashers air gap to stop sink backflow is only half the battle if your filters are also gunked up. 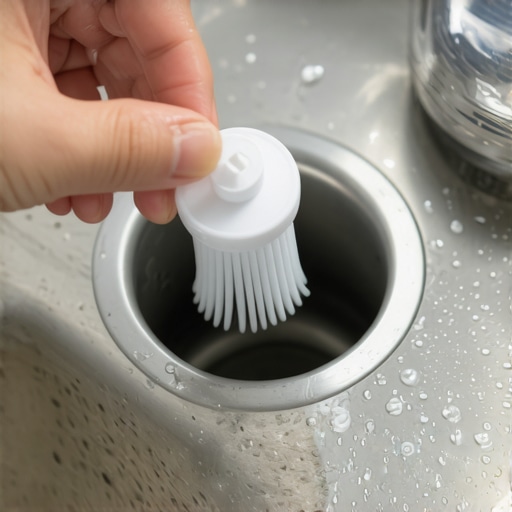
Blast the Deep Clogs Out of the Drain Hose
If scrubbing the top doesn’t solve the leak, the blockage is further down the line in the larger hose that connects the air gap to your garbage disposal. This is the ‘heavy lifting’ phase of the repair. You can use a wet/dry vacuum to suck the clog out from the top, or you can try the cardboard tube trick. Take the empty roll from a paper towel, place it over the air gap, and blow a sharp, quick burst of air through it. This pressure is often enough to send the blockage sliding into the disposal. I once tried to blow through the hose directly with my mouth—a massive mistake. The backpressure was so intense that a jet of lukewarm, grey sludge—basically a smoothie of week-old pesto and soap—shot straight back into my face. It was the ultimate ‘neighbor error.’ Using a vacuum or a tube is the simple fix for a dishwasher that overflows onto the floor without the risk of a mouth full of drain water.
Check the Garbage Disposal Entry for Hidden Obstructions
The very last place to look is where the hose meets the garbage disposal. This is a common bottleneck. Food debris often gets stuck right at the plastic nipple where the hose attaches. If you recently installed a new disposal and your air gap is suddenly geysering, it is almost certain you forgot to knock out the plastic plug inside that nipple. Even for older units, grease can solidify here, especially if you use low-heat cycles. If you find that clearing this spot solves your drainage but you still see water sitting in the bottom of your dishwasher, you may need to dig deeper into your machine’s internal pumps. Following how to unclog a dishwasher air gap without a plumber will save you a massive service fee and, more importantly, keep your kitchen dry and sanitary.
Why the High Loop Isn’t Always the Hero You Think It Is
Most DIY enthusiasts will tell you that a ‘high loop’ in your drain line is a perfect substitute for a physical air gap. I’ve seen countless forum posts claiming that as long as your hose is strapped to the underside of the counter, you’re safe. However, in my experience, this is a dangerous oversimplification. While a high loop helps prevent backflow from the sink, it does nothing to prevent a siphoning effect. If your house experiences a sudden pressure change or a massive clog downstream, that high loop can actually facilitate dirty water being pulled back into your machine. According to the Uniform Plumbing Code (UPC), a physical air gap is the only failsafe method to ensure a ‘non-mechanical’ break in the plumbing line, which is why many local codes still mandate them. If you’ve been struggling with water sitting in the bottom of your dishwasher even after clearing the lines, you might be fighting physics rather than just food scraps.
Avoid the Trap of the Wire Brush Over-Scrub
When we see a clog, our instinct is to go in with maximum force. I’ve seen homeowners use heavy-duty wire brushes intended for engine blocks to clean out the small plastic channels of an air gap. This is a classic ‘oops’ factor that leads to a permanent leak. The interior of most air gaps is made of relatively soft ABS plastic. If you scratch the interior walls with a metal brush, you’re creating thousands of microscopic grooves. These grooves act like ‘velcro’ for grease and food particles, ensuring that your air gap will clog twice as fast next time. Always stick to nylon bristles or even a simple pipe cleaner. This delicate balance between being thorough and being gentle is exactly what separates professional dishwasher diagnostics from a quick fix that fails a month later. 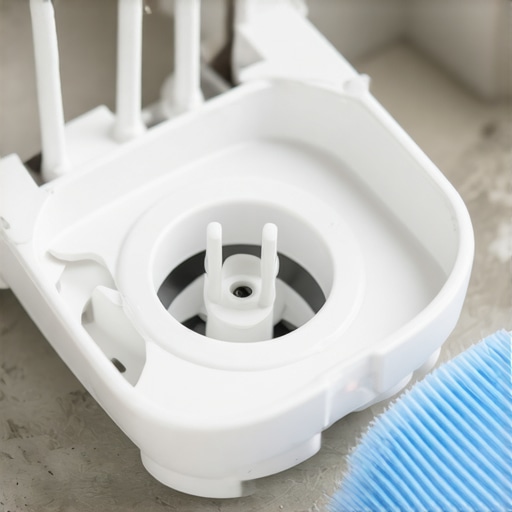
Can you really trust your air gap if you use dishwasher pods?
It sounds like a strange question, but there is a hidden nuance here that most people miss. I’ve noticed a recurring pattern where high-efficiency pods don’t always dissolve fully in shorter, cooler cycles. This creates a gelatinous sludge that is far more difficult to clear than a simple piece of pasta. This sludge coats the internal sensors and the air gap itself. If you’re seeing a recurring film, you might want to look into the truth about dishwasher pods and your drain hose. Understanding these chemical interactions is just as important as knowing how to use a wrench. It’s the same logic I apply to oven diagnostics; usually, it isn’t the part that failed for no reason, but a environmental factor like a grease spill or a power surge that triggered the issue.
The Hidden Nuance of the Garbage Disposal Connection
The most common mistake I see—and I’ve done this myself in my early days—is focusing entirely on the air gap while ignoring the garbage disposal connection. When you replace a disposal, there is a plastic knockout plug inside the nipple where the dishwasher hose connects. If you don’t knock that out completely, your air gap will geyser every single time. Even if it was knocked out years ago, grease can build up at that specific junction point, creating a ‘shelf’ that catches debris. If your dishwasher is suddenly loud or struggling, you should also be testing your dishwashers circulation pump for continuity to ensure the struggle hasn’t burnt out the motor. Have you ever fallen into this trap of fixing the top of the sink while the real problem was six inches lower? Let me know in the comments. Whether you are performing oven repair essentials or plumbing fixes, the key is always looking at the entire system, not just the part that is currently leaking. If you’re still stuck, feel free to reach out via our contact us page for more specific guidance.
I realized early on that having the right dishwasher parts and diagnostics kit is only half the battle; the other half is knowing how to use them properly. If you are serious about DIY, stop guessing which component is broken. I spent far too much money swapping out boards when I should have been using a multimeter. For me, the Fluke 117 is the gold standard because it handles non-contact voltage detection, which is a literal lifesaver when you are elbow-deep in oven repair essentials. Whether you are testing an oven thermal fuse or checking for power at the heating element, a digital reading removes the ‘maybe’ from your repair strategy.
Stop Guessing and Start Measuring with a Multimeter
When you move beyond the air gap and start looking at why your machine isn’t performing, you need to verify continuity. I’ve seen people replace perfectly good motors because they didn’t take five minutes for testing the circulation pump for continuity. A multimeter isn’t just a tool; it’s a diagnostic brain. It allows you to perform high-level parts and diagnostics just like a service pro. If your oven is acting up, use it to see if the internal cooling fan motor is getting the correct voltage before you tear the whole chassis apart. This data-driven approach is what keeps your repair costs in the double digits instead of the hundreds.

Hot Water is Your Drain’s Best Friend
Maintenance isn’t just about fixing what’s broken; it’s about preventing the sludge from ever reaching the air gap. According to the Association of Home Appliance Manufacturers (AHAM), modern dishwashers rely heavily on enzyme-based detergents that require specific thermal thresholds to activate and fully dissolve grease. If your water heater is set too low, that grease solidifies in your lines. I personally recommend running the hot water at your kitchen sink for 30 seconds before starting your dishwasher to ensure the first fill is actually hot. This simple habit, combined with knowing the best way to clean a greasy dishwasher filter, will extend the life of your drain hoses by years.
How do I maintain my appliance drainage over time?
Consistency is the secret sauce. Every three months, you should be performing a deep dive into the machine’s ‘digestive tract.’ This means more than just a surface wipe. You need to be cleaning your dishwashers hidden sump filter where the heavy sediment collects. If you ignore this, the debris eventually migrates into the air gap or the pump. I’ve noticed a trend where newer ‘smart’ appliances are beginning to include flow sensors that alert your phone when a blockage is starting, but until those are in every home, your eyes and ears are the best sensors you have. Watch for that ‘glug-glug’ sound in the sink—it’s the air gap’s way of screaming for help. If you’re still hitting a wall, check out our contact us page for troubleshooting help. Pro Tip: Use a wet/dry vac on the air gap once a year to suck out any hidden debris before it turns into a geyser.
The Future of Smart Diagnostics and Sensors
Looking ahead, I predict we will see a shift away from physical air gaps toward more sophisticated electronic backflow preventers integrated directly into the machine’s software. Until then, you are the technician in charge. Mastering oven diagnostics and dishwasher plumbing doesn’t just save money; it gives you total control over your home’s most vital systems. Don’t be afraid to get your hands dirty, but always lead with your multimeter and a solid understanding of the system’s flow.
Why Cleaning the Gap Changed My Entire DIY Mindset
Over the years, I’ve learned that the air gap isn’t just a nuisance that sprays water; it’s actually a brilliant early warning system for your entire kitchen. When that little chrome cylinder starts weeping, it’s usually telling you that your grease management has slipped. I used to think I could just blast it with chemicals, but the real lightbulb moment was realizing that physical scrubbing is the only way to break the bond of solidified dish soap and food proteins. Now, whenever I tackle parts and diagnostics, I treat the air gap as step one of a larger health check for the machine.
Another hard-won lesson: don’t wait for a flood. If you hear a gurgling sound coming from your sink during the drain cycle, that is the air gap gasping for air because a blockage is forming. Being proactive saves your cabinets from water damage that can cost thousands to repair. Finally, remember that the air gap is part of a chain. If the gap is clogged, your next stop should always be cleaning your dishwashers hidden sump filter, as debris rarely lives in just one spot. #IMAGE_PLACEHOLDER_E#
My Essential Arsenal for Keeping Drains Clear
You don’t need a professional plumber’s van to keep your kitchen running smoothly, but a few specific items make the job significantly less stressful. First, get a dedicated nylon bottle brush set; they reach the corners that a toothpick or a wire brush simply can’t touch without causing damage. I also swear by having a reliable wet/dry vacuum in the garage; it’s the fastest way to pull a deep clog out of a drain line without getting your hands or face dirty.
For the technical side, I always keep a multimeter handy to ensure the pump is actually pushing water out. If you’ve cleared the gap and still have issues, you’ll want to check out my dishwasher parts and diagnostics guide to see if a mechanical failure is the real culprit. Lastly, never underestimate the power of a good degreaser—learning the best way to clean a greasy dishwasher filter is your primary defense against future air gap geysers.
Reclaiming a Puddle-Free Kitchen Floor
There is a unique kind of satisfaction that comes from fixing a plumbing emergency with nothing more than a brush and fifteen minutes of your time. You don’t have to be a master mechanic to master your kitchen; you just have to be willing to look under the hood (or the chrome cap). By taking these small steps today, you are protecting your home and becoming the expert your appliances deserve. If you ever find yourself stuck or facing a weird leak you can’t identify, don’t hesitate to reach out through our contact us page.
Have you ever had a mini-geyser erupt from your sink in the middle of a dinner party? Let me know your messiest air gap stories in the comments below!