I will never forget the Tuesday night I opened my dishwasher expecting sparkling clean plates, only to find a murky, gray lagoon staring back at me. The smell was… let us just say, memorable. I felt that immediate sink in my stomach, the one where you start calculating how many hundreds of dollars a plumber is going to charge just to walk through the front door. But here is the thing: most of the time, that pool of water isn’t a death sentence for your appliance. It is usually just a cry for help from a specific, often cheap, component.
Stop Panicking and Start Looking for the Blockage
When I first started tinkering with my own kitchen gear, I made the classic rookie mistake of assuming the worst. I once spent a whole Saturday tearing apart my unit to replace the motor, only to find a single pistachio shell wedged in the impeller. Talk about an expensive lesson in dishwasher parts and DIY diagnostics. If you are seeing standing water at the bottom of the tub, we need to narrow down the why before you go buying a new machine. It is usually a matter of identifying dishwasher faults quickly by checking the most obvious culprits first—the filter, the drain hose, and that pesky air gap. Have you ever opened your dishwasher only to find your own mini-lake?
Is my dishwasher actually worth saving or is it just scrap metal?
It is easy to get cynical, especially when your kitchen smells like a swamp. You might think a five-year-old machine belongs in the junkyard, but modern units are surprisingly modular. According to research by the American Council for an Energy-Efficient Economy, modern dishwashers use as little as 3 gallons of water per cycle, which means even a small clog in the drain pump assembly can completely throw off the machine’s ability to clear the tub. Today, I am going to walk you through exactly how to spot the one part that stops your dishwasher from draining and how to fix it without losing your mind or your savings. [image_placeholder]
Clear the easiest obstacles first
Before you start ripping the unit out from the cabinetry, we have to look at the traffic jam points. Think of your dishwasher like a highway; if there is a wreck at the exit, the whole system backs up. Usually, the wreck is in a spot you can reach in your pajamas.
That little cylinder on your sink is more important than you think
The air gap—that chrome cylinder sitting next to your faucet—is the most frequent culprit for a mini-lake in the tub. Its only job is to prevent nasty sink water from siphoning back into your clean dishes. I once had a neighbor call me in tears because her kitchen was flooding. I walked in, popped the cap off the air gap, and found a single Lego head wedged inside. Five seconds later, the water was gone. If yours is clogged with food bits or scale, you can usually unclog a blocked dishwasher air gap with a straw or a small bottle brush. It is much faster than unclogging your air gap in five minutes compared to hours of manual bailing.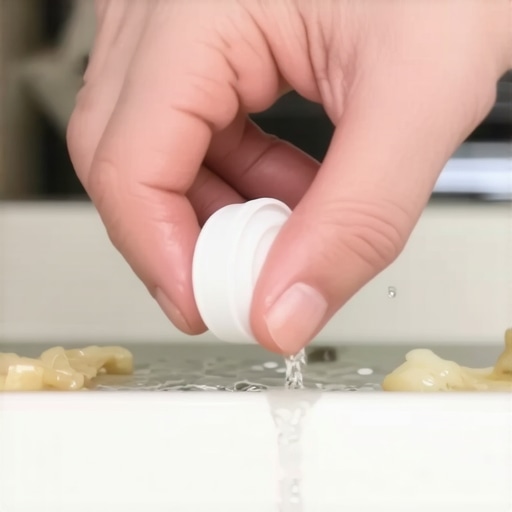
Stop the hose from strangling your machine
If the air gap is clear, follow the drain hose under the sink. It is basically a giant straw. If it is kinked or looped too low, gravity becomes your enemy. I remember one job where the homeowner had pushed a heavy box of detergent against the hose, crimping it shut like a folded garden hose. No motor on earth can push water through a crushed tube. Check the connections where the hose meets the garbage disposal. This is a prime spot for the one part that stops your dishwasher from draining completely—the knockout plug. If you just installed a new disposal and the dishwasher won’t drain, that plug is likely still there.
Get your hands dirty with the pump and check valve
When the lines are clear but the water stays put, it is time to look at the mechanics. This is where dishwasher parts and DIY diagnostics get a bit more technical, but do not let it scare you. Most pumps are accessible by removing the bottom kickplate.
Don’t confuse the drain pump with its cousin
Many DIYers get frustrated because they check the wrong motor. You need to know the difference between a drain pump and a circulation pump. The circulation pump moves water during the wash, while the drain pump handles the exit strategy. If you hear a noisy dishwasher drain pump assembly, it is likely trying to grind up a bone or a piece of broken glass.
The valve that keeps the swamp at bay
Inside that assembly sits the check valve. This tiny rubber flap is the unsung hero of your kitchen. It opens to let water out and snaps shut to keep it from rushing back in. Over time, grease and hard water turn that rubber into a stiff, useless cracker. You should always make time to inspect your dishwashers check valve for clogs or wear. Diagnosing these specific parts is remarkably similar to oven repair essentials and troubleshooting common issues; it is all about identifying which specific component has stopped doing its job. I once spent two hours on my knees only to find a rubber band wrapped around the impeller. It was a messy, wet realization that sometimes the smallest things cause the biggest headaches.While we’re talking about these specific components, there’s a layer of nuance that often separates the seasoned pro from the frustrated weekend warrior. Most people subscribe to what I call the “part cannon” theory: if something stops working, you just keep firing expensive new parts at it until the machine finally hums to life. But here is a contrarian take for you: a part that “tests good” with a simple continuity check can still be the very reason your kitchen is currently a disaster zone. I’ve seen countless homeowners spend hundreds on a brand-new drain motor when the real issue was a slightly corroded wire harness that only failed under a full electrical load. Before you go spending your hard-earned money, you need to be pinpointing faults before calling a repair expert by looking at the system’s electrical health as a whole.
Stop firing the part cannon at every problem
The biggest trap you can fall into is assuming that a part is either 100% dead or 100% functional. In reality, modern appliance electronics often live in a frustrating gray area of intermittent failure. For example, a heating element might show perfect continuity when it’s cold on your workbench, but once it reaches operating temperature, tiny thermal fractures expand and break the circuit. This is why testing an oven bake element for invisible cracks is a far more effective diagnostic step than just a quick visual inspection. According to research by the Association of Home Appliance Manufacturers (AHAM), nearly 25% of modern appliance service calls involve these intermittent “ghost” issues that a basic multimeter check might miss.
Why does your dishwasher cycle take forever to finish?
If your machine is running for three or four hours and still leaving a filmy mess on your glassware, you might think the motor is “getting tired” or the pump is weak. Most people would immediately start searching for dishwasher parts and DIY diagnostics for the pump assembly, but the hidden nuance here is usually the turbidity sensor. This tiny infrared “eye” measures how much light can pass through the water; if it’s covered in a microscopic layer of hard water scale, it tells the control board the water is still filthy, forcing the machine into an endless, inefficient loop. This is the most common reason for why your dishwasher cycle takes hours longer than usual. Cleaning a $20 sensor with some vinegar is a whole lot better than junking a $600 machine. 
The hidden danger of ignoring electrical chatter
Have you ever heard your oven or dishwasher making a rhythmic, rapid clicking sound? Many homeowners ignore this until the machine finally refuses to turn on, but that “chatter” is often the sound of a relay on the control board struggling to maintain a connection. Learning how to tell if your ovens relay board is clicking for the wrong reasons can save you from a catastrophic failure that could damage other sensitive components or even create a safety hazard. It is all about identifying dishwasher faults quickly before they cascade into a multi-part replacement nightmare. Have you ever fallen into this trap where you replaced a perfectly good part only to find out it wasn’t the source of the problem? Let me know in the comments below.I’ve spent years crawling under kitchen islands and squinting at circuit boards, and if there’s one thing I’ve learned, it’s that a $20 multimeter is your best friend. But don’t just buy any cheap plastic box; you want one with an audible ‘continuity’ beep. Trust me, trying to read a flickering screen while balanced on your shoulder in a dark cabinet is a recipe for a neck cramp. Beyond the electrical side, I swear by a set of long-neck nut drivers. You’d be surprised how many oven repair essentials and troubleshooting common issues involve reaching a screw hidden behind a heat shield that a standard screwdriver simply can’t touch. If you’re serious about this, invest in a dedicated ‘appliance kit’ so you aren’t hunting for a 1/4-inch socket while your floor is actively flooding. Another secret weapon in my kit isn’t a tool at all—it’s citric acid. Most people use harsh chemicals that eat away at the rubber seals, but pure citric acid is the gold standard for clearing hard water deposits from dishwasher interior walls without causing long-term damage. According to the Whirlpool Digital Diagnostics Service Manual, over 30% of ‘pump failures’ are actually just calcium buildup preventing the impeller from spinning at full RPM. A monthly hot cycle with a tablespoon of citric acid can add five years to your machine’s lifespan. 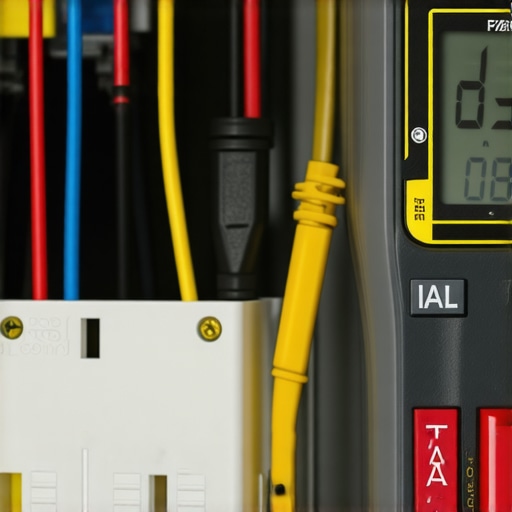
How do I keep my dishwasher and oven running like new?
Consistency is the key here. You don’t need to be an expert; you just need to be observant. For your oven, stop ignoring that slight haze between the panes of glass. Knowing the secret to cleaning an ovens inner glass without taking it apart isn’t just about vanity—it allows you to actually see your food so you aren’t opening the door every five minutes and letting all the heat out. While you’re at it, you should be testing your oven door seal with the dollar bill trick every few months. If that dollar bill slides out easily, you’re literally burning money every time you bake. Looking ahead, I predict we are moving toward an era of ‘predictive maintenance’ where your machines will send a notification to your phone long before a part actually fails. We’re already seeing this with smart sensors, and eventually, the goal is for appliances to have ‘self-healing’ control boards that can bypass a faulty circuit. Until then, you need to be proactive about how to inspect your oven control board for burn marks manually. My best advice? Tonight, go into your kitchen and perform the dollar bill test on your oven door. It takes ten seconds and could save you $50 on your next utility bill. If you find a gap, it’s the perfect low-stakes way to start your DIY journey.
Hard Truths I Learned While Laying on My Kitchen Floor
After years of fixing these machines, I’ve realized that the ‘part cannon’ is the most expensive way to fail. Just because a part looks okay doesn’t mean it’s performing under pressure. One of the biggest breakthroughs I had was learning that intermittent failures are often caused by loose connections or wire corrosion rather than burnt-out motors. Before you buy anything, focus on pinpointing faults before calling a repair expert. It’s also worth noting that many ‘broken’ units are simply clogged with minerals. I’ve seen ‘dead’ pumps come back to life after a simple descaling. Always verify your electrical path before assuming a mechanical death. If you need a roadmap, check out my comprehensive guide to dishwasher parts and DIY diagnostics to stay organized during your next repair.
Tools That Saved My Sanity and My Wallet
You don’t need a professional workshop to handle most home repairs, but you do need a few non-negotiables. First, get a multimeter with a loud continuity beep; it’s the only way to know for sure if a switch is actually closing. Second, keep a bag of food-grade citric acid in your pantry for descaling; it is safer than harsh chemicals for clearing hard water deposits from dishwasher interior walls. Third, a set of magnetized nut drivers will prevent you from losing screws into the dark abyss of the appliance frame. Mastering these oven repair essentials and troubleshooting common issues starts with having the right reach. I also recommend keeping a dedicated notebook where you record the model numbers and common failure codes for your specific brand so you aren’t Googling them in a panic later.
Stop Being Afraid of Your Appliances
The goal isn’t just to fix a leak; it’s to gain the confidence to own your kitchen. Most people are intimidated by the wires and the hum, but these machines are just puzzles waiting to be solved. By taking the time to start identifying dishwasher faults quickly, you’re saving yourself thousands of dollars over the lifetime of your home. You have the power to keep your kitchen running smoothly without being at the mercy of an expensive service schedule. So, go grab that dollar bill and test your oven door seal right now; it’s the smallest step that leads to the biggest savings in the future of your household maintenance. Have you ever replaced a part only to find out the real problem was something much simpler and cheaper like a loose wire? Let me know in the comments below!