I remember standing in my kitchen, staring at a plate of spaghetti that looked clean but felt like it had been sprayed with a fine mist of industrial tallow. It was that visceral moment I realized my ‘self-cleaning’ appliance was actually a lie. I had been ignoring that little circular screen at the bottom for over a year, assuming the detergent would just handle it. Spoiler alert: it doesn’t. When I finally pulled it out, I didn’t find just food scraps; I found a gray, waxy sludge that looked like it belonged in a sewer pipe. If you have ever wondered why your dishwasher leaves a greasy film on everything, the culprit is staring back at you from the bottom of the tub. Today, I am going to show you how to tackle that gunk so your dishes actually come out sparkling again.
Stop Ignoring the Sludge in Your Machine
Grease is a silent killer for kitchen appliances. It doesn’t just make your plates feel tacky; it migrates. It gets into the spray arms, coats the heating element, and eventually leads to you identifying dishwasher faults that could have been avoided with ten minutes of maintenance. Most people wait until they see standing water to act, but by then, the grease has usually turned into a solid, soap-scum-fortified barrier. I made the massive mistake early on of thinking I could just ‘power through’ the grease by using more detergent. All that did was create a foamy mess that caused the machine to overflow onto the floor because the sensors were blinded by the buildup.
Will a dirty filter actually break my dishwasher?
It absolutely can. Beyond the smell, a clogged filter forces the motor to work twice as hard to circulate water. According to a study by NSF International, the dishwasher filter is consistently ranked as one of the top ten germiest places in the average home, often harboring mold and yeast alongside that old bacon grease. If you don’t clear it, you’re essentially washing your ‘clean’ dishes in a bacterial soup. This buildup is often the secret reason the bottom of your dishwasher stays dirty no matter how many cycles you run. Have you ever pulled out your filter and been genuinely shocked by what was living down there? Drop a comment and let me know I’m not the only one who neglected this for too long! Before we grab the scrub brush, let’s look at why standard soaps often fail to cut through this specific type of kitchen grime. [image placeholder]Standard dish soaps are formulated to suspend oils in water, but once that water cools or the grease concentration spikes, the soap literally loses its grip. This is when the grease ‘plates out,’ coating the walls of your machine and eventually choking the filter mesh. To fix this, you have to move beyond a simple rinse and get into the mechanics of the machine.
Strip the Filter Down to the Mesh
Most homeowners assume a quick blast under the kitchen faucet is enough to clear a filter. It isn’t. Grease is incredibly resilient and often forms a transparent, waxy film that you can’t even see until the light hits it at the right angle. I once spent twenty minutes scrubbing a mesh that looked perfectly fine, only to realize that every single pore was actually sealed shut by a layer of translucent fat. You need hot water, a soft-bristled toothbrush, and a heavy-duty degreasing agent. If you notice the mesh is torn or the plastic frame is warped, you are better off consulting a comprehensive guide to dishwasher parts to identify the exact replacement part for your model before the motor burns out from the strain.
Clean Out the Sump to Stop the Recirculating Gunk
The filter sits inside a component called the sump—essentially the ‘stomach’ of your dishwasher where water collects before being pumped back through the spray arms. If the sump is full of food debris and sludge, the machine is just washing your plates with a diluted soup of old leftovers. Last Tuesday, I thought I’d finally beaten the ‘grease film’ boss in my own kitchen after soaking the filter for an hour. But when I reached my hand into the dark hole of the sump, I felt something slimy and hard. It was a chicken bone coated in a layer of white fat so thick it looked like a candle stub. That single blockage was preventing the pump from fully evacuating the dirty water. You must learn how to clean your dishwasher’s hidden sump filter and the surrounding housing if you want the grease to actually leave the building.
Clear Those Tiny Spray Arm Holes
Think of your spray arms like a garden sprinkler system. If the little holes are clogged with calcium or grease, the water pressure drops and the cleaning power vanishes. Use a simple trick for clearing your dishwasher spray arm holes: use a wooden toothpick or a straightened paperclip to gently poke through each nozzle. Be careful not to break the tip off inside the arm. If you’ve cleared the holes and still don’t see results, you might be wondering why your dishwasher bottom spray arm isn’t spinning; usually, this points to a worn-out mount or a physical obstruction deep in the manifold. 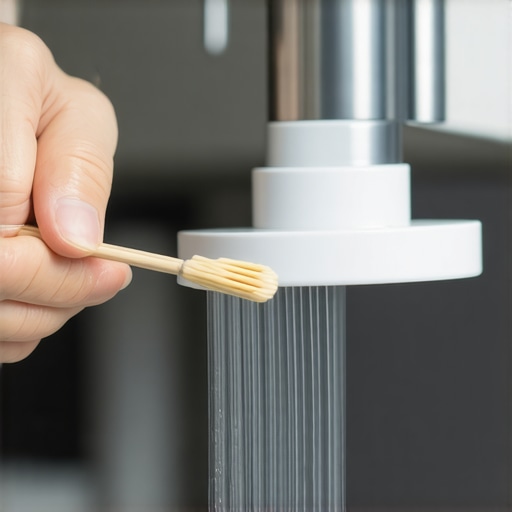
Check the Water Temperature Before You Blame the Soap
If your water isn’t hitting at least 120°F (49°C), the grease on your dishes will simply move from the plate to the tub wall without ever dissolving. Many people find they are dealing with a dishwasher that wont heat the water because of a faulty heating element. You can verify this yourself by testing your dishwashers high limit thermostat for continuity using a basic multimeter. If that thermostat is tripped or broken, the machine will never get hot enough to ‘melt’ the grease away, regardless of how much detergent you throw at the problem.It’s easy to get tunnel vision when a machine stops working. You see the orange light in the oven and assume the heat is coming, but then… silence. Most DIYers believe that a glowing igniter is a functional igniter. In my experience, that’s a dangerous trap. A gas igniter can glow as bright as a sunset and still be electrically dead to the gas valve. This is where oven diagnostics pinpointing faults becomes a game of exact electrical resistance, not just visuals. You need a specific amperage to pull that valve open, and a weakened igniter simply won’t cut it. This is exactly why your gas oven igniter glows but doesnt light even when it looks healthy. It’s a nuance that separates a basic repair from professional-level troubleshooting. 
Is your oven control board actually the villain here?
Often, homeowners see a dead display or weird behavior and immediately shell out hundreds for a new control board. Before you do that, stop and breathe. According to data shared by the Association of Home Appliance Manufacturers (AHAM), a significant percentage of professional service calls could be avoided by checking basic electrical continuity first. Sometimes the issue is as simple as testing an oven temperature sensor with just a multimeter to find it’s sending the wrong resistance data, tricking the board into shutting down for safety. You should always determine how to tell if your oven control board is repairable or if you’re just seeing symptoms of a failing oven control board like a loose neutral wire or a blown thermal fuse. Throwing parts at the problem—often called ‘parts cannon’ repair—is the most expensive way to learn how your kitchen works. Digging into oven repair essentials means understanding that the board is the brain, but the brain is only as good as the signals it receives from the sensors. The ‘parts cannon’ method doesn’t just waste money; it can also introduce new problems. For example, if you replace a control board without checking if a shorted wire caused the original board to fail, you’ll likely fry the brand-new part within seconds. Always look for the ‘why’ behind the failure.
Avoid the expensive mistake of overtightening
Here is an ‘oops’ factor I learned the hard way after years of working on these machines: your oven is a living, breathing thing that expands and contracts with heat. If you are installing a new oven door handle without stripping the screws, do not crank them down with all your might. I once overtightened a handle on a high-end range, and the first time the oven hit 450 degrees, the tension from the metal expansion literally shattered the outer glass door. It was a heart-sinking $400 mistake for what should have been a $20 handle repair. This principle of ‘snug, not jammed’ applies to dishwasher parts as well; forcing a plastic housing into place can lead to micro-fractures that only manifest as leaks months later. When you’re identifying dishwasher faults, remember that plastic and heat are a volatile mix. Have you ever fallen into this trap of replacing a part only to realize you had the wrong culprit entirely? Let me know in the comments below, I’d love to hear your ‘oops’ stories!
Grab a Professional Grade Multimeter First
I spent years using cheap $10 multimeters that gave me ghost readings, leading me to replace perfectly good heating elements when the problem was actually just a loose terminal. Now, I swear by a meter with a LoZ (Low Impedance) mode. It filters out stray voltage that can trick you into thinking a circuit is live when it is just picking up electrical noise from nearby wires. This is vital when you are testing your dishwashers circulation pump for continuity or searching for the most reliable way to test an oven thermal fuse. If your meter shows 120V but the motor refuses to turn, you might be looking at a high-resistance connection that only a quality tool will reveal. Precision is the difference between a fixed machine and a frustrated weekend. 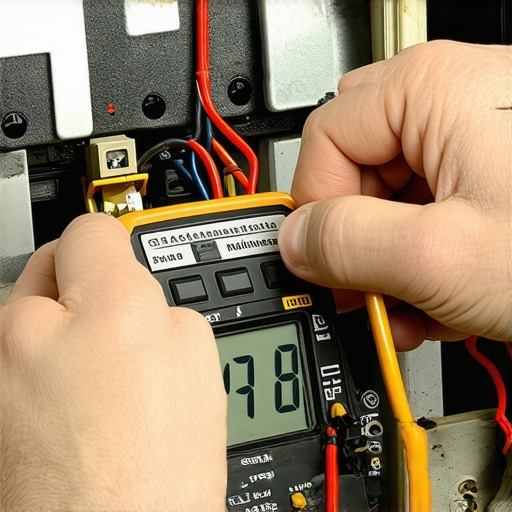
How do I maintain these high-heat systems over time?
Maintenance is not just about a quick wipe-down; it is about inspecting the integrity of the components that take the most thermal abuse. Once every few months, you should be testing your oven bake element for hidden cold spots by running a high-heat cycle and looking for any uneven glowing patterns. While you have the door open, take a moment to find the best way to remove stubborn rust from an oven rack. Rust particles do not just look bad; they can flake off and damage the porcelain coating of the oven floor, leading to permanent structural damage. If you ignore these small signs, you will eventually wonder why your oven temperature drops randomly during baking as the internal sensors become coated in kitchen debris and grease. According to the Whirlpool Corporation Service Technical Sheets, even a five percent deviation in sensor resistance can lead to a 25-degree temperature swing, which is more than enough to ruin a delicate cake or a holiday roast.
Stop Hard Water Before It Kills Your New Parts
If you live in a region with hard water, your repair efforts are always on a timer. Calcium carbonate will eventually calcify the very components you just painstakingly installed. I recommend using a citric acid-based cleaner once a month—not just for the fresh scent, but to keep the solenoids in your water valves from sticking. This is the secret to making dishwasher parts last ten years instead of three. It is much easier to run a cleaning cycle than it is to spend an afternoon identifying dishwasher faults caused by mineral buildup. Looking ahead, I suspect we are moving toward an era of truly predictive maintenance. Newer high-end ranges are starting to include Wi-Fi-enabled sensors that track amperage draw in real-time. In the near future, your oven will likely send a notification to your phone saying your igniter resistance has increased by fifteen percent, prompting you to order a replacement before the part actually fails. Until that technology is in every home, we have to rely on our own diagnostics. My challenge to you is this: pull the kickplate off your dishwasher this weekend and look for salt-like crusting around the motor housing. Catching a tiny leak early is the only way to avoid a simple oven diagnostics session turning into a full-blown floor renovation. If you run into a mystery you cannot solve, you can always contact us to share your findings.
Three Harsh Truths About Kitchen Maintenance
After years of wrestling with greasy filters and stubborn igniters, I’ve realized that the most expensive repairs usually start as the smallest oversights. First, never assume a part is fine just because it looks okay; I’ve seen heating elements that glowed perfectly while actually testing your oven bake element for hidden cold spots only to find they were failing. Second, clean components last twice as long. If you take the time to remove hard water build-up in your dishwasher, you’re not just cleaning—you’re extending the life of every internal valve. Finally, remember that your time is valuable. Sometimes it’s better to consult a comprehensive guide to dishwasher parts rather than guessing and checking with your wallet.
The Diagnostic Toolkit Every Homeowner Needs
When I’m out in the field or working in my own home, there are a few resources I simply cannot live without. I always keep a high-quality multimeter nearby because testing an oven thermal fuse is impossible to do accurately by eye. For physical components, I always insist on replacing parts with the correct OEM match to ensure the safety of the appliance. If you’re feeling stuck, I highly recommend diving into oven diagnostics pinpointing faults through official service manuals—they are the roadmaps that pros use to avoid mistakes. I trust these tools because they eliminate the guesswork that leads to frustration. [image placeholder]
Reclaim Your Kitchen Today
It is incredibly empowering to hear that familiar hum of a perfectly functioning machine knowing you were the one who fixed it. Don’t let the complexity of modern machines intimidate you. Whether you are dealing with a simple clog or deep oven repair, every step you take builds your confidence for the next project. Your dishwasher and oven are the workhorses of your home, and with the right parts and a bit of patience, you can keep them running for years. If you hit a wall, don’t hesitate to contact us for a second opinion. Have you ever replaced a part only to find out it wasn’t the real problem? Let me know your biggest DIY surprise in the comments below!