I was staring at a tray of pale, soggy biscuits when I finally snapped. The oven light was on, the fan was humming, and the top heating element was glowing red, but the bottom of my tray felt like it had been sitting in a lukewarm cupboard. My beautiful dual-fuel range—the centerpiece of my kitchen—had decided to go on strike right before a family brunch. I’ll be honest, my first thought was a panicked calculation of how many hundreds of dollars a repair technician would cost on a Sunday. But then I remembered my own advice: most of these machines are just a collection of simple parts waiting for a little attention. If you have ever felt that sinking feeling when your roast stays raw on the bottom, you are exactly where I was three months ago. Today, I am going to show you how to take control of your kitchen again by swapping that dead bake element yourself.
The Sunday My Roast Beef Stayed Raw on the Bottom
When you own a dual-fuel oven, you get the best of both worlds—precise gas stovetop cooking and even electric baking. However, it also means you have two different systems to worry about. I spent way too much time early on troubleshooting common issues with parts because I was convinced the gas line was the culprit. It wasn’t. It was the simple electric bake element at the very bottom. You can see the difference between a failing unit and a fresh one right here: [image_placeholder_1]. I made the rookie mistake of thinking that if the oven felt ‘warm,’ the element must be fine. In reality, the top broiler was doing all the heavy lifting while the bottom just sat there stone-cold. I even went as far as testing an oven temperature sensor with just a multimeter before I finally looked down and saw the physical blister on the heating coil.
Is this repair actually worth the DIY stress?
I know what you’re thinking: ‘I am not an electrician, and I definitely don’t want to mess with a gas-connected appliance.’ That skepticism is healthy! Safety is the first rule of the ‘Helpful Neighbor’ handbook. But here is the secret: replacing the lower element is an entirely electrical job that doesn’t involve the gas components at all. According to the Association of Home Appliance Manufacturers, electric heating elements are often the first component to fail in a range due to the constant extreme thermal expansion and contraction they endure. By doing this yourself, you aren’t just saving money; you’re ensuring the job is done with a high-quality OEM part rather than whatever the ‘quick-fix’ guy has in his van.
Stop Paying the Repairman for a Twenty-Minute Job
One of my biggest early blunders was not realize that replacing the oven bake element in 15 minutes or less is actually possible once you get the back panel off. I once spent an hour trying to unscrew the element from inside the oven cavity, only to realize the terminal nuts were hidden behind the rear insulation. It was a sweaty, frustrating mess that could have been avoided with a little guidance. You should also keep an eye out to see if your oven is sparking, which is a dead giveaway that the internal wire of the element has breached its protective casing. If your range has been acting up, have you ever been betrayed by your oven right before a big dinner party? It’s a rite of passage for every home cook, but it doesn’t have to be a permanent headache. Let’s get into the actual steps so you can get back to baking biscuits that actually crunch.
Kill the Power and Clear Your Workspace
Before you even think about grabbing a screwdriver, you need to cut the juice. Unplugging the unit is non-negotiable. If your range is hardwired, flip the breaker. I once tried to ‘cheat’ by just turning the dial to off, but I quickly realized that checking for a burnt terminal block on your electric oven is a lot more painful when there is still live current waiting to bite you. Once it is safe, pull the oven away from the wall just enough to get some breathing room. You will be working inside the cavity, but having access to the back is often the secret to a smooth swap.
Don’t Let Those Wires Slip Into the Abyss
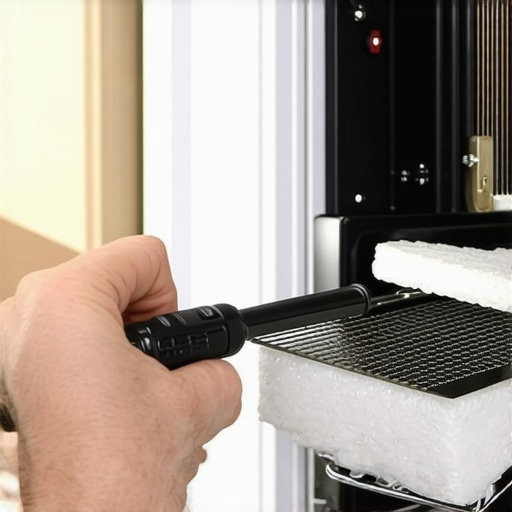
Open the door and remove the racks. The bake element is held in by two or three screws at the back and usually a couple of support legs. As you unscrew the mounting plate, pull the element forward very gently. You will see two wires connected to the terminals. Here is where my ‘fishing’ nightmare happened: I pulled the old element out, the wires slipped off, and they snapped back behind the insulation like a pair of startled snakes. I spent nearly an hour with a coat hanger trying to get them back while my dinner guests were pulling into the driveway. Now, I always use a clothespin or a piece of painter’s tape to secure those wires to the oven frame the second they are disconnected. This is a critical part of oven diagnostics and pinpointing faults before you accidentally make the job ten times harder.
Swapping the Coil and Testing Your Success
Slide the new element into place and reattach the wires to the spade connectors. Ensure the connections are tight; a loose wire can cause arcing, which is why oven control board symptoms sometimes mimic a bad element when it is actually just a poor connection. If you aren’t sure if the element was the only problem, you might want to spend a minute testing the resistance on your broil element as well just to ensure the whole circuit is healthy. Once the screws are back in and the element is seated firmly, push the range back and restore power. Don’t be alarmed if you see a tiny bit of smoke or smell something ‘new’ for the first five minutes—that’s just the factory coating burning off the fresh metal. This simple fix is the most common cure for fixing an oven that bakes too slow for your favorite family recipes.
Everyone tells you to buy a thermometer and immediately dive into the fast way to recalibrate your oven for accurate temperatures if your cake is sinking in the middle. But here is the contrarian truth: if your oven is off by more than 25 degrees, the software isn’t the problem—the hardware is. Most DIYers spend hours tweaking digital settings when they actually have a physical breach. I have seen countless homeowners waste an entire Saturday recalibrating a control board when the real culprit was a worn-out seal. You can’t program your way out of a mechanical leak. If you aren’t sure where to start, I always recommend testing your oven door seal with the dollar bill trick before you touch a single button on the display. It is the most low-tech, high-accuracy diagnostic tool in your kitchen.
Why does my gas igniter glow bright red but still won’t light the burner?
This is the most common ‘advanced’ trap for homeowners. In a gas system, a glowing igniter is not a guarantee of a working igniter. These components work on electrical resistance; as they age, they might still get hot enough to glow, but they fail to draw enough amperage to open the safety valve. It is a deceptive failure because it looks like it is doing its job. According to data from the National Association of Service Dealers, nearly 30% of gas oven service calls involve igniters that glow but lack the ‘oomph’ to trigger the gas flow. If you are seeing light but no fire, you are likely looking at why your gas oven igniter glows but doesn’t light. Replacing it is a much better use of your time than endlessly resetting the breaker and hoping for a miracle.

The ‘Oops’ factor often hits when we move from the oven to the dishwasher. Most people assume that if the dishes are still dirty, the pump must be dead. In reality, I find that a huge percentage of drainage issues stem from the ‘more is better’ soap philosophy. Over-sudsing can actually trick the sensors into thinking the tub is empty, leading to the one part that stops your dishwasher from draining completely. Furthermore, there is a persistent myth that dishwasher pods are the ultimate solution, but the truth about dishwasher pods and your drain hose is that they often don’t dissolve fully in shorter, eco-friendly cycles, leading to nasty clogs that look like mechanical failures. Before you start testing your dishwasher circulation pump for continuity, check your filter and your detergent habits first.
Becoming an expert at dishwasher parts and DIY diagnostics means learning to look past the obvious symptoms. If your unit is leaking, don’t just buy a new gasket. Look at the spray arms. A tiny crack in the plastic can create a high-pressure jet of water that bypasses the seal entirely, leading to dishwasher spray arm melting or pressure-related leaks that no gasket can stop. Have you ever fallen into the trap of replacing the most expensive part first, only to realize it was a five-dollar fix? Let me know in the comments—I have certainly been there myself!
Stop Guessing and Get a Multimeter
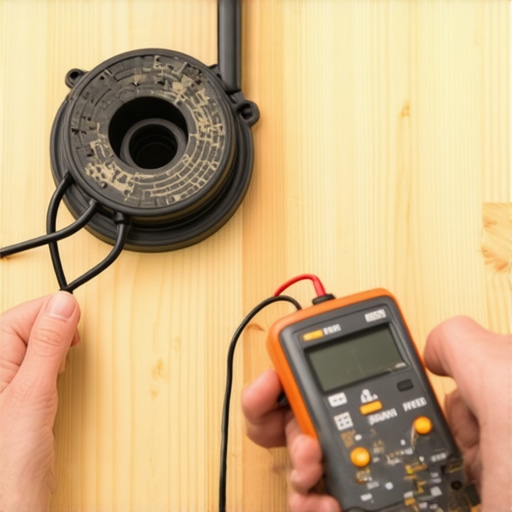
If you want to move from a frantic Googler to a confident DIYer, you need to stop relying on visual inspections alone. I wasted years looking for burn marks on wires when a simple $15 digital multimeter would have told me the truth in five seconds. When you are deep into oven diagnostics and pinpointing faults, the ‘continuity’ setting is your secret weapon. It tells you if there is a clear path for electricity to flow. If you touch your probes to the terminals and get no beep, that part is dead—end of story. This is by far the most reliable way to test an oven thermal fuse or any heating element. I personally recommend a model with an ‘auto-ranging’ feature so you don’t have to worry about setting the right voltage scale yourself.
How can I maintain my kitchen tech without a degree?
The secret to longevity isn’t expensive service contracts; it is the ‘Sum of Small Things.’ I treat my kitchen like a well-oiled machine. Once a month, I perform a ‘deep-clean’ cycle that goes beyond just wiping the door. According to the American Society of Home Inspectors (ASHI), nearly 40% of early dishwasher pump failures are caused by chronic sediment buildup that could have been cleared with basic monthly maintenance. I always start by finding the best way to clean a greasy dishwasher filter because a clogged screen forces the motor to work twice as hard, leading to premature burnout.
While you are down there, I highly suggest using a simple trick for clearing your dishwasher spray arm holes: use a soft toothpick or a small pipe cleaner to ensure no calcium deposits are blocking the water jets. If your sink is draining slowly into the unit, take a moment to learn how to unclog a dishwasher air gap without a plumber. Keeping these pathways clear is the difference between an appliance that lasts eight years and one that lasts fifteen. I suspect that in the very near future, we will see more ‘predictive maintenance’ sensors built into standard ranges that will alert your phone the moment an element’s resistance drops out of the optimal range. Until then, we have to be the brains of the operation.
Mastering parts and diagnostics to identify dishwasher faults quickly is about pattern recognition. If you notice a slight change in the sound of your machine, don’t wait for it to stop working entirely. A humming sound that wasn’t there last week is a cry for help. If you ever feel stuck or can’t find the specific part number for your model, don’t hesitate to contact us for guidance. My advanced tip for you this week: grab your phone, take a photo of the model number sticker inside your oven door right now, and save it in a ‘Home Maintenance’ folder. Having that ready when you are standing in the hardware store aisle is a total game-changer.
Hard Truths from a Self-Taught Kitchen Mechanic
After years of trial and error, I have realized that the biggest hurdle in home maintenance isn’t the technical difficulty, but the ‘fear of the unknown’. Here are a few lightbulb moments I learned the hard way:
- Physical over Digital: Always suspect the physical component before blaming the digital control board. I have seen homeowners spend hundreds on a new display when a simple $40 element was the real culprit.
- Connection Quality: ‘Close enough’ isn’t good enough for electrical connections. If a spade terminal feels loose, you must crimp it or replace it; otherwise, you’re inviting a future failure.
- Documentation is Key: Your phone’s camera is your most powerful tool. Photograph every wire and screw location before you unplug anything. Following these oven repair essentials will save you from the common ‘where does this red wire go?’ panic.
Tools That Saved My Sanity and My Wallet
To perform these repairs effectively, you don’t need a professional workshop, but you do need a few specific items that I personally trust. A digital multimeter is non-negotiable for oven diagnostics and pinpointing faults. You don’t need the most expensive model; a basic auto-ranging version will work perfectly for testing continuity. I also suggest keeping a fresh dollar bill in your toolbox, not for tips, but for testing your oven door seal to ensure no heat is escaping. Lastly, bookmark a reliable dishwasher parts guide so you can identify components like the turbidity sensor or check valve before you start pulling hoses and creating a mess.
Take Your Kitchen Back One Bolt at a Time
You don’t need a trade certificate to maintain a high-performing kitchen. Whether you are learning to identify dishwasher faults quickly or simply swapping out a heating coil, the confidence you gain by doing it yourself is worth far more than the money saved. Oven repair doesn’t have to be a mystery that requires an expensive service call. If you hit a wall or a part just doesn’t look right, feel free to contact us and we will help you through the fog. Now, go grab that screwdriver—your perfectly baked roast is waiting. Have you ever spent hours on a repair only to find out it was a five-minute fix? Let me know in the comments below!