I remember the exact moment I realized my dishwasher was winning our long-standing feud. I was unloading a cycle of clean dishes when I heard a sharp, metallic clink. A steak knife had slipped through a gaping hole in the bottom of the cutlery basket, wedging itself right against the spray arm. If I had started another load, that knife would have acted like a crowbar, potentially destroying the motor or snapping the arm clean off. It was a visceral reminder that even the smallest plastic failure can lead to a massive repair bill. I’m not just talking about a minor inconvenience; I’m talking about the kind of mechanical disaster that makes you consider washing everything by hand—which, let’s be honest, nobody has time for.
Why You Should Stop Ignoring That Hole in the Basket
We often treat the silverware basket as an afterthought, a simple plastic cage that just holds our forks and spoons. But when it starts to crumble, it creates a domino effect of problems. You might notice why your dishwasher is leaving white streaks on silverware because the items are bunched together too tightly, or worse, items fall through and block the water flow. Today, I am going to show you that you do not need a degree in engineering to fix this. We are going to find the right part and swap it out in less time than it takes to brew a pot of coffee. I’ve made my share of blunders, like the time I tried to use zip ties and duct tape to patch a hole, only to have the heat melt the plastic into a sticky mess on my favorite mugs. Trust me, replacing a melted dishwasher cutlery basket the easy way is the only real solution.
Is buying a brand-name replacement actually worth the extra cost?
This is the question I get asked most often by neighbors who see me tinkering in my garage. The fear is always that a generic basket won’t fit or will melt. While I love a good bargain, a poorly made basket can actually leach chemicals under high heat. According to data from Consumer Reports, the average dishwasher lasts about 10 years, but internal plastic components often fail at the 5-year mark due to the corrosive nature of modern detergents and high-temp drying cycles. Have you ever looked down and realized your silverware was literally escaping through the floor of the rack? It’s a common frustration, but it’s one of the easiest DIY wins you can snag. Before you go ordering a whole new bottom rack, check out this comprehensive guide to DIY diagnostics to make sure you aren’t missing any other hidden issues that might be causing your plastic to degrade prematurely. We’re going to get your kitchen back in order without the stress of a professional service call.
Look Inside the Door for the Golden Ticket
Before you spend a dime, you need the model number. Think of your dishwasher like a vintage car; parts aren’t universal, and ‘close enough’ usually results in a leak or a melted mess. Open your dishwasher door and look at the very top edge or the side of the inner tub. You are looking for a sticker or an engraved plate. This number is your North Star. If you try to guess based on how the basket looks in a thumbnail image online, you might end up with a basket that doesn’t clear the detergent dispenser. I once tried to ‘eyeball it’ with a generic basket from a thrift store, only to realize it was two inches too tall. Every time the spray arm spun, it hit the bottom of the basket with a rhythmic ‘thwack-thwack-thwack’ that eventually cracked the arm. It’s always better to use a comprehensive guide to DIY diagnostics to ensure you are getting the exact match for your specific unit.

Pop the Old One Out and Seat the New One Right
Replacing the basket is usually as simple as lifting a handle, but some models use a locking tab or a small screw to keep things stable during high-pressure cycles. If your basket is integrated into the door, you might need to check if there are any plastic clips holding it in place. Be gentle. These clips become brittle after years of being blasted by 140-degree water. If you find a loose connection, you might need to know how to replace a stripped dishwasher rack screw rather than forcing it and snapping the plastic housing. Once the old, jagged basket is out, take a look at the floor of the dishwasher. This is the perfect moment for a quick inspection. Most people never see this area clearly until the rack is removed.
Check for Hidden Debris While the Rack is Out
Since you’ve already cleared the way, do not miss the chance to peek at your filter. When a cutlery basket fails, small bits of plastic often break off and migrate toward the drain. If those shards get past the mesh, they can cause a world of hurt. You should take a moment to learn how to clean the hidden debris under your dishwasher filter to prevent a future drainage nightmare. I learned this the hard way when a tiny tooth from a broken basket wedged itself into my impeller. The resulting noise sounded like a woodchipper in my kitchen. At first, I couldn’t tell the difference between a drain pump and a circulation pump failure because the grinding was so loud. Cleaning out the ‘sump’ area now saves you from a much more technical repair later.
Stop the Heat from Killing Your New Plastic
Once the new basket is seated, you want to make sure it lasts longer than the first one. The primary killers of dishwasher plastic are overcrowding and proximity to the heating element. When you pack too many heavy stainless steel knives into one compartment, the weight stresses the plastic mesh. Also, keep an eye on how you load. You want to follow the best way to load your dishwasher for maximum water reach, which keeps the basket balanced and ensures that the drying cycle’s heat is distributed evenly rather than baking one corner of the rack. If your basket sits directly over the element, avoid using the ‘high-temp dry’ or ‘sanatize’ settings unless you absolutely have to, as this constant expansion and contraction is what leads to those hairline fractures in the first place.
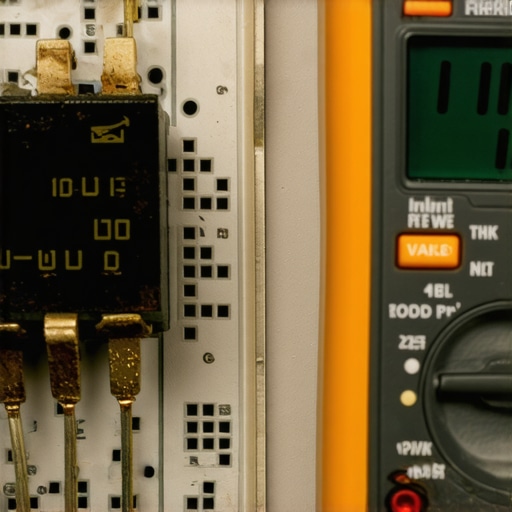
Most DIYers think they’ve mastered the game once they buy a multimeter, but there is a massive difference between reading a number and understanding what it actually means for your machine. I see people fall into the ‘continuity trap’ all the time. They test a bake element, see that it isn’t technically ‘broken’ in two, and assume it must be fine. In my experience, a heating element can have perfect continuity and still be failing miserably. If you aren’t testing your ovens bake element for hidden cold spots, you are only seeing half the story. These elements can develop internal resistance issues that prevent them from reaching the necessary temperature, even if they glow red. It’s the same logic for dishwashers; just because a motor hums doesn’t mean it’s actually moving water.
The Control Board Relay Might Be Gaslighting You
Everyone blames the heating element first, but the real villain is often a tiny black box on the control board. If your oven isn’t heating, your first instinct shouldn’t be to buy a new element. Instead, you need to know how to identify a bad oven relay on the control board. These relays are the gatekeepers of power; when they fail, they often leave behind a telltale scorch mark or a ‘clicking’ sound that never results in heat. According to the Association of Home Appliance Manufacturers (AHAM), electrical control failures are among the top causes of premature appliance replacement, yet many of these boards can be fixed with a simple part swap rather than a $500 unit replacement. Have you ever replaced a part only to find the problem persisted? Let me know in the comments, because that ‘Oops’ factor usually points directly back to a diagnostic error on the board.
Can a tiny blister on the heating element really ruin your dinner?
Absolutely. One of the most overlooked nuances in oven repair is the physical inspection of the element’s surface. Even if the oven seems to be working, you should be how to check your ovens bake element for tiny blisters or localized swelling. These are signs that the internal insulation is failing. If you ignore these ‘pimples’ on the metal, the element will eventually short out, potentially sending a surge that fries your expensive control board. It’s a classic case of a five-dollar problem turning into a five-hundred-dollar catastrophe because the ‘advanced’ signs were ignored. This is where oven diagnostics pinpointing faults before calling a repair expert becomes your best financial defense.
Why Most Multimeter Readings Lead You Astray
The biggest mistake I see is ‘ghost voltage.’ You might measure 120V at a wire and think you have power, but the moment you put a load on it, that voltage collapses to zero because of a corroded connection or a loose wire nut. This is why 5 multimeter tricks for diagnosing a dead control board are essential for anyone moving past the beginner phase. You have to test circuits under load. If you’re just poking at disconnected wires, you aren’t seeing how the machine actually behaves when it’s trying to do its job. Whether you are testing the resistance on your ovens broil element or checking a pump, always look for the ‘voltage drop’—it’s the smoking gun of a bad connection. If you feel like you’re hitting a wall, don’t be afraid to consult parts and diagnostics how to identify dishwasher faults quickly to refine your strategy. Understanding these deep-level nuances is what separates the part-changers from the actual technicians.
I’ve reached a point where I don’t even step into a kitchen without my trusty thermal imaging camera. If you can see the heat signature of a resistor on a control board, you aren’t just guessing; you’re looking at physics in action. A hot spot on a PCB is a neon sign for impending failure. According to Fluke’s technical documentation on thermography, identifying thermal anomalies can prevent up to 90% of electrical failures before they result in smoke or a total board meltdown. This is why I always suggest that serious DIYers move beyond the basic twenty-dollar meter. If you are already utilizing 5 multimeter tricks for diagnosing a dead control board, you’re ahead of the pack, but seeing the heat is the ultimate level-up for complex oven repairs.
Thermal Imaging Saves You from Costly Guesswork
Using an infrared camera allows you to pinpoint exactly where an element is thinning out before it actually breaks. It’s particularly useful for those intermittent issues that drive people crazy—like when an oven works fine for twenty minutes and then suddenly dies. By visualizing the heat across the entire bake element, you can see ‘cold spots’ that a simple continuity test would miss. It’s much more effective than blindly troubleshooting common issues with parts because it gives you a real-time map of the failure. I once spent three days trying to find a hairline crack in a dishwasher control board until I saw the thermal bloom coming from a loose solder joint. It saved me from replacing the entire machine.

How do I keep my repairs from failing after six months?
Maintenance isn’t a one-and-done deal; it’s about establishing a rhythm of inspection. Every six months, I pull the lower spray arm of my dishwasher and check the holes for tiny seeds, calcium deposits, or plastic shards. If you aren’t consistently cleaning the hidden debris under your dishwasher filter, you’re effectively forcing your machine to work twice as hard. This extra strain is what eventually leads to identifying a bad dishwasher circulation motor by the sound—that high-pitched whine that means the bearings are crying for help. Longevity comes from reducing friction and heat. That means keeping filters clear, ensuring gaskets stay supple, and never ignoring a strange click or a rhythmic thumping.
Sensors and Predictive Tech are the Next Big Thing
The landscape of home repair is shifting rapidly toward ‘Smart Diagnostics.’ We are moving toward a world where your dishwasher will ping your smartphone with the exact part number for a failing solenoid before the flood even starts. Brands like Bosch and Miele are already integrating sophisticated error logs, but the real future lies in predictive vibration analysis. Soon, sensors will detect a slight imbalance in your dishwasher’s circulation pump before you even notice the dishes aren’t as clean as they used to be. Until that tech is standard in every home, you’ll still need to rely on identifying dishwasher faults quickly using your own senses and tools. I honestly believe the next generation of ‘repair kits’ will include an OBD-II style scanner for your stove.
My challenge to you is simple: try one advanced maintenance tip this weekend. Don’t just clear your dishwasher’s main filter. Instead, unscrew the actual housing and look for the grit that hides in the ‘sump’ area. It’s the single best way to extend the life of your drain pump. While you’re at it, take a moment for oven diagnostics pinpointing faults by checking your door hinges for any sagging. Keeping your appliances in top shape doesn’t require a miracle; it just requires a little bit of curiosity and the right diagnostic mindset.
Hard Lessons I Learned While Wrestling with Burnt Wiring
I used to think that if a part looked clean, it worked. This is the biggest lie in appliance repair. A heating element can look brand new but have an internal break that only shows up when the metal expands under heat. That is why I always recommend learning how to test an oven broil element using a simple ohmmeter before you toss it in the trash. Another hard truth is that most ‘broken’ dishwashers are actually just hungry for a deep clean. If you are identifying a bad dishwasher circulation motor by the sound, you might find that a simple piece of glass or a stray pit was the culprit all along. Trusting your ears is often more effective than trusting your eyes.
The Three Must-Have Tools for Your Appliance Survival Kit
My toolkit has evolved, but three things are non-negotiable. First, a reliable digital multimeter—do not settle for the cheapest one at the bottom of the bin because accuracy matters when you are testing low-voltage sensors. Second, a high-intensity magnetic flashlight; you cannot fix what you cannot see in the dark recesses of a cabinet. Third, a set of non-marring pry tools to save your appliance’s finish when popping off control panels. #IMAGE_PLACEHOLDER_E# If you are just starting, check out these oven repair essentials and troubleshooting common issues with parts to see which items you will reach for most often. These tools are the difference between a one-hour fix and a three-day headache.
Your Journey from Part-Changer to Expert Technician Starts Now
Repairing your own home is not just about saving money; it is about the confidence of knowing exactly how your world works. You do not need to be a master electrician to swap a cutlery basket or test a thermal fuse. However, knowing when to stop diying and call an oven repair expert is its own kind of wisdom that saves you from safety hazards. Every home appliance has a story to tell through its sounds and heat signatures. By paying attention to these small cues, you can master your oven repair, parts, and diagnostics for every machine in your kitchen. Have you ever spent hours on a complex repair only to find that a simple loose wire was the real culprit? Tell me your best ‘Oops’ stories in the comments below!