Ever had that dreaded moment when you open your dishwasher, only to find a warped, melted mess where your trusty cutlery basket used to be? I remember the shock and frustration that hit me like a ton of dishes. I thought I’d have to buy a whole new dishwasher or spend hours chasing down expensive parts. But here’s the lightbulb moment—there’s a surprisingly SIMPLE way to replace a melted dishwasher cutlery basket without draining your wallet or losing your mind!
Why Bother Fixing It Yourself Instead of Calling a Repair Technician?
Let’s face it. When something breaks down in our kitchen appliances, the temptation is to dial up a professional. But did you know that a typical dishwasher repair can cost anywhere from $150 to $300? And that’s not even including potential wait times. Frankly, fixing it yourself can save both time and money—if you know what you’re doing. Plus, the satisfaction of completing a repair on your own is worth a lot. If you’re like me, you probably want to keep your tools and skills sharp, not to mention avoid the inconvenience of a dishwasher out of commission during busy weeks.
Is Replacing Melted Parts Really Worth the Effort?
Absolutely. Many homeowners overlook the fact that parts like the cutlery basket are designed to be replaceable. A quick search reveals how many folks have successfully swapped out their damaged racks using only basic tools. And here’s a fun fact: according to appliance experts, many common dishwasher faults, including warped baskets, can be diagnosed and fixed without calling in professional help. Just avoid that early mistake I made—assuming every repair required a pro—it cost me more time and money than necessary.
What’s Coming Next?
In the following sections, I’ll walk you through the entire process of replacing your melted dishwasher basket in a way that’s straightforward and approachable. So if you’ve been staring at that deformed rack and thinking, “There’s gotta be an easier way,” stick around. You’ll be amazed how simple it can be to get your dishwasher back in top shape, ready for years of reliable use. Ready to dive in? Let’s get your kitchen humming again!
Remove the Damaged Basket Carefully
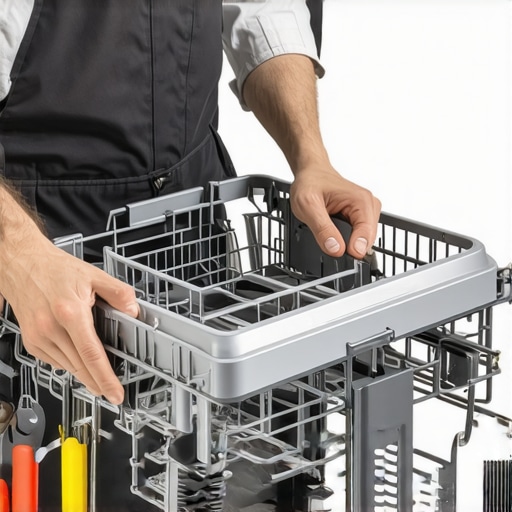
Start by unplugging your dishwasher and opening it to access the rack. Gently slide out the melted or warped basket, supporting its weight to prevent further damage. Use a screwdriver if any screws are holding it in place. I once worked on mine after a small kitchen fire caused the plastic to melt, and careful handling prevented additional cracks.
Identify the Right Replacement Part
Locate the exact model number of your dishwasher, usually on a sticker inside the door. Visit a site like this guide to find compatible baskets. When I replaced mine, matching the model number ensured a perfect fit, preventing future issues.
Prepare Your Workspace and Tools
Gather a Phillips screwdriver, possibly a nut driver, and a clean cloth. Cleaning the surrounding area helps avoid losing small screws or dropping parts. I recommend laying out a towel to catch any falling screws—trust me, I once spent 15 minutes searching for a tiny screw that rolled under the dishwasher.
Install the New Basket Precisely
Align the new basket’s wheels and hooks with the rails inside the dishwasher. Push gently until it clicks into place. Verify that it moves smoothly and is secured. During my first replacement, I used the cardboard from the packaging to support the basket during installation, making the process smoother.
Test the Installation
Run a short cycle without dishes to ensure the basket stays aligned and moves freely. Look for any wobbling or resistance. After my first test run, I needed to adjust the position slightly—a quick fix that saved me from future leaks or noise during operation.
Final Checks and Clean-Up
Inspect the area for leftover debris or tools. Wipe down the surrounding surfaces to remove any grease or plastic residue. Confirm the basket is seated correctly; a misaligned basket can cause water leaks or poor wash performance. I learned this the hard way when I didn’t double-check, leading to a minor dishwasher leak during the next cycle.
Monitor Performance in Future Cycles
Keep an eye on your dishwasher over the next few wash cycles. Ensure the new basket remains stable and functions as intended. Regular inspections can prevent issues like cracks or warping from recurring, saving you time and money in the long run. Remember, DIY repairs become easier with experience—each successful fix boosts your confidence for the next project.
For more detailed troubleshooting tips on related appliances, check out this resource.
 While many believe that diagnosing appliance issues is straightforward, the reality is far more nuanced. One frequent misconception is that all parts are easily replaceable and that DIY fixes always save money. However, overlooking the intricate nuances of component compatibility and diagnostic accuracy can lead to more costly errors, such as ordering the wrong part or misinterpreting fault codes. For example, some assume that a simple error code indicates a single, easily fixed problem, but in reality, it may stem from complex issues like faulty temperature sensors or wiring harnesses, which require a deeper understanding of appliance circuitry. An advanced mistake often made is relying solely on online troubleshooting guides without considering model-specific details, which can result in installing incompatible parts or causing further damage. According to leading appliance repair experts, proper diagnosis involves a systematic process of testing electrical continuity, including checking thermistors or safety thermostats, rather than jumping straight to component replacement. This approach minimizes unnecessary repairs and helps pinpoint the root cause more effectively. Moreover, a common myth is that all faults are visible or audible, but many problems manifest as subtle efficiency drops or intermittent failures, making advanced testing techniques essential. By understanding these nuances, homeowners can avoid costly missteps and achieve reliable repairs. For those interested in honing diagnostic skills, exploring detailed guides such as [this resource](https://appliancebargainz.com/parts-and-diagnostics-how-to-identify-dishwasher-faults-quickly) can provide valuable insights. Remember, proper troubleshooting is less about guesswork and more about scientific testing—so don’t fall for the trap of oversimplification. Have you ever fallen into this trap? Let me know in the comments.
Keeping Your Appliances Running Smoothly: Tools and Techniques
To ensure your appliances stay reliable and efficient over time, investing in the right tools and adopting proper maintenance routines make all the difference. One of my go-to tools is a quality digital multimeter, which I use regularly to check electrical components like heating elements and thermostats. Unlike basic models, a true RMS multimeter provides accurate readings even with fluctuating signals, giving me confidence that my diagnostics are precise. I personally prefer the Fluke 117 for its durability and reliability, especially when testing appliance circuits, as recommended by industry experts.
Another indispensable item is a set of insulated screwdrivers, which grant safety and ease when working with energized parts. I keep a small set from Wiha, including Phillips and flat-head varieties, because their ergonomic design reduces fatigue during detailed repairs. For cleaning, I rely on a toothbrush with stiff bristles, aiding in removing mineral buildup or debris from spray nozzles and filters. I’ve found that regular cleaning using these tools prevents clogs that could lead to malfunction or inefficiency.
Practicing routine inspections is equally important. For dishwashers, checking the float switch ensures the unit doesn’t overfill, and I routinely verify its operation by gently pressing the float to see if the switch activates. This simple test, aligned with established procedures, can save you from water damage and costly repairs.
Looking ahead, automation and smart diagnostics are evolving, with appliances increasingly integrating sensors that alert homeowners to issues before they escalate. However, I believe hands-on skills remain vital; understanding how to interpret error codes and condition your tools allows for swift troubleshooting and saves money. For example, maintaining a dedicated diagnostic toolkit with an infrared thermometer, multimeter, and small flashlight enables you to diagnose problems accurately in less time.
How can you maintain your appliances over the long haul?
Clearly, regular tool use combined with scheduled inspections fosters durability. Adequately calibrated and well-maintained equipment ensures that diagnostics remain accurate, thereby preventing minor issues from blossoming into major failures. Remember, addressing small faults early extends the life of your dishwasher or oven and can improve performance significantly.
If you’re looking to deepen your maintenance skills, consider reading about diagnosing faults using specialized equipment like thermal cameras, which can uncover hidden overheating or insulation problems. Starting with a basic multimeter and learning to interpret readings is a crucial first step toward more advanced diagnostics. Take this advice and try testing your oven’s heating element for micro-cracks—an often overlooked yet common reason for uneven baking. Proper maintenance isn’t just about fixing things when they break; it’s about proactively preventing issues and understanding your appliances at a fundamental level. Explore more about this process in this resource and begin your journey toward appliance mastery.
The Hardest Lesson I Learned About Parts, Diagnostics, Oven Repair, Dishwasher
One thing that took me by surprise was how crucial it is to double-check the compatibility of replacement parts. I once ordered what I thought was the correct dishwasher basket, only to realize it didn’t fit after installation. This costly mistake taught me to always verify model numbers and consult detailed guides before purchasing.
Three Myths About DIY Appliance Fixes That Held Me Back
I used to believe that all repairs required fancy tools or professional expertise. Over time, I discovered that many small fixes, like replacing a melted basket, can be done with basic screwdrivers and patience. Busting these myths has empowered me to attempt repairs confidently, saving money and time.
What Experts Won’t Tell You About Parts, Diagnostics, Oven Repair, Dishwasher
Many professionals keep certain troubleshooting shortcuts to themselves; however, I found that understanding the electrical basics—like checking continuity with a multimeter—makes all the difference. Building this knowledge base has helped me diagnose issues swiftly, reducing dependency on guesswork.
My Essential Toolkit for Dishwasher and Oven Repairs
From a reliable digital multimeter to insulated screwdrivers, having the right tools has transformed my repair process. I trust brands like Fluke and Wiha because of their durability and precision, which makes diagnosing and fixing appliances more manageable and less stressful.
Turn Your Repairs into Wins and Confidence
Remember, tackling a melted dishwasher basket or any appliance issue isn’t just about saving money—it’s about gaining skills and confidence. Every successful repair boosts your understanding and prepares you for the next challenge. Don’t hesitate to take that first step; you’re capable of more than you think.
Which repair challenge caught you off guard, and how did you overcome it? Share your story below!