I’ll never forget the sound of my Sunday roast nearly sliding onto the kitchen floor. It wasn’t the pan’s fault; it was that high-end, supposedly ‘pro-style’ rack slide that decided to snap a ball bearing right when I needed it most. You spend a fortune on these luxury ranges, and when a simple slide fails, it feels like the whole kitchen is broken. I stood there, oven mitts on, staring at a tilted 15-pound bird, realizing my ‘pro’ kitchen was currently a ‘no-go’ zone. But here is the thing I learned the hard way: you don’t need to shell out hundreds for a service call just to get that smooth glide back.
Stop Wrestling with Your Heavy Roasts
If your oven rack feels like it’s dragging over gravel, you are probably dealing with a collapsed telescopic rail or a seized ball-bearing carriage. In my early DIY days, I made the classic mistake of thinking a little WD-40 would solve the sticking. Huge error. Not only is that a fire hazard, but the smell of chemical solvent in your sourdough is something you never quite forget. Before you start buying random bits, you should look into oven repair essentials and troubleshooting common issues to see if it’s a simple alignment problem or a total part failure. We are going to walk through the exact steps to swap that slide out so you can get back to effortless baking. Pro-style ranges are built like tanks, often weighing upwards of 300 pounds according to Consumer Reports, and that heavy-duty build means the internal components like rack slides bear immense stress every time you check a turkey. Unlike when dishwasher racks are hard to pull out and just need a quick cleaning, oven slides often require a full component swap due to the high-heat environment that dries out specialized factory lubricants.
Is This DIY Project Too Risky for a High-End Appliance?
I get it. You paid a premium for that brand name on the handle, and the last thing you want to do is strip a screw or bend a side liner. However, these slides are designed to be modular. If you can use a screwdriver and have a little patience, you can do this. Have you ever felt that momentary panic when a heavy dish suddenly jerks forward because the rack stuck? That’s your sign to act before the slide fails completely and ruins a ceramic baking dish—or your floor. Proper oven diagnostics can help you identify if the issue is the slide itself or the mounting studs on the oven wall. Once you’ve confirmed the slide is the culprit, the process is surprisingly straightforward, and I’m going to show you how to handle the clips and screws without losing your cool.
Clear the Deck Before You Start
You can’t work in a cramped, hot space. First, let the oven cool completely—don’t be like me and think a “slightly warm” oven is fine; those stainless steel liners hold heat longer than you’d expect. Remove all the standard wire racks first. If your model has the heavy telescopic slides, they are usually held in by a combination of rear hooks and front thumb-screws or spring clips. I remember the first time I did this on a high-end range; I spent ten minutes tugging on a rail only to realize there was a tiny, hidden locking tab at the very back. Once you find that tab, the whole assembly usually tilts up and out easily.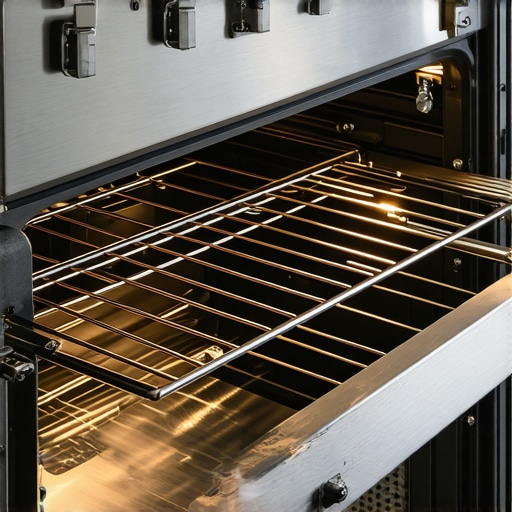
Extract the Failed Rail Without Scuffing the Finish
Most pro-style slides are mounted to a side ladder or directly into the oven wall. If your slide is screwed in, you might encounter a bit of resistance from heat-seizing. This is where you need to be careful not to strip the head. If you do run into trouble with hardware, you can look into replacing a stripped screw specifically designed for high-heat environments. It’s a similar headache to when you are using the correct tool for removing a rusted dishwasher heating element nut; patience and the right bit size are your best friends here. Once the screws are out, the rail should pull free. Take a second to look at the ball-bearing carriage. If you see tiny metal spheres rolling around the bottom of your oven, the internal race has collapsed, and there is no fixing it—it’s replacement time.
Check the Support Studs for Secret Damage
Before you slap the new part in, look at where the rail connects to the oven wall. Sometimes the weight of a 20-pound Dutch oven causes the mounting studs to sag or the ladder rack to bend. This is part of essential oven diagnostics. If the wall is warped, a new slide will just bind again in a week. I once spent an hour installing a brand-new $200 rail only to find it still stuck because the side liner itself had buckled. I had to gently tap the liner back into place with a rubber mallet before the glide felt like silk again. It’s much like how identifying dishwasher faults quickly requires looking at the housing, not just the moving part.
Slide the New Hardware Home
When you have the new part, align the rear hooks first. This is the hook and pivot maneuver. Engagement should be smooth. If you have to force it, something is misaligned. Refer back to oven repair essentials and troubleshooting if the clips won’t seat. Once the rear is locked, the front should drop right onto the mounting stud. Tighten your screws just until they are snug—over-tightening in a high-heat zone is a recipe for a snapped bolt during the next thermal expansion cycle. Unlike when you are how to repair a peeling dishwasher rack with a touch-up kit, there’s no painting over a bad install here; it either glides or it doesn’t. Give it a few test pulls while empty to ensure the telescopic stages extend fully without catching.People often tell you that the self-cleaning cycle is a godsend for a busy kitchen, but if you want my honest, expert opinion: it is the primary reason I see high-end slides fail. Most manuals tell you to remove the racks, but many homeowners forget, thinking the heavy-duty chrome can take it. It can’t. The extreme heat, which often exceeds 900 degrees Fahrenheit, doesn’t just burn off grease; it incinerates the factory-applied high-temperature lubricants required for that ‘glide’ feel. According to research by the Association of Home Appliance Manufacturers (AHAM), extreme thermal stress is one of the leading causes of premature mechanical failure in kitchen appliances. When that grease disappears, the friction creates flat spots on your ball bearings, and no amount of cleaning will fix a bearing that is no longer round.
Can You Actually Re-Lubricate a Seized Telescopic Rail?
Technically, you can buy high-temperature food-grade graphite or lithium-based lubricants, but here is the nuance most people miss: if the rail is already grinding, the damage is internal. I’ve seen people try to save $200 by spraying silicone into a collapsed carriage. All that does is create a sticky mess that attracts more carbon and eventually smokes out your kitchen. This is a case where oven diagnostics really save you time. You need to know when to clean and when to cut your losses. It’s a completely different beast than why your dishwasher racks are hard to pull out, where the culprit is usually just mineral buildup from hard water. 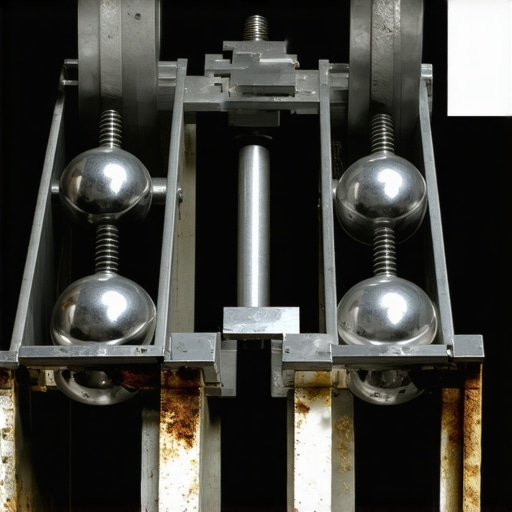 Another ‘oops’ factor I see constantly involves the misinterpretation of resistance. If your rack is sticking, don’t immediately assume the slide is toast. Check the temperature sensor. In some modern pro-style ranges, a failing sensor can cause the oven to run hotter than the display claims, causing the metal liners to expand slightly and pinch the rails. If you aren’t sure, learning to distinguish between a faulty oven sensor and a bad board is a skill that separates the ‘part-swappers’ from the true experts. Before you spend a dime, verify that your other appliances aren’t having similar issues by checking a comprehensive guide to dishwasher diagnostics to see if your home has a systemic issue like a failing surge protector or localized heat warping. Have you ever fallen into this trap and ruined a perfectly good set of racks by leaving them in during a clean cycle? Let me know in the comments.If you really want to graduate from a simple ‘part-swapper’ to a true home expert, you have to embrace the data. I never start a repair without my trusty multimeter. Whether I am testing the resistance of an oven igniter or checking if a fan motor is drawing too much current, the numbers on that screen tell a story that your eyes can’t see. According to the technical documentation from Appliance Aid, a leading resource for niche appliance repair, most electronic failures in high-end ranges stem from micro-vibrations and thermal expansion rather than catastrophic component failure. This means that a slide that is ‘just a little’ sticky isn’t just an annoyance; it’s a vibration source that can eventually rattle a control board connector loose.
How do I maintain these high-heat components without breaking them?
The secret isn’t in a spray can. For your telescopic slides, the only maintenance I recommend is a localized application of high-temperature, food-grade graphite powder. Avoid oils at all costs. For the rest of the oven, consistency is your best friend. Every six months, you should be calibrating your oven with a simple thermometer to ensure the heating elements aren’t overworking themselves. If you notice a 25-degree discrepancy, your oven is working 10% harder than it needs to, which drastically shortens the lifespan of those expensive ball-bearing slides. It’s a similar logic to your other appliances; for example, if you don’t know the quickest way to remove hard water build-up in your dishwasher, the pump works harder, gets hotter, and eventually fries the thermal fuse.  I predict that within the next five years, we will see ‘smart slides’ integrated into luxury ranges—sensors that can detect friction levels and send a push notification to your phone before the rail collapses. We aren’t quite there yet, so for now, you are the sensor. When you are performing oven diagnostics, listen for the ‘click’ of the metal. A healthy slide is silent; a dying one ‘sings.’ If you’ve also noticed your dishwasher acting up, take a look at a comprehensive guide to dishwasher diagnostics to see if your home’s water pressure or electrical quality is the hidden culprit behind these component failures. My challenge to you this weekend is to perform a simple resistance check—grab a multimeter and follow the steps for how to test an oven fan motor for resistance. It’s the best way to get comfortable with the ‘guts’ of your appliance before something actually breaks.
What Nobody Tells You About Those Expensive Telescopic Rails
After years of tinkering with pro-style ranges, I’ve realized that the most expensive part of a repair isn’t the part itself—it’s the assumptions we make. One major “lightbulb moment” for me was discovering that thermal expansion is a silent killer. If you notice your oven temperature drops randomly during baking, the resulting fluctuating heat causes the metal to expand and contract unevenly, which is what eventually cracks the bearing housing in your rails. Another hard lesson: if you hear a high-pitched squeak, it isn’t just friction; it’s the sound of a bearing losing its shape. This is why proper oven diagnostics are non-negotiable. Finally, always check your side liners; I’ve seen homeowners replace perfectly good slides when the real culprit was a bowed oven wall. Knowing how to identify the difference between a faulty oven sensor and a bad board can often reveal why the oven is running too hot and melting your rail lubricants in the first place.
The Toolkit That Saves My Sanity Every Time
I don’t go into any repair blind, and neither should you. My “go-to” kit isn’t fancy, but it is effective. First, a magnetic nut driver is essential because dropping a mounting screw into the bottom of a 48-inch range is a quick way to turn a 20-minute job into a three-hour ordeal. Second, I always keep a bottle of food-grade graphite powder; it’s the only lubricant that survives the high-heat environment of a pro oven. Third, I highly recommend a digital multimeter. Whether you are testing the resistance of an oven igniter or trying to see if your fan is drawing too much current, the numbers don’t lie. Lastly, a simple oven thermometer helps you calibrate your oven to prevent the overheating that ruins these delicate ball-bearing systems.
#IMAGE_PLACEHOLDER_E#
Take Back Control of Your Gourmet Kitchen
There is a unique sense of pride that comes from sliding a heavy tray of cookies out on a rail that you fixed yourself. It’s more than just saving money on a service call; it’s about understanding the machine that feeds your family. Don’t let a grinding noise or a stuck rack intimidate you. Most of these high-end components are designed to be serviced by someone with patience and the right information. By mastering your own oven repair techniques, you ensure your kitchen remains the heart of your home, not a source of stress. Have you ever had a rack stick right in the middle of a big holiday dinner? Tell me your “kitchen disaster” stories in the comments below!