It was a cold Tuesday evening, and my stomach was growling. I had a tray of homemade lasagna ready to slide into the oven, but there was one glaring problem: that stubborn little preheat light. It just wouldn’t turn off. I waited ten minutes. Then twenty. After forty-five minutes of staring at that tiny amber glow, I realized something was seriously wrong. I ended up ordering takeout, but that glowing light haunted me. If you are currently staring at your control panel wondering if your kitchen has entered a twilight zone, you are not alone. This is one of those classic appliance mysteries that can drive any home cook absolutely crazy.
The Glowing Amber Trap
When your oven preheat light stays on forever, it is usually telling you a story about a hidden breakdown inside the machine. Most of us assume the oven is just taking its sweet time, but after an hour, it is clear that the internal communication has failed. In my early days of DIY tinkering, I made the classic rookie mistake of simply ignoring the light and throwing my food in anyway. The result? A half-baked, doughy mess because the actual temperature was nowhere near what I had set. Trust me, ignoring this signal is a recipe for ruined dinners and wasted energy.
Today, we are going to demystify this annoying issue once and for all. We will pinpoint exactly why your oven is stuck in this endless warm-up loop so you can get back to stress-free baking. If you have faced this specific, infuriating problem, drop a comment below or send me a message on my contact page—I would love to hear your own kitchen battle stories! Before you call in an expensive technician, you can easily run some basic oven diagnostics to pinpoint the fault yourself.
Is my control board actually toasted?
Many homeowners immediately panic and assume they need a brand-new, expensive control board. While control board failures do happen, more than 70% of preheating issues are actually caused by simple, replaceable components like a worn-out sensor or a failing element. According to industry repair data compiled by the Association of Home Appliance Manufacturers, faulty sensors and broken heating elements remain the leading causes of temperature calibration errors in residential ranges. Before you assume the worst, it is crucial to perform a few basic checks. You can start by testing your oven thermostat to see if it is reading the temperature accurately, or learn how to test your igniter resistance if you own a gas model. Pinpointing the actual culprit is much easier than you think once you know where to look.
Step by Step Diagnostics to Turn Off That Light
When you are staring at a preheat light that refuses to turn off, you are essentially looking at an unfinished conversation. Your oven’s main control board has sent a command to heat up, but it is waiting for a confirmation signal back from the temperature sensor or the heating elements. Until that signal arrives, the system stays paused in warm-up mode. To resolve this, you need to systematically isolate the three main hardware suspects: the temperature sensor, the heating elements, and the electrical connections. Let us walk through how to systematically test each component without guessing.
Grab Your Multimeter and Test the Temperature Sensor
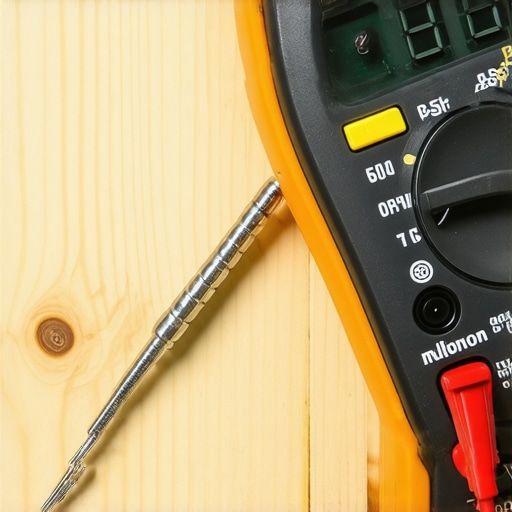
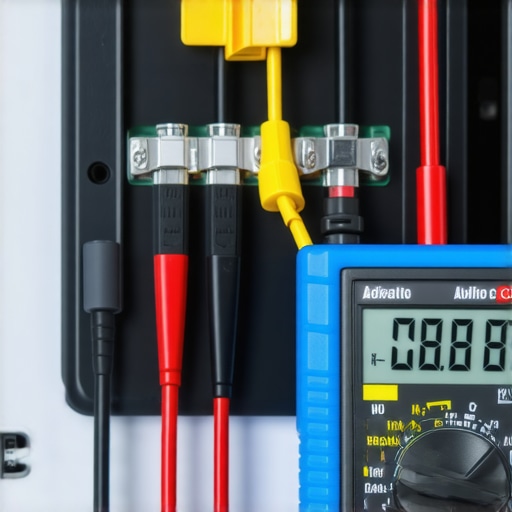
Your temperature sensor is a small, pencil-like metal probe located near the top back corner of the oven interior. Think of it as the thermometer of your appliance. When it fails, it might register that the oven is still ice cold even if the chamber is actually boiling hot. To check it, you must first unplug your oven from the wall or shut off the circuit breaker. Locate the sensor, unscrew the mounting screws, and carefully pull it forward to expose the plastic wire harness. Disconnect the plug. Setting your digital multimeter to the ohms setting (Ω), place the probes on the two terminals inside the sensor plug. At room temperature (about 73 degrees Fahrenheit), you should get a reading of approximately 1,080 ohms. If your reading is wildly different or shows zero continuity, you are dealing with a faulty component. For a deeper dive on interpreting these numbers, you can read our guide on identifying the difference between a faulty oven sensor and a bad board, which will save you from buying the wrong replacement parts.
Inspect the Physical Condition of Your Heating Elements
If the sensor is healthy, the next suspect is the physical heating loop. I will never forget a weekend repair job on my aunt’s old range where the preheat light stayed on for hours. I initially assumed the thermostat was shot. However, when I got down on my knees and looked closely at the lower bake element, I noticed a tiny, bubbling blister on the back curve of the metal coil. It was a microscopic break in the electrical circuit, meaning the element was only receiving partial voltage and could not generate enough heat. If you see physical blistering, warping, or bright red hot spots that fade quickly, your element is failing. For electric ovens, you can learn more about why your oven heating element is blistering and about to break before it completely snaps. If you run a gas model instead of electric, a weak igniter will cause the exact same endless preheat cycle. The igniter might glow bright orange, but it may lack the electrical strength to open the gas safety valve. To verify this, you should follow the steps to test a gas oven igniter with a multimeter to see if the draw is sufficient.
Verify Sensor Calibration and Output Resistance
Even if a sensor shows basic continuity, it can still drift out of calibration over time, sending slightly inaccurate readings that prevent the control board from registering a completed preheat cycle. To confirm if your sensor is sending the correct signals at actual operating temperatures, you can follow the instructions to test an oven temperature sensor with a multimeter across different heat ranges. If the sensor tests fine and your heating elements are pristine, you may be dealing with a thermal fuse that is tripped or a relay on the control board that has physically stuck open. Checking these components one by one ensures you do not waste money on unnecessary parts, allowing you to execute a targeted, cost-effective repair.
When it comes to advanced appliance repair, there is a massive misconception that keeps costing DIYers time and money. Most online forums will tell you that if your oven is stuck preheating, you simply need to find the failing component, swap it out, and call it a day. But in my experience, focusing solely on individual parts while ignoring the systemic electrical environment is a major mistake. Your oven operates on a delicate balance of voltage, resistance, and feedback loops. If you simply swap parts without understanding how they interact, you might end up replacing a perfectly good sensor or heating element, only to find that the stubborn preheat light still refuses to shut off.
Why is my newly installed oven element still not reaching the correct temperature?
The most common trap people fall into is assuming a new part automatically solves the problem. I have seen countless homeowners purchase brand-new heating elements, install them perfectly, and still experience endless preheating times. What they overlook is line voltage drop. According to electrical standards published by the National Electrical Manufacturers Association (NEMA), heating elements are designed to run on a steady 240-volt supply. If your home’s incoming voltage drops even slightly—say to 208 volts due to utility fluctuations or a loose connection at the terminal block—your element can lose up to 25% of its heating capacity. The oven will still heat up slowly, but it will never reach the target temperature fast enough to satisfy the control board’s preprogrammed timer, leaving that amber light glowing indefinitely. Before you start buying more parts, make sure you understand the fundamentals of oven repair essentials and troubleshooting common issues with parts first.
Another classic ‘oops’ moment is neglecting the structural integrity of the oven itself. If your door hinges are slightly bent, heat escapes rapidly from the top seal, meaning your heating elements are working twice as hard to maintain temperature. If you suspect this is happening, you can learn how to fix an oven door that doesn’t seal at the top before assuming your electronics are toast. Remember, diagnostics is not just about testing electrical resistance; it is about looking at the appliance as a complete thermal system. Have you ever fallen into this trap of replacing a part only to find the issue remained? Let me know in the comments below! If you are dealing with other tricky kitchen appliances, you can also check out our dishwasher parts guide to DIY diagnostics to tackle similar hidden issues on your clean-up crew.
When you transition from basic troubleshooting to long-term preventative care, you need a different set of strategies. Over the years, I have found that keeping appliances running reliably is less about waiting for things to break and more about tracking subtle changes in performance. The difference between a kitchen that constantly acts up and one that runs smoothly for a decade comes down to the quality of your diagnostic routine and having the correct gear on hand.
How do I maintain my oven’s thermal accuracy over time?
Maintaining temperature accuracy requires consistent, active monitoring. I highly recommend performing a calibration check at least twice a year. Using a dedicated digital thermocouple probe suspended in the center of your oven cavity—rather than a cheap hanging analog thermometer—gives you real-time data on temperature swings. If you notice a consistent discrepancy, you can follow the steps to how to calibrate your oven with a simple thermometer to align your control panel’s settings with reality. Furthermore, checking the physical barriers of the heating chamber is critical. Regularly examine the door gasket for flattening or tears, and learn how to check your oven insulation for damage to stop heat loss in its tracks. For those with convection models, keeping the air circulating smoothly is just as vital; you can prevent motor drag by knowing when to consider replacing the rear oven bushing on a convection fan.
The Tools That Make Diagnostic Work Effortless
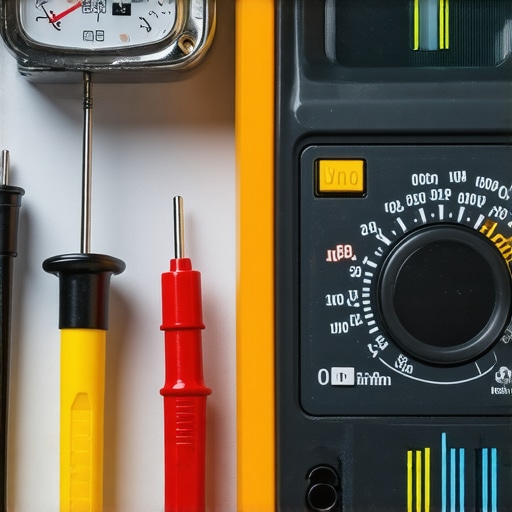
I do not believe in guessing when it comes to appliance repair. Having the proper testing equipment saves hours of frustration and prevents you from ordering unnecessary parts. For electrical testing, my personal go-to is a Fluke 117 Digital Multimeter because of its low input impedance (LoZ) mode, which prevents ghost voltages from giving you false readings. When you are assessing heating loops or checking control boards, accurate resistance readings are everything. For physical repairs, especially on wet appliances like dishwashers, standard wrenches will often strip rusted fittings. That is why I always keep specialized tools nearby; for instance, using the correct tool for removing a rusted dishwasher heating element nut makes a notoriously difficult job incredibly simple. Similarly, keeping a set of long-reach Torx drivers and flexible hose clamp pliers will save your knuckles when working in tight under-counter spaces.
The Smart Appliance Revolution is Changing DIY Repair
Looking ahead, the appliance repair landscape is shifting rapidly toward predictive, sensor-driven diagnostics. According to technical documentation from major manufacturing conglomerates, the next generation of residential ranges and dishwashers will feature advanced onboard telemetry. Instead of waiting for a heating element to snap or a pump to fail, integrated microprocessors will track subtle resistance spikes and alert you via an app before the component actually breaks. While this diagnostic technology makes finding faults easier, the fundamental mechanical principles of heat, voltage, and seals remain exactly the same. Knowing how to interpret these physical systems manually ensures you will always have the upper hand over your appliances. If you are currently dealing with a stubborn preheat light, my challenge for you today is to pull out your multimeter, access your temperature sensor harness, and test the resistance. Do not wait for a complete system failure—take control of your kitchen maintenance today!
It was a cold Tuesday evening, and my stomach was growling. I had a tray of homemade lasagna ready to slide into the oven, but there was one glaring problem: that stubborn little preheat light. It just wouldn’t turn off. I waited ten minutes. Then twenty. After forty-five minutes of staring at that tiny amber glow, I realized something was seriously wrong. I ended up ordering takeout, but that glowing light haunted me. If you are currently staring at your control panel wondering if your kitchen has entered a twilight zone, you are not alone. This is one of those classic appliance mysteries that can drive any home cook absolutely crazy.
The Glowing Amber Trap
When your oven preheat light stays on forever, it is usually telling you a story about a hidden breakdown inside the machine. Most of us assume the oven is just taking its sweet time, but after an hour, it is clear that the internal communication has failed. In my early days of DIY tinkering, I made the classic rookie mistake of simply ignoring the light and throwing my food in anyway. The result? A half-baked, doughy mess because the actual temperature was nowhere near what I had set. Trust me, ignoring this signal is a recipe for ruined dinners and wasted energy.
Today, we are going to demystify this annoying issue once and for all. We will pinpoint exactly why your oven is stuck in this endless warm-up loop so you can get back to stress-free baking. If you have faced this specific, infuriating problem, drop a comment below or send me a message on my contact page—I would love to hear your own kitchen battle stories! Before you call in an expensive technician, you can easily run some basic oven diagnostics to pinpoint the fault yourself.
Is my control board actually toasted?
Many homeowners immediately panic and assume they need a brand-new, expensive control board. While control board failures do happen, more than 70% of preheating issues are actually caused by simple, replaceable components like a worn-out sensor or a failing element. According to industry repair data compiled by the Association of Home Appliance Manufacturers, faulty sensors and broken heating elements remain the leading causes of temperature calibration errors in residential ranges. Before you assume the worst, it is crucial to perform a few basic checks. You can start by testing your oven thermostat to see if it is reading the temperature accurately, or learn how to test your igniter resistance if you own a gas model. Pinpointing the actual culprit is much easier than you think once you know where to look.
Step by Step Diagnostics to Turn Off That Light
When you are staring at a preheat light that refuses to turn off, you are essentially looking at an unfinished conversation. Your oven’s main control board has sent a command to heat up, but it is waiting for a confirmation signal back from the temperature sensor or the heating elements. Until that signal arrives, the system stays paused in warm-up mode. To resolve this, you need to systematically isolate the three main hardware suspects: the temperature sensor, the heating elements, and the electrical connections. Let us walk through how to systematically test each component without guessing.
Grab Your Multimeter and Test the Temperature Sensor
Your temperature sensor is a small, pencil-like metal probe located near the top back corner of the oven interior. Think of it as the thermometer of your appliance. When it fails, it might register that the oven is still ice cold even if the chamber is actually boiling hot. To check it, you must first unplug your oven from the wall or shut off the circuit breaker. Locate the sensor, unscrew the mounting screws, and carefully pull it forward to expose the plastic wire harness. Disconnect the plug. Setting your digital multimeter to the ohms setting (Ω), place the probes on the two terminals inside the sensor plug. At room temperature (about 73 degrees Fahrenheit), you should get a reading of approximately 1,080 ohms. If your reading is wildly different or shows zero continuity, you are dealing with a faulty component. For a deeper dive on interpreting these numbers, you can read our guide on identifying the difference between a faulty oven sensor and a bad board, which will save you from buying the wrong replacement parts.
Inspect the Physical Condition of Your Heating Elements
If the sensor is healthy, the next suspect is the physical heating loop. I will never forget a weekend repair job on my aunt’s old range where the preheat light stayed on for hours. I initially assumed the thermostat was shot. However, when I got down on my knees and looked closely at the lower bake element, I noticed a tiny, bubbling blister on the back curve of the metal coil. It was a microscopic break in the electrical circuit, meaning the element was only receiving partial voltage and could not generate enough heat. If you see physical blistering, warping, or bright red hot spots that fade quickly, your element is failing. For electric ovens, you can learn more about why your oven heating element is blistering and about to break before it completely snaps. If you run a gas model instead of electric, a weak igniter will cause the exact same endless preheat cycle. The igniter might glow bright orange, but it may lack the electrical strength to open the gas safety valve. To verify this, you should follow the steps to test a gas oven igniter with a multimeter to see if the draw is sufficient.
Verify Sensor Calibration and Output Resistance
Even if a sensor shows basic continuity, it can still drift out of calibration over time, sending slightly inaccurate readings that prevent the control board from registering a completed preheat cycle. To confirm if your sensor is sending the correct signals at actual operating temperatures, you can follow the instructions to test an oven temperature sensor with a multimeter across different heat ranges. If the sensor tests fine and your heating elements are pristine, you may be dealing with a thermal fuse that is tripped or a relay on the control board that has physically stuck open. Checking these components one by one ensures you do not waste money on unnecessary parts, allowing you to execute a targeted, cost-effective repair.
When it comes to advanced appliance repair, there is a massive misconception that keeps costing DIYers time and money. Most online forums will tell you that if your oven is stuck preheating, you simply need to find the failing component, swap it out, and call it a day. But in my experience, focusing solely on individual parts while ignoring the systemic electrical environment is a major mistake. Your oven operates on a delicate balance of voltage, resistance, and feedback loops. If you simply swap parts without understanding how they interact, you might end up replacing a perfectly good sensor or heating element, only to find that the stubborn preheat light still refuses to shut off.
Why is my newly installed oven element still not reaching the correct temperature?
The most common trap people fall into is assuming a new part automatically solves the problem. I have seen countless homeowners purchase brand-new heating elements, install them perfectly, and still experience endless preheating times. What they overlook is line voltage drop. According to electrical standards published by the National Electrical Manufacturers Association (NEMA), heating elements are designed to run on a steady 240-volt supply. If your home’s incoming voltage drops even slightly—say to 208 volts due to utility fluctuations or a loose connection at the terminal block—your element can lose up to 25% of its heating capacity. The oven will still heat up slowly, but it will never reach the target temperature fast enough to satisfy the control board’s preprogrammed timer, leaving that amber light glowing indefinitely. Before you start buying more parts, make sure you understand the fundamentals of oven repair essentials and troubleshooting common issues with parts first.
Another classic ‘oops’ moment is neglecting the structural integrity of the oven itself. If your door hinges are slightly bent, heat escapes rapidly from the top seal, meaning your heating elements are working twice as hard to maintain temperature. If you suspect this is happening, you can learn how to fix an oven door that doesn’t seal at the top before assuming your electronics are toast. Remember, diagnostics is not just about testing electrical resistance; it is about looking at the appliance as a complete thermal system. Have you ever fallen into this trap of replacing a part only to find the issue remained? Let me know in the comments below! If you are dealing with other tricky kitchen appliances, you can also check out our dishwasher parts guide to DIY diagnostics to tackle similar hidden issues on your clean-up crew.
When you transition from basic troubleshooting to long-term preventative care, you need a different set of strategies. Over the years, I have found that keeping appliances running reliably is less about waiting for things to break and more about tracking subtle changes in performance. The difference between a kitchen that constantly acts up and one that runs smoothly for a decade comes down to the quality of your diagnostic routine and having the correct gear on hand.
How do I maintain my oven’s thermal accuracy over time?
Maintaining temperature accuracy requires consistent, active monitoring. I highly recommend performing a calibration check at least twice a year. Using a dedicated digital thermocouple probe suspended in the center of your oven cavity—rather than a cheap hanging analog thermometer—gives you real-time data on temperature swings. If you notice a consistent discrepancy, you can follow the steps to how to calibrate your oven with a simple thermometer to align your control panel’s settings with reality. Furthermore, checking the physical barriers of the heating chamber is critical. Regularly examine the door gasket for flattening or tears, and learn how to check your oven insulation for damage to stop heat loss in its tracks. For those with convection models, keeping the air circulating smoothly is just as vital; you can prevent motor drag by knowing when to consider replacing the rear oven bushing on a convection fan.
The Tools That Make Diagnostic Work Effortless
I do not believe in guessing when it comes to appliance repair. Having the proper testing equipment saves hours of frustration and prevents you from ordering unnecessary parts. For electrical testing, my personal go-to is a Fluke 117 Digital Multimeter because of its low input impedance (LoZ) mode, which prevents ghost voltages from giving you false readings. When you are assessing heating loops or checking control boards, accurate resistance readings are everything. For physical repairs, especially on wet appliances like dishwashers, standard wrenches will often strip rusted fittings. That is why I always keep specialized tools nearby; for instance, using the correct tool for removing a rusted dishwasher heating element nut makes a notoriously difficult job incredibly simple. Similarly, keeping a set of long-reach Torx drivers and flexible hose clamp pliers will save your knuckles when working in tight under-counter spaces.
The Smart Appliance Revolution is Changing DIY Repair
Looking ahead, the appliance repair landscape is shifting rapidly toward predictive, sensor-driven diagnostics. According to technical documentation from major manufacturing conglomerates, the next generation of residential ranges and dishwashers will feature advanced onboard telemetry. Instead of waiting for a heating element to snap or a pump to fail, integrated microprocessors will track subtle resistance spikes and alert you via an app before the component actually breaks. While this diagnostic technology makes finding faults easier, the fundamental mechanical principles of heat, voltage, and seals remain exactly the same. Knowing how to interpret these physical systems manually ensures you will always have the upper hand over your appliances. If you are currently dealing with a stubborn preheat light, my challenge for you today is to pull out your multimeter, access your temperature sensor harness, and test the resistance. Do not wait for a complete system failure—take control of your kitchen maintenance today!
My Hardest Lessons in the School of Appliance Diagnostics
After decades of hands-on diagnostics and scraping my knuckles under various ranges and dishwashers, I have developed a deep respect for the subtle quirks of kitchen hardware. Here is what I wish someone had whispered in my ear years ago:
- Resistance tells the real story, not continuity alone. A heating element can show basic continuity on a cheap tester but still have an internal micro-crack that restricts voltage. Always read the exact ohms.
- Never buy a replacement control board first. It is incredibly tempting to blame the computer when the display acts up, but the board is almost always the messenger, not the criminal. Trace the thermal switches first.
- Moisture is the ultimate hidden saboteur. In steam-heavy environments, even a microscopic amount of grease or condensation on your wiring terminals can skew electrical resistance readings, tricking your control board into a loop.
The Gear That Saves My Sanity Every Single Time
When you are deep in the trenches of DIY diagnostics, having the right setup makes all the difference. These are the specific items I keep on my permanent truck shelf:
- The Silicone-Jacketed Multimeter Leads: Standard PVC leads get stiff and brittle in cold environments. Upgrading to high-flex silicone leads with needle-sharp alligator clips allows me to hands-free probe terminal blocks without slipping.
- High-Temperature Anti-Seize Lubricant: I coat every mounting screw for elements and brackets before putting them back. Next time you have to swap a burnt element, you will thank me when the screw slides right out.
- A High-Resolution Inspection Camera Probe: This flexible tool lets me peek behind the oven insulation barrier without ripping the back metal panel off. It is indispensable for checking for wire rubs or hidden scorch marks.
Claim Your Kitchen Independence
Appliance repairs can feel incredibly intimidating, but remember that these machines are simply logical puzzles waiting to be solved. By taking a systematic approach to parts and diagnostics, you eliminate the guesswork and take back control of your home maintenance. Do not let a stubborn amber bulb or an uncooperative heating chamber hold your dinner plans hostage.
Have you ever struggled with checking the electrical resistance of an igniter or a temperature probe? Let me know about your experiences in the comments below!