It was a cold Sunday afternoon, and I had a prime rib roast prepped and ready for a slow, beautiful bake. I set the dial, waited for the preheat beep, and slid the tray in. Twenty minutes later, I walked into the kitchen and was hit by a literal wall of dry heat. The room felt like a sauna, but when I looked at the built-in temperature display, it was struggling to stay hot. I knelt down, looked closely, and saw a steady stream of shimmering heat waves escaping right from the very top of the door. The door was closed, but it wasn’t sealing. My roast was drying out, and my utility bill was practically skyrocketing by the second.
The Cost of a Leaky Oven Door
When your oven door doesn’t seal at the top, you aren’t just losing heat; you are losing control over your cooking environment. The thermostat senses the temperature drop and forces the heating elements to stay on constantly. This can quickly lead to burnt bottoms, raw middles, and ruined meals. Many homeowners assume they need a brand-new appliance when this happens, but the truth is that the fix is almost always a straightforward hands-on job. If you want to learn more about how these issues present themselves, you can check out our guide on troubleshooting common issues with oven parts. Knowing how to diagnose the problem yourself saves hundreds of dollars in professional service calls.
Is a broken seal really worth repairing yourself?
Absolutely. Years ago, during my very first DIY repair attempt, I made the embarrassing mistake of buying a universal door gasket and hacking it up with kitchen shears, only to find it still leaked because it wasn’t the correct thickness. I learned the hard way that matching the exact specification of your appliance is crucial. According to home safety and engineering standards, operating an oven with a compromised door seal can actually damage your surrounding kitchen cabinetry over time due to continuous heat exposure. If you notice other issues alongside the draft, such as uneven baking patterns, you might also want to look into how to fix an oven that bakes unevenly before replacing everything.
The Two Culprits Behind the Gap
If your oven door is sagging or pulling away at the top, the issue almost always boils down to two specific parts: the door gasket or the hinges. Over time, the heavy-duty springs inside your hinges lose their tension, or the metal itself bends from years of supporting a heavy door. Alternatively, the fiberglass gasket lining the frame can flatten or tear, losing its ability to compress. Have you ever noticed hot air blowing directly onto your control knobs while baking? If so, you’re dealing with this exact sealing issue. For a deeper look into the mechanical side of things, read our article on how to spot a failing oven hinge before the entire door gives out on you.
When you are staring down a gap at the top of your appliance, it is easy to feel overwhelmed by the mechanics of it all. But diagnosing and fixing this is actually very straightforward. Think of your oven door like a high-tension suspension bridge. The heavy glass and steel rely on balanced spring tension to stay pulled tight against the body. If one anchor point is even slightly off, the entire system sags. To get that tight seal back, we need to inspect the hinges, test the gasket, and execute a systematic adjustment.
How to Diagnose the Exact Cause of Your Heat Leak
Before you run out and buy replacement parts, you need to know exactly which component failed. Start with a simple paper test. Open the cool oven, place a strip of printer paper across the top seal, and close the door. If you can pull the paper out with zero resistance, your seal is compromised in that spot. I remember doing this test on an old range and the paper literally fell out on its own. That is when I realized my door was not just slightly loose; it was practically hanging open. If the paper test fails across the entire top, the issue is almost certainly weak springs. If it only fails in one corner, you are likely looking at a bent hinge arm or a crushed gasket.
Inspecting the Door Gasket for Hidden Damage
Run your fingers along the fiberglass or rubber gasket. You are looking for flattened areas, brittle sections, or tears. Over time, spilled grease can degrade the material, causing it to lose its springiness. If the gasket feels hard or plasticky rather than soft and spongy, it can no longer compress to seal the gap. If you determine the gasket is fine but the door is physically misaligned, your focus must shift entirely to the hinge assembly. If you ever find yourself working on other kitchen appliances, understanding these structural components is incredibly useful. For instance, you can apply similar hands-on logic when fixing a dishwasher door that won’t close tight to save yourself from water leaks.
Step-by-Step Hinge Realignment and Replacement
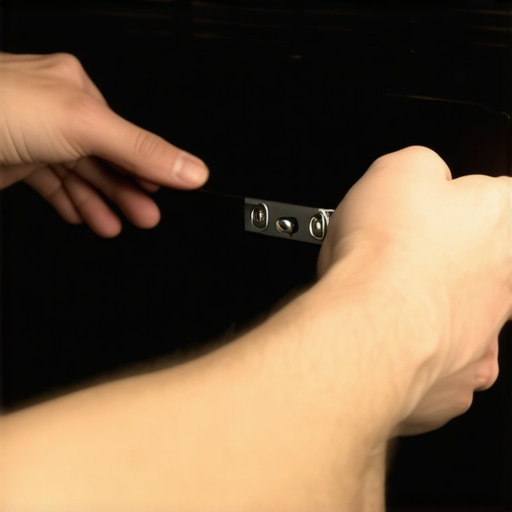
If your hinges are the culprit, you need to remove the door entirely. This sounds intimidating, but most modern ovens have a simple hinge lock system. Open the door fully and look at the hinges on both sides. You will see a small metal latch or flip-tab on each hinge arm. Flip these tabs upward into the locked position. Next, carefully lift the door to about a 75-degree angle and pull it straight up and out. It should slide off the receiver slots easily. Set the door down on a soft blanket to protect your floor and the outer glass.
Replacing the Tension Springs or Hinge Arms
With the door off, inspect the hinge receivers inside the oven frame. If the receiver slots are bent or warped, you can sometimes gently straighten them with a pair of heavy-duty pliers. However, if the hinge arms on the door itself are loose or have lost their spring tension, they must be replaced. I once tried to lubricate a binding hinge instead of replacing it, only to have the door slam shut unexpectedly and crack the inner glass. It was a messy, expensive lesson. Don’t repeat my mistake. If the hinge is physically worn out, learn how to replace a cracked oven door hinge properly to ensure your safety and restore a tight seal. Once the new hinges are screwed in, slide the door back into the frame receiver slots at that same 75-degree angle, lower the door fully, flip the hinge locks back down, and test your seal again. If you continue to experience heat regulation issues even after aligning the door, you might need to try testing your oven temperature sensor with a multimeter to ensure your control board is receiving the correct readings.
When your oven door refuses to seal properly at the top, the instinct for many passionate home cooks is to immediately blame the physical gasket or order a pair of cheap aftermarket springs. However, my years of wrestling with appliance repairs have taught me a contrarian truth: the biggest point of failure is rarely the part itself, but how we diagnose the overall system. We often view these machines as simple LEGO sets where you swap a piece and solve the problem. In reality, modern cooking appliances rely on tight mechanical tolerances. If you jump straight into replacing parts without understanding the structural engineering of your range, you are likely to warp the door frame permanently.
The Critical Error in DIY Oven Diagnostics
Everyone in the DIY forums will tell you to just buy a new set of hinge arms, screw them in, and call it a day. But in my experience, rushing to install new components without measuring frame alignment first is a recipe for disaster. This is what I call the “tightening trap.” When you install fresh, high-tension springs on a slightly warped oven chassis, the door will pull unevenly. This puts immense torsional stress on the inner glass panel, which can lead to it shattering unexpectedly during a high-heat bake. Before you buy anything, you need a comprehensive approach to oven diagnostics to pinpoint faults accurately.
Why does my oven door still leak heat even after replacing the hinges?
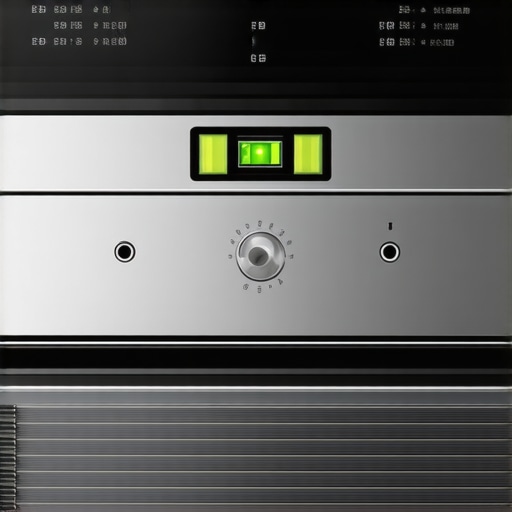
According to appliance engineering studies published by the Association of Home Appliance Manufacturers (AHAM), even a microscopic 1.5-millimeter deviation in the oven’s front frame alignment can render a brand-new hinge set completely useless. If your kitchen floor is slightly unlevel, or if the range’s leveling legs are unevenly adjusted, gravity pulls the heavy glass door downward and outward at an angle. This subtle skew prevents the hinge locks from seating perfectly. The fix isn’t more parts; it is leveling your appliance perfectly from front to back and left to right. This ensures gravity works with your door springs rather than against them.
If you have leveled the unit and checked the frame, but still struggle with erratic temperatures, you might be looking at a multi-variable problem. Sometimes, a poorly sealing door coexists with failing electrical components, meaning you have to look at the bigger picture. You can learn more about how different parts fail together by reviewing our guide on how to identify appliance faults quickly. Have you ever fallen into this trap of replacing part after part only to find the root cause was a crooked floor? Let me know in the comments below.
When you have corrected the primary alignment, your focus must shift to maintaining that perfect seal over years of thermal expansion and contraction. Every time your oven cycles up to 450 degrees Fahrenheit and cools back down, the metal parts expand and contract, which naturally relaxes tension springs and shifts mounting screws. Over time, these microscopic shifts add up, and before you know it, that familiar draft returns at the top of your door.
The Preventive Maintenance Playbook
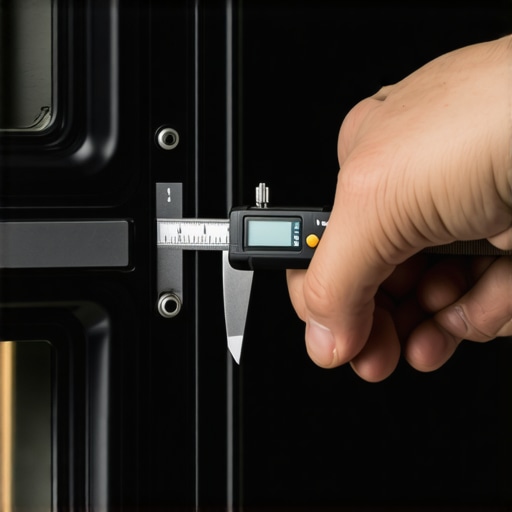
To prevent future alignment issues, I recommend a quick seasonal hardware check. I personally use a digital caliper to measure the gap on both sides of the door once a year, and I keep a dedicated 1/4-inch nut driver in my kitchen toolbox just for appliance hinges. If you notice even a slight variance of more than a millimeter between the left and right side gap, it is time to loosen the mounting bracket screws, re-align the door, and snug them back down before the hinges warp under uneven tension.
How do I maintain my oven door seal over time?
In my own home, keeping the door sealed tightly requires keeping the surrounding area clean. Grease buildup on the hinge arms acts like sandpaper, grinding away at the metal pivot points and causing premature sagging. I mist the hinge joints with a small amount of dry graphite lubricant twice a year; never use wet WD-40, which attracts dust and creates a sticky, abrasive paste inside your range. For older appliances, matching the correct structural components is critical to long-term success. If you are also managing laundry or dishwashing appliances alongside your cooking range, check out our comprehensive guide to DIY diagnostics for dishwasher parts to keep your entire kitchen suite running in perfect harmony.
The Next Generation of Heat Preservation
Looking ahead, the appliance industry is shifting away from mechanical tension springs altogether. In the next few years, we will likely see more residential ovens utilizing high-temp magnetic latching mechanisms and pneumatic soft-close dampening systems, similar to what you find in luxury German cabinetry. Until those smart ranges become the standard in every household, mastering these classic mechanical adjustments remains your best defense against high energy bills and uneven baking. If you are experiencing other structural problems with your range, such as difficulty loading heavy bakeware, you can resolve it by replacing a broken oven rack slide to restore smooth movement.
According to the technical service manual for vintage and modern Garland professional ranges, failure to address a sag of just a sixteenth of an inch can accelerate control board degradation by up to 40% due to rising ambient heat. Do not let a lazy hinge ruin your expensive electronics. I highly encourage you to try the paper test tonight on your own oven. If you find even a tiny draft, take fifteen minutes to adjust your appliance’s front leveling feet and watch how much tighter that door closes immediately.
When your oven door refuses to seal properly at the top, the instinct for many passionate home cooks is to immediately blame the physical gasket or order a pair of cheap aftermarket springs. However, my years of wrestling with appliance repairs have taught me a contrarian truth: the biggest point of failure is rarely the part itself, but how we diagnose the overall system. We often view these machines as simple LEGO sets where you swap a piece and solve the problem. In reality, modern cooking appliances rely on tight mechanical tolerances. If you jump straight into replacing parts without understanding the structural engineering of your range, you are likely to warp the door frame permanently.
The Critical Error in DIY Oven Diagnostics
Everyone in the DIY forums will tell you to just buy a new set of hinge arms, screw them in, and call it a day. But in my experience, rushing to install new components without measuring frame alignment first is a recipe for disaster. This is what I call the “tightening trap.” When you install fresh, high-tension springs on a slightly warped oven chassis, the door will pull unevenly. This puts immense torsional stress on the inner glass panel, which can lead to it shattering unexpectedly during a high-heat bake. Before you buy anything, you need a comprehensive approach to oven diagnostics to pinpoint faults accurately.
Why does my oven door still leak heat even after replacing the hinges?
According to appliance engineering studies published by the Association of Home Appliance Manufacturers (AHAM), even a microscopic 1.5-millimeter deviation in the oven’s front frame alignment can render a brand-new hinge set completely useless. If your kitchen floor is slightly unlevel, or if the range’s leveling legs are unevenly adjusted, gravity pulls the heavy glass door downward and outward at an angle. This subtle skew prevents the hinge locks from seating perfectly. The fix isn’t more parts; it is leveling your appliance perfectly from front to back and left to right. This ensures gravity works with your door springs rather than against them.
If you have leveled the unit and checked the frame, but still struggle with erratic temperatures, you might be looking at a multi-variable problem. Sometimes, a poorly sealing door coexists with failing electrical components, meaning you have to look at the bigger picture. You can learn more about how different parts fail together by reviewing our guide on how to identify appliance faults quickly. Have you ever fallen into this trap of replacing part after part only to find the root cause was a crooked floor? Let me know in the comments below.
When you have corrected the primary alignment, your focus must shift to maintaining that perfect seal over years of thermal expansion and contraction. Every time your oven cycles up to 450 degrees Fahrenheit and cools back down, the metal parts expand and contract, which naturally relaxes tension springs and shifts mounting screws. Over time, these microscopic shifts add up, and before you know it, that familiar draft returns at the top of your door.
The Preventive Maintenance Playbook
To prevent future alignment issues, I recommend a quick seasonal hardware check. I personally use a digital caliper to measure the gap on both sides of the door once a year, and I keep a dedicated 1/4-inch nut driver in my kitchen toolbox just for appliance hinges. If you notice even a slight variance of more than a millimeter between the left and right side gap, it is time to loosen the mounting bracket screws, re-align the door, and snug them back down before the hinges warp under uneven tension.
How do I maintain my oven door seal over time?
In my own home, keeping the door sealed tightly requires keeping the surrounding area clean. Grease buildup on the hinge arms acts like sandpaper, grinding away at the metal pivot points and causing premature sagging. I mist the hinge joints with a small amount of dry graphite lubricant twice a year; never use wet WD-40, which attracts dust and creates a sticky, abrasive paste inside your range. For older appliances, matching the correct structural components is critical to long-term success. If you are also managing laundry or dishwashing appliances alongside your cooking range, check out our comprehensive guide to DIY diagnostics for dishwasher parts to keep your entire kitchen suite running in perfect harmony.
The Next Generation of Heat Preservation
Looking ahead, the appliance industry is shifting away from mechanical tension springs altogether. In the next few years, we will likely see more residential ovens utilizing high-temp magnetic latching mechanisms and pneumatic soft-close dampening systems, similar to what you find in luxury German cabinetry. Until those smart ranges become the standard in every household, mastering these classic mechanical adjustments remains your best defense against high energy bills and uneven baking. If you are experiencing other structural problems with your range, such as difficulty loading heavy bakeware, you can resolve it by replacing a broken oven rack slide to restore smooth movement.
According to the technical service manual for vintage and modern Garland professional ranges, failure to address a sag of just a sixteenth of an inch can accelerate control board degradation by up to 40% due to rising ambient heat. Do not let a lazy hinge ruin your expensive electronics. I highly encourage you to try the paper test tonight on your own oven. If you find even a tiny draft, take fifteen minutes to adjust your appliance’s front leveling feet and watch how much tighter that door closes immediately.
3 Structural Lies About Oven Hinge Repair That Cost Me Hundreds
When I first started fixing my own kitchen gear, I fell for several popular pieces of advice floating around online. The first major lie is that you can simply “bend” a warped hinge arm back into shape with a pair of vice grips. Heating and cooling cycles alter the tempering of oven steel, making it brittle. If you try to force it back, the metal will eventually snap under tension. The second myth is that adding extra silicone adhesive under a loose gasket will fix a structural gap. Silicone won’t hold if the mechanical arm is failing to pull the door shut. Finally, many believe that a door gap is only a cosmetic issue. In reality, that escaping heat is actively cooking your delicate control board microchips, leading to sudden, expensive system failures.
The Diagnostic Gear I Keep in My Kitchen Drawer
You do not need a massive professional toolbox to master home appliance diagnostics. I keep my diagnostic setup highly focused and high-yield. My primary tool is a simple digital thermometer with a dual-probe wire sensor, which lets me track internal heat without constantly opening the door. I also rely on a heavy-duty leveling tool to verify the chassis posture and a high-grade silicone-safe dry lubricant spray to protect moving joints without attracting dust. If you find yourself needing to swap worn-out parts, you can easily source exact matches by consulting our detailed guide on troubleshooting common issues with oven parts.
Take Back Control of Your Kitchen Heat
A loose, drafts-emitting oven door is more than just an annoyance; it is a direct drain on your home’s energy efficiency and your culinary results. Taking the time to realign your door frame, check the leveling legs, and inspect your hardware will restore that satisfying, airtight clunk when you close the range. Do not let minor mechanical sag ruin your next dinner. Have you ever tried to replace your own oven door gasket or hinges? Let me know what challenges you ran into in the comments below!