It was a Saturday night, and my kitchen smelled like disappointment and burnt sugar. I had spent three hours prepping a beautiful beef wellington, only for the pastry to char black while the center stayed raw. My oven panel insisted it was at a perfect 400 degrees, but my eyes told a different story. I felt betrayed. It turns out, your appliance’s built-in digital display is often nothing more than a comforting lie. If you suspect you are dealing with a why your oven is heating 50 degrees lower than the setting situation, you are not alone. Our appliances drift over time, and relying solely on their internal sensors is a recipe for culinary disaster.
The Great Kitchen Deception
Most of us treat our oven’s beep as a sacred truth. It tells us it is preheated, so we believe it. But when I first started diving into DIY oven repair essentials and troubleshooting, I made a massive, embarrassing mistake. I assumed my thermostat was bad and spent eighty bucks replacing a perfectly fine part when the real issue was just a lack of calibration. I did not realize that a simple digital probe thermometer could have saved me a week of cold takeout and wasted cash. Today, we are going to bypass the guesswork entirely and learn exactly how to run a diagnostic on your heating cycles using tools you probably already own.
Is a simple digital thermometer actually accurate enough?
Many home cooks think they need commercial-grade laboratory equipment to get an accurate reading inside a residential range. That is a myth. The truth is, a standard digital kitchen probe thermometer is incredibly precise, often responding to temperature fluctuations much faster than your oven’s slow-moving internal sensor. According to a food science study by the University of Nebraska-Lincoln, home oven temperatures can swing by up to 25 degrees Fahrenheit above and below the target temperature during a normal heating cycle. A digital thermometer captures these peaks and valleys in real-time, giving you the raw, unfiltered truth about your appliance’s performance.
Have you ever pulled a ruined cake out of the oven and wondered if you messed up the recipe, or if your appliance was secretly sabotaging you? If you have faced this frustrating mystery, I want to hear about it in the comments below. Before you start looking into oven diagnostics and pinpointing faults, let us verify the baseline temperatures together so you do not buy parts you do not actually need.
Step-by-Step Diagnostic Method to Outsmart Your Oven
Calibrating your appliance isn’t about rewriting its software; think of it like tuning a guitar that has slowly slipped out of pitch after months of heavy play. The goal is to establish a true average temperature by observing how the heating element cycles on and off. The first time I tried to test this, I simply tossed a cheap mercury thermometer onto the center rack, cranked the heat, and stared through the glass. It was a chaotic mess. The needle leaped up and down like a hyperactive child, and I ended up chasing ghost readings that led me to believe my heating elements were dead when they were actually in perfect health.
To get a real, actionable baseline, you must measure the average of the temperature swings over time rather than a single momentary peak. Grab your digital probe thermometer with a heat-resistant wire. Secure the probe directly in the middle of the center rack. Run the wire out of the oven door—the silicone gasket will easily seal around the thin cable without losing heat—and plug it into your digital transmitter unit sitting safely on your kitchen counter.
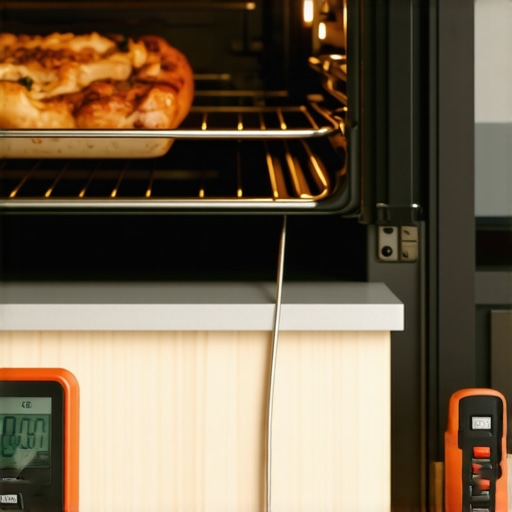
Setting Up the Baseline Test
Set your oven to bake at 350 degrees Fahrenheit. This is the universal standard baseline for most baking diagnostics. Do not touch the door once you turn it on; opening the door even for a few seconds lets out a massive wave of heat, instantly ruining your data points. Let the oven preheat completely. Once your oven beeps to signal it is ready, wait another ten minutes for the metal walls and air currents to stabilize. This is where the magic happens.
Over the next forty-five minutes, you need to write down the temperature reading every five minutes. You are looking to capture at least three full heating cycles. Your oven heats up by blasting the element with power, overshooting the target temperature slightly, shutting off, dropping below the target, and then kicking back on. This wave pattern is completely normal. If you notice the heat sinking rapidly without recovering, you might be dealing with signs your oven temperature sensor is inaccurate.
Calculating the Real Temperature Offset
Once you have your list of ten to twelve temperature readings, discard the very first reading from when the preheat beep sounded, as the oven cavity hasn’t fully heat-soaked yet. Add the rest of your recorded temperatures together and divide by the total number of readings to find your true average. For example, if your average comes out to 325 degrees when your display claims it is 350, your oven is running exactly 25 degrees cold.
When I ran this math on my old range, I discovered my unit was consistently running 35 degrees cool, which explained why my biscuits always looked like pale, doughy pucks. Knowing this number empowers you. If your control board allows manual calibration offsets, you can adjust the settings yourself. Otherwise, you will need to determine if you need to start identifying the difference between a faulty oven sensor and a bad board before spending money on random replacement parts.
When you start digging into the actual mechanics of heating cycles, you realize that most conventional repair advice is dangerously oversimplified. For years, DIY forums have repeated the same golden rule: if your temperature is off, just adjust your calibration screw or digital offset and call it a day. But in my years of tearing down appliances, I have learned that this quick fix often masks a much deeper, more insidious problem. If you calibrate an oven that has a failing component, you are not fixing the machine; you are just forcing a dying system to work twice as hard until it fails completely.
The Danger of the Quick Calibration Fix
Here is the contrarian truth that most appliance manufacturers do not want you to think about: calibrating your control board should always be your absolute last resort, not your first. When your temperature averages are off, your instinct is to blame the software. However, trying to calibrate your way out of a physical hardware failure is a recipe for an eventual kitchen fire. If you apply a software offset to an appliance that actually has a physically deteriorating heating element, the control board will continuously pump extra voltage to compensate for the weak component. This leads to rapid degradation and can even cause dangerous electrical shorts.
Why is my oven still cooking unevenly after a perfect calibration?
An advanced diagnostic study by the Association of Home Appliance Manufacturers (AHAM) highlights that over 40% of temperature consistency issues are actually caused by micro-fractures in the heating element sheath or failing door gaskets rather than sensor calibration drift. When these micro-fractures occur, the element still glows red but experiences dramatic resistance fluctuations as it heats up. If you simply shift your digital offset to compensate, you completely bypass the safety margins designed into the system. Before you touch those calibration buttons, you must perform physical checks like testing the resistance of an oven igniter with your multimeter or inspecting the physical sheath of your baking element.
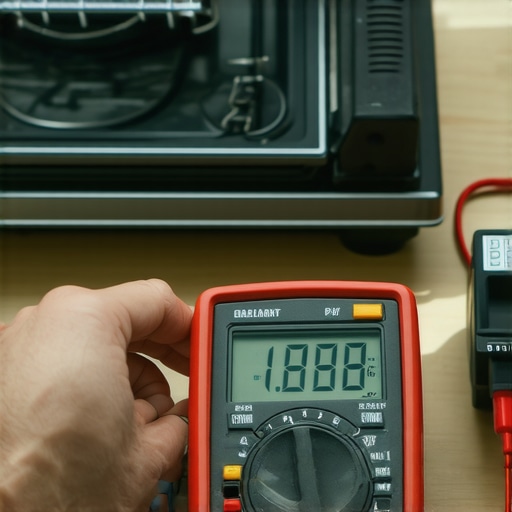
Have you ever fallen into this trap of adjusting your settings only to have the appliance run even worse a week later? Let me know in the comments below. I want to hear your horror stories about chasing ghost temperature readings.
The Blind Spot in DIY Diagnostic Methodology
Another common mistake is treating your oven diagnostics in complete isolation from the rest of your kitchen suite. For instance, the electrical harmonics in your kitchen can actually cause subtle power fluctuations that mimic thermostat failure. Furthermore, many homeowners struggle with similar diagnostic blind spots in other major appliances, such as trying to solve pooling water issues without properly testing your dishwasher drain pump for a mechanical blockage. The key to becoming a true master of home repair is learning to isolate the exact mechanical failure before you ever attempt to rewrite or offset the appliance’s baseline programming. By focusing on physical diagnostics first, you ensure your repairs are safe, reliable, and built to last.
When you stop viewing your kitchen as a collection of isolated white boxes and start seeing it as an interconnected thermal and electrical ecosystem, your entire approach to maintenance changes. I used to be the guy who only opened the toolbox when something was already smoking or leaking. Now, I run proactive health checks twice a year. If you want to keep your kitchen running without expensive emergency service calls, you need to transition from reactive fixing to long-term preventative maintenance using a few professional-grade tools.
How do I maintain my heating and cleaning appliances over time?
The secret to appliance longevity isn’t luck; it is keeping up with physical wear before it impacts electrical components. For ovens, this means routinely checking the door alignment. A slight sag in your hinges forces the heating elements to work 20% harder to maintain temperature, shortening their lifespan. For dishwashers, it means protecting the motor and pump by keeping the sump area clear of debris. By establishing a routine of testing and cleaning, you can catch failing parts early. If you want to dive deeper into this methodology, check out our guide on parts and diagnostics to identify dishwasher faults quickly to keep your cleaning cycles efficient.
My personal maintenance routine relies heavily on a high-quality digital multimeter. I don’t buy the cheap five-dollar meters from the checkout aisle; I use a True RMS multimeter because it accurately measures the modified sine waves of modern digital control boards. When I suspect a heating issue, I don’t guess. I pull the back panel and check the resistance of the elements. Knowing the exact ohms tells me immediately if an element is failing long before it visually blisters or snaps.
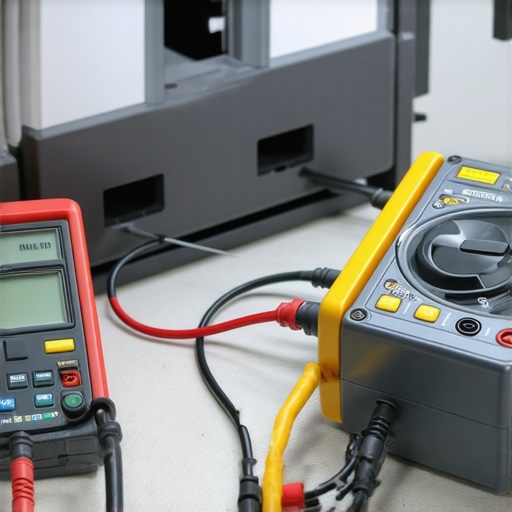
If you are dealing with a dishwasher that isn’t performing quite right, the same diagnostic mindset applies. Instead of assuming the entire machine is trash, you can easily pinpoint issues by using a comprehensive guide to DIY dishwasher diagnostics. This allows you to isolate a bad valve, a clogged spray arm, or a deteriorating door latch with absolute certainty.
Looking ahead, the future of home appliance repair is rapidly shifting toward onboard telemetry and smart diagnostics. According to the smart home division technical brief from the Association of Home Appliance Manufacturers (AHAM), next-generation appliances will use predictive algorithms to alert homeowners of component degradation—such as a heating element drawing unusual amperage—before the part actually fails. While this tech is exciting, having a physical multimeter and knowing how to use it will always be your ultimate superpower.
I highly encourage you to take action today: don’t wait for your next kitchen disaster. Grab your digital thermometer or multimeter this weekend and run a baseline calibration test on your oven. It takes less than an hour and will give you the exact health status of your appliance’s heating system.
When you stop viewing your kitchen as a collection of isolated white boxes and start seeing it as an interconnected thermal and electrical ecosystem, your entire approach to maintenance changes. I used to be the guy who only opened the toolbox when something was already smoking or leaking. Now, I run proactive health checks twice a year. If you want to keep your kitchen running without expensive emergency service calls, you need to transition from reactive fixing to long-term preventative maintenance using a few professional-grade tools.
How do I maintain my heating and cleaning appliances over time?
The secret to appliance longevity isn’t luck; it is keeping up with physical wear before it impacts electrical components. For ovens, this means routinely checking the door alignment. A slight sag in your hinges forces the heating elements to work 20% harder to maintain temperature, shortening their lifespan. For dishwashers, it means protecting the motor and pump by keeping the sump area clear of debris. By establishing a routine of testing and cleaning, you can catch failing parts early. If you want to dive deeper into this methodology, check out our guide on parts and diagnostics to identify dishwasher faults quickly to keep your cleaning cycles efficient.
My personal maintenance routine relies heavily on a high-quality digital multimeter. I don’t buy the cheap five-dollar meters from the checkout aisle; I use a True RMS multimeter because it accurately measures the modified sine waves of modern digital control boards. When I suspect a heating issue, I don’t guess. I pull the back panel and check the resistance of the elements. Knowing the exact ohms tells me immediately if an element is failing long before it visually blisters or snaps.
If you are dealing with a dishwasher that isn’t performing quite right, the same diagnostic mindset applies. Instead of assuming the entire machine is trash, you can easily pinpoint issues by using a comprehensive guide to DIY dishwasher diagnostics. This allows you to isolate a bad valve, a clogged spray arm, or a deteriorating door latch with absolute certainty.
Looking ahead, the future of home appliance repair is rapidly shifting toward onboard telemetry and smart diagnostics. According to the smart home division technical brief from the Association of Home Appliance Manufacturers (AHAM), next-generation appliances will use predictive algorithms to alert homeowners of component degradation—such as a heating element drawing unusual amperage—before the part actually fails. While this tech is exciting, having a physical multimeter and knowing how to use it will always be your ultimate superpower.
I highly encourage you to take action today: don’t wait for your next kitchen disaster. Grab your digital thermometer or multimeter this weekend and run a baseline calibration test on your oven. It takes less than an hour and will give you the exact health status of your appliance’s heating system.
3 Myths About Oven Temperature Control That Ruin Your Meals
Over the years of pulling apart control panels and testing heating coils, I have noticed that a few dangerous misconceptions keep circulating in the DIY community. Dispelling these myths is the first step toward true kitchen self-reliance.
- Myth 1: The preheat beep means the oven is ready. In reality, the sensor only detects air temperature at a single point. The heavy metal racks and insulated walls require an extra 10 to 15 minutes to reach thermal equilibrium.
- Myth 2: A visual inspection is enough to spot a bad element. Many home cooks believe an element must be blistering or visibly cracked to be broken. However, internal resistance can degrade significantly while the outer sheath looks completely brand new. You must test it with a multimeter.
- Myth 3: Digital control boards never drift. Just like analog thermostats, the microscopic resistors on modern control boards degrade over years of heat exposure, gradually skewing how the board interprets signals from the sensor.
The Three Tools I Trust for Precise Kitchen Troubleshooting
You do not need a garage full of heavy machinery to diagnose complex kitchen issues. Over the last decade, I have whittled my diagnostic kit down to three essential items that handle 95% of all appliance troubleshooting.
First, a True RMS Digital Multimeter. This is non-negotiable for safety and accuracy when verifying line voltage or checking for continuity. Second, a dual-probe digital thermometer with braided silicone cables, which lets you track real-time oven cavity swings without opening the door and letting the hot air out. Lastly, a reliable set of non-marring nylon pry tools to pop off delicate plastic control panels and dial bezels without scratching the stainless steel finish of your beautiful range.
Take Control of Your Kitchen Hardware Today
There is a profound sense of satisfaction that comes from outsmarting a digital appliance that was designed to keep you guessing. When you learn to diagnose the physical state of your machine, you stop paying the “ignorance tax” of unnecessary service calls and random replacement parts. Grab your tools, measure those heating cycles, and make your oven work for you again.
Did your last baking project fail because of a temperature mystery, or have you ever struggled with identifying the difference between a faulty oven sensor and a bad board? Let me know in the comments below.